
:max_bytes(150000):strip_icc():format(webp)/how-to-fix-it-when-pngs-wont-open-in-windows-11-41107f6a55db4318b6c2b64437de5b75.jpg)
Updated Unlocking FCPX Potential A Deep Dive Into XML Files for 2024
Unlocking FCPX Potential: A Deep Dive Into XML Files
What is an XML File and How to Export XML in Final Cut Pro X?

Shanoon Cox
Mar 27, 2024• Proven solutions
The XML files have multiple usages and contain the tags and texts as their main components. The purpose of the XML file is to format the data to aid in optimal storage and transfer process. The XML file consists of tags and texts. This tag contains the main elements of the file, and the text carries readable information.
Unlike HTML, the Extensible Markup Language describes the data content in a readable format without any complex codes. It is easy to understand and displays a clear illustration of the purpose. You can find the applications of XML in web publishing, to perform web tasks, and common uses like data storage, transfers.
Most users opt for XML due to its compatible features, readability, and personalization options. In this article, you will learn how to import and export XML files in the Final Cut Pro application. Use the below guidelines to carry out the desired process successfully. It is high time to get ready for an informative takeoff. Fasten your seats for the enlightening journey on the XML file at the Final cut pro X program.
- [Part1: What is the XML file in Final cut pro X? ](#what is XML)
- [Part2: Why exporting XML in final cut pro instead?](#export XML)
- [Part3: How to import and export XML files in Final cut pro X?](#how to do it)
- Part4: What editors can import and export XML files?

Part 1: What is the XML file in Final cut pro X?
XML, or Extensible Markup Language, can be imported and exported in Final Cut Pro. The best way to transfer the Final cut pro X files to any other third-party application is to use the XML format. Many programs do not recognize the file format of Final cut pro X documents. To convert it as a readable file, transfer the output in the form of XML type.
Most users may refine or edit the Final cut pro X files further to achieve their desired outcomes. To overcome the file compatibility issues, you must adopt the XML file pattern.
The sole purpose of the XML file is to avoid the complexity in transferring the data files like libraries, media, projects from the Final cut pro X app to another application. It minimizes the difficulties in handling the export procedure of the edited media files.
Despite ample methodologies in the digital space, XML is the simplest way to overcome unnecessary compatibility issues. You can convert the output files to a flexible format for a better transfer process. All forms of metadata, documents transfers occur using the XML file.
The handling comforts aid the usage of XML in the Final Cut Pro X ambiance. Quick processing is feasible with this file format and you can export them based on your needs. The simple texts with faster transfer persuade the editors to opt for this format. This Markup language is easy to understand, and you need not require any technical skills to understand the XML content.
The tags and texts reveal the standard operation of that file. You can work on the XML fine in your comforts unlike the other file types in the digital space. The Final Cut Pro X editors use the XML file to import and export the media file’s components, libraries, events for further processing. The XML serves as a comfortable file type to edit on the FINAL CUT PRO X platform.
Part 2: Why exporting XML in final cut pro instead?
You must be wondering, why do you need to export the XML file from the Final Cut Pro X environment? What are benefits do you achieve in transferring this XML content from this ambiance? Here comes the solutions for your queries in detail for better understanding.
- For further editing
As you all know that, the foremost purpose of Final Cut Pro X is to edit, store and transfer the media files based on the requirement. In case, if you want to make a unique edit on the processed videos, then you must transfer the edited clips to the desired applications.
In this scenario, you require a reliable file format to carry the meta details of the edited videos. There is a need to export the XML file to the FINAL CUT PRO X platform. To make further edits, you must transfer the entire project to the editing tools without any data loss.
- For teamworking
If you are working in groups, make your edits to be visible to your teammates. It requires a quick share of your projects from Final Cut Pro X to any other platform. To serve this purpose, export the XML files. XML file format assists in faster shares and lossless transfer to any required ambiance.
In addition, Filmora is even easier for team-working, click to see how .


- To transfer projects, clips, and libraries to other APP or devices
The XML file carries the metadata elements of the projects. It contains crucial components like libraries, clips. Moreover, the XML format helps to overcome compatibility issues. You can transfer them to any application or device and disclose them in no time.
It acts as a standard file type to handle many digital spaces flawlessly. If there is a need for the edited XML files in Final Cut Pro X, immediately transfer them to the necessary apps or devices for further processing.
Part 3: How to import and export XML files in Final cut pro X?
The next question that arises quickly after surfing the above content is how to import and export the XML files in the Final Cut Pro X tool for further editing purposes.
In this section, you will discover efficient steps to carry out the transfer process flawlessly. It ensures lossless transfer and the XML files moves at a rapid rate to the desired ambiance from the Final Cut Pro X tool.
To import the XML file in the Final Cut Pro X program, follow the below guidelines.
Step 1: Open the Final cut pro X app on your device, then tap the File Menu at the top bar of the screen. From the dropdown list choose ‘Import -> XML’ option.
Step 2: Surf the folders in your device and select the desired XML file that requires the import action. Hit the ‘Import’ button to load the XML file into the Final Cut Pro X platform.

Another method to import the XML file into the Final Cut Pro X ambiance is that you can drag the XML files directly into the working environment of this program.
Next, you can learn how to export the XML files from the Final Cut Pro X tool for further edit and processing activities.
Step 1: Open the Final Cut Pro X program, choose the libraries or events that require the export process. Then, tap ‘File -> Export XML’. Type in the name for this XML file and choose the desired folder in your system for quick access.
Step 2: Enable the Metadata view pop-up to witness the data in the structured format. Select the XML version and press the ‘Save’ button to complete the export process.

The XML file is available in your system, and you can use it at any application for further processing.
Both the import and export process in Final Cut Pro X is simple, and you can try them without any issues. Few clicks are enough to complete the procedure flawlessly.
Part 4: What editors can import and export XML files?
There are surplus video editors available in the digital market to work with XML files to acquire the enhanced version of the clips. iMovie and Lumafusion programs can imports and exports the XML files to make depth edits as per the needs.
The iMovie application encourages the editors to import the XML files into its working timeline quickly. Simple drag and drop actions are enough to complete the import procedure. Insert the XML file in the timeline and make the necessary edits like trim, crop according to your requirement.
The Lumafusion is a renowned program that edits videos optimally on the iOS platform. You can import the XML files into this environment in no time. Press the ‘File -> Import’ option and navigate the folders to include the XML file into this video editor timeline. Using the built-in features of this app, make the perfect edits to suit your needs without any compromises.

Conclusion
Thus, you had an insightful discussion on the XML files and their associated import and export procedures in the Final Cut Pro X program. Use the above content to work with the XML files effectively.
The stepwise guidelines will aid you to tap the perfect controls for successful insertion and the transfer of the XML data. The glimpses of the video editing tools help you to understand that you can import the XML data for further edits.
This article had given you enlightening facts about XML and its importance during the transfer and storage process. Connect with this article to discover the role of XML in organizing the vital data and its associated imports and exports in the Final cut pro X program.
Shanoon Cox
Shanoon Cox is a writer and a lover of all things video.
Follow @Shanoon Cox
Shanoon Cox
Mar 27, 2024• Proven solutions
The XML files have multiple usages and contain the tags and texts as their main components. The purpose of the XML file is to format the data to aid in optimal storage and transfer process. The XML file consists of tags and texts. This tag contains the main elements of the file, and the text carries readable information.
Unlike HTML, the Extensible Markup Language describes the data content in a readable format without any complex codes. It is easy to understand and displays a clear illustration of the purpose. You can find the applications of XML in web publishing, to perform web tasks, and common uses like data storage, transfers.
Most users opt for XML due to its compatible features, readability, and personalization options. In this article, you will learn how to import and export XML files in the Final Cut Pro application. Use the below guidelines to carry out the desired process successfully. It is high time to get ready for an informative takeoff. Fasten your seats for the enlightening journey on the XML file at the Final cut pro X program.
- [Part1: What is the XML file in Final cut pro X? ](#what is XML)
- [Part2: Why exporting XML in final cut pro instead?](#export XML)
- [Part3: How to import and export XML files in Final cut pro X?](#how to do it)
- Part4: What editors can import and export XML files?
Part 1: What is the XML file in Final cut pro X?
XML, or Extensible Markup Language, can be imported and exported in Final Cut Pro. The best way to transfer the Final cut pro X files to any other third-party application is to use the XML format. Many programs do not recognize the file format of Final cut pro X documents. To convert it as a readable file, transfer the output in the form of XML type.
Most users may refine or edit the Final cut pro X files further to achieve their desired outcomes. To overcome the file compatibility issues, you must adopt the XML file pattern.
The sole purpose of the XML file is to avoid the complexity in transferring the data files like libraries, media, projects from the Final cut pro X app to another application. It minimizes the difficulties in handling the export procedure of the edited media files.
Despite ample methodologies in the digital space, XML is the simplest way to overcome unnecessary compatibility issues. You can convert the output files to a flexible format for a better transfer process. All forms of metadata, documents transfers occur using the XML file.
The handling comforts aid the usage of XML in the Final Cut Pro X ambiance. Quick processing is feasible with this file format and you can export them based on your needs. The simple texts with faster transfer persuade the editors to opt for this format. This Markup language is easy to understand, and you need not require any technical skills to understand the XML content.
The tags and texts reveal the standard operation of that file. You can work on the XML fine in your comforts unlike the other file types in the digital space. The Final Cut Pro X editors use the XML file to import and export the media file’s components, libraries, events for further processing. The XML serves as a comfortable file type to edit on the FINAL CUT PRO X platform.
Part 2: Why exporting XML in final cut pro instead?
You must be wondering, why do you need to export the XML file from the Final Cut Pro X environment? What are benefits do you achieve in transferring this XML content from this ambiance? Here comes the solutions for your queries in detail for better understanding.
- For further editing
As you all know that, the foremost purpose of Final Cut Pro X is to edit, store and transfer the media files based on the requirement. In case, if you want to make a unique edit on the processed videos, then you must transfer the edited clips to the desired applications.
In this scenario, you require a reliable file format to carry the meta details of the edited videos. There is a need to export the XML file to the FINAL CUT PRO X platform. To make further edits, you must transfer the entire project to the editing tools without any data loss.
- For teamworking
If you are working in groups, make your edits to be visible to your teammates. It requires a quick share of your projects from Final Cut Pro X to any other platform. To serve this purpose, export the XML files. XML file format assists in faster shares and lossless transfer to any required ambiance.
In addition, Filmora is even easier for team-working, click to see how .
- To transfer projects, clips, and libraries to other APP or devices
The XML file carries the metadata elements of the projects. It contains crucial components like libraries, clips. Moreover, the XML format helps to overcome compatibility issues. You can transfer them to any application or device and disclose them in no time.
It acts as a standard file type to handle many digital spaces flawlessly. If there is a need for the edited XML files in Final Cut Pro X, immediately transfer them to the necessary apps or devices for further processing.
Part 3: How to import and export XML files in Final cut pro X?
The next question that arises quickly after surfing the above content is how to import and export the XML files in the Final Cut Pro X tool for further editing purposes.
In this section, you will discover efficient steps to carry out the transfer process flawlessly. It ensures lossless transfer and the XML files moves at a rapid rate to the desired ambiance from the Final Cut Pro X tool.
To import the XML file in the Final Cut Pro X program, follow the below guidelines.
Step 1: Open the Final cut pro X app on your device, then tap the File Menu at the top bar of the screen. From the dropdown list choose ‘Import -> XML’ option.
Step 2: Surf the folders in your device and select the desired XML file that requires the import action. Hit the ‘Import’ button to load the XML file into the Final Cut Pro X platform.
Another method to import the XML file into the Final Cut Pro X ambiance is that you can drag the XML files directly into the working environment of this program.
Next, you can learn how to export the XML files from the Final Cut Pro X tool for further edit and processing activities.
Step 1: Open the Final Cut Pro X program, choose the libraries or events that require the export process. Then, tap ‘File -> Export XML’. Type in the name for this XML file and choose the desired folder in your system for quick access.
Step 2: Enable the Metadata view pop-up to witness the data in the structured format. Select the XML version and press the ‘Save’ button to complete the export process.
The XML file is available in your system, and you can use it at any application for further processing.
Both the import and export process in Final Cut Pro X is simple, and you can try them without any issues. Few clicks are enough to complete the procedure flawlessly.
Part 4: What editors can import and export XML files?
There are surplus video editors available in the digital market to work with XML files to acquire the enhanced version of the clips. iMovie and Lumafusion programs can imports and exports the XML files to make depth edits as per the needs.
The iMovie application encourages the editors to import the XML files into its working timeline quickly. Simple drag and drop actions are enough to complete the import procedure. Insert the XML file in the timeline and make the necessary edits like trim, crop according to your requirement.
The Lumafusion is a renowned program that edits videos optimally on the iOS platform. You can import the XML files into this environment in no time. Press the ‘File -> Import’ option and navigate the folders to include the XML file into this video editor timeline. Using the built-in features of this app, make the perfect edits to suit your needs without any compromises.
Conclusion
Thus, you had an insightful discussion on the XML files and their associated import and export procedures in the Final Cut Pro X program. Use the above content to work with the XML files effectively.
The stepwise guidelines will aid you to tap the perfect controls for successful insertion and the transfer of the XML data. The glimpses of the video editing tools help you to understand that you can import the XML data for further edits.
This article had given you enlightening facts about XML and its importance during the transfer and storage process. Connect with this article to discover the role of XML in organizing the vital data and its associated imports and exports in the Final cut pro X program.
Shanoon Cox
Shanoon Cox is a writer and a lover of all things video.
Follow @Shanoon Cox
Elevate Your Video Game: Best Free Online Video Enhancement Software
Top 9 Best Online Video Quality Enhancer for FREE

Ollie Mattison
Apr 24, 2024• Proven solutions
In 2024, the average person will watch 17 hours of video content every week. Improving the quality of your videos can make your content more noticeable.
Fortunately, there are many excellent video quality enhancer tools to choose from. These tools can enhance both the visual and audio clarity of your content. Ultimately, this will enhance your professionalism and reputation as a trustworthy creator.
Are you wondering where to start when selecting an effective, user-friendly video enhancer? Here are some of our top recommendations to help you begin.
- Part 2: 5 Free AI Video Enhancers [Software Options]
- Part 3: Top 2 4K Video Enhancer Online Free Options
- Part 4: How to Choose the Best Video Enhancer
- In this article
Why Do You Need an AI Video Enhancer?
AI video enhancers utilize generative AI to remove noise, stabilize shaky videos, upscale, or enhance their overall appearance. These tools employ machine learning and neural network techniques to analyze videos and apply different effects for enhancement. Trained on extensive datasets, most AI video enhancers can understand video content like faces, scenes, and objects, automatically adjusting imperfections.
Using an AI video enhancer is an excellent way to boost video quality quickly. Unlike traditional methods, AI speeds up the enhancement process significantly. There are additional benefits, such as:
- **Enhanced Media Quality:**AI video enhancers enhance videos automatically with advanced algorithms, maintaining quality, clarity, and detail.
- Noise Reduction: Many AI video enhancer tools effectively reduce visual noise in videos, resulting in cleaner and clearer footage.
- **Reviving Old Clip:**AI video enhancers are adept at restoring old video footage to make it appear more vibrant.
5 Free AI Video Enhancers [Software Options]
Are blurry videos on your large screen getting on your nerves? Thanks to advancements in artificial intelligence (AI), you can now enhance your low-resolution videos for a crystal-clear viewing experience.
Whether you’re a video editor, content creator, or streamer, incorporating an AI video upscaler into your toolkit is a wise choice. Here are the top 5 picks for the best free AI video enhancer software to improve your video editing.
1.Wondershare Filmora - AI Video Enhancer

Pricing:Filmora offers a free trial without exporting.
Wondershare Filmora stands out in video editing by combining comprehensive editing features with AI-powered enhancement tools. With 4K editing, Filmora ensures videos are improved and future-proofed.
In addition to enhancement, Filmora offers over 300 unique transitions and effects catering to creative minds. Audio enthusiasts will enjoy advanced audio tools like audio ducking and equalizers.
Filmora’s standout feature is its motion tracking capability, enabling dynamic video compositions. While beginners may find the abundance of features overwhelming, regular updates and an active online community provide ample support.
Features
- Filmora’s advanced AI video-enhancing algorithms let you convert black-and-white footage to colored ones.
- It boosts frame rates up to 240 FPS using AI-enhanced frame interpolation technology and 4x super-resolution algorithms.
- Filmora enhances videos’ clarity and quality through audio ducking, equalizers, and more.
- This AI Video Enhancer tracks and attaches objects in videos.
- The tool preserves details and enhances quality in slow-motion scenes.
- Offers over 300 unique transitions and effects.
Pros
- Versatile editing and enhancement options.
- This AI video enhancer is designed to assist both beginners and professionals.
- It supports batch processing, enhancing 10+ videos simultaneously.
Cons
- The free version adds a watermark.
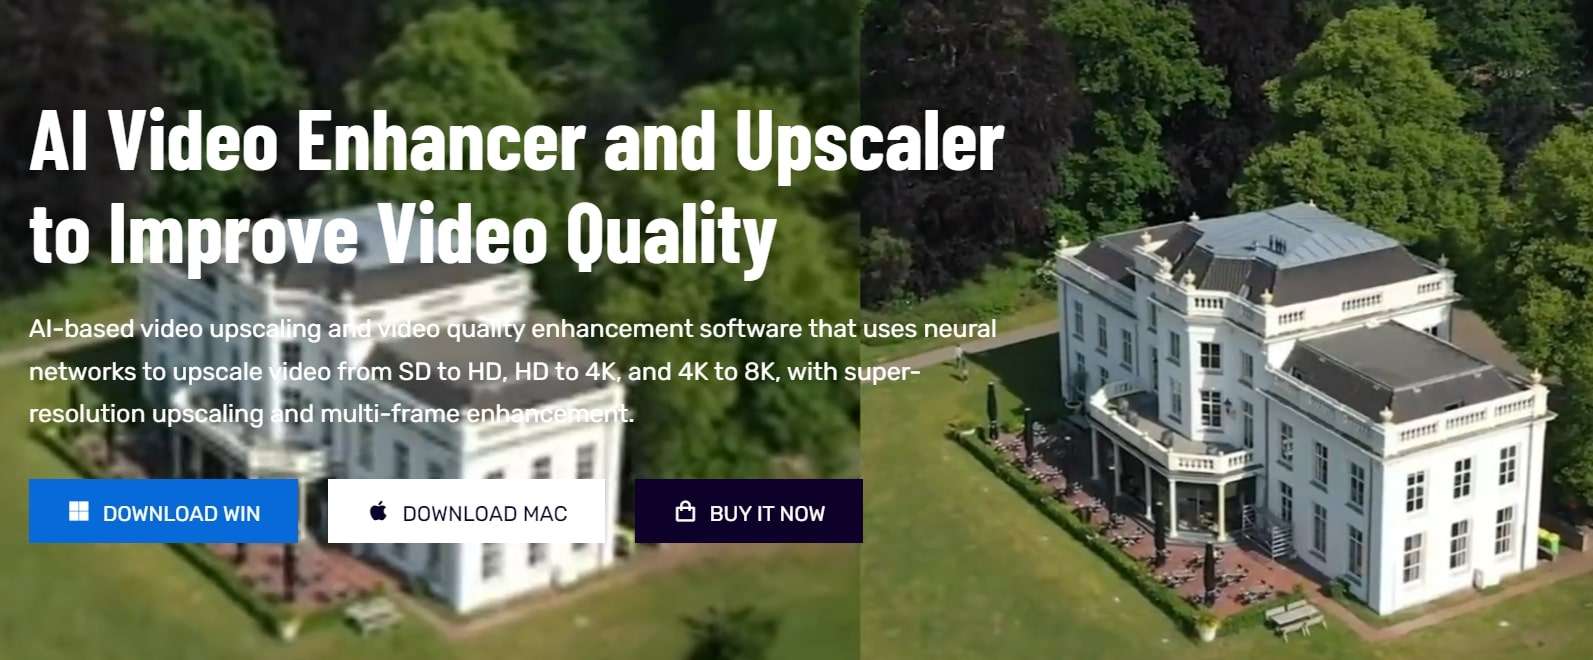
2.AVCLabs Video Enhancer AI
Pricing:AVCLabs offers new users a 7-day free trial.
AVCLabs Video Enhancer AI utilizes a neural network to improve video clip quality. With super-resolution AI video upscaling and multi-frame enhancement, it can easily upscale video from SD to HD (720p or 1080p) to 4K and up to 8K in just one click.
With support for various video and audio formats, users can work seamlessly without compatibility issues. A notable feature is its batch processing capability, enabling users to upscale and enhance multiple videos simultaneously, saving time. The real-time preview feature is invaluable for those who wish to see the software’s results before finalizing their project.
Features
- AVCLabs seamlessly enhances any video footage without quality loss. Whether single or multi-frame, you’ll experience smooth transitions and improved frames.
- With AVCLabs’ color correction feature, you can easily adjust each video frame’s brightness, saturation, and contrast. This tool employs AI video upscaling to create larger, more detailed images without sacrificing quality.
- This video enhancement tool offers automatic face refinement to enhance facial details, which is ideal for improving low-quality videos with excessive noise and blurriness.
- The Super Resolution feature recovers high-resolution videos from low-resolution materials by generating additional pixel data to fill gaps, resulting in enhanced output.
- AVCLabs Video Enhancer AI uses a multi-frame convolutional neural network to stabilize video shakes and remove motion artifacts, overlay noise, and grain, producing natural and enhanced results.
Pros
- AVCLabs features a color calibration algorithm that accurately portrays natural colors.
- It allows you to add color to old black-and-white videos.
- The video processing is fully automatic, requiring no manual fine-tuning.
Cons
- The app demands a significant amount of free space, up to 15 GB.
- It is only compatible with Windows and Mac operating systems.
- The free trial adds a watermark from AVC Labs to the videos.
3.UniFab Video Enhancer
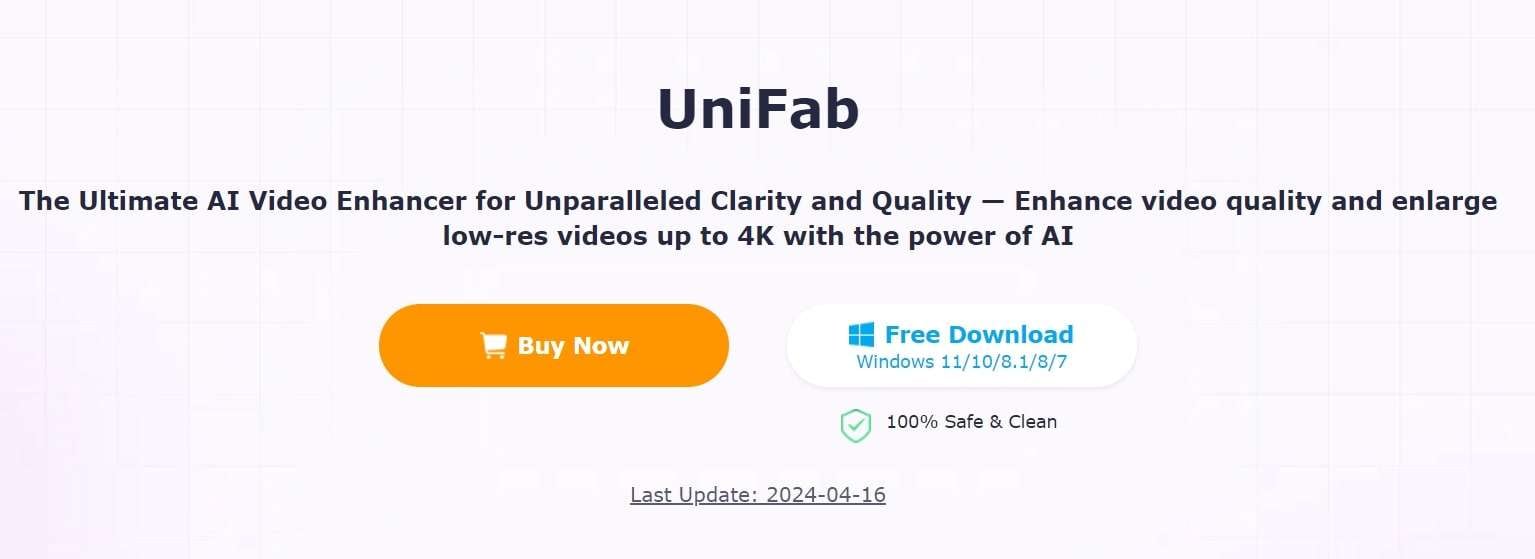
Pricing: UniFab provides a 30-day free trial for new AI users and a 30-day money-back guarantee for paid.
UniFab is a comprehensive AI-powered video enhancer to enhance video quality for all types of videos. Standout features like upscaling video to HDR10/Dolby Vision, denoising, and deinterlacing set this tool apart.
The models are regularly updated with the latest advancements in Deep Learning. Whether you’re a novice or an expert, UniFab offers both automatic and manual modes for video enhancement, making it easy to use without requiring complex settings.
Features
- Upgrade any video to 720p, 1080p, or even 4k resolution with remarkable clarity.
- Convert SDR videos to stunning HDR formats like HDR10+ and Dolby Vision. This feature revitalizes your videos, making them significantly more vibrant and immersive.
- Utilize AI technology to deinterlace your videos, ensuring smooth playback and a pristine viewing experience on modern displays.
- Specifically designed for videos captured in low-light conditions or with high ISO settings, this tool intuitively reduces grain and noise, restoring your footage’s true essence without sacrificing detail.
- Experience unprecedented fluidity as the software boosts your videos to an impressive 120FPS using AI. This transforms your content into a smooth motion stream, ideal for high-definition screens and attentive audiences.
Pros
- It allows audio up-mixing to EAC3 5.1/DTS 7.1 through AI.
- Utilizes GPU-accelerated technology.
- Supports video conversion, compression, and editing.
Cons
- The free trial is limited to 3 videos.
- Does not support Mac systems.
4.Topaz Video Enhance AI
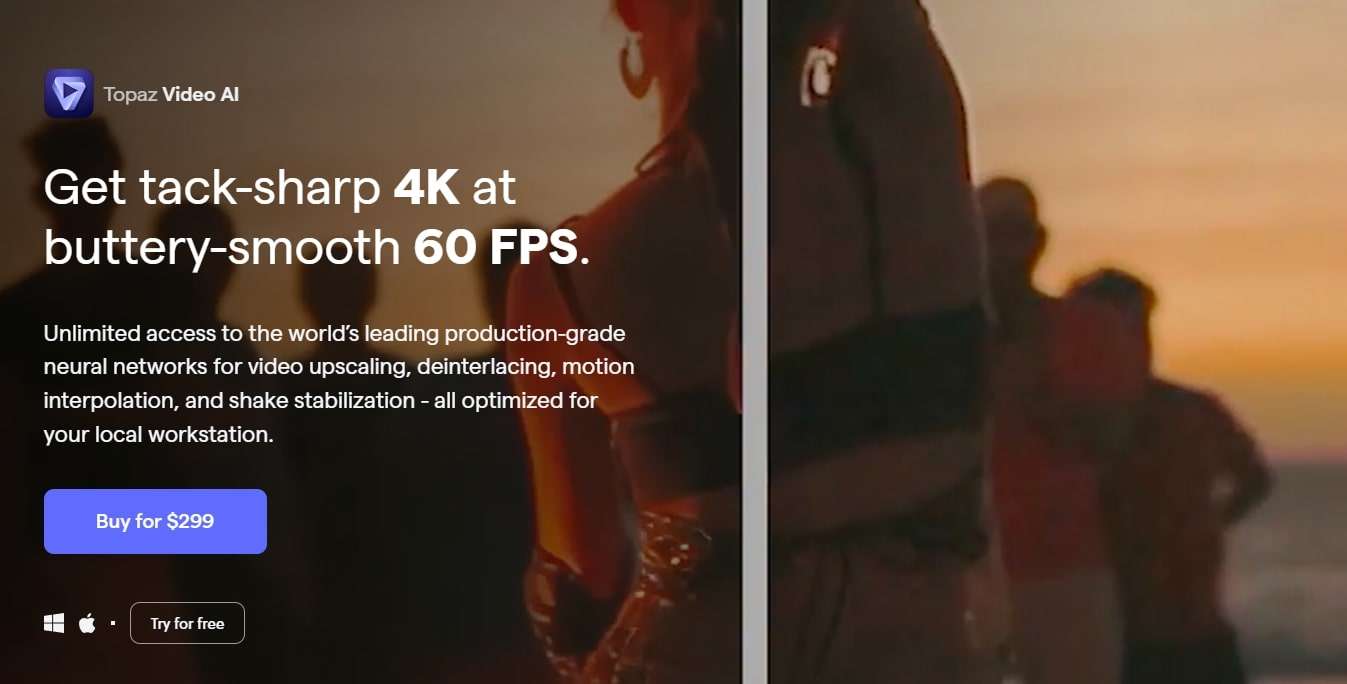
Pricing:Topaz video enhancement tool offers a 30-day no-questions-asked refund policy.
Topaz Video Enhance AI enhances video quality by increasing its resolution. It supports batch upscaling of videos and is compatible with DVD, DSLR, Game, and HD stock footage.
Many notable film studios consider Topaz Video Enhance AI one of the best video editing software tools. It is suitable for various uses, such as commercials, movie content, and YouTube videos.
Features
- This free video upscaling software swiftly analyzes video footage quality using AI tools and recreates it into high-resolution videos.
- Topaz offers Gaia CGI and Theia for enhancing CG and animated videos, along with Proteus and Artemis for noise removal and sharpening.
- Easily recover details from any video footage by injecting original details using adjacent frames’ additional information. It detects and corrects visual artifacts formed during compression.
- Topaz provides an automatic mode for quick video quality enhancement and manual fine-tuning options using available controls.
- With this free video enhancer software, preserve video audio tracks and select from different conversion options for optimal output in the final project.
Pros
- Reduces motion artifacts.
- Adds extra frames for smooth, slow-motion videos.
- Enhances video quality up to 8K.
Cons
- AI processing can be time-consuming, sometimes taking hours.
- Requires a high-quality graphics card.
5.HitPaw Video Enhancer

Pricing:HitPaw AI video enhancer offers a 30-day refund guarantee on paid plans.
HitPaw is a user-friendly video enhancer suitable for both beginners and professionals. It features an easy-to-navigate interface, ensuring even those with minimal experience can improve their videos. Despite its simplicity, HitPaw offers robust enhancement tools, including color correction and stabilization. Its extensive support for various video formats eliminates compatibility concerns.
The software prioritizes efficient video enhancement without compromising quality or speed. Comprehensive tutorials help users explore different editing tasks and unlock their content’s full potential.
Features
- Utilize advanced AI algorithms to upscale low-resolution videos for a more appealing look. The AI feature optimizes content for sharper and more vibrant visuals.
- The HitPaw video quality enhancer app uses AI tools to improve detailing on human faces. Apply filters and adjust settings to enhance facial output in videos.
- The app includes a video stabilization feature that eliminates shaky camera movements, producing smoother and clearer videos with a professional touch.
- HitPaw offers an AI video repair option to restore damaged, corrupted, and old videos. It can also use deep learning AI to colorize black-and-white videos.
- Remove noise from videos with the General Denoise feature, making them look sharper, clearer, and newer.
Pros
- Supports various video formats.
- Has a user-friendly and intuitive interface.
- Can repair and enhance animation videos.
Cons
- The free plan has limited editing features.
Top 2 4K Video Enhancer Online Free Options
The AI-enhanced video tools mentioned above excel in their field. However, there are times when you might run out of storage or need a quick fix through your browser. So, here are some online AI tools that can enhance your videos. Unlike offline video enhancer AIs, online tools are easily accessible. While they may offer fewer features than desktop solutions, they are still useful for some editors.
1.Cutout.Pro
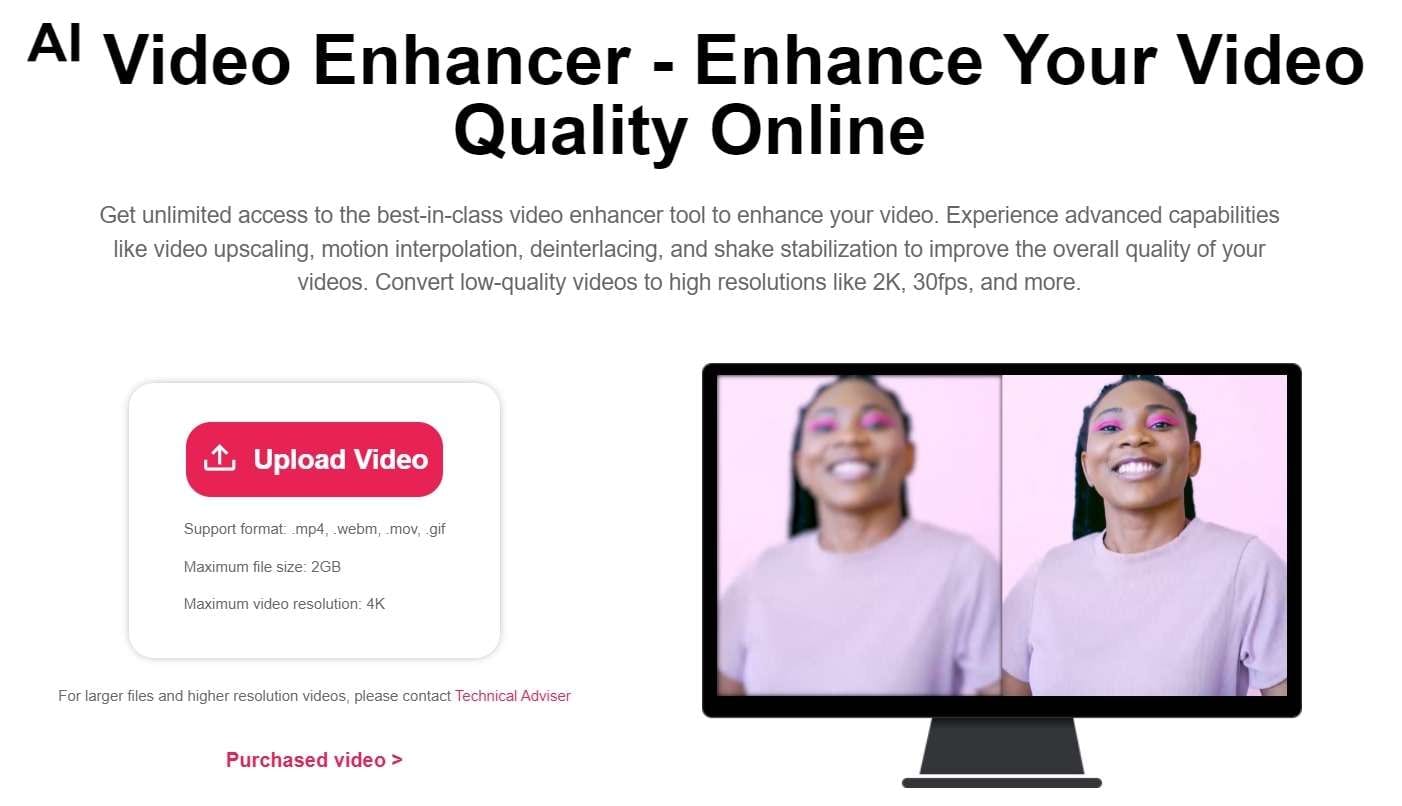
Many editing professionals rely on this free AI video enhancer for unlimited video improvements. Cutout.Pro utilizes advanced features such as video upscaling, motion interpolation, deinterlacing, and shake stabilization to enhance overall quality. This tool converts low-quality videos to higher resolutions like 2K, 30fps, and beyond. Moreover, this online tool swiftly reduces visual noise and other motion artifacts from clips using AI.
Features
- Reduce noise, motion artifacts, and improve video resolution significantly with this powerful online video quality enhancer and upscaler. Perfect for enhancing low-resolution videos like 240p, 360p, 480p, and more.
- Pro increases video frame rates without sacrificing quality. Smooth out shaky footage for better slow-motion effects.
- This tool enhances video resolution up to 2K at a maximum of 30fps effortlessly. It sharpens and defines your videos, bringing your story to life like a professional.
- This is perfect for filmmakers seeking to enhance footage quality and create professional-looking films. Improve video resolution and quality to unblur, upscale, and smooth videos for cinematic results.
- Enhance the quality of personal videos as this tool features shake stabilization for professional results.
- This video enhancer is ideal for professionals creating cinematic frames and restoring old footage. It’s also great for individuals looking to improve the quality of compressed videos downloaded from social media platforms like YouTube, Netflix, and TikTok.
Pros
- It boosts video frame rates and enables HD clip exports.
- Users can upload videos in MP4, MOV, WebM, and GIF formats for processing.
Cons
- It only offers a 5-second preview of the results after enhancement.
2.Clideo Video Enhancer
Clideo is an online video-enhancing tool that can completely transform any random video. It lets you add special AI effects and filters to adjust the video’s brightness, saturation, and contrast, making it stunning, vibrant, and attractive. You can enhance any video professionally for social media attention or business branding.
When it comes to video-enhancing tools, users seek maximum customization options. Clideo offers various features, functions, and facilities to transform average-looking videos into 4k video resolutions.
Features
- The interface is intuitive, so you don’t need any video editing experience to use it.
- You can enhance your video regardless of format because Clideo works with MP4, WMV, MOV, VOB, AVI, and other popular formats.
- You don’t need to download and install the video enhancer to your device. It’s not only faster but also more secure.
- Enhance multiple videos or images simultaneously.
- Add subtitles with customizable text fonts.
- Text Overlay feature with support for HD resolution.
- Access a media library with social sharing options.
Pros
- User-friendly tool is ideal for beginners.
- Supports multiple formats.
- As an online tool, it saves device storage space.
- Reasonable pricing.
- Provides uninterrupted video editing with customizable features.
Cons
- A premium subscription is required to remove watermarking.
- No offline app available; internet connection always necessary.
- No dedicated mobile app.
How to Choose the Best Video Enhancer
Consider the following to ensure you select the right video enhancer for your needs and creative vision.
1.Type of Content
Think about the type of content you’re working with. Are you creating short-form clips for social media or longer, more complex videos? Different enhancers may better suit different content types, so consider your file type and potential quality issues.
2.Consider The Features You Need
Consider the tools and features you need from your video quality enhancer software. Each system offers different capabilities, so planning can help you find the option that best fits your requirements.
3.Sharing Formats and Requirements
Determine the purpose of your video project and any specific sharing requirements. Understanding your goals will help you plan accordingly, whether for online sharing or commercial use.
4.Your Budget
Keep your budget in mind. Some enhancers offer free features, while others may require a purchase or subscription fee for full access. Budgeting effectively ensures you get the best value for your money while achieving great video results.
Conclusion
The video enhancement landscape has been transformed by artificial intelligence, providing numerous options to enhance your videos’ quality. Whether a professional filmmaker or a casual content creator, free AI video enhancers offer a chance to take your productions to the next level.
Each software has unique strengths, from Wondershare Filmora’s comprehensive editing features to AVCLabs’ neural network-powered upscaling and UniFab’s HDR conversion capabilities. User-friendly options like HitPaw cater to beginners while providing robust enhancement tools.
Moreover, for quick fixes or limited storage, online options like Cutout.Pro and Clideo offer accessible solutions with impressive results. With these advancements, achieving professional-quality videos is now achievable for everyone.
Ollie Mattison
Ollie Mattison is a writer and a lover of all things video.
Follow @Ollie Mattison
Ollie Mattison
Apr 24, 2024• Proven solutions
In 2024, the average person will watch 17 hours of video content every week. Improving the quality of your videos can make your content more noticeable.
Fortunately, there are many excellent video quality enhancer tools to choose from. These tools can enhance both the visual and audio clarity of your content. Ultimately, this will enhance your professionalism and reputation as a trustworthy creator.
Are you wondering where to start when selecting an effective, user-friendly video enhancer? Here are some of our top recommendations to help you begin.
- Part 2: 5 Free AI Video Enhancers [Software Options]
- Part 3: Top 2 4K Video Enhancer Online Free Options
- Part 4: How to Choose the Best Video Enhancer
- In this article
Why Do You Need an AI Video Enhancer?
AI video enhancers utilize generative AI to remove noise, stabilize shaky videos, upscale, or enhance their overall appearance. These tools employ machine learning and neural network techniques to analyze videos and apply different effects for enhancement. Trained on extensive datasets, most AI video enhancers can understand video content like faces, scenes, and objects, automatically adjusting imperfections.
Using an AI video enhancer is an excellent way to boost video quality quickly. Unlike traditional methods, AI speeds up the enhancement process significantly. There are additional benefits, such as:
- **Enhanced Media Quality:**AI video enhancers enhance videos automatically with advanced algorithms, maintaining quality, clarity, and detail.
- Noise Reduction: Many AI video enhancer tools effectively reduce visual noise in videos, resulting in cleaner and clearer footage.
- **Reviving Old Clip:**AI video enhancers are adept at restoring old video footage to make it appear more vibrant.
5 Free AI Video Enhancers [Software Options]
Are blurry videos on your large screen getting on your nerves? Thanks to advancements in artificial intelligence (AI), you can now enhance your low-resolution videos for a crystal-clear viewing experience.
Whether you’re a video editor, content creator, or streamer, incorporating an AI video upscaler into your toolkit is a wise choice. Here are the top 5 picks for the best free AI video enhancer software to improve your video editing.
1.Wondershare Filmora - AI Video Enhancer
Pricing:Filmora offers a free trial without exporting.
Wondershare Filmora stands out in video editing by combining comprehensive editing features with AI-powered enhancement tools. With 4K editing, Filmora ensures videos are improved and future-proofed.
In addition to enhancement, Filmora offers over 300 unique transitions and effects catering to creative minds. Audio enthusiasts will enjoy advanced audio tools like audio ducking and equalizers.
Filmora’s standout feature is its motion tracking capability, enabling dynamic video compositions. While beginners may find the abundance of features overwhelming, regular updates and an active online community provide ample support.
Features
- Filmora’s advanced AI video-enhancing algorithms let you convert black-and-white footage to colored ones.
- It boosts frame rates up to 240 FPS using AI-enhanced frame interpolation technology and 4x super-resolution algorithms.
- Filmora enhances videos’ clarity and quality through audio ducking, equalizers, and more.
- This AI Video Enhancer tracks and attaches objects in videos.
- The tool preserves details and enhances quality in slow-motion scenes.
- Offers over 300 unique transitions and effects.
Pros
- Versatile editing and enhancement options.
- This AI video enhancer is designed to assist both beginners and professionals.
- It supports batch processing, enhancing 10+ videos simultaneously.
Cons
- The free version adds a watermark.
2.AVCLabs Video Enhancer AI
Pricing:AVCLabs offers new users a 7-day free trial.
AVCLabs Video Enhancer AI utilizes a neural network to improve video clip quality. With super-resolution AI video upscaling and multi-frame enhancement, it can easily upscale video from SD to HD (720p or 1080p) to 4K and up to 8K in just one click.
With support for various video and audio formats, users can work seamlessly without compatibility issues. A notable feature is its batch processing capability, enabling users to upscale and enhance multiple videos simultaneously, saving time. The real-time preview feature is invaluable for those who wish to see the software’s results before finalizing their project.
Features
- AVCLabs seamlessly enhances any video footage without quality loss. Whether single or multi-frame, you’ll experience smooth transitions and improved frames.
- With AVCLabs’ color correction feature, you can easily adjust each video frame’s brightness, saturation, and contrast. This tool employs AI video upscaling to create larger, more detailed images without sacrificing quality.
- This video enhancement tool offers automatic face refinement to enhance facial details, which is ideal for improving low-quality videos with excessive noise and blurriness.
- The Super Resolution feature recovers high-resolution videos from low-resolution materials by generating additional pixel data to fill gaps, resulting in enhanced output.
- AVCLabs Video Enhancer AI uses a multi-frame convolutional neural network to stabilize video shakes and remove motion artifacts, overlay noise, and grain, producing natural and enhanced results.
Pros
- AVCLabs features a color calibration algorithm that accurately portrays natural colors.
- It allows you to add color to old black-and-white videos.
- The video processing is fully automatic, requiring no manual fine-tuning.
Cons
- The app demands a significant amount of free space, up to 15 GB.
- It is only compatible with Windows and Mac operating systems.
- The free trial adds a watermark from AVC Labs to the videos.
3.UniFab Video Enhancer
Pricing: UniFab provides a 30-day free trial for new AI users and a 30-day money-back guarantee for paid.
UniFab is a comprehensive AI-powered video enhancer to enhance video quality for all types of videos. Standout features like upscaling video to HDR10/Dolby Vision, denoising, and deinterlacing set this tool apart.
The models are regularly updated with the latest advancements in Deep Learning. Whether you’re a novice or an expert, UniFab offers both automatic and manual modes for video enhancement, making it easy to use without requiring complex settings.
Features
- Upgrade any video to 720p, 1080p, or even 4k resolution with remarkable clarity.
- Convert SDR videos to stunning HDR formats like HDR10+ and Dolby Vision. This feature revitalizes your videos, making them significantly more vibrant and immersive.
- Utilize AI technology to deinterlace your videos, ensuring smooth playback and a pristine viewing experience on modern displays.
- Specifically designed for videos captured in low-light conditions or with high ISO settings, this tool intuitively reduces grain and noise, restoring your footage’s true essence without sacrificing detail.
- Experience unprecedented fluidity as the software boosts your videos to an impressive 120FPS using AI. This transforms your content into a smooth motion stream, ideal for high-definition screens and attentive audiences.
Pros
- It allows audio up-mixing to EAC3 5.1/DTS 7.1 through AI.
- Utilizes GPU-accelerated technology.
- Supports video conversion, compression, and editing.
Cons
- The free trial is limited to 3 videos.
- Does not support Mac systems.
4.Topaz Video Enhance AI
Pricing:Topaz video enhancement tool offers a 30-day no-questions-asked refund policy.
Topaz Video Enhance AI enhances video quality by increasing its resolution. It supports batch upscaling of videos and is compatible with DVD, DSLR, Game, and HD stock footage.
Many notable film studios consider Topaz Video Enhance AI one of the best video editing software tools. It is suitable for various uses, such as commercials, movie content, and YouTube videos.
Features
- This free video upscaling software swiftly analyzes video footage quality using AI tools and recreates it into high-resolution videos.
- Topaz offers Gaia CGI and Theia for enhancing CG and animated videos, along with Proteus and Artemis for noise removal and sharpening.
- Easily recover details from any video footage by injecting original details using adjacent frames’ additional information. It detects and corrects visual artifacts formed during compression.
- Topaz provides an automatic mode for quick video quality enhancement and manual fine-tuning options using available controls.
- With this free video enhancer software, preserve video audio tracks and select from different conversion options for optimal output in the final project.
Pros
- Reduces motion artifacts.
- Adds extra frames for smooth, slow-motion videos.
- Enhances video quality up to 8K.
Cons
- AI processing can be time-consuming, sometimes taking hours.
- Requires a high-quality graphics card.
5.HitPaw Video Enhancer
Pricing:HitPaw AI video enhancer offers a 30-day refund guarantee on paid plans.
HitPaw is a user-friendly video enhancer suitable for both beginners and professionals. It features an easy-to-navigate interface, ensuring even those with minimal experience can improve their videos. Despite its simplicity, HitPaw offers robust enhancement tools, including color correction and stabilization. Its extensive support for various video formats eliminates compatibility concerns.
The software prioritizes efficient video enhancement without compromising quality or speed. Comprehensive tutorials help users explore different editing tasks and unlock their content’s full potential.
Features
- Utilize advanced AI algorithms to upscale low-resolution videos for a more appealing look. The AI feature optimizes content for sharper and more vibrant visuals.
- The HitPaw video quality enhancer app uses AI tools to improve detailing on human faces. Apply filters and adjust settings to enhance facial output in videos.
- The app includes a video stabilization feature that eliminates shaky camera movements, producing smoother and clearer videos with a professional touch.
- HitPaw offers an AI video repair option to restore damaged, corrupted, and old videos. It can also use deep learning AI to colorize black-and-white videos.
- Remove noise from videos with the General Denoise feature, making them look sharper, clearer, and newer.
Pros
- Supports various video formats.
- Has a user-friendly and intuitive interface.
- Can repair and enhance animation videos.
Cons
- The free plan has limited editing features.
Top 2 4K Video Enhancer Online Free Options
The AI-enhanced video tools mentioned above excel in their field. However, there are times when you might run out of storage or need a quick fix through your browser. So, here are some online AI tools that can enhance your videos. Unlike offline video enhancer AIs, online tools are easily accessible. While they may offer fewer features than desktop solutions, they are still useful for some editors.
1.Cutout.Pro
Many editing professionals rely on this free AI video enhancer for unlimited video improvements. Cutout.Pro utilizes advanced features such as video upscaling, motion interpolation, deinterlacing, and shake stabilization to enhance overall quality. This tool converts low-quality videos to higher resolutions like 2K, 30fps, and beyond. Moreover, this online tool swiftly reduces visual noise and other motion artifacts from clips using AI.
Features
- Reduce noise, motion artifacts, and improve video resolution significantly with this powerful online video quality enhancer and upscaler. Perfect for enhancing low-resolution videos like 240p, 360p, 480p, and more.
- Pro increases video frame rates without sacrificing quality. Smooth out shaky footage for better slow-motion effects.
- This tool enhances video resolution up to 2K at a maximum of 30fps effortlessly. It sharpens and defines your videos, bringing your story to life like a professional.
- This is perfect for filmmakers seeking to enhance footage quality and create professional-looking films. Improve video resolution and quality to unblur, upscale, and smooth videos for cinematic results.
- Enhance the quality of personal videos as this tool features shake stabilization for professional results.
- This video enhancer is ideal for professionals creating cinematic frames and restoring old footage. It’s also great for individuals looking to improve the quality of compressed videos downloaded from social media platforms like YouTube, Netflix, and TikTok.
Pros
- It boosts video frame rates and enables HD clip exports.
- Users can upload videos in MP4, MOV, WebM, and GIF formats for processing.
Cons
- It only offers a 5-second preview of the results after enhancement.
2.Clideo Video Enhancer
Clideo is an online video-enhancing tool that can completely transform any random video. It lets you add special AI effects and filters to adjust the video’s brightness, saturation, and contrast, making it stunning, vibrant, and attractive. You can enhance any video professionally for social media attention or business branding.
When it comes to video-enhancing tools, users seek maximum customization options. Clideo offers various features, functions, and facilities to transform average-looking videos into 4k video resolutions.
Features
- The interface is intuitive, so you don’t need any video editing experience to use it.
- You can enhance your video regardless of format because Clideo works with MP4, WMV, MOV, VOB, AVI, and other popular formats.
- You don’t need to download and install the video enhancer to your device. It’s not only faster but also more secure.
- Enhance multiple videos or images simultaneously.
- Add subtitles with customizable text fonts.
- Text Overlay feature with support for HD resolution.
- Access a media library with social sharing options.
Pros
- User-friendly tool is ideal for beginners.
- Supports multiple formats.
- As an online tool, it saves device storage space.
- Reasonable pricing.
- Provides uninterrupted video editing with customizable features.
Cons
- A premium subscription is required to remove watermarking.
- No offline app available; internet connection always necessary.
- No dedicated mobile app.
How to Choose the Best Video Enhancer
Consider the following to ensure you select the right video enhancer for your needs and creative vision.
1.Type of Content
Think about the type of content you’re working with. Are you creating short-form clips for social media or longer, more complex videos? Different enhancers may better suit different content types, so consider your file type and potential quality issues.
2.Consider The Features You Need
Consider the tools and features you need from your video quality enhancer software. Each system offers different capabilities, so planning can help you find the option that best fits your requirements.
3.Sharing Formats and Requirements
Determine the purpose of your video project and any specific sharing requirements. Understanding your goals will help you plan accordingly, whether for online sharing or commercial use.
4.Your Budget
Keep your budget in mind. Some enhancers offer free features, while others may require a purchase or subscription fee for full access. Budgeting effectively ensures you get the best value for your money while achieving great video results.
Conclusion
The video enhancement landscape has been transformed by artificial intelligence, providing numerous options to enhance your videos’ quality. Whether a professional filmmaker or a casual content creator, free AI video enhancers offer a chance to take your productions to the next level.
Each software has unique strengths, from Wondershare Filmora’s comprehensive editing features to AVCLabs’ neural network-powered upscaling and UniFab’s HDR conversion capabilities. User-friendly options like HitPaw cater to beginners while providing robust enhancement tools.
Moreover, for quick fixes or limited storage, online options like Cutout.Pro and Clideo offer accessible solutions with impressive results. With these advancements, achieving professional-quality videos is now achievable for everyone.
Ollie Mattison
Ollie Mattison is a writer and a lover of all things video.
Follow @Ollie Mattison
FCPX Skin Retouching: A Plugin-Free Guide to Flawless Complexions
Full Guide: How to Add a Skin Smoother Effect with Final Cut Pro

Liza Brown
Mar 27, 2024• Proven solutions
It’s quite common for vloggers to try to show the best of their states. However, makeup, weather, and the shooting equipment may disagree. So, how to tackle this problem?

Fortunately, we have the best solutions to fix the skin tone issue by using FCPX’s built-in tools or smooth skin plugins. You will learn how to strategically adjust your footage’s look for stylistic purposes and impress your audience with your video-editing skills. Now, let’s understand what a skin smoother effect is before learning how to add it in FCPX.
Part 1: How to Add a Skin Smoother Effect without Plugins in Final Cut Pro?
Smoothening the skin in Final Cut Pro is very simple. Simply select the video, choose Video effects to be applied, and adjust the percentages from the Inspector pane. You will get wrinkle-free skin with an astonishing look. While multiple plugins are also available to apply a skin smoother effect, you can use the built-in features of Final Cut Pro to smoothen the skin and decrease the amount of contrast.
Here’s how you can do this:
step1Choose the starting image and edit the clip into the timeline. Press Option and make a connected copy of the clip by dragging it up. The start and end points should match for syncing. In the Effects Browser, drag Blur > Gaussian Blur to apply the blur effect on the upper clip.

step2Open the Inspector pan and select Compositing from its bottom. Switch the Blend Mode to Lighten and adjust the Opacity slider as per your desired glow. Usually, 40 to 45% is ideal.

step3Now, go to the top of the Inspector and turn on the blue checkbox next to Gaussian. Adjust the blurring effect until you achieve your desired level of skin softening. It is highly recommended to blur using the horizontal setting to soften the skin while keeping the eyes sharp. Here, the glow is controlled by Opacity while skin softening is controlled by the Blue Amount.

For better results, add a Vignette by selecting and combining the two clips into a Compound Clip. From the Effects Browser, select Stylize > Vignette and adjust drag the vignette. Now, customize the compound clip settings in the Inspector pane until you achieve your desired look. Compare the results between two images before and after editing
Part 2: Where to Find Good Skin Smoother Plugins?
Plugins make it easy for beginners and users with limited expertise to add a skin smoother effect in Final Cut Pro X. You can find both free and paid skin smoother plugins for FCPX online. Given below are some popular skin smoothening plugins for Final Cut Pro X.
- Skin Smoother 2
Skin Smoother 2 is a powerful and easy-to-use plugin that allows you to smooth out unwanted skin details and enhance your facial appearance.
Price: $19.99 (One-time Charges)
Software Requirements: FCP 10.2 or later
Features:
- Enhanced control over facial adjustments with fine-tuning giving more natural results;
- Precise color sampling without a need to match up with present skin tones; and
- 3 to 5 times faster rendering.
- Color Finale
Color Finale is a user-friendly, fine-tuned, and fully-featured professional skin smoother plugin purpose bit for FCP.

Price: $152
Software Requirements: FCP 10.4.8 - 10.5.1
Features:
- Color wheels, curves, and LUT utilities;
- A complete professional color toolset for videographers, colorists, and editors; and
- Allows personal preference on the interface.
- Universe
A comprehensive FCP tool with 89 individual plugins to apply the next-generation skin smoothening and facial improvement effects.
Price: $199/year
Software Requirements: FCPX 10.5 or later
Features:
- Advanced transitions and effects and motion graphics tools;
- A variety of cool presents and text generators; and
- Number counters, chromatic aberration, VHS looks, camera shake, glitch effects.
Part 3: How to adopt Skin Smoothing Plugins into FCPX?
Follow these steps to use the Skin Smooth 2 Plugin for Final Cut Pro X:
- Purchase and download the Skin Smoother 2 plugin. Go to downloads, unzip the folder containing the plugin and install it on your computer.
- Open the FCPX, go to Effects, and click on Skin Smoother 2. A list of options will appear. Import the image or video you want to edit.

- To apply the skin-smoothing effect, click on Add Color Mask, and select the areas of the face where the color mask has to be added.
- Adjust the Skin Smoothing, Smoothing Mix, and the Softness of the color mask as per your requirements.
- Finally, click on Add Shape Mask, two circles will appear on the image. Adjust the covering area of both circles for Shape Mask 1 to add a smiling face.


Part 4: How to Smooth Skin in Filmora?
Wondershare Filmora features advanced tuning tools and a variety of video filters and overlays. Learn how to smooth skin or beautify your face in the video with this advanced video-editing software.
- Open Filmora, open New Project and click Import to load your videos to the timeline.
- Double click on the video to open the editing window. Open the Color panel and adjust parameters according to your preference such as white balance, tone, and 3D LUT, etc.
- Open the toolbar, click the Advanced Color Tuning icon, go to the advanced color tuning window, and adjust the white balance, color tint and temperature, HSL, 3D LUT, Vignette, and Light. If you are a beginner, try applying the present templates.
- To set a specific tone or beautify your video, open the Tools tab and click the Color Correction option to change the color tones.
- Open Effects and Transitions and select the skin smooth filter. Hover the cursor over the filter and click the plus icon in the middle to add that effect. You can also apply the effect to the whole clip by dragging and dropping it directly onto the video clip.
Part 5: How to smooth skin in Adobe Pro?
Given below are simple steps to create a face matter, control the skin smoothing, adjust color correction, and correct the skin glow in Adobe Pro by using the Beauty Studio Effect:
- Applying the Beauty Studio effect smoothens all parts of the image including the background. However, it will make your footage look artificial, which is not desired. Hence, turn on the Pixel Chooser, pick two colors with the eye dropper tool. Color A for the darker area and Color B for the lighter area.
- Underneath the Mocha Matte, use the eyedropper tool to select colors on the skin of the subject in your footage.
- Now, click on View Matte/Mask to visualize the image areas where you are applying the skin smoothing effect. The Beauty Studio will affect the smoothing effect in the white area while the black area will remain unsmoothed.
- Adjust the Saturation, Hue, and Luma softness to enhance the appearance of the skin, eyes, and mouth.
- To prevent the rest of the image from getting affected, create a Mocha mask around the face by clicking on the Mocha logo and drawing a mask with the X-Spline tool. Make sure the mask moves as the subject is moved after your track forward and back.
- Beauty Studio offers four levels of skin smoothing. You can adjust these levels as per your situation by lowering the smoothing amount for each level. For better results, adjust the levels at 70 or below.
- For the final touch, adjust the sharpening between 10-20 points, add saturation between 3 to 8 points for color correction, and add 5 to 10 points of glow. Your image is ready, compare the results before and after applying the effect.
Conclusion
Smooth skin with clear facial expressions attracts everyone. You can apply a skin smooth effect in your video by using advanced video editing tools like Final Cut Pro, Adobe Premium, and Wondershare Filmora.
There are two methods to add a skin smooth effect with FCPX: By using in-built software settings, or by using plugins like Skin Smoother 2, Color Finale, and Universe. Use Beauty Studio Effect in Adobe Pro to smooth skin and improve facial appearance. Finally, you can beautify the face in your video by adding transitions, making color adjustments, and applying different effects with Wondershare Filmora.
Liza Brown
Liza Brown is a writer and a lover of all things video.
Follow @Liza Brown
Liza Brown
Mar 27, 2024• Proven solutions
It’s quite common for vloggers to try to show the best of their states. However, makeup, weather, and the shooting equipment may disagree. So, how to tackle this problem?
Fortunately, we have the best solutions to fix the skin tone issue by using FCPX’s built-in tools or smooth skin plugins. You will learn how to strategically adjust your footage’s look for stylistic purposes and impress your audience with your video-editing skills. Now, let’s understand what a skin smoother effect is before learning how to add it in FCPX.
Part 1: How to Add a Skin Smoother Effect without Plugins in Final Cut Pro?
Smoothening the skin in Final Cut Pro is very simple. Simply select the video, choose Video effects to be applied, and adjust the percentages from the Inspector pane. You will get wrinkle-free skin with an astonishing look. While multiple plugins are also available to apply a skin smoother effect, you can use the built-in features of Final Cut Pro to smoothen the skin and decrease the amount of contrast.
Here’s how you can do this:
step1Choose the starting image and edit the clip into the timeline. Press Option and make a connected copy of the clip by dragging it up. The start and end points should match for syncing. In the Effects Browser, drag Blur > Gaussian Blur to apply the blur effect on the upper clip.
step2Open the Inspector pan and select Compositing from its bottom. Switch the Blend Mode to Lighten and adjust the Opacity slider as per your desired glow. Usually, 40 to 45% is ideal.
step3Now, go to the top of the Inspector and turn on the blue checkbox next to Gaussian. Adjust the blurring effect until you achieve your desired level of skin softening. It is highly recommended to blur using the horizontal setting to soften the skin while keeping the eyes sharp. Here, the glow is controlled by Opacity while skin softening is controlled by the Blue Amount.
For better results, add a Vignette by selecting and combining the two clips into a Compound Clip. From the Effects Browser, select Stylize > Vignette and adjust drag the vignette. Now, customize the compound clip settings in the Inspector pane until you achieve your desired look. Compare the results between two images before and after editing
Part 2: Where to Find Good Skin Smoother Plugins?
Plugins make it easy for beginners and users with limited expertise to add a skin smoother effect in Final Cut Pro X. You can find both free and paid skin smoother plugins for FCPX online. Given below are some popular skin smoothening plugins for Final Cut Pro X.
- Skin Smoother 2
Skin Smoother 2 is a powerful and easy-to-use plugin that allows you to smooth out unwanted skin details and enhance your facial appearance.
Price: $19.99 (One-time Charges)
Software Requirements: FCP 10.2 or later
Features:
- Enhanced control over facial adjustments with fine-tuning giving more natural results;
- Precise color sampling without a need to match up with present skin tones; and
- 3 to 5 times faster rendering.
- Color Finale
Color Finale is a user-friendly, fine-tuned, and fully-featured professional skin smoother plugin purpose bit for FCP.
Price: $152
Software Requirements: FCP 10.4.8 - 10.5.1
Features:
- Color wheels, curves, and LUT utilities;
- A complete professional color toolset for videographers, colorists, and editors; and
- Allows personal preference on the interface.
- Universe
A comprehensive FCP tool with 89 individual plugins to apply the next-generation skin smoothening and facial improvement effects.
Price: $199/year
Software Requirements: FCPX 10.5 or later
Features:
- Advanced transitions and effects and motion graphics tools;
- A variety of cool presents and text generators; and
- Number counters, chromatic aberration, VHS looks, camera shake, glitch effects.
Part 3: How to adopt Skin Smoothing Plugins into FCPX?
Follow these steps to use the Skin Smooth 2 Plugin for Final Cut Pro X:
- Purchase and download the Skin Smoother 2 plugin. Go to downloads, unzip the folder containing the plugin and install it on your computer.
- Open the FCPX, go to Effects, and click on Skin Smoother 2. A list of options will appear. Import the image or video you want to edit.
- To apply the skin-smoothing effect, click on Add Color Mask, and select the areas of the face where the color mask has to be added.
- Adjust the Skin Smoothing, Smoothing Mix, and the Softness of the color mask as per your requirements.
- Finally, click on Add Shape Mask, two circles will appear on the image. Adjust the covering area of both circles for Shape Mask 1 to add a smiling face.
Part 4: How to Smooth Skin in Filmora?
Wondershare Filmora features advanced tuning tools and a variety of video filters and overlays. Learn how to smooth skin or beautify your face in the video with this advanced video-editing software.
- Open Filmora, open New Project and click Import to load your videos to the timeline.
- Double click on the video to open the editing window. Open the Color panel and adjust parameters according to your preference such as white balance, tone, and 3D LUT, etc.
- Open the toolbar, click the Advanced Color Tuning icon, go to the advanced color tuning window, and adjust the white balance, color tint and temperature, HSL, 3D LUT, Vignette, and Light. If you are a beginner, try applying the present templates.
- To set a specific tone or beautify your video, open the Tools tab and click the Color Correction option to change the color tones.
- Open Effects and Transitions and select the skin smooth filter. Hover the cursor over the filter and click the plus icon in the middle to add that effect. You can also apply the effect to the whole clip by dragging and dropping it directly onto the video clip.
Part 5: How to smooth skin in Adobe Pro?
Given below are simple steps to create a face matter, control the skin smoothing, adjust color correction, and correct the skin glow in Adobe Pro by using the Beauty Studio Effect:
- Applying the Beauty Studio effect smoothens all parts of the image including the background. However, it will make your footage look artificial, which is not desired. Hence, turn on the Pixel Chooser, pick two colors with the eye dropper tool. Color A for the darker area and Color B for the lighter area.
- Underneath the Mocha Matte, use the eyedropper tool to select colors on the skin of the subject in your footage.
- Now, click on View Matte/Mask to visualize the image areas where you are applying the skin smoothing effect. The Beauty Studio will affect the smoothing effect in the white area while the black area will remain unsmoothed.
- Adjust the Saturation, Hue, and Luma softness to enhance the appearance of the skin, eyes, and mouth.
- To prevent the rest of the image from getting affected, create a Mocha mask around the face by clicking on the Mocha logo and drawing a mask with the X-Spline tool. Make sure the mask moves as the subject is moved after your track forward and back.
- Beauty Studio offers four levels of skin smoothing. You can adjust these levels as per your situation by lowering the smoothing amount for each level. For better results, adjust the levels at 70 or below.
- For the final touch, adjust the sharpening between 10-20 points, add saturation between 3 to 8 points for color correction, and add 5 to 10 points of glow. Your image is ready, compare the results before and after applying the effect.
Conclusion
Smooth skin with clear facial expressions attracts everyone. You can apply a skin smooth effect in your video by using advanced video editing tools like Final Cut Pro, Adobe Premium, and Wondershare Filmora.
There are two methods to add a skin smooth effect with FCPX: By using in-built software settings, or by using plugins like Skin Smoother 2, Color Finale, and Universe. Use Beauty Studio Effect in Adobe Pro to smooth skin and improve facial appearance. Finally, you can beautify the face in your video by adding transitions, making color adjustments, and applying different effects with Wondershare Filmora.
Liza Brown
Liza Brown is a writer and a lover of all things video.
Follow @Liza Brown
Edit Videos Like a Pro: 14 Free Software Options Without Watermarks
14 Free Video Editing Software With No Watermark
Ollie Mattison
Mar 27, 2024• Proven solutions
Nowadays, digital marketing is rising, especially in the form of video promotion. Marketers and influencers are making efforts to attract potential audiences and users to their products and services through creative and attractive videos. However, if the final exported video is attached with a watermark, that could be annoying, and your users might consider you unprofessional.
Thus, in this article, we collect 14 free video editing software that can export video without watermarks. Each of them has outstanding video editing features. Now find the one that fits you best and start sharing your videos on YouTube, Facebook, Instagram, and on more platforms.
- Top 14 Best Free Video Editing Software without Watermarks - Free to Use
- Comparison of These 14 No Watermark Attached Video Editing Tools [Quick View]
- FAQs: Tips You May Want to Know About Free Video Editor with or without Watermark
Top 14 Best Free Video Editing Software with No Watermark
Usually, a free video editor is free when editing videos, however, a watermark with the editor’s logo will be attached while exporting the final work.
The great news is that we do find the 14 advanced editing software with high-quality features that could export video without watermark, read on.
1 Filmora - Best Video Editor for All Creators
Filmora Video Editor is the best free video editing software with no watermark included while downloading your editing videos. It is easy to use and possesses with various AI-powered functions and built-in templates, you can 1-click to apply templates for making product videos, promotion videos, vlogs, business videos, and more. Offers the exporting size for YouTube, Instagram, Tiktok, and more.
Free Video Editor without Watermark
 Secure Download
Free Video Editor without Watermark
Secure Download


- Best for: for all creators
- Users rating: 4.8/5
- Compatibility: Windows, Mac, iOS, Android, Web Online
Filmora now upgrades with the latest trending AI features , you can use AI to generate and edit videos in a more convenient way. AI tranalation , AI text-based editing , AI text-to-video , etc…
Note: You can edit videos with Filmora’s free trial version, however, to export videos without a watermark, you need to upgrade the version. The paid version also offers trendy effects, and creative assets to improve your video editing and create a more stunning video.
If you are looking for a free online video editor with no watermark included, Filmora online video editor also is your good choice. Plus, Filmora’s Mobile version also is a free video editor app, try it!
Try Free Editing Software No Watermark
Secure Download
Try Free Editing Software No Watermark
Secure Download
2 VSDC Free Video Editor - Free Video Editor for Beginners [No watermark]
For a long peroid, VSDC always rank at the front as one of the best free video editor without watermark. It is capable enough to assist marketing professionals in creating product demos and how to use videos to improve the knowledge base of their audience.
- Best for: beginners and people who have less editing skills
- Users rating: 4.0/5
- Compatibility: Windows, iOS

It doesn’t leave any watermark on edited videos, and you will be impressed with the quality of edited videos. VSDC supports a wide range of file formats so that users can create free tutorials and post them on different social media.
VSDC also has a pro version that has advanced tools such as screen record, a mask tool, voiceover, and chroma key for professional-level editing, which costs $29.99. Just for you to choose.
*Tips: Click to read VSDC review .
3 PowerDirector - Fast Rendering Speeds Editor
PowerDirector owns AI features that can easily and quickly generate a video clip. It possesses millions of royalty-free stock content and renews the library monthly.
- Best for: amateur or experienced editors
- Users rating: 4.5/5
- Compatibility: Windows, Mac, iOS, Android

PowerDirector is free for making videos, to remove the watermark while exporting the final video clip, you have to purchase a subscription plan.
*Tips: Click to read PowerDirector review .
4 OpenShot - Open Source Free Video Editor without Watermark
For those who are searching for a feature-rich yet easy-to-use software tool to work on their short video projects, OpenShot can provide you with great results. OpenShot is an open-source video editing tool that has no watermark for downloading videos. It allows users to trim, scale smoothly, and resize clips while mixing audio information with simple drag and drop tools.
- Best for: open source video editing lovers
- Users rating: 4.4/5
- Compatibility: Windows, Mac, Linux

This year, OpenShot launched its video editing cloud API which helps to unlock your creativity. It loads with many other advanced features that make it suitable for professionals which is suitable for beginners who want to create videos for social media and YouTube channels.
*Tips: Click to read OpenShot review .
5 Lightworks - Free Video Editor for Professionals
If you need professional-level video editing software, Lightworks has wrapped many interesting features for you. The free version of Lightworks does not have a watermark and can directly export videos to YouTube/Vimeo. You will be happy to know that this tool has been used for editing popular Hollywood movies. You can use this free movie making software to create high-quality videos without watermarks.
- Best for: all desktop device video editing
- Users rating: 3.5/5
- Compatibility: Windows, Mac, and Linux

As a free video editor without a watermark, Lightworks does not pose any video length limit rule on users; moreover, its healthy online community assists beginners with top-rated tips and tricks to design quality projects. The free version of Lightworks has almost all the features of the pro-paid version with a limit on output formats only.
*Tips: Click to read Lightworks review .
6 Shotcut - Open source Free Video Editor
This free video editing software is another open-source editor that extends support to a wide range of video file formats, and it can download video without the watermark. Shotcut has a huge community of beginner filmmakers, it is easy for them to use due to its interactive user terminal.
- Best for: small and short clips editing
- Users rating: 4.2/5
- Compatibility: Windows, Mac, and Linux

There is a wide range of file formats along with awesome video/audio effects and variable frame rates that can help users to design custom videos with ease.
One of the most valuable features of Shortcut is its native timeline editing feature that does not require importing projects from the system. It allows several intuitive actions such as locking waveforms and multi-tracks to create wonderful videos.
*Tips: Click to read Shotcut review .
7 Blender - Free 3D Creation Video Editor for Professionals
Blender is an open-source platform that has earned fame due to its 3D pipeline - modeling, rigging, animation, simulation, rendering, compositing, motion tracking, and 2D animation pipeline. However, they also have a comprehensive video editor.
Blender is free open-source software and won’t leave a dreadful watermark either. The main editing sections are modeling, rendering, VFX, sculpting, and 3D animation which are on par even with professional editors.
- Best for: 3D effects lovers
- Users rating: 4.5/5
- Compatibility: Windows, Mac, and Linux

However, beginners should beware of using this editing program! Prior advanced editing knowledge is needed to navigate its convoluted interface. But for skilled editors who don’t want to spend big bucks on an editor, or are just looking for a privacy-friendly open-source alternative, Blender represents an offer you simply can’t refuse!
*Tips: Click to read Blender review .

Wondershare Filmora Video Editor
Filmora - No Watermark Video Editing Software
• Easily edit and export video files without watermark
• Offers popular effects and filters for making your video professional
• Cross-platform supported - (Windows, Mac, iOS, Android, Online)
Try It Free Try It Free Learn More >> Learn More >>
8 Apple iMovie - Popular Mac Built-in Video Editor
Apple iMovie is a free editing software with no watermark for macOS and iOS. You can create videos or movies from iPhone to iPad to Mac. The new Magic Movie and Storyboards help shape your story on iPhone, iPad, or Mac which brings more magic and cinematic results.
- Best for: video enthusiasts with Apple’s systems
- Users rating: 4.3/5
- Compatibility: Mac, iPhone, iPad

iMovie offers built-in movie templates and various video effects, soundtracks, and filters to create a professional-quality video. Share the movie instantly on various platforms directly from iMovie with no watermark, it is a good choice for Apple system lovers.
*Tips: Click to read iMovie review .
9 Apple Final Cut Pro - Advanced Editing Tool for macOS
If you are a Mac user and looking for a video editor that professionals use regularly, Final Cut Pro is your destination. The outstanding object tracker, cinematic mode and automatic HDR workflows can bring your video to next level. What’s moer, it owns a highlight special feature - supporting 360-degree stereoscope and multi-cam under up to 64 angles, easy to improve the video quality.
- Best for: professional video editing for Mac users
- Users rating: 4.4/5
- Compatibility: Mac
Download Link: https://www.apple.com/hk/en/final-cut-pro/

Offers a 90-day free trail used for video editing, exporting cinematic movie video without watermark.
*Tips: Click to read Final Cut Pro review .
10 Hitfilm Express - Better Video Effects Solution
Hitfilm Express is free video editing software with no watermark for pc also possesses a powerful VFX function. It is a great video editor if you want to add the most common video effects that you see in movies and games.
- Best for: professional and video effects users
- Users rating: 4.4/5
- Compatibility: Windows, Mac

Starting from shotgun effects and lighting effects to muzzle flash effects and blaster effects, you can get every special VFX effect from Hitfilm Express with an advanced screen simulation option along with a changing backdrop. You can even animate different models and apply masking and layering techniques. You can create sci-fi visual effects that you mostly see in movies and games.
*Tips: Click to read Hitfilm Express review .
11 Video Grabber - Cloud Video Editing Platform
Video Grabber is an online platform where you can edit your video instantly without installing any software. It is a simple video editor with basic video editing options. You can cut out clips from a video and turn them into GIFs, extract audio from a video or merge videos.
- Best for: edit videos without downloading software
- Users rating: 4.1/5
- Compatibility: Windows, Mac, Linux

You can trim videos, rotate videos, crop the dimensions, change the play speed, add watermark, convert speech to text. It is completely free to use and secure as an online video editor.
12 Clipchamp - Online Editor with Video and Aido Effects
Clipchamp is another free online video editor with no watermark that is now owned by Microsoft. You can create and edit videos without prior experience. You can make professional-quality videos thanks to its pro-level features. There are various customizable templates available to choose from and make videos from video streaming and social media platforms.
- Best for: online video editing use
- Users rating: 4.3/5
- Compatibility: Windows, Mac, Online

Drag your clips, photos, and audios on the timeline, add titles, and effects, and edit the clips and export as well as publish on online platforms. You can trim and cut, split and combine, rotate, crop, and flip videos. Besides, you can add texts, add a background, balance colors, and apply filters and effects instantly.
*Tips: Click to read Clipchamp review .
13 VideoProc - Video Editor with Video Conversion Feature
VideoProc is famous for its video conversion and screen recording features, it also is a video editor with video editing options. It possesses full hardware acceleration for offering high video quality.
- Best for: need to convert and edit video
- Users rating: 4.6/5
- Compatibility: Windows, Mac

However, you only get a 5-minute-long video for a free trial.
14 CapCut - Best TikTok Video Maker
CapCut now is rising really fast, as you can edit video in Capcut and export to TikTok directly. It owns a huge library of hot and trendy Tiktok video templates, you can apply these templates directly to swiftly create a new video.
- Best for: social media enthusiast
- Users rating: 4.7/5
- Compatibility: Windows, Mac, iOS, Android, Web Online

No watermark will attach to videos. Basically, at the end of the video clip, they will leave a Capcut logo, however, you can erase it while editing the video. This is quite humanized.
Want to Get Video Editing Software with No Watermark Attach? Try This Out!
Filmora Video Editor brings you all the convenience of editing videos with handy functions. You can make your creative ideas into realize! More importantly, your complete video can export without a watermark!
Try It Free Try It Free Learn More > Learn More >
Screen Record on iPad with Ease Learn More >
Comparison of These 14 No Watermark Attached Video Editing Tools [Quick View]
| Product | Best for | Compatibility |
|---|---|---|
| Filmora | all creators | Windows, Mac, iOS, Android, Web Online |
| VSDC | beginners and people who have less editing skills | Windows, iOS |
| PowerDirector | amateur or experienced editors | Windows, Mac, iOS, Android |
| OpenShot | open source video editing lovers | Windows, Mac, Linux |
| Lightworks | all desktop device video editing | Windows, Mac, Linux |
| Shotcut | small and short clips editing | Windows, Mac, Linux |
| Blender | 3D effects lovers | Windows, Mac, Linux |
| iMovie | video enthusiasts with Apple’s systems | Mac, iPhone, iPad |
| Final Cut Pro | professional video editing for Mac users | Mac |
| Hitfilm Express | professional and video effects users | Windows, Mac |
| Video Grabber | edit videos without downloading software | Windows, Mac, Linux |
| Clipchamp | online video editing use | Windows, Mac, Online |
| VideoProc | need to convert and edit video | Windows, Mac |
| CapCut | social media enthusiast | Windows, Mac, iOS, Android, Web Online |
FAQs: Tips You May Want to Know About Free Video Editor with or without Watermark
If you want to know more about free video editors without watermark, you can check the FAQs below.
Q1. Does Lightworks Free Version Have a Watermark?
No, the free version of Lightworks does not have a watermark. You can directly export videos to YouTube/Vimeo, but you are limited to the MPEG4/ format and a maximum resolution of 720p.
The advanced features such as user-definable project locations, Boris FX, Boris Graffiti, advanced Project sharing & Stereoscopic (3D) output are also missing in the free version. What’s more, you need to “renew” the free license every seven days.
Q2. Does Free Movavi Have a Watermark?
Yes, all software from Movavi adds a “Trial” watermark to output videos when you use a trial/free version of the program. Trial versions come with a 7-day trial license (14-day for Movavi Business Suite).
They also come with certain restrictions that vary from program to program. The most common limitation is, that when converting audio files, only half the file length is converted. In the Movavi Video Suite trial, video capture is limited to 5 minutes & audio capture is 2 minutes.
Conclusion
Above is the 14 best video editing software that can export video without watermarks. The final selection of video editing tools depends on your basic requirements.
If you are looking for a free yet AI-powered video editing tool, we highly recommend Filmora Video Editor as your best choice. Download and try how intelligent it could be for editing videos!
Secure Download
Secure Download
Ollie Mattison
Ollie Mattison is a writer and a lover of all things video.
Follow @Ollie Mattison
Ollie Mattison
Mar 27, 2024• Proven solutions
Nowadays, digital marketing is rising, especially in the form of video promotion. Marketers and influencers are making efforts to attract potential audiences and users to their products and services through creative and attractive videos. However, if the final exported video is attached with a watermark, that could be annoying, and your users might consider you unprofessional.
Thus, in this article, we collect 14 free video editing software that can export video without watermarks. Each of them has outstanding video editing features. Now find the one that fits you best and start sharing your videos on YouTube, Facebook, Instagram, and on more platforms.
- Top 14 Best Free Video Editing Software without Watermarks - Free to Use
- Comparison of These 14 No Watermark Attached Video Editing Tools [Quick View]
- FAQs: Tips You May Want to Know About Free Video Editor with or without Watermark
Top 14 Best Free Video Editing Software with No Watermark
Usually, a free video editor is free when editing videos, however, a watermark with the editor’s logo will be attached while exporting the final work.
The great news is that we do find the 14 advanced editing software with high-quality features that could export video without watermark, read on.
1 Filmora - Best Video Editor for All Creators
Filmora Video Editor is the best free video editing software with no watermark included while downloading your editing videos. It is easy to use and possesses with various AI-powered functions and built-in templates, you can 1-click to apply templates for making product videos, promotion videos, vlogs, business videos, and more. Offers the exporting size for YouTube, Instagram, Tiktok, and more.
Free Video Editor without Watermark
Secure Download
Free Video Editor without Watermark
Secure Download
- Best for: for all creators
- Users rating: 4.8/5
- Compatibility: Windows, Mac, iOS, Android, Web Online
Filmora now upgrades with the latest trending AI features , you can use AI to generate and edit videos in a more convenient way. AI tranalation , AI text-based editing , AI text-to-video , etc…
Note: You can edit videos with Filmora’s free trial version, however, to export videos without a watermark, you need to upgrade the version. The paid version also offers trendy effects, and creative assets to improve your video editing and create a more stunning video.
If you are looking for a free online video editor with no watermark included, Filmora online video editor also is your good choice. Plus, Filmora’s Mobile version also is a free video editor app, try it!
Try Free Editing Software No Watermark
Secure Download
Try Free Editing Software No Watermark
Secure Download
2 VSDC Free Video Editor - Free Video Editor for Beginners [No watermark]
For a long peroid, VSDC always rank at the front as one of the best free video editor without watermark. It is capable enough to assist marketing professionals in creating product demos and how to use videos to improve the knowledge base of their audience.
- Best for: beginners and people who have less editing skills
- Users rating: 4.0/5
- Compatibility: Windows, iOS
It doesn’t leave any watermark on edited videos, and you will be impressed with the quality of edited videos. VSDC supports a wide range of file formats so that users can create free tutorials and post them on different social media.
VSDC also has a pro version that has advanced tools such as screen record, a mask tool, voiceover, and chroma key for professional-level editing, which costs $29.99. Just for you to choose.
*Tips: Click to read VSDC review .
3 PowerDirector - Fast Rendering Speeds Editor
PowerDirector owns AI features that can easily and quickly generate a video clip. It possesses millions of royalty-free stock content and renews the library monthly.
- Best for: amateur or experienced editors
- Users rating: 4.5/5
- Compatibility: Windows, Mac, iOS, Android
PowerDirector is free for making videos, to remove the watermark while exporting the final video clip, you have to purchase a subscription plan.
*Tips: Click to read PowerDirector review .
4 OpenShot - Open Source Free Video Editor without Watermark
For those who are searching for a feature-rich yet easy-to-use software tool to work on their short video projects, OpenShot can provide you with great results. OpenShot is an open-source video editing tool that has no watermark for downloading videos. It allows users to trim, scale smoothly, and resize clips while mixing audio information with simple drag and drop tools.
- Best for: open source video editing lovers
- Users rating: 4.4/5
- Compatibility: Windows, Mac, Linux
This year, OpenShot launched its video editing cloud API which helps to unlock your creativity. It loads with many other advanced features that make it suitable for professionals which is suitable for beginners who want to create videos for social media and YouTube channels.
*Tips: Click to read OpenShot review .
5 Lightworks - Free Video Editor for Professionals
If you need professional-level video editing software, Lightworks has wrapped many interesting features for you. The free version of Lightworks does not have a watermark and can directly export videos to YouTube/Vimeo. You will be happy to know that this tool has been used for editing popular Hollywood movies. You can use this free movie making software to create high-quality videos without watermarks.
- Best for: all desktop device video editing
- Users rating: 3.5/5
- Compatibility: Windows, Mac, and Linux
As a free video editor without a watermark, Lightworks does not pose any video length limit rule on users; moreover, its healthy online community assists beginners with top-rated tips and tricks to design quality projects. The free version of Lightworks has almost all the features of the pro-paid version with a limit on output formats only.
*Tips: Click to read Lightworks review .
6 Shotcut - Open source Free Video Editor
This free video editing software is another open-source editor that extends support to a wide range of video file formats, and it can download video without the watermark. Shotcut has a huge community of beginner filmmakers, it is easy for them to use due to its interactive user terminal.
- Best for: small and short clips editing
- Users rating: 4.2/5
- Compatibility: Windows, Mac, and Linux
There is a wide range of file formats along with awesome video/audio effects and variable frame rates that can help users to design custom videos with ease.
One of the most valuable features of Shortcut is its native timeline editing feature that does not require importing projects from the system. It allows several intuitive actions such as locking waveforms and multi-tracks to create wonderful videos.
*Tips: Click to read Shotcut review .
7 Blender - Free 3D Creation Video Editor for Professionals
Blender is an open-source platform that has earned fame due to its 3D pipeline - modeling, rigging, animation, simulation, rendering, compositing, motion tracking, and 2D animation pipeline. However, they also have a comprehensive video editor.
Blender is free open-source software and won’t leave a dreadful watermark either. The main editing sections are modeling, rendering, VFX, sculpting, and 3D animation which are on par even with professional editors.
- Best for: 3D effects lovers
- Users rating: 4.5/5
- Compatibility: Windows, Mac, and Linux
However, beginners should beware of using this editing program! Prior advanced editing knowledge is needed to navigate its convoluted interface. But for skilled editors who don’t want to spend big bucks on an editor, or are just looking for a privacy-friendly open-source alternative, Blender represents an offer you simply can’t refuse!
*Tips: Click to read Blender review .
Wondershare Filmora Video Editor
Filmora - No Watermark Video Editing Software
• Easily edit and export video files without watermark
• Offers popular effects and filters for making your video professional
• Cross-platform supported - (Windows, Mac, iOS, Android, Online)
Try It Free Try It Free Learn More >> Learn More >>
8 Apple iMovie - Popular Mac Built-in Video Editor
Apple iMovie is a free editing software with no watermark for macOS and iOS. You can create videos or movies from iPhone to iPad to Mac. The new Magic Movie and Storyboards help shape your story on iPhone, iPad, or Mac which brings more magic and cinematic results.
- Best for: video enthusiasts with Apple’s systems
- Users rating: 4.3/5
- Compatibility: Mac, iPhone, iPad
iMovie offers built-in movie templates and various video effects, soundtracks, and filters to create a professional-quality video. Share the movie instantly on various platforms directly from iMovie with no watermark, it is a good choice for Apple system lovers.
*Tips: Click to read iMovie review .
9 Apple Final Cut Pro - Advanced Editing Tool for macOS
If you are a Mac user and looking for a video editor that professionals use regularly, Final Cut Pro is your destination. The outstanding object tracker, cinematic mode and automatic HDR workflows can bring your video to next level. What’s moer, it owns a highlight special feature - supporting 360-degree stereoscope and multi-cam under up to 64 angles, easy to improve the video quality.
- Best for: professional video editing for Mac users
- Users rating: 4.4/5
- Compatibility: Mac
Download Link: https://www.apple.com/hk/en/final-cut-pro/
Offers a 90-day free trail used for video editing, exporting cinematic movie video without watermark.
*Tips: Click to read Final Cut Pro review .
10 Hitfilm Express - Better Video Effects Solution
Hitfilm Express is free video editing software with no watermark for pc also possesses a powerful VFX function. It is a great video editor if you want to add the most common video effects that you see in movies and games.
- Best for: professional and video effects users
- Users rating: 4.4/5
- Compatibility: Windows, Mac
Starting from shotgun effects and lighting effects to muzzle flash effects and blaster effects, you can get every special VFX effect from Hitfilm Express with an advanced screen simulation option along with a changing backdrop. You can even animate different models and apply masking and layering techniques. You can create sci-fi visual effects that you mostly see in movies and games.
*Tips: Click to read Hitfilm Express review .
11 Video Grabber - Cloud Video Editing Platform
Video Grabber is an online platform where you can edit your video instantly without installing any software. It is a simple video editor with basic video editing options. You can cut out clips from a video and turn them into GIFs, extract audio from a video or merge videos.
- Best for: edit videos without downloading software
- Users rating: 4.1/5
- Compatibility: Windows, Mac, Linux
You can trim videos, rotate videos, crop the dimensions, change the play speed, add watermark, convert speech to text. It is completely free to use and secure as an online video editor.
12 Clipchamp - Online Editor with Video and Aido Effects
Clipchamp is another free online video editor with no watermark that is now owned by Microsoft. You can create and edit videos without prior experience. You can make professional-quality videos thanks to its pro-level features. There are various customizable templates available to choose from and make videos from video streaming and social media platforms.
- Best for: online video editing use
- Users rating: 4.3/5
- Compatibility: Windows, Mac, Online
Drag your clips, photos, and audios on the timeline, add titles, and effects, and edit the clips and export as well as publish on online platforms. You can trim and cut, split and combine, rotate, crop, and flip videos. Besides, you can add texts, add a background, balance colors, and apply filters and effects instantly.
*Tips: Click to read Clipchamp review .
13 VideoProc - Video Editor with Video Conversion Feature
VideoProc is famous for its video conversion and screen recording features, it also is a video editor with video editing options. It possesses full hardware acceleration for offering high video quality.
- Best for: need to convert and edit video
- Users rating: 4.6/5
- Compatibility: Windows, Mac
However, you only get a 5-minute-long video for a free trial.
14 CapCut - Best TikTok Video Maker
CapCut now is rising really fast, as you can edit video in Capcut and export to TikTok directly. It owns a huge library of hot and trendy Tiktok video templates, you can apply these templates directly to swiftly create a new video.
- Best for: social media enthusiast
- Users rating: 4.7/5
- Compatibility: Windows, Mac, iOS, Android, Web Online
No watermark will attach to videos. Basically, at the end of the video clip, they will leave a Capcut logo, however, you can erase it while editing the video. This is quite humanized.
Want to Get Video Editing Software with No Watermark Attach? Try This Out!
Filmora Video Editor brings you all the convenience of editing videos with handy functions. You can make your creative ideas into realize! More importantly, your complete video can export without a watermark!
Try It Free Try It Free Learn More > Learn More >
Screen Record on iPad with Ease Learn More >
Comparison of These 14 No Watermark Attached Video Editing Tools [Quick View]
| Product | Best for | Compatibility |
|---|---|---|
| Filmora | all creators | Windows, Mac, iOS, Android, Web Online |
| VSDC | beginners and people who have less editing skills | Windows, iOS |
| PowerDirector | amateur or experienced editors | Windows, Mac, iOS, Android |
| OpenShot | open source video editing lovers | Windows, Mac, Linux |
| Lightworks | all desktop device video editing | Windows, Mac, Linux |
| Shotcut | small and short clips editing | Windows, Mac, Linux |
| Blender | 3D effects lovers | Windows, Mac, Linux |
| iMovie | video enthusiasts with Apple’s systems | Mac, iPhone, iPad |
| Final Cut Pro | professional video editing for Mac users | Mac |
| Hitfilm Express | professional and video effects users | Windows, Mac |
| Video Grabber | edit videos without downloading software | Windows, Mac, Linux |
| Clipchamp | online video editing use | Windows, Mac, Online |
| VideoProc | need to convert and edit video | Windows, Mac |
| CapCut | social media enthusiast | Windows, Mac, iOS, Android, Web Online |
FAQs: Tips You May Want to Know About Free Video Editor with or without Watermark
If you want to know more about free video editors without watermark, you can check the FAQs below.
Q1. Does Lightworks Free Version Have a Watermark?
No, the free version of Lightworks does not have a watermark. You can directly export videos to YouTube/Vimeo, but you are limited to the MPEG4/ format and a maximum resolution of 720p.
The advanced features such as user-definable project locations, Boris FX, Boris Graffiti, advanced Project sharing & Stereoscopic (3D) output are also missing in the free version. What’s more, you need to “renew” the free license every seven days.
Q2. Does Free Movavi Have a Watermark?
Yes, all software from Movavi adds a “Trial” watermark to output videos when you use a trial/free version of the program. Trial versions come with a 7-day trial license (14-day for Movavi Business Suite).
They also come with certain restrictions that vary from program to program. The most common limitation is, that when converting audio files, only half the file length is converted. In the Movavi Video Suite trial, video capture is limited to 5 minutes & audio capture is 2 minutes.
Conclusion
Above is the 14 best video editing software that can export video without watermarks. The final selection of video editing tools depends on your basic requirements.
If you are looking for a free yet AI-powered video editing tool, we highly recommend Filmora Video Editor as your best choice. Download and try how intelligent it could be for editing videos!
Secure Download
Secure Download
Ollie Mattison
Ollie Mattison is a writer and a lover of all things video.
Follow @Ollie Mattison
Also read:
- 2024 Approved TikTok Video Editing Hacks How to Reverse Clips with Ease
- New Watermark-Free TikTok Videos Top Online Removal Services for 2024
- New 2024 Approved Top 5 Free Video Compression Apps for iOS Devices
- Updated In 2024, Mastering the Ken Burns Effect in Final Cut Pro A Step-by-Step Guide
- Updated In 2024, Here We Are Going to Go Through the Process of Getting Avidemux Running on Your System and Cropping some Video
- New Free Video Editing Solutions for 32-Bit Windows Users for 2024
- Updated In 2024, Rewind to the Past Top Apps for Adding Retro VHS Effects to Your Videos
- Updated The Top 10 Stop Motion Animation Tools You Need to Know
- In 2024, Transform Photos Into Videos Top Maker Software and Apps
- Updated Create Engaging WhatsApp Status Videos with These Top Makers for 2024
- Updated In 2024, OGG Conversion Mastery Tips and Tricks From the Pros
- Updated Video Speed Controllers Best Software for Windows, Mac, and More for 2024
- Updated Changing the Shape of Your Video Aspect Ratio in FCP Explained for 2024
- New 2024 Approved FCPX Essential Adding a Countdown Timer in Just 3 Clicks
- Updated From Zero to Hero 10 Free FCPX Plugins for Editors for 2024
- Updated In 2024, Insights From Top OGG Conversion Tools
- Take Your Video Editing to the Next Level 6 Advanced Adobe Premiere Techniques for 2024
- 2024 Approved Videoleap on MacBook A Quick Start Guide to Downloading and Using
- Updated In 2024, MOD Video Editing on a Shoestring Top Free Editors
- New In 2024, 10 Blockbuster Movies That Rely on Final Cut Pro for Post-Production
- Updated In 2024, Ranking the Best Top 10 Video Editing Software Options
- Updated In 2024, Master Video Blurring Top Rated Apps for iPhone and Android Users
- New Unleash Your Creativity Top Video Animation Apps for Smartphone and Tablet Users for 2024
- New GoPro Video Editing Simplified A Free Online Resource for 2024
- Simplify Your Workflow Top Video Editors with Reframe for 2024
- New In 2024, Getting Started with Stop Motion A Beginners Handbook
- Updated Chrome OS Video Editors The Best Free Options Available for 2024
- New The Ultimate List of Online Lyric Video Creators for 2024
- Updated From Zero to Hero Top 10 Online Gaming Intro Design Tools for 2024
- Updated 10 Leading Open-Source Video Editors You Can Use for Free for 2024
- Updated In 2024, Filmora Free Trial Vs. Full Version Which One to Choose?
- New Transform Your Footage Sony Digital Camcorder Video Editing Essentials for 2024
- Updated In 2024, Why Mp3 Converter for Windows Is a Game-Changer (And Why You Should Read About It)
- Updated In 2024, From Bland to Grand 10 Best Online Neon Text Effect Generators
- Top-Rated and Totally Free The Best Online Video Editors without Watermarks for 2024
- 2024 Approved The Ultimate List of Public Domain Image Sources
- How to Unlock ZTE Phone without PIN
- How To Restore Missing Pictures Files from Google Pixel Fold.
- Which Pokémon can Evolve with a Moon Stone For Oppo K11x? | Dr.fone
- In 2024, How to Transfer Contacts from Honor 80 Pro Straight Screen Edition to Outlook | Dr.fone
- How to Turn Off Google Location to Stop Tracking You on Motorola Razr 40 | Dr.fone
- Updated FCPX Subtitle Tutorial How to Create and Edit Captions
- In 2024, How to Unlock Xiaomi 14 Phone Pattern Lock without Factory Reset
- How to Bypass Android Lock Screen Using Emergency Call On Nubia Z50S Pro?
- How To Fix Unresponsive Phone Touchscreen Of Realme C67 4G | Dr.fone
- Reliable User Guide to Fix Vivo S17t Running Slow and Freezing | Dr.fone
- Unleash the Power of Slow Motion Best Video Editing Tools
- In 2024, How To Do Xiaomi 14 Pro Screen Sharing | Dr.fone
- How to Turn Off Google Location to Stop Tracking You on Motorola Defy 2 | Dr.fone
- In 2024, Fixing Foneazy MockGo Not Working On Infinix Smart 8 Plus | Dr.fone
- In 2024, How to Use Pokémon Emerald Master Ball Cheat On Motorola Razr 40 Ultra | Dr.fone
- Forgot iPhone Passcode Again? Unlock Apple iPhone 15 Pro Without Passcode Now | Dr.fone
- Updated Splice Video Editor for Mac Free Download Now
- Updated Best Web-Based Video Creators with Audio Capabilities
- In 2024, Top 10 Samsung Galaxy Z Flip 5 Android SIM Unlock APK
- How To Remove the Two Factor Authentication On Apple iPhone 14 Pro Max
- Title: Updated Unlocking FCPX Potential A Deep Dive Into XML Files for 2024
- Author: MdadeLe
- Created at : 2024-04-28 15:03:53
- Updated at : 2024-04-29 15:03:53
- Link: https://smart-video-editing.techidaily.com/updated-unlocking-fcpx-potential-a-deep-dive-into-xml-files-for-2024/
- License: This work is licensed under CC BY-NC-SA 4.0.
