
:max_bytes(150000):strip_icc():format(webp)/editing-5c8a53d446e0fb0001336621.png)
Updated Join Videos Without Restrictions 7 Best Watermark-Free Apps for 2024
Join Videos Without Restrictions: 7 Best Watermark-Free Apps
Sometimes, when delving into the vast space of internet and trying to find the perfect online platforms or software in order to edit some videos, it might get frustrating to find only the ones with watermark. But of course, the resources are endless and in case we have some information, we can easily access the free video editing platforms which give us the opportunity to edit our videos without undesired logos on them. In this case, we will be discussing 6 video mergers without watermark, and the way we can use them – the tools and features they offer, and how we can get the best out of them.
- Photos by Microsoft
If you are too lazy to get high-quality results using popular video editors, like Filmora, try Photos App. It is a built-in program that usually opens your images on Windows 10, but you can also use it for merging your videos. And guess what? Since it comes within the system, all the features, although limited, are absolutely free.
How to Merge Videos on Windows using Photos App?

These are the steps to combine multiple clips in Windows 10 with Photos App.
Step 1: Open Photos App
Go to the ‘Start’ menu, find Photos App, and click to open it.
Step 2: Make a New Project
Click the ‘New video project’ (big blue box) under the ‘Video Projects’ tab. Alternatively, you can click the ‘New video’ button and select the ‘New video project’ option from the dropdown menu.
Step 3: Add Clips
Look for the text ‘Project library.’ Then click the ‘+ Add’ button. This will open a new window so you can select the clips you want to combine. Also, import videos one by one in a proper sequence because you cannot arrange them later.
Step 4: Make a Storyboard
After importing all the shots, you want to merge, click the ‘Place in storyboard’ button. This option will add all the chosen clips to your project’s storyboard.
- Fastreel by Movavi
Fastreel is a free online video editor. It is extremely easy to use right away, without installing anything. So, on Fastreel, one can edit videos or use online templates in the browser itself. Actually, the first tool we see in the list of Fastreel tools is to merge a video; then, it can be used in order to compress, make, cut, and create a video. On fastreel, you can add a watermark to a video, if wanted - so, it is very voluntary. As for the merging of a video, when this tool is chosen, it’s pretty simple to understand the steps – you can just drop/add multiple files right away.

The format must be either of the listed: MP4, MOV, MKV, AVI, and WMV, and the total size mustn’t exceed 500 MB. Then, in order to add some transitions, a style can be chosen from the drop-down menu, and after that, you should hit on Continue button to stitch the videos together. For the last step, you can export the result by selecting Download option.

- Free Video Cutter Joiner
Free Video Cutter Joiner – the name already explains it all by itself! This is a free video merger which will not add watermark on your video. The software needs to be downloaded, and contributes to quickly cutting and joining videos. Free Video Cutter Joiner has no size limits – it can cut and merge videos with large file sizes without any trouble, and speed of it to do so is quite fast. It supports several file formats, such as AVI, MPEG, WMV, 3GP FLV, MP4, WMV, MOV, VOB, etc.
So, once downloaded, you will see how user-friendly and straightforward the software is: it shows two of its features right away – video cutter and video joiner. You choose which one you are about to use – so, in our case, video joiner.

Then, you should click the the “+” icon, which lets you add files from your PC.

Then, hit on the Join button, and choose Indirect Join. Hitting on Start Join will start merging all the uploaded videos, and, wait a little until the process has been completed.

- Clideo
Clideo is the online platform that declares that it makes it super easy to edit all your video files, images and GIFs, and is totally free. It gives us the opportunities to: merge, compress, resize, cut, make, crop, speed, rotate, add music to, loop, flip, reverse, mute, filter, and adjust the videos. Add subtitles, make memes, create slideshows, etc. Therefore, it’s pretty rich in its tools and features.
As for merging videos, much like Fastreel, Clideo is pretty straightforward. You just click on the mentioned tool, and then easily choose files you would like to combine – you can merge any amount of video clips there. Several files can be chosen at the same time, or they can be added one by one.

Then it will take you to the editor, where you can join the videos. It’s possible to rearrange the files, by using drag-and-drop until they’re in the desired order. You can also add images and set duration from them, add audio, change its length and volume. The last step is choosing the aspect ratio and clicking the Export button. You can watch the preview of your result and then click on Download if you are satisfied with the merged file.

- Typito
Typito is a platform to merge videos online, as well as Fastreel and Clideo. It is free, and mostly aims to create combinations one can use to post on social network such as Instagram, Facebook, and Youtube. Typito supports a great many formats, some of them being MP4, AVI, FLV and WMV. You can edit your videos before merging them by trimming, cropping and resizing, and also add transition effects and music. It quickly combines footage, doesn’t watermark the videos, has brand kit of colors, fonts and style. It can also create collection of images, which is used for making Youtube compilation at most times.
To merge videos, you should choose the tool, then Get Started, and register and sign in first.

Then click on New Project, choose a video format (the platform offers you the list of the most popular ones), and it will take you to the editor, where you start off by adding media.

Drag and drop images or videos that you want to combine into a single video. You can also click to upload media files from your system or browse our Stock Media library for high-quality stock photos and video. Then, you can put your video clips in order, and work on it, if you want to use different tools, such as: edit, crop, trim, or resize them, as well as add text captions, images, and transitions. After you have previewed your video, you can click on the export button in the top right corner, and then, your merged video will be ready to be shared.
- Online UniConverter
Online UniConverter is the next online platform giving us the chance to merge our videos without watermark. It is an online analogue of Wondershare UniConverter, and is a very powerful platform, where you can trim, split, rotate, adjust, and download videos in HD quality. UniConverter supports numerous video formats, including MP4, AVI, MOV, MP3, WEBM. Online UniConverter offers various transitions and aspect ratios to fit the screen.

The web-site has lots of tools and features to offer: in the description of it, it reads: video converter, video compressor, video editor, audio converter, audio compressor, audio cutter, GIF maker, YouTube thumbnail, and image resizer. Importing media to the online UniConverter is extremely easy, and combining videos turns out to be a quick process, too.

Anyway, if you want to combine a lot of files and the size of them all exceeds 100 MB, you will not be able to use Online Uniconverter for that. It supports the video no more than 100 MB and suggests using Wondershare UniConverter (originally Wondershare Video Converter Ultimate) for Desktop.
- Wondershare Filmora
Last but not least – Filmora Video Editor ! Even it differs from other abovementioned video mergers, as in it is not totally free and adds a Filmora logo on exported project, it’s a great suggestion for people who want to make their videos look great with the help of various tools. When a user is ready to pay, Filmora offers a subscription model, and for a bit more, one can get a permanent license. The software costs $51.99 per year or $79.99 for an outright purchase (prices are regularly discounted).
Wondershare Filmora has a clear and pleasing interface, offers trimming, transitions, overlays, several effects, as well as some more advanced and modern features, such as motion tracking. For this one particular software, we will be offering a step by step guide about how to merge videos there.
For Win 7 or later (64-bit)
For macOS 10.14 or later
- Open the program.
- Choose Import Media Files Here.

- Choose your

- We can click and drag, essentially, “insert” a video in a sequence below. The Linear Timeline allows us to understand exactly when a video clip ends and when a new one starts.

- Accordingly, we can make one video “sit” next to another. If we want or need it, we will add the third video clip, fourth, and so on.

- We can view the entire video and save the video afterwards.
- Start to save video - we make sure the result is exactly what we wanted, find the Export button above the timeline and click on it.

- In the opened window, on the left side, to be precise, if we observe well, we can already choose in which format we want to save our clip. On the right we can indicate what name we want to give to our video; The location where we want to store it; Also, we see the resolution (which we can modify freely after clicking on Settings); Size; Duration.

- In Settings, we can decide how much quality the video should have, how many kbps will be the Bit Rate, how many fps the Frame Rate should be, etc., but most likely, beginners will not need to change all this.

- After selecting everything, right-click on the Export button in the lower right corner of the window and the program will start saving the material.


So, in this article, we introduced some online platforms and software for you to use if you would like to merge videos and combine them into one. These are: Fastreel, Free Video Cutter Joiner, Clideo, Typito, Online UniConverter, Wondershare Filmora. It’s up to you which one you would like to choose to merge your videos or edit them in any other way, but you can try either of them and choose to your own liking – even so, of course, there are some other video mergers worth considering, that we might mention in the coming articles. Before then, enjoy with free video editors, without watermark!
If you are too lazy to get high-quality results using popular video editors, like Filmora, try Photos App. It is a built-in program that usually opens your images on Windows 10, but you can also use it for merging your videos. And guess what? Since it comes within the system, all the features, although limited, are absolutely free.
How to Merge Videos on Windows using Photos App?
These are the steps to combine multiple clips in Windows 10 with Photos App.
Step 1: Open Photos App
Go to the ‘Start’ menu, find Photos App, and click to open it.
Step 2: Make a New Project
Click the ‘New video project’ (big blue box) under the ‘Video Projects’ tab. Alternatively, you can click the ‘New video’ button and select the ‘New video project’ option from the dropdown menu.
Step 3: Add Clips
Look for the text ‘Project library.’ Then click the ‘+ Add’ button. This will open a new window so you can select the clips you want to combine. Also, import videos one by one in a proper sequence because you cannot arrange them later.
Step 4: Make a Storyboard
After importing all the shots, you want to merge, click the ‘Place in storyboard’ button. This option will add all the chosen clips to your project’s storyboard.
- Fastreel by Movavi
Fastreel is a free online video editor. It is extremely easy to use right away, without installing anything. So, on Fastreel, one can edit videos or use online templates in the browser itself. Actually, the first tool we see in the list of Fastreel tools is to merge a video; then, it can be used in order to compress, make, cut, and create a video. On fastreel, you can add a watermark to a video, if wanted - so, it is very voluntary. As for the merging of a video, when this tool is chosen, it’s pretty simple to understand the steps – you can just drop/add multiple files right away.
The format must be either of the listed: MP4, MOV, MKV, AVI, and WMV, and the total size mustn’t exceed 500 MB. Then, in order to add some transitions, a style can be chosen from the drop-down menu, and after that, you should hit on Continue button to stitch the videos together. For the last step, you can export the result by selecting Download option.
- Free Video Cutter Joiner
Free Video Cutter Joiner – the name already explains it all by itself! This is a free video merger which will not add watermark on your video. The software needs to be downloaded, and contributes to quickly cutting and joining videos. Free Video Cutter Joiner has no size limits – it can cut and merge videos with large file sizes without any trouble, and speed of it to do so is quite fast. It supports several file formats, such as AVI, MPEG, WMV, 3GP FLV, MP4, WMV, MOV, VOB, etc.
So, once downloaded, you will see how user-friendly and straightforward the software is: it shows two of its features right away – video cutter and video joiner. You choose which one you are about to use – so, in our case, video joiner.
Then, you should click the the “+” icon, which lets you add files from your PC.
Then, hit on the Join button, and choose Indirect Join. Hitting on Start Join will start merging all the uploaded videos, and, wait a little until the process has been completed.
- Clideo
Clideo is the online platform that declares that it makes it super easy to edit all your video files, images and GIFs, and is totally free. It gives us the opportunities to: merge, compress, resize, cut, make, crop, speed, rotate, add music to, loop, flip, reverse, mute, filter, and adjust the videos. Add subtitles, make memes, create slideshows, etc. Therefore, it’s pretty rich in its tools and features.
As for merging videos, much like Fastreel, Clideo is pretty straightforward. You just click on the mentioned tool, and then easily choose files you would like to combine – you can merge any amount of video clips there. Several files can be chosen at the same time, or they can be added one by one.
Then it will take you to the editor, where you can join the videos. It’s possible to rearrange the files, by using drag-and-drop until they’re in the desired order. You can also add images and set duration from them, add audio, change its length and volume. The last step is choosing the aspect ratio and clicking the Export button. You can watch the preview of your result and then click on Download if you are satisfied with the merged file.
- Typito
Typito is a platform to merge videos online, as well as Fastreel and Clideo. It is free, and mostly aims to create combinations one can use to post on social network such as Instagram, Facebook, and Youtube. Typito supports a great many formats, some of them being MP4, AVI, FLV and WMV. You can edit your videos before merging them by trimming, cropping and resizing, and also add transition effects and music. It quickly combines footage, doesn’t watermark the videos, has brand kit of colors, fonts and style. It can also create collection of images, which is used for making Youtube compilation at most times.
To merge videos, you should choose the tool, then Get Started, and register and sign in first.
Then click on New Project, choose a video format (the platform offers you the list of the most popular ones), and it will take you to the editor, where you start off by adding media.
Drag and drop images or videos that you want to combine into a single video. You can also click to upload media files from your system or browse our Stock Media library for high-quality stock photos and video. Then, you can put your video clips in order, and work on it, if you want to use different tools, such as: edit, crop, trim, or resize them, as well as add text captions, images, and transitions. After you have previewed your video, you can click on the export button in the top right corner, and then, your merged video will be ready to be shared.
- Online UniConverter
Online UniConverter is the next online platform giving us the chance to merge our videos without watermark. It is an online analogue of Wondershare UniConverter, and is a very powerful platform, where you can trim, split, rotate, adjust, and download videos in HD quality. UniConverter supports numerous video formats, including MP4, AVI, MOV, MP3, WEBM. Online UniConverter offers various transitions and aspect ratios to fit the screen.
The web-site has lots of tools and features to offer: in the description of it, it reads: video converter, video compressor, video editor, audio converter, audio compressor, audio cutter, GIF maker, YouTube thumbnail, and image resizer. Importing media to the online UniConverter is extremely easy, and combining videos turns out to be a quick process, too.
Anyway, if you want to combine a lot of files and the size of them all exceeds 100 MB, you will not be able to use Online Uniconverter for that. It supports the video no more than 100 MB and suggests using Wondershare UniConverter (originally Wondershare Video Converter Ultimate) for Desktop.
- Wondershare Filmora
Last but not least – Filmora Video Editor ! Even it differs from other abovementioned video mergers, as in it is not totally free and adds a Filmora logo on exported project, it’s a great suggestion for people who want to make their videos look great with the help of various tools. When a user is ready to pay, Filmora offers a subscription model, and for a bit more, one can get a permanent license. The software costs $51.99 per year or $79.99 for an outright purchase (prices are regularly discounted).
Wondershare Filmora has a clear and pleasing interface, offers trimming, transitions, overlays, several effects, as well as some more advanced and modern features, such as motion tracking. For this one particular software, we will be offering a step by step guide about how to merge videos there.
For Win 7 or later (64-bit)
For macOS 10.14 or later
- Open the program.
- Choose Import Media Files Here.
- Choose your
- We can click and drag, essentially, “insert” a video in a sequence below. The Linear Timeline allows us to understand exactly when a video clip ends and when a new one starts.
- Accordingly, we can make one video “sit” next to another. If we want or need it, we will add the third video clip, fourth, and so on.
- We can view the entire video and save the video afterwards.
- Start to save video - we make sure the result is exactly what we wanted, find the Export button above the timeline and click on it.
- In the opened window, on the left side, to be precise, if we observe well, we can already choose in which format we want to save our clip. On the right we can indicate what name we want to give to our video; The location where we want to store it; Also, we see the resolution (which we can modify freely after clicking on Settings); Size; Duration.
- In Settings, we can decide how much quality the video should have, how many kbps will be the Bit Rate, how many fps the Frame Rate should be, etc., but most likely, beginners will not need to change all this.
- After selecting everything, right-click on the Export button in the lower right corner of the window and the program will start saving the material.
So, in this article, we introduced some online platforms and software for you to use if you would like to merge videos and combine them into one. These are: Fastreel, Free Video Cutter Joiner, Clideo, Typito, Online UniConverter, Wondershare Filmora. It’s up to you which one you would like to choose to merge your videos or edit them in any other way, but you can try either of them and choose to your own liking – even so, of course, there are some other video mergers worth considering, that we might mention in the coming articles. Before then, enjoy with free video editors, without watermark!
Transform Your Videos with 3D Effects: A Windows User’s Guide
You may want to add 3D effects to a video to make something in it appear realistic. For example, you can have balloons moving in a circle around a person’s head, make a building hit by a thunderstorm, etc. However, adding such properties to a footage requires a lot of focus and precision that comes with in-depth learning and a lot of practice.
That said, here you will learn how to add 3D effects to a video using Windows’s free built-in Photos app. In addition, you will also see how easy the process becomes if you use a dedicated third-party software that has been specifically designed for the purpose.
In this article
01 How to Add 3D Effects in Windows 11 Photos App for Free
02 How to Add 3D Effects to Video with Filmora
Part 1: How to Add 3D Effects in Windows 11 Photos App for Free
To add 3D effects to a video with the Photos app, you must right-click the media file, go to ‘Open with’, and click to select ‘Photos’ from the submenu. Once this is done, you can follow the steps that are given below to complete the remaining procedure:
Step 1: Open the 3D Effects Panel
In the Photos app, pause the video to avoid any distractions. Click the See more icon (with three horizontal dots) from the top-center, hover mouse to Edit more, and click Add 3D effects.

Step 2: Add a 3D Effect and Customize
Make sure that the Effects tab is selected from the top of the right pane, scroll through the available effects, and click the one that you want to add to the video. Once added, in the preview window, use the scaling handles and rotation tools to resize the effect and change its orientation respectively.

Optionally use the Volume slider from the right pane to increase or decrease the sound volume of the effect to blend it in with the audio of the footage. If required, drag the side handles of the effect in the progress bar at the bottom to increase or decrease the duration of the effect in the video.

Step 3: Use Anchor Point
Drag and place the 3D effect to the location you want it to appear at, turn on the Attach to a point button from the right pane, and drag the anchor point to the object where you want it to stick even if the camera moves.

Step 4: Export the Video
Click the Play button from the bottom to preview the video with the 3D effect, and if everything looks fine, click Save a copy from the bottom-right area.

When the Finish your video box appears, choose your preferred resolution from the Video quality drop-down list, and click Export.

Next, choose your preferred destination folder in the Save As box that opens up next, specify the name of the output file in the File name field, and click Export to export the modified clip in MP4 format.
Note: Videos that you export from the Photos app are by default saved in MP4 format.
As one of the best basic video editing software for beginners , the Microsoft Photos app allows you trim video, add text to video and much more. For details, check how to edit videos with the Microsoft Photos app on Windows 10 and Windows 11.
Part 2: How to Add 3D Effects to Video with Filmora
Although Photos is a free app in Windows 11, it has certain limitations. This is where Filmora video editor , a product by Wondershare, comes into play. Wondershare Filmora is a post-production application for both Windows and Mac computers, and is considered a good competitor of some of the industry-standard video editing applications like Adobe Premiere Pro, Final Cut Pro X, DaVinci Resolve, etc.
While the Photos app can add 3D effects to the videos quickly, Filmora gives more control by offering a plethora of editing tools, options, and presets. In addition, Filmora is a timeline-oriented tool that allows you to add effects, filters, and/or elements in their corresponding layers without making any changes to the original footage.
For Win 7 or later (64-bit)
For macOS 10.12 or later
You can follow the step-by-step instructions that are given below to learn how to add 3D effects to a video with Wondershare Filmora:
Step 1: Import Source Video and Add It to the Timeline
After installing Wondershare Filmora on Windows 10 or Windows 11, launch the program, click anywhere inside the Media box present at the upper-left section of the interface, and locate and import the source video to the program. Next, hover the mouse over the thumbnail of the video, click the + icon from the bottom-right corner.
When the confirmation box appears, either click Match to Media or Keep Project Settings to adjust the project settings according to the media clip or modify the media clip according to the project preferences while adding the footage to the Timeline respectively.
Step 2: Add 3D Titles and Transitions
Click Titles from the toolbox at the top, type 3D Titles in the Search titles field present at the upper section of the upper-left box, and click 3D titles from the suggestions list.

From all the available 3D title presets that appear next, drag the one you like to the Timeline, and place it above the video track.

After this, double-click the placeholder text in the Preview window, and replace it with your caption. You can customize the font, color, and alignment of the text from the options that appear on left. Click OK from the lower-left area of the left pane to exit the editing mode. Repeat the process for all the texts that the preset has. Optionally, drag the sides of the 3D title in the Timeline to specify its duration of visibility on the screen.

To add the transitions, click Media from the toolbox at the top, click Import Media from the Media box, and repeat the process explained earlier to add a new video clip to the Timeline. Make sure that both the clips are on the same track, and are placed next to each other. Now, go to Transitions from the toolbox, and drag and place your preferred transition effect between the two media clips in the Timeline. Optionally you can drag the sides of the transition inwards or outwards to increase or decrease the speed of the effect respectively.

After this, move the Playhead (Skimmer) to the beginning of the Timeline, and press the Spacebar on your keyboard to preview the video.
Note: It is a good practice to preview your video several times during the entire editing process. This will help you identify the error sooner, and you will be able to address the issue with fewer hassles.
Step 3: Add Elements and Effects
Go to Elements from the toolbox, drag your preferred element from the upper-left box to the Timeline, and place it on a new track. You can drag the sides of the element in the Timeline to increase or decrease its visibility during video playback.

To add effects, go to Effects from the toolbox, drag your preferred effect from the upper-left box, and place it on a new layer in the Timeline. As it is with other entities, you can drag the sides of the effect to increase or decrease the duration of its impact on the video. Next, double-click the Effects layer in the Timeline, and use the available options in the box to make further adjustments.
Note: The options that you get by double-clicking the effect in the Timeline may vary according to the adjustments it allows you to make.

Once this is done, preview the video, click Export from the top-center, and use the tabs and options on the Export box to export the modified video in your preferred format.
Conclusion
If you are new to the VFX and video editing industry, trying hands with the Photos app would give you a fair idea about how things work. Once you are well-versed or if you are already a post-production professional, you can and you must go for a dedicated program like Wondershare Filmora that not only has an intuitive interface, it is also equipped with a plethora of presets to add 3D titles, elements, transitions, and effects to the videos without much hassle.
02 How to Add 3D Effects to Video with Filmora
Part 1: How to Add 3D Effects in Windows 11 Photos App for Free
To add 3D effects to a video with the Photos app, you must right-click the media file, go to ‘Open with’, and click to select ‘Photos’ from the submenu. Once this is done, you can follow the steps that are given below to complete the remaining procedure:
Step 1: Open the 3D Effects Panel
In the Photos app, pause the video to avoid any distractions. Click the See more icon (with three horizontal dots) from the top-center, hover mouse to Edit more, and click Add 3D effects.
Step 2: Add a 3D Effect and Customize
Make sure that the Effects tab is selected from the top of the right pane, scroll through the available effects, and click the one that you want to add to the video. Once added, in the preview window, use the scaling handles and rotation tools to resize the effect and change its orientation respectively.
Optionally use the Volume slider from the right pane to increase or decrease the sound volume of the effect to blend it in with the audio of the footage. If required, drag the side handles of the effect in the progress bar at the bottom to increase or decrease the duration of the effect in the video.
Step 3: Use Anchor Point
Drag and place the 3D effect to the location you want it to appear at, turn on the Attach to a point button from the right pane, and drag the anchor point to the object where you want it to stick even if the camera moves.
Step 4: Export the Video
Click the Play button from the bottom to preview the video with the 3D effect, and if everything looks fine, click Save a copy from the bottom-right area.
When the Finish your video box appears, choose your preferred resolution from the Video quality drop-down list, and click Export.
Next, choose your preferred destination folder in the Save As box that opens up next, specify the name of the output file in the File name field, and click Export to export the modified clip in MP4 format.
Note: Videos that you export from the Photos app are by default saved in MP4 format.
As one of the best basic video editing software for beginners , the Microsoft Photos app allows you trim video, add text to video and much more. For details, check how to edit videos with the Microsoft Photos app on Windows 10 and Windows 11.
Part 2: How to Add 3D Effects to Video with Filmora
Although Photos is a free app in Windows 11, it has certain limitations. This is where Filmora video editor , a product by Wondershare, comes into play. Wondershare Filmora is a post-production application for both Windows and Mac computers, and is considered a good competitor of some of the industry-standard video editing applications like Adobe Premiere Pro, Final Cut Pro X, DaVinci Resolve, etc.
While the Photos app can add 3D effects to the videos quickly, Filmora gives more control by offering a plethora of editing tools, options, and presets. In addition, Filmora is a timeline-oriented tool that allows you to add effects, filters, and/or elements in their corresponding layers without making any changes to the original footage.
For Win 7 or later (64-bit)
For macOS 10.12 or later
You can follow the step-by-step instructions that are given below to learn how to add 3D effects to a video with Wondershare Filmora:
Step 1: Import Source Video and Add It to the Timeline
After installing Wondershare Filmora on Windows 10 or Windows 11, launch the program, click anywhere inside the Media box present at the upper-left section of the interface, and locate and import the source video to the program. Next, hover the mouse over the thumbnail of the video, click the + icon from the bottom-right corner.
When the confirmation box appears, either click Match to Media or Keep Project Settings to adjust the project settings according to the media clip or modify the media clip according to the project preferences while adding the footage to the Timeline respectively.
Step 2: Add 3D Titles and Transitions
Click Titles from the toolbox at the top, type 3D Titles in the Search titles field present at the upper section of the upper-left box, and click 3D titles from the suggestions list.
From all the available 3D title presets that appear next, drag the one you like to the Timeline, and place it above the video track.
After this, double-click the placeholder text in the Preview window, and replace it with your caption. You can customize the font, color, and alignment of the text from the options that appear on left. Click OK from the lower-left area of the left pane to exit the editing mode. Repeat the process for all the texts that the preset has. Optionally, drag the sides of the 3D title in the Timeline to specify its duration of visibility on the screen.
To add the transitions, click Media from the toolbox at the top, click Import Media from the Media box, and repeat the process explained earlier to add a new video clip to the Timeline. Make sure that both the clips are on the same track, and are placed next to each other. Now, go to Transitions from the toolbox, and drag and place your preferred transition effect between the two media clips in the Timeline. Optionally you can drag the sides of the transition inwards or outwards to increase or decrease the speed of the effect respectively.
After this, move the Playhead (Skimmer) to the beginning of the Timeline, and press the Spacebar on your keyboard to preview the video.
Note: It is a good practice to preview your video several times during the entire editing process. This will help you identify the error sooner, and you will be able to address the issue with fewer hassles.
Step 3: Add Elements and Effects
Go to Elements from the toolbox, drag your preferred element from the upper-left box to the Timeline, and place it on a new track. You can drag the sides of the element in the Timeline to increase or decrease its visibility during video playback.
To add effects, go to Effects from the toolbox, drag your preferred effect from the upper-left box, and place it on a new layer in the Timeline. As it is with other entities, you can drag the sides of the effect to increase or decrease the duration of its impact on the video. Next, double-click the Effects layer in the Timeline, and use the available options in the box to make further adjustments.
Note: The options that you get by double-clicking the effect in the Timeline may vary according to the adjustments it allows you to make.
Once this is done, preview the video, click Export from the top-center, and use the tabs and options on the Export box to export the modified video in your preferred format.
Conclusion
If you are new to the VFX and video editing industry, trying hands with the Photos app would give you a fair idea about how things work. Once you are well-versed or if you are already a post-production professional, you can and you must go for a dedicated program like Wondershare Filmora that not only has an intuitive interface, it is also equipped with a plethora of presets to add 3D titles, elements, transitions, and effects to the videos without much hassle.
The Best Free Online Tool to Convert Dailymotion Videos
Best Free DailyMotion Video Converters Online

Ollie Mattison
Mar 27, 2024• Proven solutions
Dailymotion is a popular video-sharing platform. Millions of users flock to Dailymotion to get their daily dose of entertainment, education, and information.
Naturally, it’s not always possible to watch videos on the site online. Many of us need to download and convert Dailymotion videos for offline viewing. Additionally, you might want to transfer the videos on your computer or mobile.
For doing so, you will need a good Dailymotion video converter that converts your videos to various formats. Today, we are going to explore some of the top tools that you can use as a Dailymotion converter. So, let’s start with our first contender.
Best Free Online DailyMotion Video Converter
1. FlexClip
FlexClip is not only a video converter but a complete online video maker. You can create professional videos in minutes using a range of templates and free resources. Content creators can also edit videos and add special effects to woo their audience.

FlexClip provides an online video converter for Dailymotion and other video-sharing platforms. You can convert videos to mp4, MOV, M4V, and other common formats. The service is completely free, and your videos also don’t come out with watermarks.
However, you have to download the Dailymotion videos on your computer first to use the tool.
2. SaveTheVideo.com
If you’re looking for a simple online video converter for Dailymotion, SaveTheVideo may fit your bill. You can download and convert videos from a range of sites. They include YouTube, Facebook, Vimeo, Instagram, and more.

It’s also very easy to use the online tool. You don’t have to download any software. You can just paste the link of your video in the tool and start converting. The converter is browser-based and works from any computer or mobile device.
SaveTheVideo lets you convert videos to multiple formats like-
- Mp3
- Mp4
- 3gp
- M4a
You can also use the tool for small edits and merging audio and video files.
3. Onvico
Onvico is another useful Dailymotion converter. It supports around 400 websites that include Dailymotion, social media sites, YouTube, and more. You can start downloading and converting videos in minutes using direct links of your videos.

Onvico allows you to convert videos to popular formats like mp4 and mp3. These are the two formats most people use to save their videos. Mp3 converts videos to audio tracks and is great for music lovers.
You get to choose the format once you provide the link on the site. The video will download to any device you use, including computers and mobiles.
Onvico offers fast downloads.
4. Online Convert
Online Convert is a fantastic tool for all your converting needs. You can convert not only videos but also images, documents, eBooks, and more.

The video converter is quite robust and handles videos from Dailymotion and similar platforms. You can take advantage of a range of formats like WMV, Mp4, MOV, FLV, and AVI. The tool also provides a plethora of options to choose your video specifications.
For example, you can change the video bitrate or aspect ratio to match your needs.
Online Convert works from any browser. You can even download the mobile app to convert videos using your smartphone. The apps are available for both iOS and Android.
5. Downsv
Downsv is an easy-to-use Dailymotion converter. You can also use the tool to download videos in different formats from multiple websites. It supports many uncommon websites like Tumblr and ESPN. You can convert videos to many formats, including 3gp, mp4, and m4a.

Converting videos is simple when you use Downsv. You have to copy and paste the URL of the video in the download box. Then you can choose the format and quality to save your videos.
Downsv also works for audio-sharing sites. You can download audio clips from Soundcloud, TED Talk, and Bandcamp. The service is also available on Google Play as an Android app.
6. All in One Downloader
All In One Downloader or AIO is a social media video converter. Along with Dailymotion, you can download videos from many social media sites. They include TikTok, Instagram, Twitter, Vimeo, and more. The site also supports the download of images and gifs.

It’s quite simple to convert videos using AIO. You need to copy the video link and paste it in the download box. You can also choose the conversion format that includes mp4, 3gp, and m4a. AIO also supports HD conversions if the original video is in HD. For images, you can convert them to JPG or PNG.
The converter works on PCs, Mac, and mobiles.
7. Online Downloader
Online Downloader will come in handy when you want to convert Dailymotion videos. You can directly convert videos online and save them on your computer or mobile. As the whole conversion works in the cloud, you don’t have to download any software.

Online Downloader lets you convert videos to all popular formats. Additionally, some rare formats are also available, like 3g2, RM, or WebM. Moreover, you can convert Dailymotion videos to audio files like mp3, FLAC, and OGG.
The tool works from the browser and suits all devices. You can even upload files from your device and convert them online using Online Downloader.
8. 9xBuddy
9xBuddy is another Dailymotion converter you can check out. The online tool is fit for anyone who wants to save videos for offline viewing. You can use the service in your PC or mobile and get quick downloads and conversions.

The process is also quite straightforward. You have to provide your Dailymotion video link on the download box. Once you do that, 9xBuddy will start extracting the video from your link. After a while, you will get the option to download your video. You will be able to choose the video format and quality at this time.
Then just click on “download.”
9. KeepVid
KeepVid is one of the oldest video converters and downloaders. The service was launched even before Dailymotion came into existence. KeepVid has steadily grown over the years and added support for multiple websites, including Dailymotion. You can convert videos from more than 1,000 websites in easy steps.

KeepVid works like any video converter. It uses the video URL to extract videos. You can then convert them to your chosen format like mp4 and mp3. The tool is also ideal for HD video downloads.
You can even download the desktop version to convert 4K and 1080p videos.
The converter is completely free of ads.
10. RapidConverter
RapidConverte r is suitable for people who want to convert 1080p Dailymotion videos. You can use your browser to convert 720p and HD videos without downloading any software. All you need to do is paste the video URL in the download box and press “convert.”

The YouTube converter Dailymotion will let you convert videos to many formats. You can turn your videos into mp4, AVI, and other formats. If needed, you can even convert videos to audio mp3 files.
The best of all, you can convert unlimited videos for free. There are no limitations or charges for downloading or converting videos.
Best Free DailyMotion Converter for Windows and Mac: Wondershare UniConverter
Wondershare UniConverter is a professional and free tool to convert Dailymotion videos. It also supports video conversions from as many as 10,000 sites. You can also choose a range of formats like mp4, MKV, and AVI.
Additionally, Wondershare is a great tool to create video DVDs. You can directly burn DVDs and even edit videos for your desired effects. On top of that, you also get many features like screen recorder and gif maker. You can also fix video metadata using Wondershare.
The tool is available for both Windows and Mac systems. You won’t need any other converter once you download and start using Wondershare UniConverter.
Let’s find out how you can convert Dailymotion videos using the software.
Step 1: Copy Video Link
The first step is to access the video on Dailymotion. Then copy the URL from the address bar using your right-click or Ctrl + C.
Step 2: Launch Wondershare UniConverter
Download and install Wondershare UniConverter on your PC or Mac. Launch the tool and click on the “Downloader” option on the left menu.
Step 3: Choose Video Format

Slide the “Download then Convert” to on position at the lower part of the interface. You will now be able to select your format for conversion. Choose the required format from the pop-up window.
Step 4: Provide Video Link
Access the “+Paste URL” tab and paste the video URL you had copied. The tool will now start downloading and converting your video. You can check out the converted videos in the “Finished” tab.
Final Thoughts
Converting Dailymotion videos is a simple task. We have listed the top converters you can use to convert your videos. Choose a browser-based downloader if you want casual downloads. However, you will need something like Wondershare UniConverter for professional results. Give the tools a try and see what fits your bill. Don’t forget to tell us what you chose in the comments!
Wanna be creative in DailyMotion video production? Try Filmora X video editor!
Filmora X is a video editor for all creators; it features the royalty-free audio library which includes audio effects and music tracks, which allows you to add background sound to video without looking forward to somewhere else.
For Win 7 or later (64-bit)
 Secure Download
For macOS 10.12 or later
Secure Download
Besides, the title templates, transitions, effects and elements will help you polish the downloaded DailyMotion video to the next level.
Ollie Mattison
Ollie Mattison is a writer and a lover of all things video.
Follow @Ollie Mattison
Ollie Mattison
Mar 27, 2024• Proven solutions
Dailymotion is a popular video-sharing platform. Millions of users flock to Dailymotion to get their daily dose of entertainment, education, and information.
Naturally, it’s not always possible to watch videos on the site online. Many of us need to download and convert Dailymotion videos for offline viewing. Additionally, you might want to transfer the videos on your computer or mobile.
For doing so, you will need a good Dailymotion video converter that converts your videos to various formats. Today, we are going to explore some of the top tools that you can use as a Dailymotion converter. So, let’s start with our first contender.
Best Free Online DailyMotion Video Converter
1. FlexClip
FlexClip is not only a video converter but a complete online video maker. You can create professional videos in minutes using a range of templates and free resources. Content creators can also edit videos and add special effects to woo their audience.
FlexClip provides an online video converter for Dailymotion and other video-sharing platforms. You can convert videos to mp4, MOV, M4V, and other common formats. The service is completely free, and your videos also don’t come out with watermarks.
However, you have to download the Dailymotion videos on your computer first to use the tool.
2. SaveTheVideo.com
If you’re looking for a simple online video converter for Dailymotion, SaveTheVideo may fit your bill. You can download and convert videos from a range of sites. They include YouTube, Facebook, Vimeo, Instagram, and more.
It’s also very easy to use the online tool. You don’t have to download any software. You can just paste the link of your video in the tool and start converting. The converter is browser-based and works from any computer or mobile device.
SaveTheVideo lets you convert videos to multiple formats like-
- Mp3
- Mp4
- 3gp
- M4a
You can also use the tool for small edits and merging audio and video files.
3. Onvico
Onvico is another useful Dailymotion converter. It supports around 400 websites that include Dailymotion, social media sites, YouTube, and more. You can start downloading and converting videos in minutes using direct links of your videos.
Onvico allows you to convert videos to popular formats like mp4 and mp3. These are the two formats most people use to save their videos. Mp3 converts videos to audio tracks and is great for music lovers.
You get to choose the format once you provide the link on the site. The video will download to any device you use, including computers and mobiles.
Onvico offers fast downloads.
4. Online Convert
Online Convert is a fantastic tool for all your converting needs. You can convert not only videos but also images, documents, eBooks, and more.
The video converter is quite robust and handles videos from Dailymotion and similar platforms. You can take advantage of a range of formats like WMV, Mp4, MOV, FLV, and AVI. The tool also provides a plethora of options to choose your video specifications.
For example, you can change the video bitrate or aspect ratio to match your needs.
Online Convert works from any browser. You can even download the mobile app to convert videos using your smartphone. The apps are available for both iOS and Android.
5. Downsv
Downsv is an easy-to-use Dailymotion converter. You can also use the tool to download videos in different formats from multiple websites. It supports many uncommon websites like Tumblr and ESPN. You can convert videos to many formats, including 3gp, mp4, and m4a.
Converting videos is simple when you use Downsv. You have to copy and paste the URL of the video in the download box. Then you can choose the format and quality to save your videos.
Downsv also works for audio-sharing sites. You can download audio clips from Soundcloud, TED Talk, and Bandcamp. The service is also available on Google Play as an Android app.
6. All in One Downloader
All In One Downloader or AIO is a social media video converter. Along with Dailymotion, you can download videos from many social media sites. They include TikTok, Instagram, Twitter, Vimeo, and more. The site also supports the download of images and gifs.
It’s quite simple to convert videos using AIO. You need to copy the video link and paste it in the download box. You can also choose the conversion format that includes mp4, 3gp, and m4a. AIO also supports HD conversions if the original video is in HD. For images, you can convert them to JPG or PNG.
The converter works on PCs, Mac, and mobiles.
7. Online Downloader
Online Downloader will come in handy when you want to convert Dailymotion videos. You can directly convert videos online and save them on your computer or mobile. As the whole conversion works in the cloud, you don’t have to download any software.
Online Downloader lets you convert videos to all popular formats. Additionally, some rare formats are also available, like 3g2, RM, or WebM. Moreover, you can convert Dailymotion videos to audio files like mp3, FLAC, and OGG.
The tool works from the browser and suits all devices. You can even upload files from your device and convert them online using Online Downloader.
8. 9xBuddy
9xBuddy is another Dailymotion converter you can check out. The online tool is fit for anyone who wants to save videos for offline viewing. You can use the service in your PC or mobile and get quick downloads and conversions.
The process is also quite straightforward. You have to provide your Dailymotion video link on the download box. Once you do that, 9xBuddy will start extracting the video from your link. After a while, you will get the option to download your video. You will be able to choose the video format and quality at this time.
Then just click on “download.”
9. KeepVid
KeepVid is one of the oldest video converters and downloaders. The service was launched even before Dailymotion came into existence. KeepVid has steadily grown over the years and added support for multiple websites, including Dailymotion. You can convert videos from more than 1,000 websites in easy steps.
KeepVid works like any video converter. It uses the video URL to extract videos. You can then convert them to your chosen format like mp4 and mp3. The tool is also ideal for HD video downloads.
You can even download the desktop version to convert 4K and 1080p videos.
The converter is completely free of ads.
10. RapidConverter
RapidConverte r is suitable for people who want to convert 1080p Dailymotion videos. You can use your browser to convert 720p and HD videos without downloading any software. All you need to do is paste the video URL in the download box and press “convert.”
The YouTube converter Dailymotion will let you convert videos to many formats. You can turn your videos into mp4, AVI, and other formats. If needed, you can even convert videos to audio mp3 files.
The best of all, you can convert unlimited videos for free. There are no limitations or charges for downloading or converting videos.
Best Free DailyMotion Converter for Windows and Mac: Wondershare UniConverter
Wondershare UniConverter is a professional and free tool to convert Dailymotion videos. It also supports video conversions from as many as 10,000 sites. You can also choose a range of formats like mp4, MKV, and AVI.
Additionally, Wondershare is a great tool to create video DVDs. You can directly burn DVDs and even edit videos for your desired effects. On top of that, you also get many features like screen recorder and gif maker. You can also fix video metadata using Wondershare.
The tool is available for both Windows and Mac systems. You won’t need any other converter once you download and start using Wondershare UniConverter.
Let’s find out how you can convert Dailymotion videos using the software.
Step 1: Copy Video Link
The first step is to access the video on Dailymotion. Then copy the URL from the address bar using your right-click or Ctrl + C.
Step 2: Launch Wondershare UniConverter
Download and install Wondershare UniConverter on your PC or Mac. Launch the tool and click on the “Downloader” option on the left menu.
Step 3: Choose Video Format
Slide the “Download then Convert” to on position at the lower part of the interface. You will now be able to select your format for conversion. Choose the required format from the pop-up window.
Step 4: Provide Video Link
Access the “+Paste URL” tab and paste the video URL you had copied. The tool will now start downloading and converting your video. You can check out the converted videos in the “Finished” tab.
Final Thoughts
Converting Dailymotion videos is a simple task. We have listed the top converters you can use to convert your videos. Choose a browser-based downloader if you want casual downloads. However, you will need something like Wondershare UniConverter for professional results. Give the tools a try and see what fits your bill. Don’t forget to tell us what you chose in the comments!
Wanna be creative in DailyMotion video production? Try Filmora X video editor!
Filmora X is a video editor for all creators; it features the royalty-free audio library which includes audio effects and music tracks, which allows you to add background sound to video without looking forward to somewhere else.
For Win 7 or later (64-bit)
Secure Download
For macOS 10.12 or later
Secure Download
Besides, the title templates, transitions, effects and elements will help you polish the downloaded DailyMotion video to the next level.
Ollie Mattison
Ollie Mattison is a writer and a lover of all things video.
Follow @Ollie Mattison
Free AVI Video Rotators for Every Need: Windows, MAC, Android, iPhone, and Online
Did you rush to record a video in a mistaken direction? Or were you just excited to film the moments without noticing the position of your camera? Whatever the case, if you regret recording the clip at the incorrect angle, here’s your chance to do the alteration. The article includes the top 16 best free AVI video rotators you can use on MAC, Windows, iPhone, Android, and online. Plus, if you’re looking for a single platform to rotate or flip videos, you can learn the complete process by following the step-by-step Filmora Video Editor tutorial that works on MAC and Windows.
In this Article
Part 1: Best AVI Video Rotators to Rotate AVI Video on Windows and MAC – Filmora Video Editor [with steps]
Part 2: Top 3 Free Video Rotators on Windows
Part 3: Top 3 Free Video Rotators on MAC
Part 4: Top 3 Free Video Rotators on Android
Part 5: Top 3 Free Video Rotators on iPhone
Part 6: Top 3 Free Video Rotators Online
Part 7: Bottom Line
Part 8: FAQs
Part 1: Best AVI Video Rotators to Rotate AVI Video on Windows and MAC – Filmora Video Editor [with steps]
Heard about Filmora but never used it? Surely, you’re missing great fun if you’re a video professional or a beginner video editor.
Filmora is an award-winning video editing software that works for both PC and MAC users. While the tool comes at an affordable price, you can still download the free setup to start showing your creativity.
This video editor has dozens of new effects, transitions, and many more features, which can help you create engaging videos. You can also enjoy some more key features, including audio ducking, color matching, motion tracking, split screen, video filters and transitions, speed control, and multiple exporting formats.
And, of course, video rotation is as easy as ABC! You can follow this step-by-step tutorial to rotate or flip your videos using Filmora 10. You can apply the same procedure if you have a different version.
Step 1: Download and Install Filmora
Visit Filmora Video Editor’s official website to download the newest version. Click on the “Try it Free” button according to your operating system (look at the icons on the button to identify the OS).
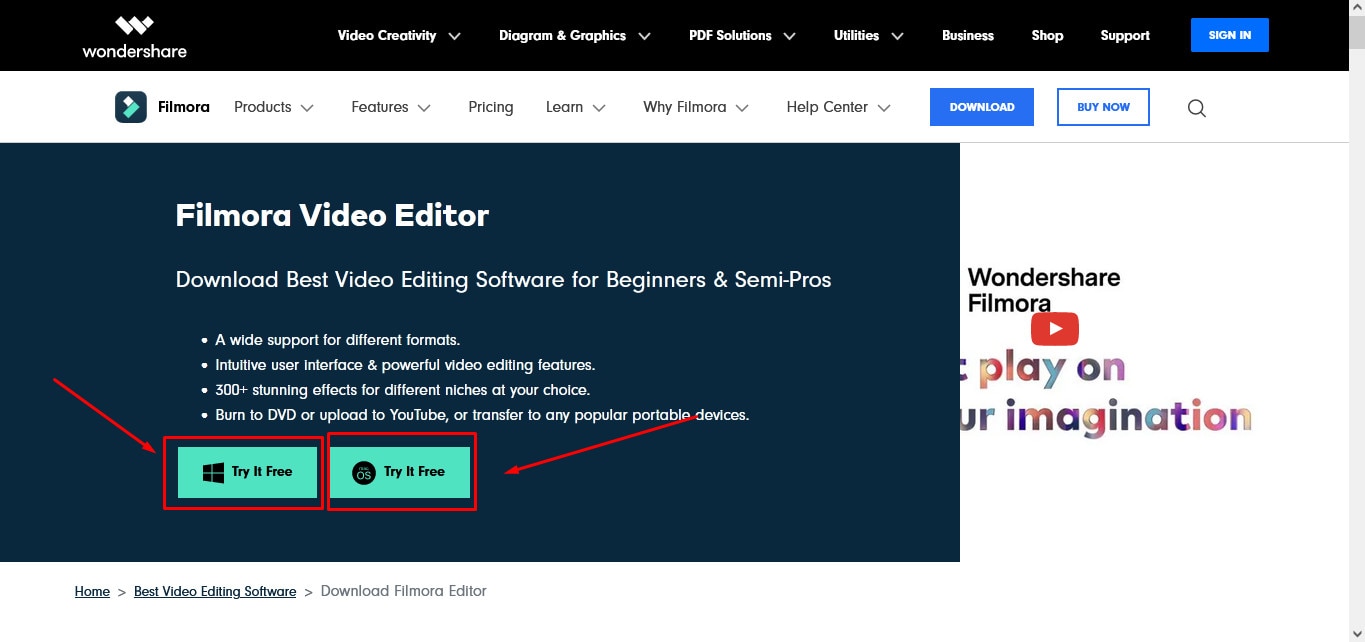
After downloading the setup, double-click the file to install the video editor. Then, open the program.
Feel free to judge the interface (see the image below), as it is pretty simple to understand. So, even if you’re a beginner, you can learn this tool within a few minutes of practice.
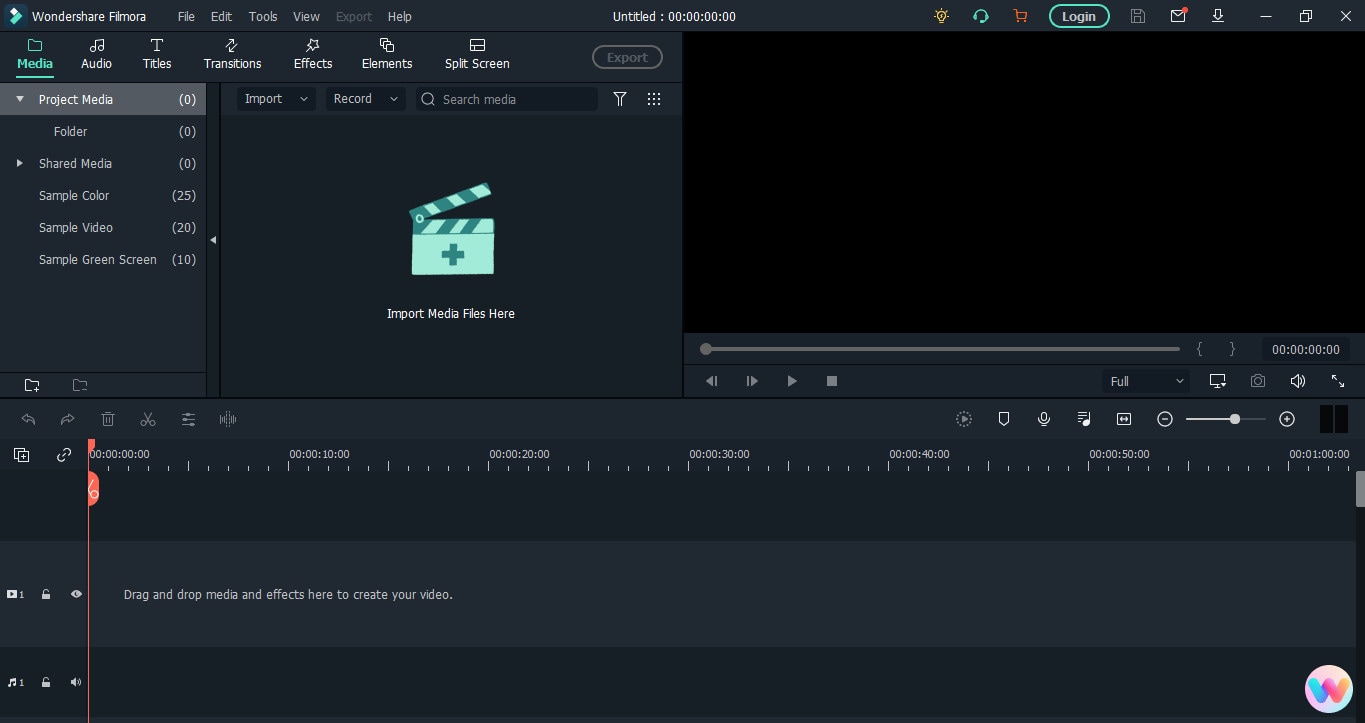
Step 2: Import the Video You Want to Rotate
The next is to bring the video file to Filmora’s library before proceeding. To do that, click on the “Movie Clip” icon in the center of the interface to select the clip from your computer’s hard drive.

Double-click or select the video and click the “Open” button to import files. The importing process may take several seconds or a few minutes, depending on the video size.
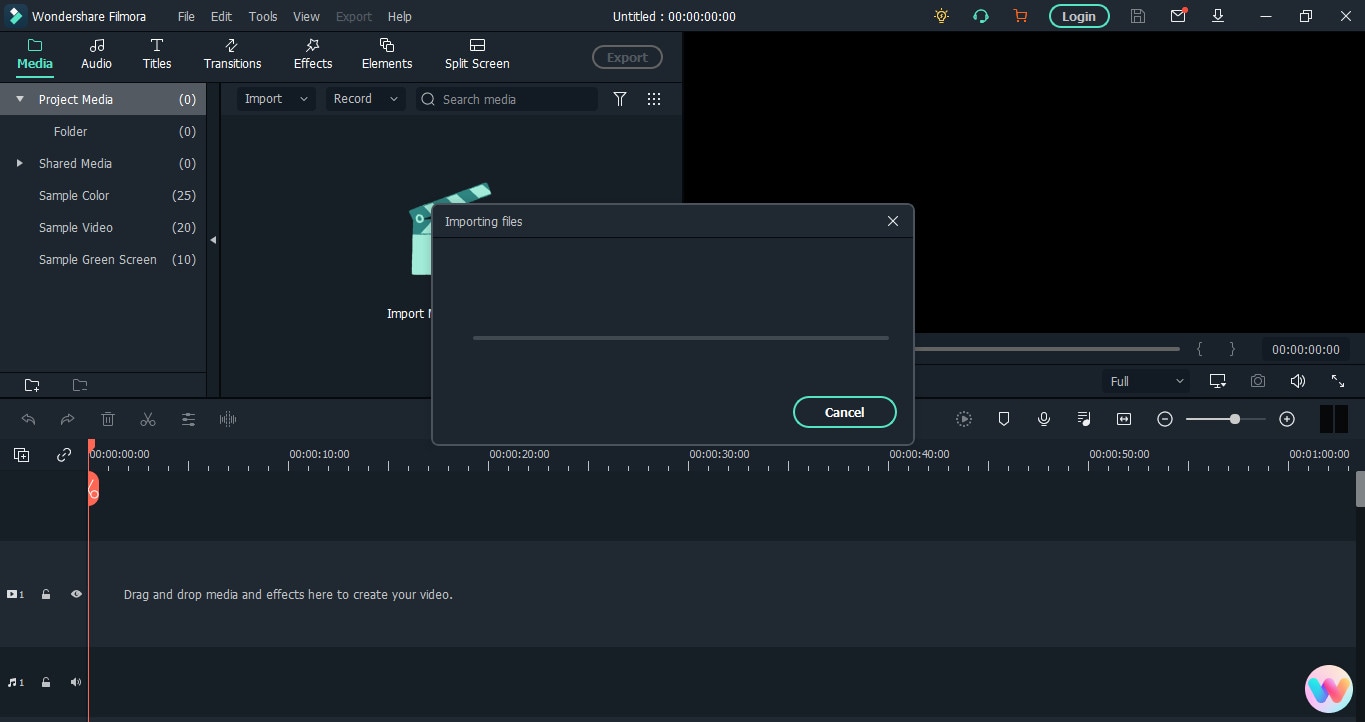
If you’re using Filmora for the first time, you might see the “Create Proxy File” message popping up right after the video import. So, simply click on the “Yes” button to go ahead.
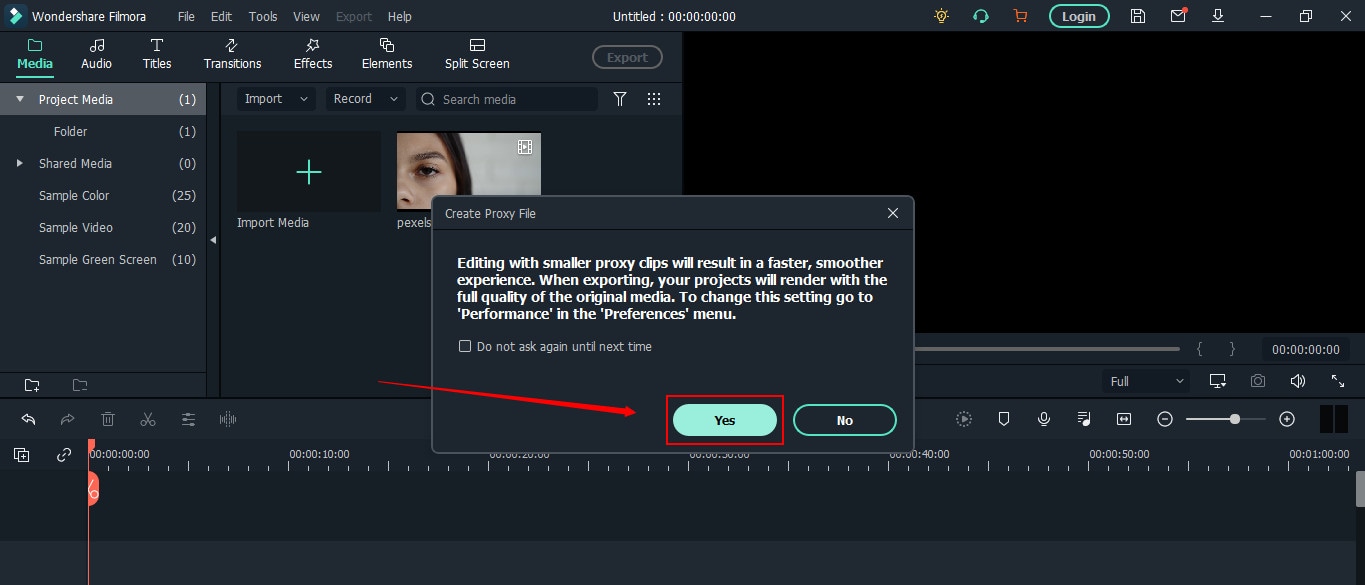
Your video will be stored in the “Project Media” tab and will be visible next to the preview window.
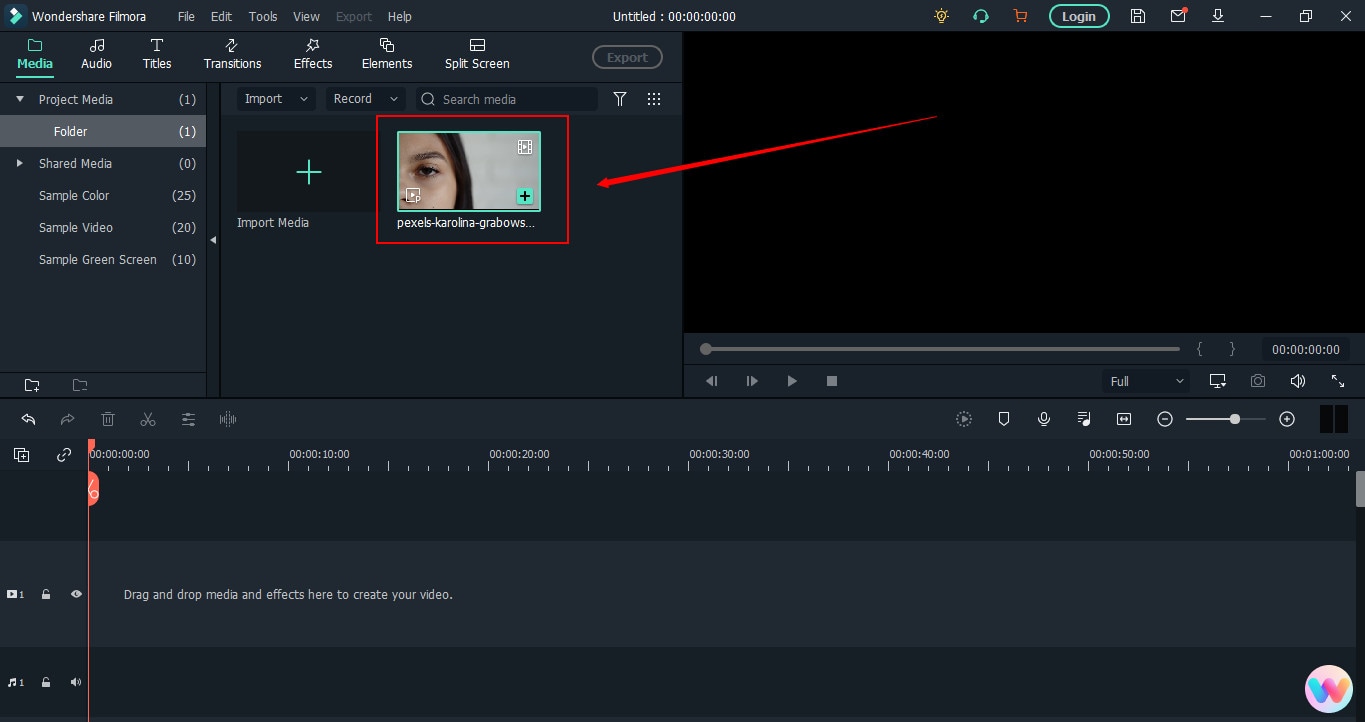
Step 3: Drag and Drop the Video on Filmora’s Timeline
To rotate the video, first, you need to add it to the track. For that, take your mouse on the video, and select it by clicking the right button on your mouse. Keep holding the button to drag the video on the timeline. Remove your finger from the button after placing the clip on the track.

Right after the above step, you will get another message to help you decide whether you want to keep the resolution of the video to its original settings or match the media. Choose “Match to Media” for fast rendering.
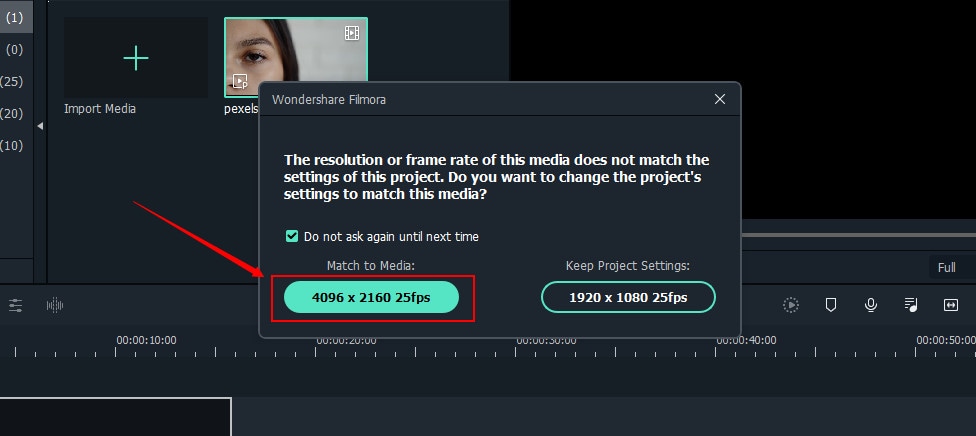
However, if you’re a professional video editor, feel free to select the option that suits you the most.
Step 4: Rotate Your Video with Filmora
Double-click anywhere on the video that is already on the timeline.

You will see three tabs – “Video,” “Color,” and “Animation.” So choose the “Video” tab and click on the “Transform” option.
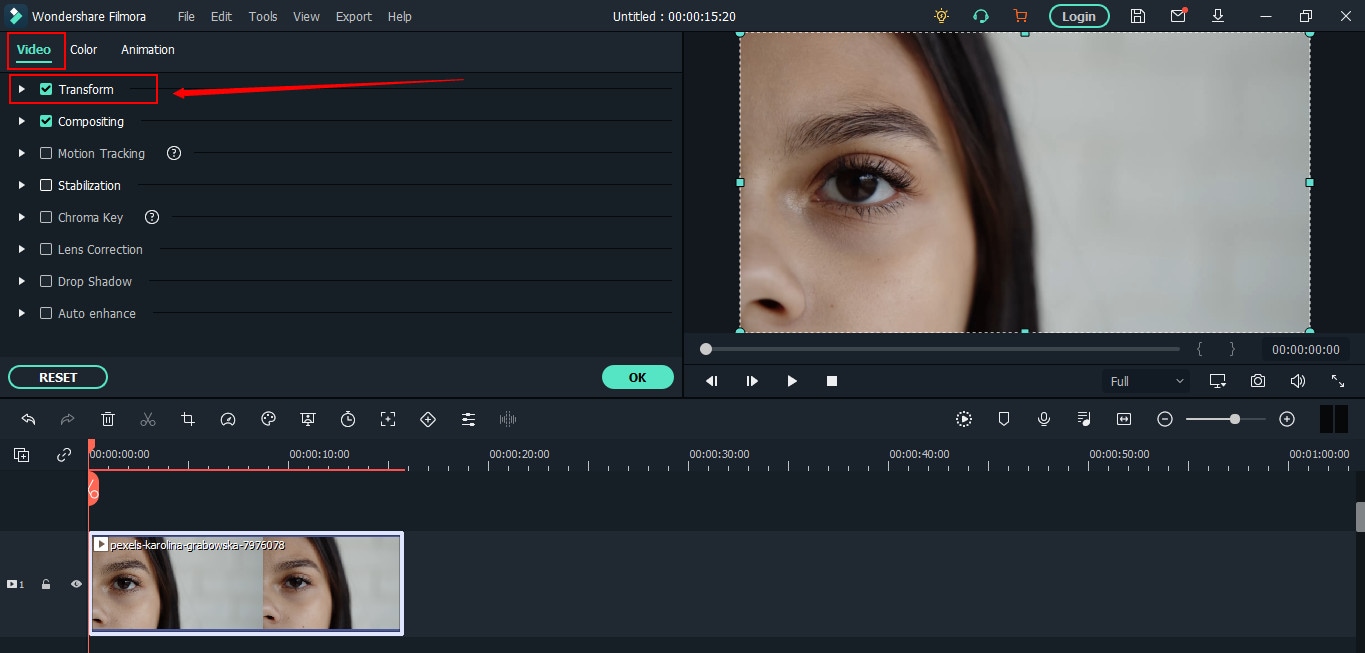
Once done, you will see three important options, which will help you rotate the video.
First, you will notice the “Rotate” option with an adjustment bar. This option will turn your video to different angles of your choice.
All you need to do is play with the adjustments by grabbing the “Round” knob-like button while keeping an eye on the preview window to see the results.
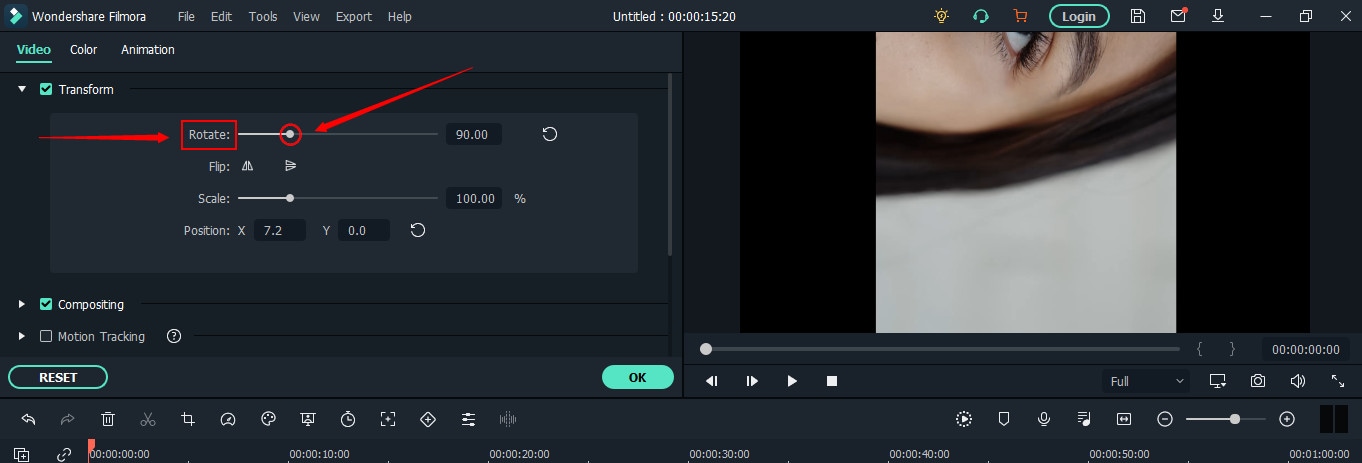
Just below “Rotate,” you will see the “Flip” option with “Horizontal” and “Vertical” mirror icons. Choosing any one of the icons will make your video mirror flip in horizontal or vertical directions.
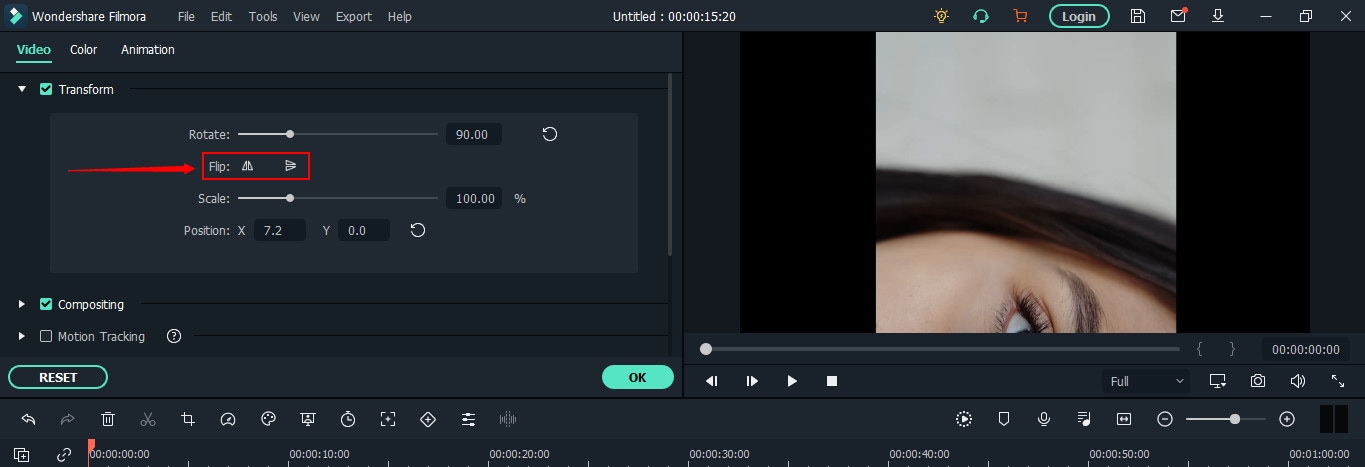
The third option is “Scale” beneath the “Flip” option. Similar to the rotate option, this tool also has an adjustment bar. You can make adjustments to magnify or de-magnify the clip to fit the screen. Although this option isn’t mandatory, you can still use it if you find the need.

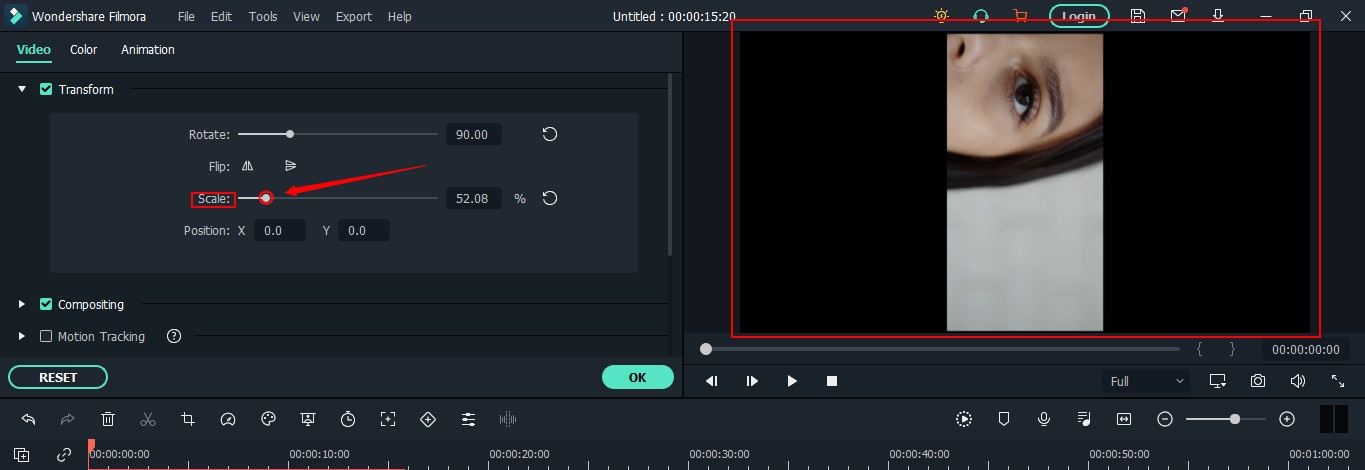
Now, click the “OK” button to apply rotation and return to the timeline.
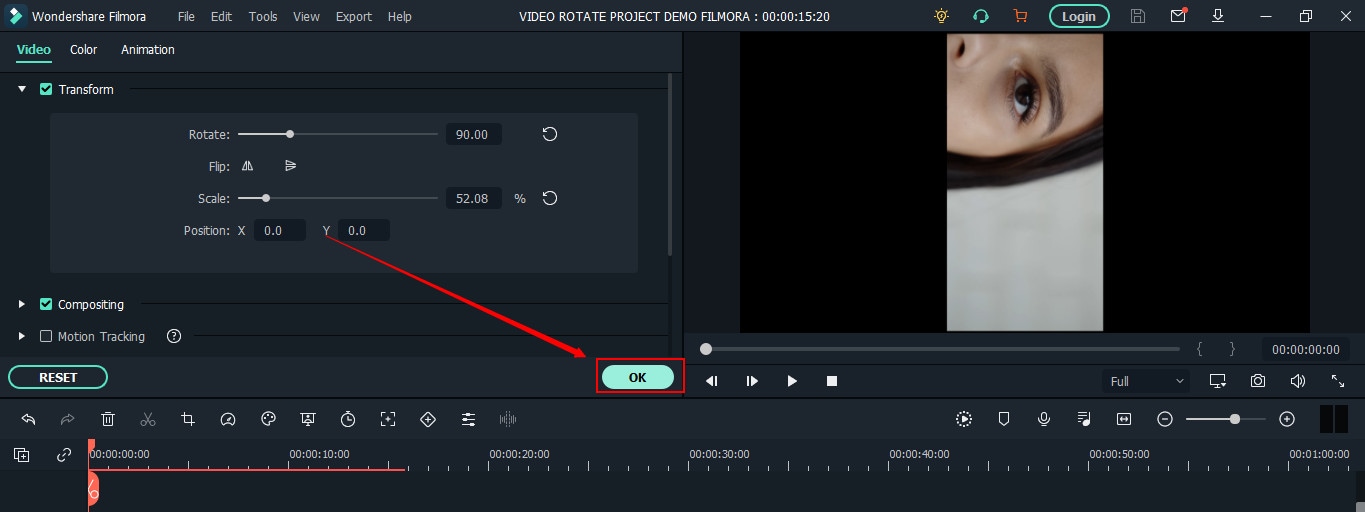
Step 5: Save and Export Rotated Video to Your Widows or MAC
Here you will learn how to save the project and then export it. If you have already saved the project in the beginning, skip reading this part and directly hit the “Export” button.
Contrarily, you can also directly export your files without saving the project. But you won’t be able to make changes to the same project in the future as all source files will be lost. Therefore, saving the project and then exporting files is recommended.
So, if you’re done with step 4, save your project before going further.
You can go to the “File” tab, choose “Save Project,” and rename the video.
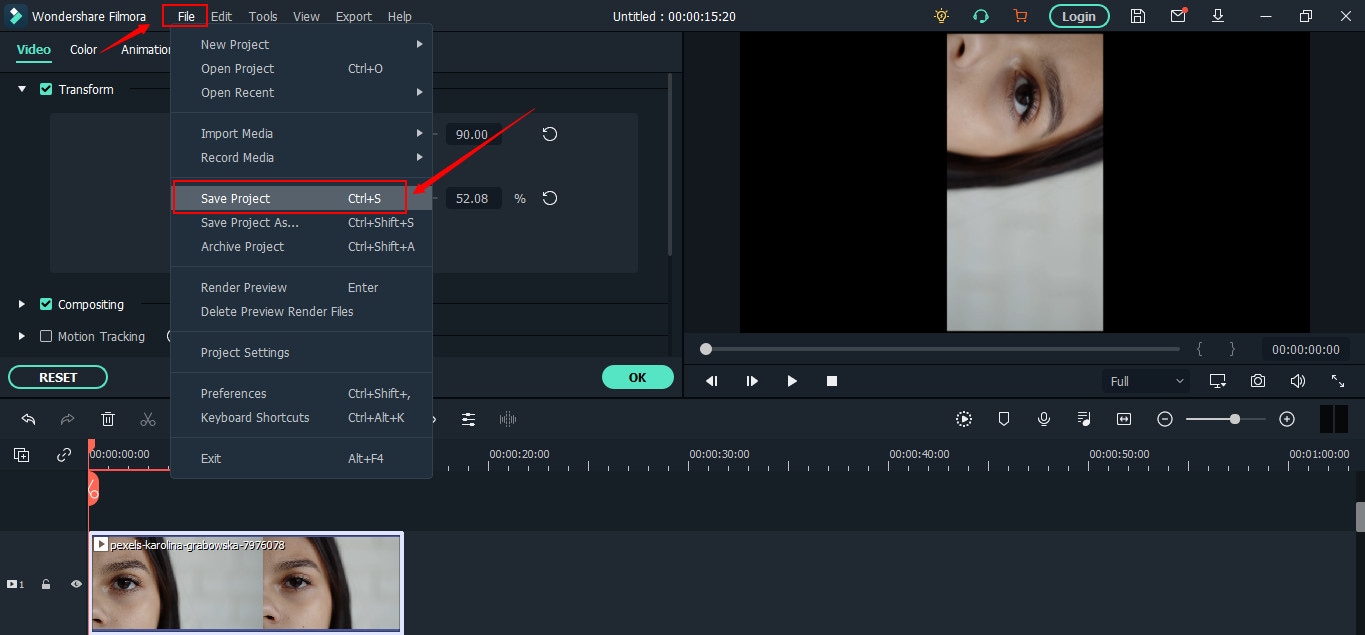
Rename your file and click on the “Save” button.
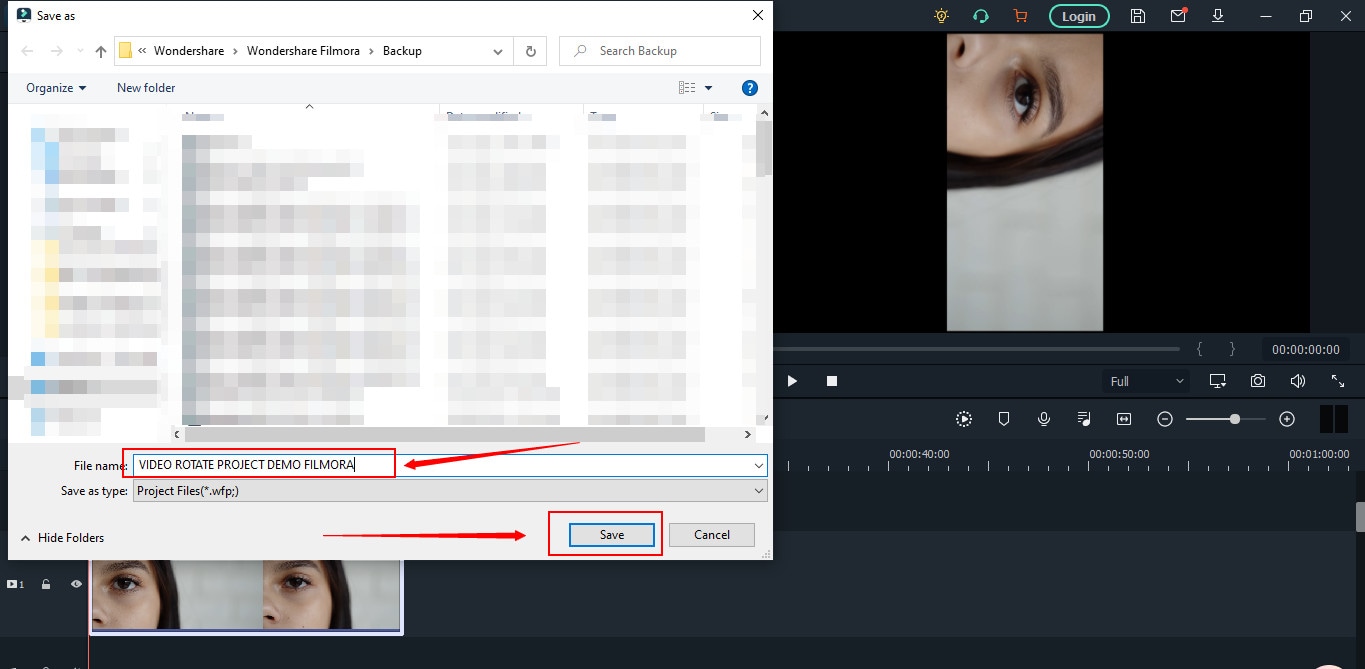
The new name will appear at the top of Filmora’s interface.
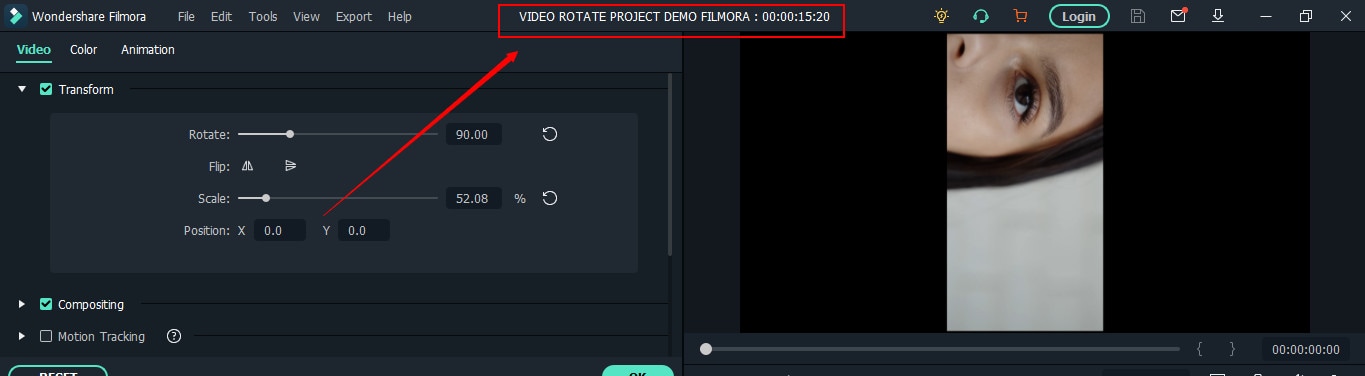
Lastly, click the “Export” button to save the file on your computer.
F 17
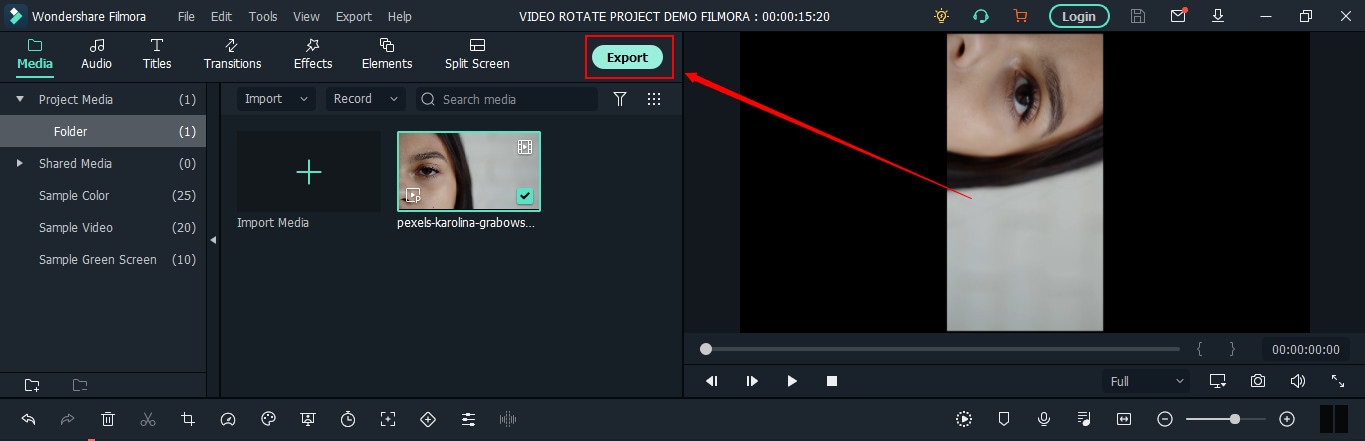
Part 2: Top 3 Free Video Rotators on Windows
No luck with finding free movie rotators for your Windows operating system? Don’t stress! These three AVI video rotators will solve your problem.
Free Video Flip and Rotate
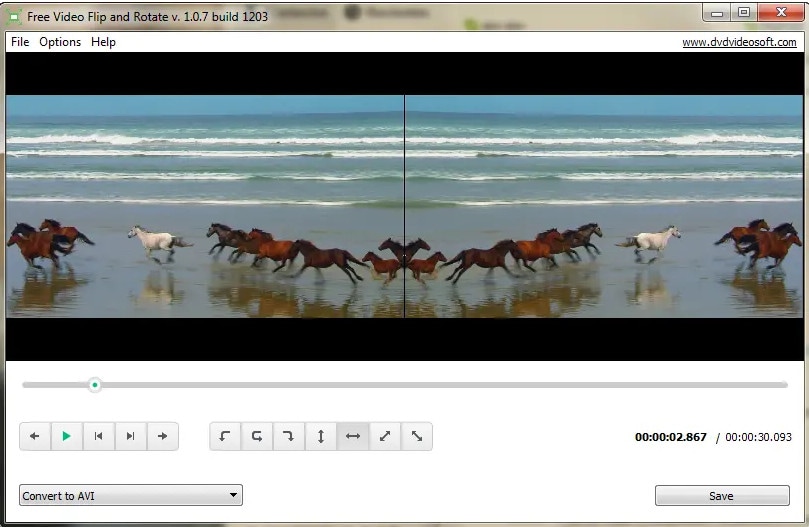
This tool could satisfy your requirements if you’re looking for a core video rotator. As the name sounds, the Free Video Flip and Rotate is software by DVD Video Soft that allows you to modify the orientation of your videos easily. In other words, this is one of the easiest video rotators for Windows users, which is also free to download and use.
It has a simple interface with user-friendly options, which permits you to rotate your videos from different angles. Besides, you can also use this software for mirroring your clips. Moreover, you can save your project in various video formats, such as AVI.
Features
- Vertical flip
- Horizontal flip
- 180° video rotation
- 90° clockwise video rotation
- 90° counter-clockwise video rotation
- Vertical flip with 90° clockwise video rotation
- Horizontal flip with 90° counter-clockwise video rotation
Pros
- One-click results
- Easy to install and run
- Free and user-friendly software
- Does not contain ads or spyware
- Requires 40.50 MB of hard disk space
- Supports AVI and other video formats
- Supports XP, Windows 7, 8, 10, and 11 versions
Cons
- Unavailable for MAC users
- Lack of additional features, such as color correction, cropping, etc.
XMedia Recode
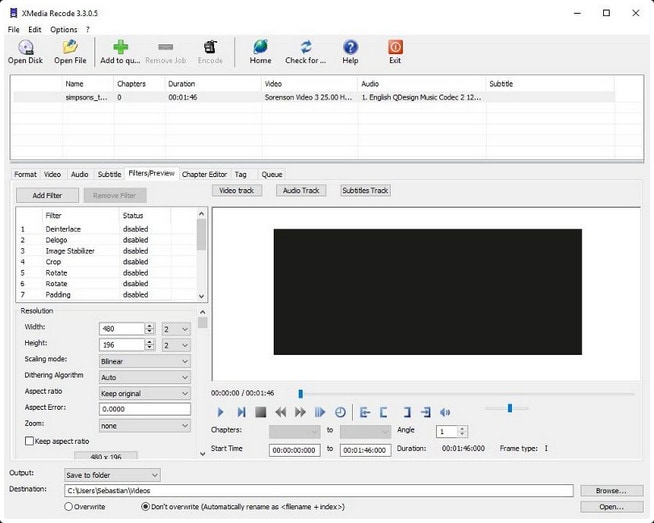
XMedia Recode is a free tool for Windows users. While the software is meant to convert videos into different formats, you can also use it for video rotation. Nevertheless, XMedia Recode has various other options, making it perfect for basic video editing.
Moreover, this software can convert unprotected Blue-rays/DVDs, create different chapters, import subtitle tracks, and many more. However, one of the best features of this video converter-cum-rotator is the video remux. That means you can convert the video container format without changing the original size.
Contrarily, XMedia Recode allows you to rotate and convert videos for countless devices, such as iPhone, iPad, Android, Xbox360, and more. But all this can be done only through Windows operating system. You can download this tool without any paid subscription. However, choose suitable processing for smooth installation, such as Windows 64bit, Windows 32bit, Vista, or XP SP3.
Features
- Blur
- Delogo
- Rotation
- Padding
- Denoise
- Cropping
- Image flip
- Swap U/V
- Clip speed
- Color curves
- Video fading
- Mirror effect
- Image stabilization
- Custom resolution
- Import 32 subtitle tracks
- Direct copy of video and audio stream into your desired format
Pros
- Free software
- Speedy conversion
- Fast batch processing
- Variety of video and audio features
- Works on Windows XP to Windows 10
- Supports 40+ video formats, including AVI
Cons
- A bit complex interface for new users
Altrasoft

Altrasoft is a small software for Windows to help rotate and convert your videos. The total size of the setup is just 971 KB.
This software is best for small video clips, which need to be rotated without wasting time. The program is free to download and use. However, the interface appears a bit old compared to new tools.
Also, unlike XMedia Recode, Altrasoft comes with limited options. So, if you only desire to rotate or flip your video and save it in the AVI or any other format, go ahead and download it.
Features
- Borders
- Zooming
- Rotation
- Color settings
- Audio formatting
- Video codec settings
- Audio codec settings
Pros
- Free to use
- Ideal for short videos
- Extremely light software
- Simple rotation options
- Rotation angle adjustments
Cons
- Outdated interface
- Lack of customer support
Part 3: Top 3 Free Video Rotators on MAC
Have you already lost your MAC storage on downloading some incompetent video rotators which claim to support AVI files? You can try these three video rotators for MAC, which are free and compatible with AVI video formats.
Kdenlive
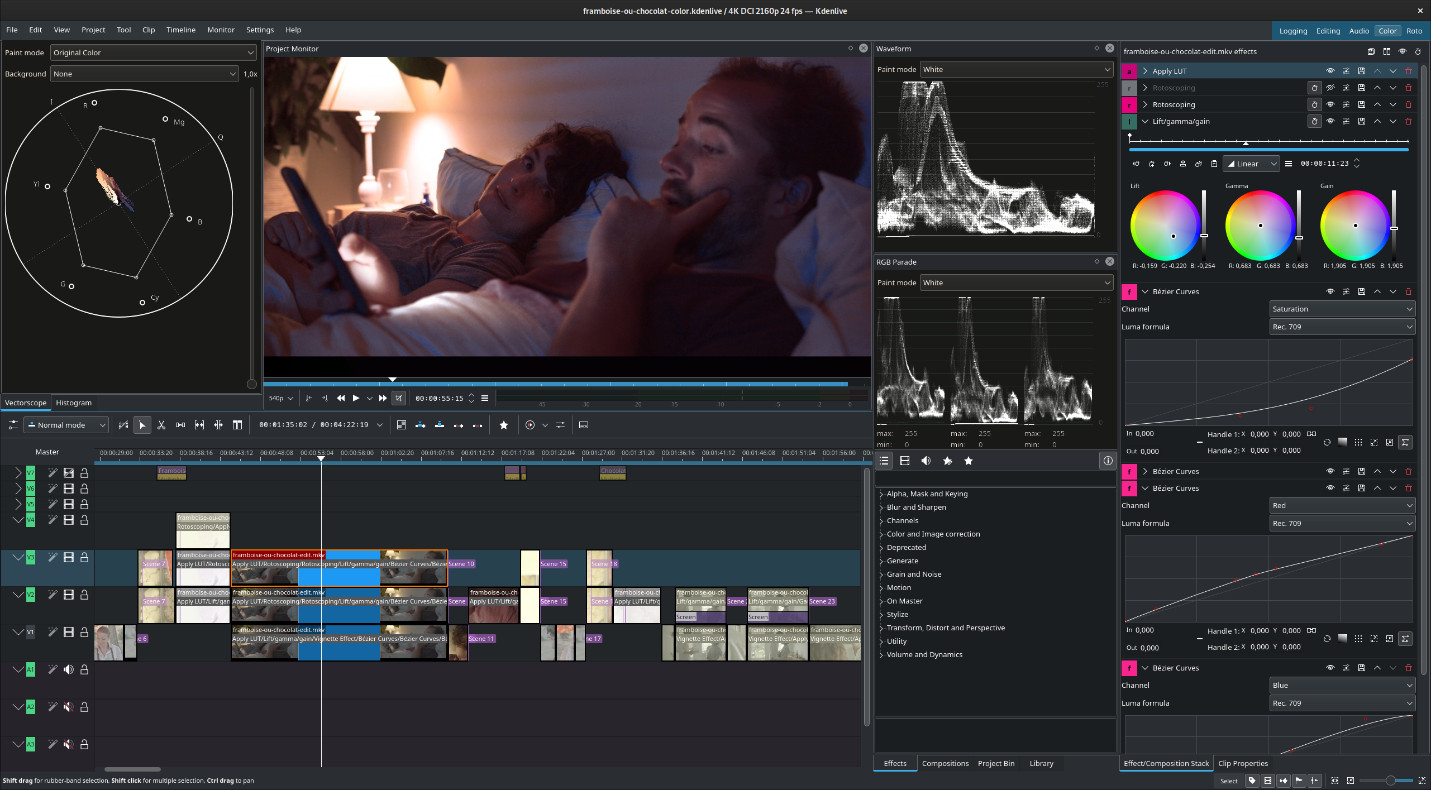
When it comes to free video rotators for MAC, it gets quite challenging to find the right tool. As a MAC OS user, you are left with limited options, especially when trying to rotate videos and save them in AVI format. However, Kdenlive appears to be a problem-solver.
Technically, Kdenlive is a free open source, cross-platform, non-linear video editor with a variety of features. Nevertheless, its Mac version works excellent compared to Windows or Linux.
You can use this software to rotate videos and save them in AVI or any other available format. Also, this program has an attractive interface with a rich library of transition templates and fonts.
Besides, from the video rotation point of view, Kdenlive allows you to turn your videos at any angle.
Features
- Rotate and zoom
- Waveform
- Histogram
- Audio meter
- Vectorscope
- Proxy editing
- Text animation
- Keyframe interpolation
- Color grading and correction
- RGB parade Multi-track video editing
- Custom shortcuts and interface layouts
- Easy line-spacing and letter-spacing adjustment
- Supports seven video formats, including AVI, MOV, HD, UHD, HDV, WEBM, and MP4
Pros
- Free to use
- Fast rendering
- Automatic backup
- Easy video rotation
- Regular bugs fixation
- Cross-platform availability
- Dozens of professional effects and transitions
Cons
- Extremely unstable on Windows OS
IMovie
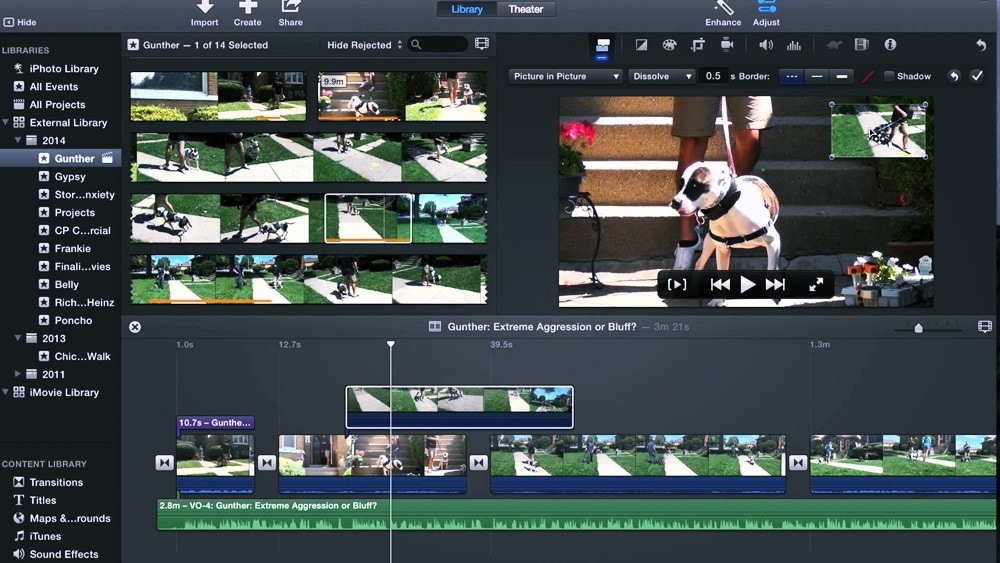
Want to get the job done quickly? Try iMovie in your MAC!
iMovie is a built-in video editing software to help create professional-level videos from your system. But you can also download iMovie if you can’t find it in the system.
Not just videos, but this software also allows you to cut and edit music without changing the files. Many filmmakers also love the tool, as they can add graphics to their projects to get remarkable results.
But that doesn’t stop new users from getting all the benefits the pros get with this software. How? Because it has a pretty straightforward look. You don’t need to click a hundred times to apply a simple effect, as all the options are right in front of you.
And when it’s about rotating a video in AVI format, feel free to rely on iMovie, as it supports several video file formats.
Features
- Video rotation and cropping
- Music and photo import
- 4K and HD video support
- Video transitions and effects
- Pre-installed backdrops and themes
- Supports working on multiple projects
Pros
- Free for MAC users
- Easy to learn
- User-friendly tools
- Extensive audio library
- Excellent movie templates
- Ideal Chroma-keying options
Cons
- Requires high storage space
- Lacks tagging and motion tracking
OpenShot
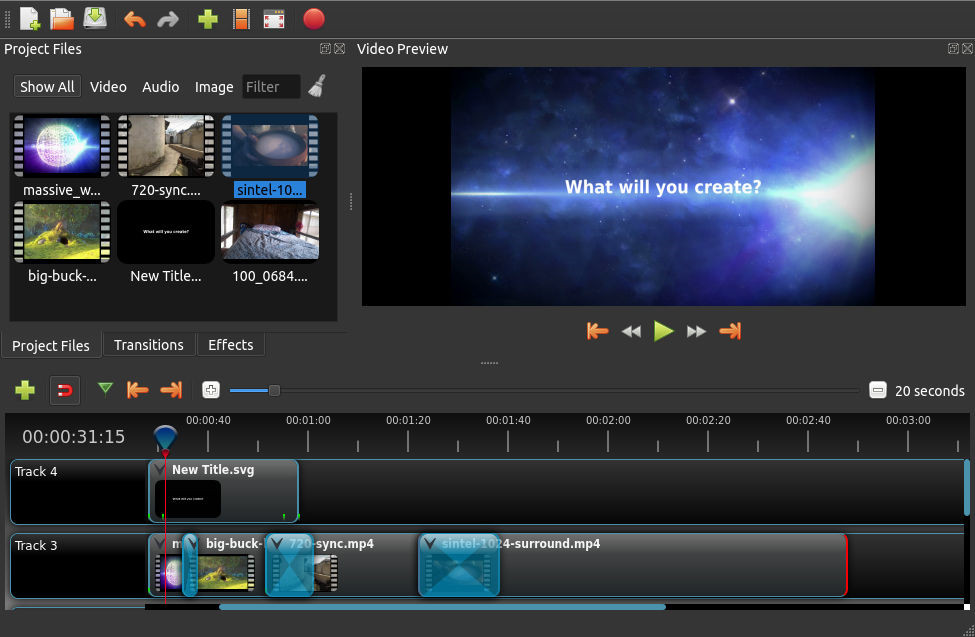
If complex video rotators make you ill, give OpenShot a shot!
It’s a free video editor which is incredibly simple to use. Most professionals around the world appreciate this powerful editing tool. Also, new users can do wonders by simply playing and understanding the options for a few minutes.
So if you plan to use OpenShot Video Editor , you would be glad to know that you can add animations, watermarks, and numerous other effects through this program. Plus, you can also enjoy audio editing within the same platform.
Although OpenShot can be installed for free on multiple operating systems, it still works best on MAC. So there’s no way to ignore this tool for rotating videos in MAC, especially when the options are limited.
Features
- Video rotation and resizing
- Drag and drop support
- Unlimited layers/tracks
- Color correction and settings
- 3D animated effects and titles
- Robust curve-based animations
- Video transitions and real-time previews
- Clip scaling, snapping, cutting, and trimming
- Image overlays, compositing, and watermarks
- Supports AVI and other audio, video, and image formats
Pros
- Free to use
- Easy editing
- No watermarking
- Available in 70+ languages
- Regular updates for improvement
- Stable performance on MAC systems
Cons
- Limited editing options for professionals
- Not suitable for old Windows OS versions
Part 4: Top 3 Free Video Rotators for Android
If using a PC to rotate your videos makes you lazy, you can change the angles of your clips through your Android phone.
So here are the three best video editing apps for Android lovers, which are free to use.
Rotate Video FX
Rotate Video FX is developed by Bizo Mobile. Despite being a small company, it has proven its mettle by offering several apps to its users in more than 100 countries. The firm is also specialized in developing mobile games for multiple platforms.
However, Rotate Video FX is one of its best creations in the world of video rotating mobile applications. This app allows you to choose the video you want to turn directly from your phone’s gallery.
And once the clip has been uploaded, you can rotate it to three different degrees by just touching the “Rotate” button.
Features
- Video rotation to 90, 180, and 270-degree angles
- Clear preview screen with no overlapping options
- Simple play, rotate, and import in a single attempt
- Social media sharing button for quick sending of media
- Automatically saves the rotated video to your phone’s gallery
Pros
- The app is free to use
- More than 1 million downloads
- Works on all android versions
Cons
- No frequent updates
- Not a user-friendly app
- Changes video resolution without permission
Smart Video Rotate and Flip
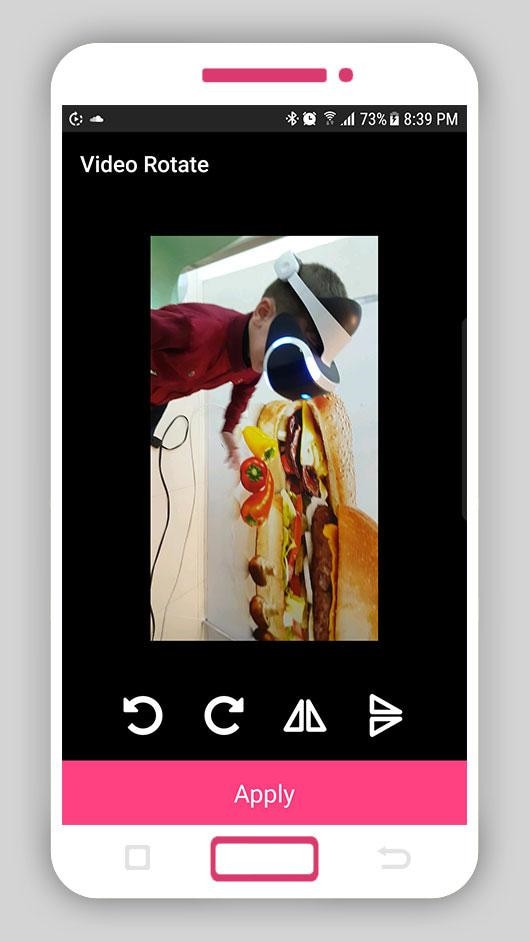
Clogica is the brainchild behind Smart Video Rotate and Flip video rotator for android. The company has been actively working in app development since 2014. And currently, it has more than 25 apps on the list, with 50 million total users.
Smart Video Rotate and Flip is a simple and smart tool to flip and rotate videos directly from your android device. So if you’re no longer interested in using desktop applications to do the job, here’s your chance to rotate your clips through your mobile phone or tablet.
This app offers a simple way to perform multiple flips and rotations simultaneously. The application works by re-encoding the media or by using the fast mode.
Features
- Allows video rotation and flips on different angles
- The output folder and renaming options
- Big preview screen and fast rendering
- Video recording directly from the application
- Permits you to make a video library within the app
Pros
- Free application
- Easy interface
- The app doesn’t change the video quality
- Allows you to mirror flip and rotate videos
- The latest update makes the app work faster
Cons
- The app contains ads
- Files become large after rotation
- Videos can only be saved to the phone’s internal memory
Rotate Video FREE
Rotate Video FREE is designed by LKR Studio. From 2014 till now, this app development company has produced seven mobile applications in the “Tools” category. And among its entire portfolio, the Rotate Video FREE app is one of the most popular creations.
Rotate Video FREE is a highly light and easy video rotator for Android devices. It has a simple interface with two main options: ‘ Pick Video’ to select the clip from your phone’s gallery. Then, the “Turn Left” button helps you rotate the video in multiple directions.
Features
- Rotates video to 90, 180, and 270 degrees
- HD video export quality
- Hassle-free rotate options
Pros
- Free of cost app
- Speedy video rotation process on large files
- Saves video directly to your phone’s memory
- Video rotation without affecting the resolution
Cons
- No mirror flipping
- The free version contains advertisements
- Hard to find the location of the saved videos
Part 5: Top 3 Free Video Rotators for iPhone
Are you struggling to find a good video rotator for iPhone? Here’s the list of three best iPhone apps to help you rotate your movies using your smartphone in AVI format.
Video Rotate + Flip Video Easy
Finding a video rotator for iPhone is a bit difficult, as most valuable applications comes after paying the price. But Video Rotate + Flip Video Easy app is totally free to download and use.
The app includes all the basic functions to rotate and flip videos in different angles. After downloading the app, you will notice a simple interface with seven options. So all you need to do is to import your video from the phone’s gallery, use the options to rotate the video, and save the rotated video in your phone.
The app is also available in different languages, including German, French, Japanese, English, Portuguese, Simplified Chinese, Spanish, and Russian.
Features
- Vertical mirror flipping
- Horizontal mirror flipping
- Frame wise video rotation
- 90° degrees clockwise and counter clockwise rotations
- 180° degrees clockwise and counter clockwise rotations
Pros
- Fast video conversion
- Small app size (only 16.1 MB)
- Available in multiple languages
- Supports iOS 11.0 or later versions
- The app is free with no watermarks
- You can install the app on your iPad
- Rotated videos can be played on all media players
- It exports the rotated video directly to your camera roll
Cons
- You need to purchase the app to remove advertisements
RFV
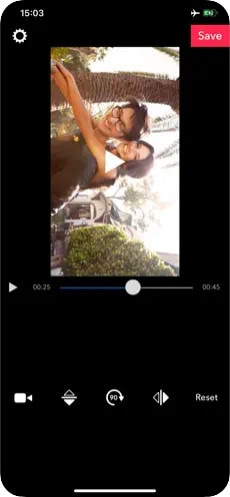
Here’s another free app to rotate and flip your videos. You can download RFV on both Android and iPhone smartphones. However, the iPhone version of the app works flawlessly. In fact, the ratings on both platforms also confirm that there are more happy iPhone users of this app than Android users.
RFV is a quick solution to correct your video orientation. So, if you have recorded the video through your iPhone at the wrong angle, you can use the app to flip and turn the clip’s position without much trouble. And you can do all of this just by selecting the options at the bottom of the app’s interface.
Features
- 90° degrees rotations
- Quick resetting
- Horizontal and vertical mirror flipping
- Turn photos into videos
- Video podcast
Pros
- RFV is a free video rotating app
- Easy installation on iPad
- Supports iOS 12.0 or later versions
- Direct loading of clip on the app from camera roll
Cons
- Large app size (41.7 MB)
- Unavailable for older iPhone versions
- It does not support file sizes above 200 MB
- Problems with saving the video on Android phones
Video Rotate – Flip Video
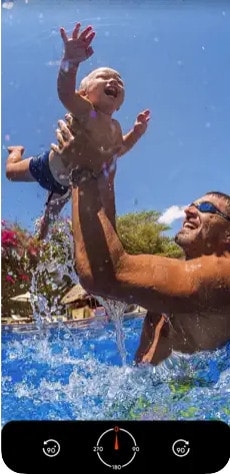
Video Rotate – Flip Video is the third in line when it comes to free video rotators for iPhones. The tool has pretty straightforward options regarding 90-degree clockwise and counter-clockwise rotations. Moreover, you can also play with different angles to adjust the orientation from 0 to 270 degrees.
Once you’re done rotating your video, you can save the new clip directly to your iPhone’s camera roll. At the same time, this app also allows you to share the rotated video on various social and communication platforms.
Features
- The app is specifically designed to rotate videos
- Uncomplicated app interface
- Live video preview
Pros
- Free and fast video rotator app for iPhone
- You can also install the app on an iPad
- Compatible with iOS 10.0 or later versions
Cons
- The app shows advertisements until you buy it
- No reset option – you have to start all over again
Part 6: Top 3 Free Video Rotators Online
Don’t want to fill your device’s storage with software? Well! You can rotate videos online for free in AVI format with ease. Here are the 3 best online video rotating tools.
Flixier
Flixier is a website that helps you create and edit videos through your internet browser. You can upload multiple videos or photos to add effects, text, and many more characteristics. This online platform allows you to add keyframes and transitions to your clips. Likewise, you can adjust your videos’ positioning, scaling, and resizing.
So can you rotate videos on Flixier?
Yes, you can and without paying a cent. The website offers a variety of options to rotate your clips. All you need to do is select the transform option and choose the rotation or flip option to see the results. And when you’re done rotating the video, simply export the file to your computer.
On the other hand, if you think you want to use Flixier frequently, you are required to buy a premium monthly or annual subscription. But until then, you can enjoy all the great traits for free.
Features
- Video rotation (90 degrees left and right)
- Video flipping (horizontal and vertical)
- Robust timeline
- 50+ transitions
- Green screen
- Live collaboration
- Screen recording
- Webcam recording
- Video effects
- Color correction
- Built-in media stock libraries
Pros
- Flixier is free
- No sign-up required
- Superfast rendering
- Variety of video templates
- Unlimited audio and video tracks
- Allows AVI media import and export
- Live video, microphone, and screen recording
Cons
- You need to purchase paid plans for team collaboration
- The free plan comes with limited projects, downloads, and storage
Clideo
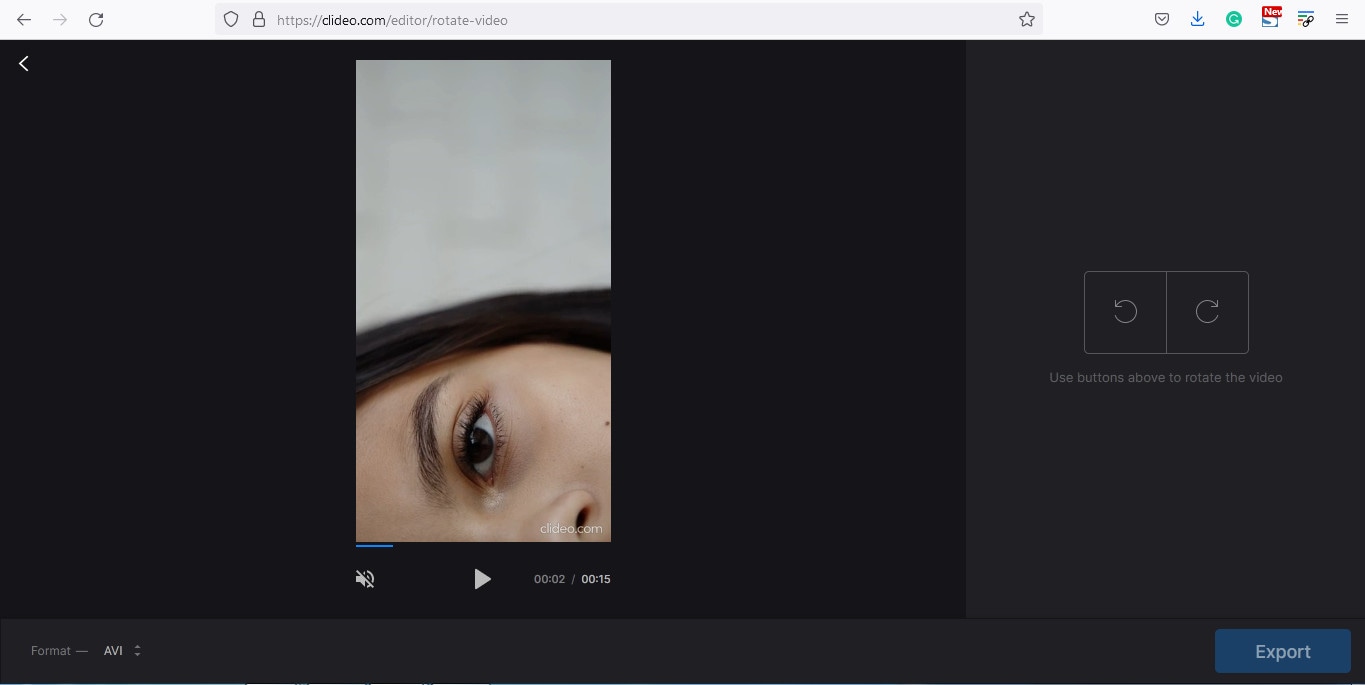
Clideo is a great online tool that allows you to create and edit images and videos in one place. This web-based program comes with a variety of features, including video rotation and flipping.
To make your videos unique, Clideo permits you to add text and music to attract the audience. Moreover, the program supports different video formats, like AVI, MPG, MP4, WMC, MOV, VOB, and more.
You can do everything right from your internet browser without installing the application on your computer. All video files that you import and export on Clideo are well-protected.
As a user, you can select different resolutions, formats, and other features to make exciting videos within a few clicks. And apart from video rotation, the tool offers numerous beneficial options, such as reverse, speed, flip, loop, stop motion, and even memes creation.
Features
- Easy video flipping and rotation
- DPI conversion
- Video compressing
- Speed adjustment
- Slideshow creation
- Filters and presets
- Audio and video cutting
- Video and audio merging
- Subtitles and personalized text
- Color correction and fading effects
Pros
- All basic features are free to use
- Best for beginners
- Non-technical interface
- Supports various video formats (including AVI)
Cons
- This online tool lacks design elements and themes
- You need to buy the premium version to use Clideo daily
Rotate My Video.Net
Last but not the least, the Rotate My Video.Net is a free online tool designed for video rotation only. So, if your video is upside down or shot in the wrong direction, feel free to use this tool.
This web-based video rotator allows you to share the video to different social platforms directly from the website. Contrarily, you also save the rotated clips on your system.
Another interesting fact about this tool is that it has no limit. That means you can upload videos on the interface and rotate them as often as possible. However, the tool does not offer other features to groom your videos.
Moreover, the developers claim that the videos are deleted automatically from the server in a few hours. Therefore, your videos stay private and safe.
Features
- 90 degrees clockwise and counter-clockwise rotation
- Video ratio adjustment options (4:3 and 16:9)
- Band color option to fill the empty black space with colors
Pros
- Entirely free – no monthly or yearly subscription required
- Easy and quick process
- Supports AVI video files
- Video quality is not disturbed after rotation
Cons
- Lacks video flipping option
- It does not include any other features
Part 7: Bottom Line
Despite a long list of free video editors, finding the right one that simplifies the task without any trouble is hard. But with these top 16 best free AVI video rotators, you can flip and rotate videos in a couple of minutes. You can find the most suitable rotator Windows, MAC, iPhone, and Android. Or, you can use the online platforms to enjoy rotations at different angles. However, regardless of device or operating system, each rotator has pros and cons. So don’t hesitate to opt for the tool that fulfills all your needs.
Part 8: FAQs
Q1. How do I rotate a video for free?
You can rotate a video for free by downloading a free video rotator according to your operating system. You can also look for online tools for video rotation. Likewise, you can also install Android and iPhone apps to rotate clips from your phone.
Q2. What software can rotate video?
There are many software that helps you rotate videos. However, most of them are paid. So, if you’re looking for some free video rotators on MAC or Windows, you can download Filmora. On the other hand, you can download programs like Altrasoft, XMedia Recode, and Free Video Flip and Rotate for Windows.
Q3. How can I rotate a video without losing quality?
Not all video rotators can promise high-quality results. So if you want to rotate your clip without damaging the quality, you must choose top-notch video editors, like Filmora or iMovie.
Q4. How do you rotate an AVI file on a MAC?
You need to download video rotators, such as Kdenlive, iMovie, or OpenShot, to rotate your AVI files for free. But, you can choose Filmora for MAC to flip and turn your AVI videos to different angles for exceptional results.
Q5. How do I rotate a video online?
To rotate an AVI video online, you need to be extremely picky, as even most online tools don’t support AVI files. But online video editors like Flixier, Clideo, and RotateMyVideo.Net allow you to rotate AVI videos easily.
Did you rush to record a video in a mistaken direction? Or were you just excited to film the moments without noticing the position of your camera? Whatever the case, if you regret recording the clip at the incorrect angle, here’s your chance to do the alteration. The article includes the top 16 best free AVI video rotators you can use on MAC, Windows, iPhone, Android, and online. Plus, if you’re looking for a single platform to rotate or flip videos, you can learn the complete process by following the step-by-step Filmora Video Editor tutorial that works on MAC and Windows.
In this Article
Part 1: Best AVI Video Rotators to Rotate AVI Video on Windows and MAC – Filmora Video Editor [with steps]
Part 2: Top 3 Free Video Rotators on Windows
Part 3: Top 3 Free Video Rotators on MAC
Part 4: Top 3 Free Video Rotators on Android
Part 5: Top 3 Free Video Rotators on iPhone
Part 6: Top 3 Free Video Rotators Online
Part 7: Bottom Line
Part 8: FAQs
Part 1: Best AVI Video Rotators to Rotate AVI Video on Windows and MAC – Filmora Video Editor [with steps]
Heard about Filmora but never used it? Surely, you’re missing great fun if you’re a video professional or a beginner video editor.
Filmora is an award-winning video editing software that works for both PC and MAC users. While the tool comes at an affordable price, you can still download the free setup to start showing your creativity.
This video editor has dozens of new effects, transitions, and many more features, which can help you create engaging videos. You can also enjoy some more key features, including audio ducking, color matching, motion tracking, split screen, video filters and transitions, speed control, and multiple exporting formats.
And, of course, video rotation is as easy as ABC! You can follow this step-by-step tutorial to rotate or flip your videos using Filmora 10. You can apply the same procedure if you have a different version.
Step 1: Download and Install Filmora
Visit Filmora Video Editor’s official website to download the newest version. Click on the “Try it Free” button according to your operating system (look at the icons on the button to identify the OS).
After downloading the setup, double-click the file to install the video editor. Then, open the program.
Feel free to judge the interface (see the image below), as it is pretty simple to understand. So, even if you’re a beginner, you can learn this tool within a few minutes of practice.
Step 2: Import the Video You Want to Rotate
The next is to bring the video file to Filmora’s library before proceeding. To do that, click on the “Movie Clip” icon in the center of the interface to select the clip from your computer’s hard drive.
Double-click or select the video and click the “Open” button to import files. The importing process may take several seconds or a few minutes, depending on the video size.
If you’re using Filmora for the first time, you might see the “Create Proxy File” message popping up right after the video import. So, simply click on the “Yes” button to go ahead.
Your video will be stored in the “Project Media” tab and will be visible next to the preview window.
Step 3: Drag and Drop the Video on Filmora’s Timeline
To rotate the video, first, you need to add it to the track. For that, take your mouse on the video, and select it by clicking the right button on your mouse. Keep holding the button to drag the video on the timeline. Remove your finger from the button after placing the clip on the track.
Right after the above step, you will get another message to help you decide whether you want to keep the resolution of the video to its original settings or match the media. Choose “Match to Media” for fast rendering.
However, if you’re a professional video editor, feel free to select the option that suits you the most.
Step 4: Rotate Your Video with Filmora
Double-click anywhere on the video that is already on the timeline.
You will see three tabs – “Video,” “Color,” and “Animation.” So choose the “Video” tab and click on the “Transform” option.
Once done, you will see three important options, which will help you rotate the video.
First, you will notice the “Rotate” option with an adjustment bar. This option will turn your video to different angles of your choice.
All you need to do is play with the adjustments by grabbing the “Round” knob-like button while keeping an eye on the preview window to see the results.
Just below “Rotate,” you will see the “Flip” option with “Horizontal” and “Vertical” mirror icons. Choosing any one of the icons will make your video mirror flip in horizontal or vertical directions.
The third option is “Scale” beneath the “Flip” option. Similar to the rotate option, this tool also has an adjustment bar. You can make adjustments to magnify or de-magnify the clip to fit the screen. Although this option isn’t mandatory, you can still use it if you find the need.
Now, click the “OK” button to apply rotation and return to the timeline.
Step 5: Save and Export Rotated Video to Your Widows or MAC
Here you will learn how to save the project and then export it. If you have already saved the project in the beginning, skip reading this part and directly hit the “Export” button.
Contrarily, you can also directly export your files without saving the project. But you won’t be able to make changes to the same project in the future as all source files will be lost. Therefore, saving the project and then exporting files is recommended.
So, if you’re done with step 4, save your project before going further.
You can go to the “File” tab, choose “Save Project,” and rename the video.
Rename your file and click on the “Save” button.
The new name will appear at the top of Filmora’s interface.
Lastly, click the “Export” button to save the file on your computer.
F 17
Part 2: Top 3 Free Video Rotators on Windows
No luck with finding free movie rotators for your Windows operating system? Don’t stress! These three AVI video rotators will solve your problem.
Free Video Flip and Rotate
This tool could satisfy your requirements if you’re looking for a core video rotator. As the name sounds, the Free Video Flip and Rotate is software by DVD Video Soft that allows you to modify the orientation of your videos easily. In other words, this is one of the easiest video rotators for Windows users, which is also free to download and use.
It has a simple interface with user-friendly options, which permits you to rotate your videos from different angles. Besides, you can also use this software for mirroring your clips. Moreover, you can save your project in various video formats, such as AVI.
Features
- Vertical flip
- Horizontal flip
- 180° video rotation
- 90° clockwise video rotation
- 90° counter-clockwise video rotation
- Vertical flip with 90° clockwise video rotation
- Horizontal flip with 90° counter-clockwise video rotation
Pros
- One-click results
- Easy to install and run
- Free and user-friendly software
- Does not contain ads or spyware
- Requires 40.50 MB of hard disk space
- Supports AVI and other video formats
- Supports XP, Windows 7, 8, 10, and 11 versions
Cons
- Unavailable for MAC users
- Lack of additional features, such as color correction, cropping, etc.
XMedia Recode
XMedia Recode is a free tool for Windows users. While the software is meant to convert videos into different formats, you can also use it for video rotation. Nevertheless, XMedia Recode has various other options, making it perfect for basic video editing.
Moreover, this software can convert unprotected Blue-rays/DVDs, create different chapters, import subtitle tracks, and many more. However, one of the best features of this video converter-cum-rotator is the video remux. That means you can convert the video container format without changing the original size.
Contrarily, XMedia Recode allows you to rotate and convert videos for countless devices, such as iPhone, iPad, Android, Xbox360, and more. But all this can be done only through Windows operating system. You can download this tool without any paid subscription. However, choose suitable processing for smooth installation, such as Windows 64bit, Windows 32bit, Vista, or XP SP3.
Features
- Blur
- Delogo
- Rotation
- Padding
- Denoise
- Cropping
- Image flip
- Swap U/V
- Clip speed
- Color curves
- Video fading
- Mirror effect
- Image stabilization
- Custom resolution
- Import 32 subtitle tracks
- Direct copy of video and audio stream into your desired format
Pros
- Free software
- Speedy conversion
- Fast batch processing
- Variety of video and audio features
- Works on Windows XP to Windows 10
- Supports 40+ video formats, including AVI
Cons
- A bit complex interface for new users
Altrasoft
Altrasoft is a small software for Windows to help rotate and convert your videos. The total size of the setup is just 971 KB.
This software is best for small video clips, which need to be rotated without wasting time. The program is free to download and use. However, the interface appears a bit old compared to new tools.
Also, unlike XMedia Recode, Altrasoft comes with limited options. So, if you only desire to rotate or flip your video and save it in the AVI or any other format, go ahead and download it.
Features
- Borders
- Zooming
- Rotation
- Color settings
- Audio formatting
- Video codec settings
- Audio codec settings
Pros
- Free to use
- Ideal for short videos
- Extremely light software
- Simple rotation options
- Rotation angle adjustments
Cons
- Outdated interface
- Lack of customer support
Part 3: Top 3 Free Video Rotators on MAC
Have you already lost your MAC storage on downloading some incompetent video rotators which claim to support AVI files? You can try these three video rotators for MAC, which are free and compatible with AVI video formats.
Kdenlive
When it comes to free video rotators for MAC, it gets quite challenging to find the right tool. As a MAC OS user, you are left with limited options, especially when trying to rotate videos and save them in AVI format. However, Kdenlive appears to be a problem-solver.
Technically, Kdenlive is a free open source, cross-platform, non-linear video editor with a variety of features. Nevertheless, its Mac version works excellent compared to Windows or Linux.
You can use this software to rotate videos and save them in AVI or any other available format. Also, this program has an attractive interface with a rich library of transition templates and fonts.
Besides, from the video rotation point of view, Kdenlive allows you to turn your videos at any angle.
Features
- Rotate and zoom
- Waveform
- Histogram
- Audio meter
- Vectorscope
- Proxy editing
- Text animation
- Keyframe interpolation
- Color grading and correction
- RGB parade Multi-track video editing
- Custom shortcuts and interface layouts
- Easy line-spacing and letter-spacing adjustment
- Supports seven video formats, including AVI, MOV, HD, UHD, HDV, WEBM, and MP4
Pros
- Free to use
- Fast rendering
- Automatic backup
- Easy video rotation
- Regular bugs fixation
- Cross-platform availability
- Dozens of professional effects and transitions
Cons
- Extremely unstable on Windows OS
IMovie
Want to get the job done quickly? Try iMovie in your MAC!
iMovie is a built-in video editing software to help create professional-level videos from your system. But you can also download iMovie if you can’t find it in the system.
Not just videos, but this software also allows you to cut and edit music without changing the files. Many filmmakers also love the tool, as they can add graphics to their projects to get remarkable results.
But that doesn’t stop new users from getting all the benefits the pros get with this software. How? Because it has a pretty straightforward look. You don’t need to click a hundred times to apply a simple effect, as all the options are right in front of you.
And when it’s about rotating a video in AVI format, feel free to rely on iMovie, as it supports several video file formats.
Features
- Video rotation and cropping
- Music and photo import
- 4K and HD video support
- Video transitions and effects
- Pre-installed backdrops and themes
- Supports working on multiple projects
Pros
- Free for MAC users
- Easy to learn
- User-friendly tools
- Extensive audio library
- Excellent movie templates
- Ideal Chroma-keying options
Cons
- Requires high storage space
- Lacks tagging and motion tracking
OpenShot
If complex video rotators make you ill, give OpenShot a shot!
It’s a free video editor which is incredibly simple to use. Most professionals around the world appreciate this powerful editing tool. Also, new users can do wonders by simply playing and understanding the options for a few minutes.
So if you plan to use OpenShot Video Editor , you would be glad to know that you can add animations, watermarks, and numerous other effects through this program. Plus, you can also enjoy audio editing within the same platform.
Although OpenShot can be installed for free on multiple operating systems, it still works best on MAC. So there’s no way to ignore this tool for rotating videos in MAC, especially when the options are limited.
Features
- Video rotation and resizing
- Drag and drop support
- Unlimited layers/tracks
- Color correction and settings
- 3D animated effects and titles
- Robust curve-based animations
- Video transitions and real-time previews
- Clip scaling, snapping, cutting, and trimming
- Image overlays, compositing, and watermarks
- Supports AVI and other audio, video, and image formats
Pros
- Free to use
- Easy editing
- No watermarking
- Available in 70+ languages
- Regular updates for improvement
- Stable performance on MAC systems
Cons
- Limited editing options for professionals
- Not suitable for old Windows OS versions
Part 4: Top 3 Free Video Rotators for Android
If using a PC to rotate your videos makes you lazy, you can change the angles of your clips through your Android phone.
So here are the three best video editing apps for Android lovers, which are free to use.
Rotate Video FX
Rotate Video FX is developed by Bizo Mobile. Despite being a small company, it has proven its mettle by offering several apps to its users in more than 100 countries. The firm is also specialized in developing mobile games for multiple platforms.
However, Rotate Video FX is one of its best creations in the world of video rotating mobile applications. This app allows you to choose the video you want to turn directly from your phone’s gallery.
And once the clip has been uploaded, you can rotate it to three different degrees by just touching the “Rotate” button.
Features
- Video rotation to 90, 180, and 270-degree angles
- Clear preview screen with no overlapping options
- Simple play, rotate, and import in a single attempt
- Social media sharing button for quick sending of media
- Automatically saves the rotated video to your phone’s gallery
Pros
- The app is free to use
- More than 1 million downloads
- Works on all android versions
Cons
- No frequent updates
- Not a user-friendly app
- Changes video resolution without permission
Smart Video Rotate and Flip
Clogica is the brainchild behind Smart Video Rotate and Flip video rotator for android. The company has been actively working in app development since 2014. And currently, it has more than 25 apps on the list, with 50 million total users.
Smart Video Rotate and Flip is a simple and smart tool to flip and rotate videos directly from your android device. So if you’re no longer interested in using desktop applications to do the job, here’s your chance to rotate your clips through your mobile phone or tablet.
This app offers a simple way to perform multiple flips and rotations simultaneously. The application works by re-encoding the media or by using the fast mode.
Features
- Allows video rotation and flips on different angles
- The output folder and renaming options
- Big preview screen and fast rendering
- Video recording directly from the application
- Permits you to make a video library within the app
Pros
- Free application
- Easy interface
- The app doesn’t change the video quality
- Allows you to mirror flip and rotate videos
- The latest update makes the app work faster
Cons
- The app contains ads
- Files become large after rotation
- Videos can only be saved to the phone’s internal memory
Rotate Video FREE
Rotate Video FREE is designed by LKR Studio. From 2014 till now, this app development company has produced seven mobile applications in the “Tools” category. And among its entire portfolio, the Rotate Video FREE app is one of the most popular creations.
Rotate Video FREE is a highly light and easy video rotator for Android devices. It has a simple interface with two main options: ‘ Pick Video’ to select the clip from your phone’s gallery. Then, the “Turn Left” button helps you rotate the video in multiple directions.
Features
- Rotates video to 90, 180, and 270 degrees
- HD video export quality
- Hassle-free rotate options
Pros
- Free of cost app
- Speedy video rotation process on large files
- Saves video directly to your phone’s memory
- Video rotation without affecting the resolution
Cons
- No mirror flipping
- The free version contains advertisements
- Hard to find the location of the saved videos
Part 5: Top 3 Free Video Rotators for iPhone
Are you struggling to find a good video rotator for iPhone? Here’s the list of three best iPhone apps to help you rotate your movies using your smartphone in AVI format.
Video Rotate + Flip Video Easy
Finding a video rotator for iPhone is a bit difficult, as most valuable applications comes after paying the price. But Video Rotate + Flip Video Easy app is totally free to download and use.
The app includes all the basic functions to rotate and flip videos in different angles. After downloading the app, you will notice a simple interface with seven options. So all you need to do is to import your video from the phone’s gallery, use the options to rotate the video, and save the rotated video in your phone.
The app is also available in different languages, including German, French, Japanese, English, Portuguese, Simplified Chinese, Spanish, and Russian.
Features
- Vertical mirror flipping
- Horizontal mirror flipping
- Frame wise video rotation
- 90° degrees clockwise and counter clockwise rotations
- 180° degrees clockwise and counter clockwise rotations
Pros
- Fast video conversion
- Small app size (only 16.1 MB)
- Available in multiple languages
- Supports iOS 11.0 or later versions
- The app is free with no watermarks
- You can install the app on your iPad
- Rotated videos can be played on all media players
- It exports the rotated video directly to your camera roll
Cons
- You need to purchase the app to remove advertisements
RFV
Here’s another free app to rotate and flip your videos. You can download RFV on both Android and iPhone smartphones. However, the iPhone version of the app works flawlessly. In fact, the ratings on both platforms also confirm that there are more happy iPhone users of this app than Android users.
RFV is a quick solution to correct your video orientation. So, if you have recorded the video through your iPhone at the wrong angle, you can use the app to flip and turn the clip’s position without much trouble. And you can do all of this just by selecting the options at the bottom of the app’s interface.
Features
- 90° degrees rotations
- Quick resetting
- Horizontal and vertical mirror flipping
- Turn photos into videos
- Video podcast
Pros
- RFV is a free video rotating app
- Easy installation on iPad
- Supports iOS 12.0 or later versions
- Direct loading of clip on the app from camera roll
Cons
- Large app size (41.7 MB)
- Unavailable for older iPhone versions
- It does not support file sizes above 200 MB
- Problems with saving the video on Android phones
Video Rotate – Flip Video
Video Rotate – Flip Video is the third in line when it comes to free video rotators for iPhones. The tool has pretty straightforward options regarding 90-degree clockwise and counter-clockwise rotations. Moreover, you can also play with different angles to adjust the orientation from 0 to 270 degrees.
Once you’re done rotating your video, you can save the new clip directly to your iPhone’s camera roll. At the same time, this app also allows you to share the rotated video on various social and communication platforms.
Features
- The app is specifically designed to rotate videos
- Uncomplicated app interface
- Live video preview
Pros
- Free and fast video rotator app for iPhone
- You can also install the app on an iPad
- Compatible with iOS 10.0 or later versions
Cons
- The app shows advertisements until you buy it
- No reset option – you have to start all over again
Part 6: Top 3 Free Video Rotators Online
Don’t want to fill your device’s storage with software? Well! You can rotate videos online for free in AVI format with ease. Here are the 3 best online video rotating tools.
Flixier
Flixier is a website that helps you create and edit videos through your internet browser. You can upload multiple videos or photos to add effects, text, and many more characteristics. This online platform allows you to add keyframes and transitions to your clips. Likewise, you can adjust your videos’ positioning, scaling, and resizing.
So can you rotate videos on Flixier?
Yes, you can and without paying a cent. The website offers a variety of options to rotate your clips. All you need to do is select the transform option and choose the rotation or flip option to see the results. And when you’re done rotating the video, simply export the file to your computer.
On the other hand, if you think you want to use Flixier frequently, you are required to buy a premium monthly or annual subscription. But until then, you can enjoy all the great traits for free.
Features
- Video rotation (90 degrees left and right)
- Video flipping (horizontal and vertical)
- Robust timeline
- 50+ transitions
- Green screen
- Live collaboration
- Screen recording
- Webcam recording
- Video effects
- Color correction
- Built-in media stock libraries
Pros
- Flixier is free
- No sign-up required
- Superfast rendering
- Variety of video templates
- Unlimited audio and video tracks
- Allows AVI media import and export
- Live video, microphone, and screen recording
Cons
- You need to purchase paid plans for team collaboration
- The free plan comes with limited projects, downloads, and storage
Clideo
Clideo is a great online tool that allows you to create and edit images and videos in one place. This web-based program comes with a variety of features, including video rotation and flipping.
To make your videos unique, Clideo permits you to add text and music to attract the audience. Moreover, the program supports different video formats, like AVI, MPG, MP4, WMC, MOV, VOB, and more.
You can do everything right from your internet browser without installing the application on your computer. All video files that you import and export on Clideo are well-protected.
As a user, you can select different resolutions, formats, and other features to make exciting videos within a few clicks. And apart from video rotation, the tool offers numerous beneficial options, such as reverse, speed, flip, loop, stop motion, and even memes creation.
Features
- Easy video flipping and rotation
- DPI conversion
- Video compressing
- Speed adjustment
- Slideshow creation
- Filters and presets
- Audio and video cutting
- Video and audio merging
- Subtitles and personalized text
- Color correction and fading effects
Pros
- All basic features are free to use
- Best for beginners
- Non-technical interface
- Supports various video formats (including AVI)
Cons
- This online tool lacks design elements and themes
- You need to buy the premium version to use Clideo daily
Rotate My Video.Net
Last but not the least, the Rotate My Video.Net is a free online tool designed for video rotation only. So, if your video is upside down or shot in the wrong direction, feel free to use this tool.
This web-based video rotator allows you to share the video to different social platforms directly from the website. Contrarily, you also save the rotated clips on your system.
Another interesting fact about this tool is that it has no limit. That means you can upload videos on the interface and rotate them as often as possible. However, the tool does not offer other features to groom your videos.
Moreover, the developers claim that the videos are deleted automatically from the server in a few hours. Therefore, your videos stay private and safe.
Features
- 90 degrees clockwise and counter-clockwise rotation
- Video ratio adjustment options (4:3 and 16:9)
- Band color option to fill the empty black space with colors
Pros
- Entirely free – no monthly or yearly subscription required
- Easy and quick process
- Supports AVI video files
- Video quality is not disturbed after rotation
Cons
- Lacks video flipping option
- It does not include any other features
Part 7: Bottom Line
Despite a long list of free video editors, finding the right one that simplifies the task without any trouble is hard. But with these top 16 best free AVI video rotators, you can flip and rotate videos in a couple of minutes. You can find the most suitable rotator Windows, MAC, iPhone, and Android. Or, you can use the online platforms to enjoy rotations at different angles. However, regardless of device or operating system, each rotator has pros and cons. So don’t hesitate to opt for the tool that fulfills all your needs.
Part 8: FAQs
Q1. How do I rotate a video for free?
You can rotate a video for free by downloading a free video rotator according to your operating system. You can also look for online tools for video rotation. Likewise, you can also install Android and iPhone apps to rotate clips from your phone.
Q2. What software can rotate video?
There are many software that helps you rotate videos. However, most of them are paid. So, if you’re looking for some free video rotators on MAC or Windows, you can download Filmora. On the other hand, you can download programs like Altrasoft, XMedia Recode, and Free Video Flip and Rotate for Windows.
Q3. How can I rotate a video without losing quality?
Not all video rotators can promise high-quality results. So if you want to rotate your clip without damaging the quality, you must choose top-notch video editors, like Filmora or iMovie.
Q4. How do you rotate an AVI file on a MAC?
You need to download video rotators, such as Kdenlive, iMovie, or OpenShot, to rotate your AVI files for free. But, you can choose Filmora for MAC to flip and turn your AVI videos to different angles for exceptional results.
Q5. How do I rotate a video online?
To rotate an AVI video online, you need to be extremely picky, as even most online tools don’t support AVI files. But online video editors like Flixier, Clideo, and RotateMyVideo.Net allow you to rotate AVI videos easily.
Also read:
- New In 2024, The Ultimate Guide to Virtualdub Features, Pros, and Cons, Plus Top Alternatives
- New In 2024, The Ultimate Guide to Free Video Trimming on Windows 10
- New Download Filmora Free Safe and Virus-Free Torrent Guide for 2024
- Pinnacle Studio Not Working? Try These Mac Alternatives Instead for 2024
- New Make a Lasting Impression 9 Top Intro Creators for Videos for 2024
- New Make a Statement 10 Best Animated Text Generators for Eye-Catching Content
- Updated Intro Mastery Top Gaming Intro Creators for Windows and Mac for 2024
- Updated Free Audio Editing Software for M4A Files Top 5 for 2024
- The Crème De La Crème of 4K Unforgettable Video Clips for 2024
- Updated 2024 Approved Resize Video in Minutes A Step-by-Step Guide
- New 2024 Approved Animation Mastery 8 Elite Software Options for Mac and Windows Users
- New Revolutionize Your Edits Top Premiere Pro Transition Tools for 2024
- New In 2024, The Best Zero-Cost Video Editors for Newcomers Desktop, Online, Mobile
- New Unlock Mac Video Editing VN Video Editor and Other Top Options
- Updated 2024 Approved Get Steady The Ultimate Guide to Video Stabilization in Adobe Premiere Pro
- Updated 2024 Approved Top Video Editors with Smart Auto-Reframe
- New In 2024, Crop, Trim, and Perfect Mastering Video Editing with Avidemux
- New Final Cut Pro Tutorial Adding Picture-in-Picture Effects to Your Videos for 2024
- 2024 Approved Today We Will Take a Look at the Best Motion Tracking Video Editing Apps for iOS & Android Devices
- New In 2024, How to Choose the Right YouTube Video Converter for MP4
- New Top-Rated Android Apps to Download Now for 2024
- New The Aspect Ratio Adjustment Tool in Final Cut Pro A Comprehensive Guide for 2024
- New Top 10 Free Whiteboard Video Makers for Windows and Mac for 2024
- New In 2024, No-Watermark Video Cutting Top 7 Free Tools
- Premiere Pro Compatibility What You Need to Know About System Requirements for 2024
- New Best of the Bunch Free Video Editors for Ubuntu Users for 2024
- New 2024 Approved 3 Steps to Add a Countdown Timer in Final Cut Pro X
- Updated 2024 Approved AVS Video Editor A Detailed Look at Its Features and Performance
- Updated In 2024, What You Should Know About M4R Files Before Converting Them
- Updated Simplify Video Editing on Mac with MKVtoolnix for 2024
- New Top-Rated Free Online Invitation Video Editors and Makers
- New The Ultimate Guide to Stop Motion on Instagram From Concept to Viral Sensation for 2024
- A Detailed VPNa Fake GPS Location Free Review On Nubia Z50 Ultra | Dr.fone
- Simple Solutions to Fix Android SystemUI Has Stopped Error For Itel S23+ | Dr.fone
- In 2024, 4 Quick Ways to Transfer Contacts from Apple iPhone SE (2022) to iPhone With/Without iTunes | Dr.fone
- How to Transfer Data After Switching From Infinix Smart 8 to Latest Samsung | Dr.fone
- Best Pokemons for PVP Matches in Pokemon Go For Oppo A1 5G | Dr.fone
- Updated In 2024, Is It That Easy to Make My Own Animated Character?
- How To Get Out of Recovery on iPhone 6 Plus? | Dr.fone
- In 2024, 5 Ways to Move Contacts From Asus ROG Phone 7 to iPhone (13/14/15) | Dr.fone
- How to Rescue Lost Messages from Nubia Red Magic 8S Pro
- Fake Android Location without Rooting For Your Tecno Phantom V Fold | Dr.fone
- Factory Reset Apple iPhone 12 mini | Dr.fone
- In 2024, How to Detect and Remove Spyware on Motorola Moto G04? | Dr.fone
- In 2024, Network Locked SIM Card Inserted On Your Lava Blaze 2 Phone? Unlock It Now
- How to Change/Add Location Filters on Snapchat For your Samsung Galaxy A54 5G | Dr.fone
- Simple ways to get lost videos back from Vivo S17 Pro
- In 2024, How Can You Transfer Files From Poco M6 Pro 4G To iPhone 15/14/13? | Dr.fone
- 2024 Approved 10 Must Watch Netflix Cartoon Series For You
- How Can I Create My Pokemon Overworld Maps On Apple iPhone 8? | Dr.fone
- Top 15 Augmented Reality Games Like Pokémon GO To Play On Nubia Z50 Ultra | Dr.fone
- 8 Best Apps for Screen Mirroring Motorola Moto G13 PC | Dr.fone
- In 2024, Top 10 Telegram Spy Tools On Realme 11 5G for Parents | Dr.fone
- The Best iSpoofer Alternative to Try On Huawei Nova Y71 | Dr.fone
- How to recover deleted photos from Android Gallery after format on Oppo Find X6
- 3 Easy Ways to Factory Reset a Locked Apple iPhone XS Without iTunes | Dr.fone
- In 2024, Does Airplane Mode Turn off GPS Location On Itel P55+? | Dr.fone
- iPhone 15 Data Recovery – An Infographic to Conquer iPhone Data Loss | Stellar
- Undelete lost messages from Motorola Moto G73 5G
- How to Intercept Text Messages on Samsung Galaxy M54 5G | Dr.fone
- 2024 Approved Final Cut Pro X Productivity Hacks Top 40 Keyboard Shortcuts
- How to Reset a Poco C65 Phone that is Locked?
- Title: Updated Join Videos Without Restrictions 7 Best Watermark-Free Apps for 2024
- Author: MdadeLe
- Created at : 2024-04-28 15:03:56
- Updated at : 2024-04-29 15:03:56
- Link: https://smart-video-editing.techidaily.com/updated-join-videos-without-restrictions-7-best-watermark-free-apps-for-2024/
- License: This work is licensed under CC BY-NC-SA 4.0.
