
:max_bytes(150000):strip_icc():format(webp)/GettyImages-77744394-e5f79596e54a4ba6a914eed31be7efc4.jpg)
Updated In 2024, Discover the Art of Bokeh Best Mobile Editing Apps
Discover the Art of Bokeh: Best Mobile Editing Apps
Best Bokeh Effects Apps in 2024

Liza Brown
Mar 27, 2024• Proven solutions
It’s no secret that DSLR cameras can help you achieve this blurred effect, but now there are dozens of apps that allow you to get the same outcome without spending hundreds on a new camera. This article will provide you with the 10 best Bokeh apps for iPhones and Androids, based on our own testing, so that you can start editing right away.
- Part 1: What is the Bokeh Effect?
- Part 2: Best Apps to Achieve the Bokeh Effect
- Part 3: What is the Bokeh Effect?
Part 1: What is the Bokeh Effect and Why Should I Be Using it?
The word “Bokeh”or “boke” refers to the Japanese concept of “blur.” It is, in its simplest form, a style of photography where one object is the primary focus, and everything else is strategically blurred.
Using the Bokeh effect is an excellent way to separate the focal point of your photo from non-focal points. It not only serves the purpose of highlighting the focus of the image, but can also help when you’re looking to get rid of an unpleasant or unwanted background. The blurred background is meant to keep your focal point at the absolute center of your audience’s attention.
Part 2: Top 10 Best Apps to Achieve the Bokeh Effect for iOS and Android
As mentioned, there are other ways to achieve the Bokeh effect without an expensive and often fidget DSLR camera. The following apps have been deemed the best based on a variety of characteristics which will be mentioned below.
1. Focos -iOS - FREE
The Focos app for iPhones is a free resource that uses computational photography and light-field camera settings to help you achieve the perfect blur. It offers users the option to apply the Bokeh effect to both the background and foreground of your image, with a variety of options for adjusting size and transparency.
To create the Bokeh effect in Focos:
- Download App via App Store and allow it access to your camera and camera roll;
- Import the image you wish you use, or take a photo using the app’s camera;
- Adjust your focal point and transparency of the blur using their sliding bar feature;

- To add more Bokeh effects, select the star Effect feature in the bottom right of the screen.

- Once you’re happy with the effect, this app allows you to save to your camera roll or share to other apps, including Instagram.
2. Photo Editor Pro - Android - FREE

Photo Editor Pro is a free application that allows users to achieve the Bokeh effect with 4 different camera modes. Users can also adjust the transparency of the bokeh effect chosen.
To create the Bokeh effect in Photo Editor Pro:
- Download the app and allow access to camera and camera roll;
- Select your desired image either via camera or camera roll;
- Choose between a variety of backgrounds and blending tools and adjust using the apps adjustable features, and download to camera roll or upload to a third-party app.
3. Auto Blur Background - Android - FREE

The Auto Blur Background app for iOS and Android is another free resource for creating an image with the Bokeh effect. The app allows users to select the size and desired amount of blur for your background, giving the user a lot of control over the outcome of their photo. It enables users to add overlays in addition to the bokeh effect to enhance the overall outcome.
To create the Bokeh effect in Auto Blur Background app:
- Import or take your photo on the Auto Blur Background application;
- Edit as desired using a variety of tools offered at the bottom of your screen, and add bokeh effect to the video;
- To export, select the Share icon in the bottom right hand corner;
- From this step you can either import directly to Instagram, or export to camera roll. If exported to camera roll, open Instagram app and add a new story, select photo from camera roll and hit add to story!
4. SnapSeed- iOS & Android - FREE
SnapSeed is one of the ultimate editing apps to help you achieve the Bokeh effect on iOS and Android devices. This app, owned by Google, provides an array of advanced editing tools to help improve your photography and editing capabilities.
To create the Bokeh effect in SnapSeed:
- Download the app in the app store and allow access to camera and camera roll;
- Import or take desired image and choose between a variety of filters;

- After selecting your filter, choose Tools and select the Lens Blur Option , and adjust your blur strength accordingly**;**

- Export and save to camera roll or upload to a third-party site.
5. AfterFocus -iOS & Android - $0.99
AfterFocus helps users achieve the Bokeh effect by letting you define the focal area and adjusting the blur of the surrounding regions.

To create the Bokeh effect in AfterFocus:
- Download the app and allow the app access to your camera and camera roll, and select the image given your options (camera, camera roll);
- Once you’ve selected your image, the app will prompt you to select whether you want to manually select the focus area or if you want their software to detect it for you;
- Several blurring tools will appear, use the focus selector tool to select the regions in which you’d like your image to be focused;
- Then use the background selector tool to select the background of your photo, and choose between lens, motion and zoom blur
6. Real Bokeh -iOS & Android - $2.99
Real Bokeh allows users on both the iPhone and Android to add Bokeh light features to their photos. It includes 36 Bokeh shapes, 33 light leak effects, 23 image filters and much more.

To create the Bokeh effect in Real Bokeh:
- Download the app and allow the app access to your camera and camera roll and select the image given your options (camera, camera roll);
- Choose between different filters, shapes and effects to add to your image;
- Adjust the transparency of your bokeh effect on the sliding bar provided by the app, and export to camera roll or to a third party site.
7. Bokeh Lens -iOS - $0.99
This app, designed for the iPhone, is a magnifying glass for photos, allowing users to create their own Bokeh effect without the use of a DSLR camera. The Bokeh level on this app is also customizable, making it great if you’re looking to get detailed.

To create the Bokeh effect in Bokeh Lens:
- Download the app and allow the app access to your camera and camera roll, and select the image given your options (camera, camera roll);
- Using the image below, follow the focus area tools, adjustable bokeh level and more to achieve your perfect photo, and then export to camera roll or third party app
8. Blur Photo - iOS & Android - FREE
Blur photo uses a one click method to achieve auto blurred backgrounds to help you achieve the Bokeh effect. It also allows you to manually adjust the settings to your own liking. Users can increase or decrease the blur effect, add filters to photos, and add emojis and text.

To create the Bokeh effect in Blur Photo:
- Download the app and allow the app access to your camera and camera roll, and select the image given your options (camera, camera roll);
- You are given a variety of image sizing options, once completed, select Blur, from here you are able to adjust the size and amount of blur and your image is blurred by using your finger to glide over desired areas;
- Upon completion, export and save to camera roll or third-party app.
9. PhotoDirector -iOS & Android - FREE
PhotoDirector is an app available on the iPhone and Android that offers extensive editing options, including the Bokeh effect. You can add animated overlays, animated decorations, sky placement, photo retouching, and much, much more.
To create the Bokeh effect in PhotoDirector:
- Download the app and allow the app access to your camera and camera roll and then select the image given your options (camera, camera roll) ;
- To find and utilize the Bokeh effect, click the Live button, from there, choose where you want the image to focus, which Bokeh effects you want and how animated you want them to be;
- Upon completion, export and save to camera roll or third-party app.
10. Tadaa SLR - iOS - $3.99
Although this app is the most expensive on the list, it also offers some of the best depth-of-field and bokeh effects. It is ultra-precise and easy to navigate.

To create the Bokeh effect in Tadaa SLR:
- Download the app and allow the app access to your camera and camera roll, and then select the image given your options (camera, camera roll);
- Once image is imported, select the Mask tool, which you can use to select the portion of the image you’d like to keep in focus;
- You may then adjust the aperture, range, gloss and highlights via the modification tools provided at the bottom of the screen.
- Adjust to your liking and export!
Part 3: Creating the Bokeh Effect Using the Portrait Mode Function on Your iPhone
If using a third-party app seems like too much effort, or you don’t find the app that achieves the exact blur to focus ratio you’re looking for, consider using the Portrait Mode feature available on newer iPhone models.
Portrait mode is a camera function that allows users to create the depth of field effect we know as Bokeh. When used, the focal image will be crisp and sharp, while the background will be blurred nicely so as to not cause a distraction to the focal point.
To achieve the Bokeh effect through Portrait Mode, you must:
- Open up your camera app and along the bottom of your screen find and select Portrait, and select from a variety of portrait mode options, including Natural light, studio light, contour light, stage light, stage light mono, high key light mono;

- Portrait mode will then allow you to choose your focal point, and do the rest of the work when it comes to blurring the background to create the Bokeh effect;
- The different modes offered will allow users to achieve different types of blur.
Note: If you want to add the bokeh effect to video on the desktop computer, you should try Wondershare Filmora , which provides tilt-shift circle and tilt-shift linear effects for creating the bokeh effect, as well as some bokeh effect overlay. For more details, you can check how to add bokeh effects to the video with Filmora.


Takeaway
Using the Bokeh effect can add a layer to your photography that takes it to the next level. While there are a variety of tools you can use to achieve this, I have covered the 10 best apps for iOS and Android users to accomplish Bokeh. And if third-party apps aren’t for you, don’t forget that iPhone user can also use Portrait Mode to achieve a great Bokeh outcome.
Liza Brown
Liza Brown is a writer and a lover of all things video.
Follow @Liza Brown
Liza Brown
Mar 27, 2024• Proven solutions
It’s no secret that DSLR cameras can help you achieve this blurred effect, but now there are dozens of apps that allow you to get the same outcome without spending hundreds on a new camera. This article will provide you with the 10 best Bokeh apps for iPhones and Androids, based on our own testing, so that you can start editing right away.
- Part 1: What is the Bokeh Effect?
- Part 2: Best Apps to Achieve the Bokeh Effect
- Part 3: What is the Bokeh Effect?
Part 1: What is the Bokeh Effect and Why Should I Be Using it?
The word “Bokeh”or “boke” refers to the Japanese concept of “blur.” It is, in its simplest form, a style of photography where one object is the primary focus, and everything else is strategically blurred.
Using the Bokeh effect is an excellent way to separate the focal point of your photo from non-focal points. It not only serves the purpose of highlighting the focus of the image, but can also help when you’re looking to get rid of an unpleasant or unwanted background. The blurred background is meant to keep your focal point at the absolute center of your audience’s attention.
Part 2: Top 10 Best Apps to Achieve the Bokeh Effect for iOS and Android
As mentioned, there are other ways to achieve the Bokeh effect without an expensive and often fidget DSLR camera. The following apps have been deemed the best based on a variety of characteristics which will be mentioned below.
1. Focos -iOS - FREE
The Focos app for iPhones is a free resource that uses computational photography and light-field camera settings to help you achieve the perfect blur. It offers users the option to apply the Bokeh effect to both the background and foreground of your image, with a variety of options for adjusting size and transparency.
To create the Bokeh effect in Focos:
- Download App via App Store and allow it access to your camera and camera roll;
- Import the image you wish you use, or take a photo using the app’s camera;
- Adjust your focal point and transparency of the blur using their sliding bar feature;
- To add more Bokeh effects, select the star Effect feature in the bottom right of the screen.
- Once you’re happy with the effect, this app allows you to save to your camera roll or share to other apps, including Instagram.
2. Photo Editor Pro - Android - FREE
Photo Editor Pro is a free application that allows users to achieve the Bokeh effect with 4 different camera modes. Users can also adjust the transparency of the bokeh effect chosen.
To create the Bokeh effect in Photo Editor Pro:
- Download the app and allow access to camera and camera roll;
- Select your desired image either via camera or camera roll;
- Choose between a variety of backgrounds and blending tools and adjust using the apps adjustable features, and download to camera roll or upload to a third-party app.
3. Auto Blur Background - Android - FREE
The Auto Blur Background app for iOS and Android is another free resource for creating an image with the Bokeh effect. The app allows users to select the size and desired amount of blur for your background, giving the user a lot of control over the outcome of their photo. It enables users to add overlays in addition to the bokeh effect to enhance the overall outcome.
To create the Bokeh effect in Auto Blur Background app:
- Import or take your photo on the Auto Blur Background application;
- Edit as desired using a variety of tools offered at the bottom of your screen, and add bokeh effect to the video;
- To export, select the Share icon in the bottom right hand corner;
- From this step you can either import directly to Instagram, or export to camera roll. If exported to camera roll, open Instagram app and add a new story, select photo from camera roll and hit add to story!
4. SnapSeed- iOS & Android - FREE
SnapSeed is one of the ultimate editing apps to help you achieve the Bokeh effect on iOS and Android devices. This app, owned by Google, provides an array of advanced editing tools to help improve your photography and editing capabilities.
To create the Bokeh effect in SnapSeed:
- Download the app in the app store and allow access to camera and camera roll;
- Import or take desired image and choose between a variety of filters;
- After selecting your filter, choose Tools and select the Lens Blur Option , and adjust your blur strength accordingly**;**
- Export and save to camera roll or upload to a third-party site.
5. AfterFocus -iOS & Android - $0.99
AfterFocus helps users achieve the Bokeh effect by letting you define the focal area and adjusting the blur of the surrounding regions.
To create the Bokeh effect in AfterFocus:
- Download the app and allow the app access to your camera and camera roll, and select the image given your options (camera, camera roll);
- Once you’ve selected your image, the app will prompt you to select whether you want to manually select the focus area or if you want their software to detect it for you;
- Several blurring tools will appear, use the focus selector tool to select the regions in which you’d like your image to be focused;
- Then use the background selector tool to select the background of your photo, and choose between lens, motion and zoom blur
6. Real Bokeh -iOS & Android - $2.99
Real Bokeh allows users on both the iPhone and Android to add Bokeh light features to their photos. It includes 36 Bokeh shapes, 33 light leak effects, 23 image filters and much more.
To create the Bokeh effect in Real Bokeh:
- Download the app and allow the app access to your camera and camera roll and select the image given your options (camera, camera roll);
- Choose between different filters, shapes and effects to add to your image;
- Adjust the transparency of your bokeh effect on the sliding bar provided by the app, and export to camera roll or to a third party site.
7. Bokeh Lens -iOS - $0.99
This app, designed for the iPhone, is a magnifying glass for photos, allowing users to create their own Bokeh effect without the use of a DSLR camera. The Bokeh level on this app is also customizable, making it great if you’re looking to get detailed.
To create the Bokeh effect in Bokeh Lens:
- Download the app and allow the app access to your camera and camera roll, and select the image given your options (camera, camera roll);
- Using the image below, follow the focus area tools, adjustable bokeh level and more to achieve your perfect photo, and then export to camera roll or third party app
8. Blur Photo - iOS & Android - FREE
Blur photo uses a one click method to achieve auto blurred backgrounds to help you achieve the Bokeh effect. It also allows you to manually adjust the settings to your own liking. Users can increase or decrease the blur effect, add filters to photos, and add emojis and text.
To create the Bokeh effect in Blur Photo:
- Download the app and allow the app access to your camera and camera roll, and select the image given your options (camera, camera roll);
- You are given a variety of image sizing options, once completed, select Blur, from here you are able to adjust the size and amount of blur and your image is blurred by using your finger to glide over desired areas;
- Upon completion, export and save to camera roll or third-party app.
9. PhotoDirector -iOS & Android - FREE
PhotoDirector is an app available on the iPhone and Android that offers extensive editing options, including the Bokeh effect. You can add animated overlays, animated decorations, sky placement, photo retouching, and much, much more.
To create the Bokeh effect in PhotoDirector:
- Download the app and allow the app access to your camera and camera roll and then select the image given your options (camera, camera roll) ;
- To find and utilize the Bokeh effect, click the Live button, from there, choose where you want the image to focus, which Bokeh effects you want and how animated you want them to be;
- Upon completion, export and save to camera roll or third-party app.
10. Tadaa SLR - iOS - $3.99
Although this app is the most expensive on the list, it also offers some of the best depth-of-field and bokeh effects. It is ultra-precise and easy to navigate.
To create the Bokeh effect in Tadaa SLR:
- Download the app and allow the app access to your camera and camera roll, and then select the image given your options (camera, camera roll);
- Once image is imported, select the Mask tool, which you can use to select the portion of the image you’d like to keep in focus;
- You may then adjust the aperture, range, gloss and highlights via the modification tools provided at the bottom of the screen.
- Adjust to your liking and export!
Part 3: Creating the Bokeh Effect Using the Portrait Mode Function on Your iPhone
If using a third-party app seems like too much effort, or you don’t find the app that achieves the exact blur to focus ratio you’re looking for, consider using the Portrait Mode feature available on newer iPhone models.
Portrait mode is a camera function that allows users to create the depth of field effect we know as Bokeh. When used, the focal image will be crisp and sharp, while the background will be blurred nicely so as to not cause a distraction to the focal point.
To achieve the Bokeh effect through Portrait Mode, you must:
- Open up your camera app and along the bottom of your screen find and select Portrait, and select from a variety of portrait mode options, including Natural light, studio light, contour light, stage light, stage light mono, high key light mono;
- Portrait mode will then allow you to choose your focal point, and do the rest of the work when it comes to blurring the background to create the Bokeh effect;
- The different modes offered will allow users to achieve different types of blur.
Note: If you want to add the bokeh effect to video on the desktop computer, you should try Wondershare Filmora , which provides tilt-shift circle and tilt-shift linear effects for creating the bokeh effect, as well as some bokeh effect overlay. For more details, you can check how to add bokeh effects to the video with Filmora.
Takeaway
Using the Bokeh effect can add a layer to your photography that takes it to the next level. While there are a variety of tools you can use to achieve this, I have covered the 10 best apps for iOS and Android users to accomplish Bokeh. And if third-party apps aren’t for you, don’t forget that iPhone user can also use Portrait Mode to achieve a great Bokeh outcome.
Liza Brown
Liza Brown is a writer and a lover of all things video.
Follow @Liza Brown
The Only Guide You’ll Need to Learn About Wav Converter
The Only Guide You’ll Ever Need to Learn About Wav Converter
An easy yet powerful editor
Numerous effects to choose from
Detailed tutorials provided by the official channel
Nowadays, people are more addicted to making reels, short videos, YouTube shorts, etc. This is where the WAV converter comes in.
It is the most versatile audio format that is compatible with almost all devices. WAV audio format is very useful for digital content creators. So, without any further ado, let’s dive into detailed facts and benefits of WAV audio format:

In this article
01 [Basic Knowledge About the WAV Format](#Part 1)
02 [The Best 6 Fast and Easy WAV Converter Online Free ](#Part 2)
03 [5 Quick Ways to Convert MP4 to WAV Audio Files Online and Offline](#Part 3)
04 [5 Best YouTube to WAV Converter](#Part 4)
Part 1 Basic Knowledge About the WAV Format
01What is a WAV file?
WAV is an audio format that is developed by IBM & Microsoft. This audio file format is specially created to be used for uncompressed audio files on Microsoft Windows systems. It is used for storing audio bitstreams on PCs, which are encoded in the Linear Pulse-Code Modulation (LPCM) format.
02What’s the WAV audio format?
WAV audio file format is also known as Waveform audio file format. It is a subset of Microsoft’s RIFF specification. This audio format starts with a file header, which is followed by data chunks. There are three main types of chunks in a WAV file, which are given as follows:
● ‘fmt” chunk – This chunk is used to specify the data format.
● ‘data” chunk – This chunk contains the actual sample of data.
● ‘RIFF” chunk – This chunk is mainly used to identify a WAV file.
03Advantages of Using WAV
There are the following advantages of using a WAV audio file format:
● WAV audio file gives the best sound quality, which resembles the sound coming from the original source of the sound.
● WAV files are primarily used for storing the recordings.
● WAV files can efficiently be converted into other different audio formats like MP3, and AIFF.
● This audio file format also allows the developers to move audio files between different computer platforms easily and freely.
● WAV file provides the benefit of easy editing to developers, podcasters, and other digital content creators.
04Is WAV Format Better than MP3?
Yes, WAV format is way better than MP3. It provides a better audio quality as compared to the MP3 file. Although MP3 files are smaller in size, they lack a good sound quality. Another major difference between a WAV file and an MP3 file is that the MP3 file enables easy editing and storage of compressed files, while on the other hand, the WAV file enables easy editing and storage of uncompressed audio files. Uncompressed files can always be easily converted into compressed files, which also helps in retaining the sound quality.
Part 2 The Best 6 Fast and Easy WAV Converter Online Free
There are numerous online tools that can be used to convert different audio file formats into WAV audio file format and vice versa. The best 6 tools that can be used for free to convert audio to WAV are given below:
● Zamzar : Zamzar is a free online tool that supports almost all types of audio files like MP3, MP4, WAV, etc. It allows the users to convert any type of audio file quickly and easily. The best part about this WAV converter is that it doesn’t require any additional software to be installed. Its simple user interface makes it easy for anyone to convert audio files into different formats.
● File ZigZag : This is an online WAV converter and supports many types of audio formats like MP2, MP3, M4A, WAV, etc. You just require to upload an audio file in this online tool and once it is converted into your desired format you will receive it through the mail.
● Free Audio Converter : This is a practical transcoding tool for audio files, capable of converting a sound file to multiple formats like MP3, OGG, WAV, and WMA, etc. It is an extremely easy-to-use interface and offers you the batch processing of files. It is one of the most demanded audio converters because of its ability to convert M4A to WAV.
● Online Audio Converter : Online audio converter is a free online app that can be used to convert audio files to other formats. This app supports all types of audio formats. This app also allows you to extract audio from a video.
● 3CX : Being one of the easiest programs used for conversion of files and formats it is widely used for the same. The most prominent advantage of this is that it can even convert the unsupported audio files to WAV format.
● To video WAV Converter: For mac, this audio converter is one of the best. It is easy to use and along with that, it supports a lot of different audio formats like MP3, M4A, WAV, etc. The finest thing about this converter is that it can process a large number of files and folders simultaneously.
Part 3 5 Quick Ways to Convert MP4 to WAV Audio Files Online and Offline
MP4 is the most familiar and widely used audio format, as it is compatible with almost every device nowadays. But podcasters and other digital content creators require to convert these files into WAV audio file format to retain the best sound quality. Here are some of the quick ways that can be used to convert MP4 to WAV format both online and offline:
● MediaHuman Audio Converter : This is software that can be used to convert MP4 to WAV format very easily. It has a drag and drops functionality that makes it easier to use. This software can be downloaded for free and is available for both Microsoft and MAC versions.
● Online uniconverter : Being one of the most popularly used online audio converters online uniconverter is extremely simple to use. This program not only converts MP4 to WAV but also supports other file formats like MP3, WAV, WMA, etc. It entitles you to select the quality of the output file.
● Cool Utilis: Another online converter that comprises a simple interface. It is widely available in 13 languages. The program supports the conversion of many other File types and formats. With this, you can also add files from google drive.
● ByClick Downloader : This is an amazing converter tool for Windows systems, which you can use to convert your file to WAV formats. With this downloader, you can also extract audio from YouTube videos. This tool also supports multiple formats like HD, MP3, MP4, AVI, etc.
● Switch Sound File Converter : It is one of the most suitable, easy to use, and comprehensive multi-format audio converters available out there. This supports different file formats and converts different files in seconds. The converter allows you to convert MP4 to WAV
Part 4 5 Best YouTube to WAV Converter
No matter your go-to genre, YouTube has always been the best place to listen to your choice. Since YouTube has practically endless content, which cannot be used for other tasks in their format, so here are a few tools that can be used to convert the format from YouTube to WAV:
● iTubeGo: This software comprises a wide variety of features that can allow you to perform multiple stuff on YouTube videos. This tool can simply be used to convert the YouTube video to any other format you wish to use it in.

● Ontiva: This web-based platform allows you to download as well as convert your YouTube videos to WAV audio format in an easy way. All you ought to do is just copy the URL of the video and paste it into the box given on this platform to convert its format.

● Freemake: Freemake is another tool that can convert your YouTube video to a WAV format in just three simple steps. All you need to do is copy and paste the URL from YouTube to Freemake and then the conversion will become a piece of cake.

● to: If you are someone, who is tired of converting your favorite YouTube video into WAV format at a slow speed? Then this is a solution to your problem, the tool offers you a high-speed conversion of YouTube video to WAV format.

● CoConvert: Another impressive web-based platform that allows you to convert YouTube video to the WAV format. This can be done in easy steps like copying and pasting the URL of the video.

Key Takeaways from This Episode
● The WAV file is an audio format that many digital content creators prefer because of its various advantages like high-quality sound.
● An enormous tech approach is that now it has become formally easier to convert multiple formats to WAV through multiple converters.
● These converters can easily be used to convert MP4 to WAV, M4A to WAV, soundcloud to WAV, and even YouTube videos to WAV format.
● In addition to this, many online and offline tools are used to convert these audio files very easily and quickly.
Nowadays, people are more addicted to making reels, short videos, YouTube shorts, etc. This is where the WAV converter comes in.
It is the most versatile audio format that is compatible with almost all devices. WAV audio format is very useful for digital content creators. So, without any further ado, let’s dive into detailed facts and benefits of WAV audio format:
In this article
01 [Basic Knowledge About the WAV Format](#Part 1)
02 [The Best 6 Fast and Easy WAV Converter Online Free ](#Part 2)
03 [5 Quick Ways to Convert MP4 to WAV Audio Files Online and Offline](#Part 3)
04 [5 Best YouTube to WAV Converter](#Part 4)
Part 1 Basic Knowledge About the WAV Format
01What is a WAV file?
WAV is an audio format that is developed by IBM & Microsoft. This audio file format is specially created to be used for uncompressed audio files on Microsoft Windows systems. It is used for storing audio bitstreams on PCs, which are encoded in the Linear Pulse-Code Modulation (LPCM) format.
02What’s the WAV audio format?
WAV audio file format is also known as Waveform audio file format. It is a subset of Microsoft’s RIFF specification. This audio format starts with a file header, which is followed by data chunks. There are three main types of chunks in a WAV file, which are given as follows:
● ‘fmt” chunk – This chunk is used to specify the data format.
● ‘data” chunk – This chunk contains the actual sample of data.
● ‘RIFF” chunk – This chunk is mainly used to identify a WAV file.
03Advantages of Using WAV
There are the following advantages of using a WAV audio file format:
● WAV audio file gives the best sound quality, which resembles the sound coming from the original source of the sound.
● WAV files are primarily used for storing the recordings.
● WAV files can efficiently be converted into other different audio formats like MP3, and AIFF.
● This audio file format also allows the developers to move audio files between different computer platforms easily and freely.
● WAV file provides the benefit of easy editing to developers, podcasters, and other digital content creators.
04Is WAV Format Better than MP3?
Yes, WAV format is way better than MP3. It provides a better audio quality as compared to the MP3 file. Although MP3 files are smaller in size, they lack a good sound quality. Another major difference between a WAV file and an MP3 file is that the MP3 file enables easy editing and storage of compressed files, while on the other hand, the WAV file enables easy editing and storage of uncompressed audio files. Uncompressed files can always be easily converted into compressed files, which also helps in retaining the sound quality.
Part 2 The Best 6 Fast and Easy WAV Converter Online Free
There are numerous online tools that can be used to convert different audio file formats into WAV audio file format and vice versa. The best 6 tools that can be used for free to convert audio to WAV are given below:
● Zamzar : Zamzar is a free online tool that supports almost all types of audio files like MP3, MP4, WAV, etc. It allows the users to convert any type of audio file quickly and easily. The best part about this WAV converter is that it doesn’t require any additional software to be installed. Its simple user interface makes it easy for anyone to convert audio files into different formats.
● File ZigZag : This is an online WAV converter and supports many types of audio formats like MP2, MP3, M4A, WAV, etc. You just require to upload an audio file in this online tool and once it is converted into your desired format you will receive it through the mail.
● Free Audio Converter : This is a practical transcoding tool for audio files, capable of converting a sound file to multiple formats like MP3, OGG, WAV, and WMA, etc. It is an extremely easy-to-use interface and offers you the batch processing of files. It is one of the most demanded audio converters because of its ability to convert M4A to WAV.
● Online Audio Converter : Online audio converter is a free online app that can be used to convert audio files to other formats. This app supports all types of audio formats. This app also allows you to extract audio from a video.
● 3CX : Being one of the easiest programs used for conversion of files and formats it is widely used for the same. The most prominent advantage of this is that it can even convert the unsupported audio files to WAV format.
● To video WAV Converter: For mac, this audio converter is one of the best. It is easy to use and along with that, it supports a lot of different audio formats like MP3, M4A, WAV, etc. The finest thing about this converter is that it can process a large number of files and folders simultaneously.
Part 3 5 Quick Ways to Convert MP4 to WAV Audio Files Online and Offline
MP4 is the most familiar and widely used audio format, as it is compatible with almost every device nowadays. But podcasters and other digital content creators require to convert these files into WAV audio file format to retain the best sound quality. Here are some of the quick ways that can be used to convert MP4 to WAV format both online and offline:
● MediaHuman Audio Converter : This is software that can be used to convert MP4 to WAV format very easily. It has a drag and drops functionality that makes it easier to use. This software can be downloaded for free and is available for both Microsoft and MAC versions.
● Online uniconverter : Being one of the most popularly used online audio converters online uniconverter is extremely simple to use. This program not only converts MP4 to WAV but also supports other file formats like MP3, WAV, WMA, etc. It entitles you to select the quality of the output file.
● Cool Utilis: Another online converter that comprises a simple interface. It is widely available in 13 languages. The program supports the conversion of many other File types and formats. With this, you can also add files from google drive.
● ByClick Downloader : This is an amazing converter tool for Windows systems, which you can use to convert your file to WAV formats. With this downloader, you can also extract audio from YouTube videos. This tool also supports multiple formats like HD, MP3, MP4, AVI, etc.
● Switch Sound File Converter : It is one of the most suitable, easy to use, and comprehensive multi-format audio converters available out there. This supports different file formats and converts different files in seconds. The converter allows you to convert MP4 to WAV
Part 4 5 Best YouTube to WAV Converter
No matter your go-to genre, YouTube has always been the best place to listen to your choice. Since YouTube has practically endless content, which cannot be used for other tasks in their format, so here are a few tools that can be used to convert the format from YouTube to WAV:
● iTubeGo: This software comprises a wide variety of features that can allow you to perform multiple stuff on YouTube videos. This tool can simply be used to convert the YouTube video to any other format you wish to use it in.
● Ontiva: This web-based platform allows you to download as well as convert your YouTube videos to WAV audio format in an easy way. All you ought to do is just copy the URL of the video and paste it into the box given on this platform to convert its format.
● Freemake: Freemake is another tool that can convert your YouTube video to a WAV format in just three simple steps. All you need to do is copy and paste the URL from YouTube to Freemake and then the conversion will become a piece of cake.
● to: If you are someone, who is tired of converting your favorite YouTube video into WAV format at a slow speed? Then this is a solution to your problem, the tool offers you a high-speed conversion of YouTube video to WAV format.
● CoConvert: Another impressive web-based platform that allows you to convert YouTube video to the WAV format. This can be done in easy steps like copying and pasting the URL of the video.
Key Takeaways from This Episode
● The WAV file is an audio format that many digital content creators prefer because of its various advantages like high-quality sound.
● An enormous tech approach is that now it has become formally easier to convert multiple formats to WAV through multiple converters.
● These converters can easily be used to convert MP4 to WAV, M4A to WAV, soundcloud to WAV, and even YouTube videos to WAV format.
● In addition to this, many online and offline tools are used to convert these audio files very easily and quickly.
Top 5 Best Video Editing Apps for iPhone
Top 5 Best Video Editing Apps for iPhone in 2024

Shanoon Cox
Mar 27, 2024• Proven solutions
An iPhone is a top user choice because it can perform time-intensive tasks without any hassle. We all are inclined to make digital content as it is an easy means to earn money and showcase our creative side. Are you able to film with your iPhone but do not know how to edit on it? You can easily edit on iPhone if you have the right editing apps with excellent mobile compatibility. Stay tuned to learn about 5 iPhone video editor apps that will make editing a smooth process. Let’s begin!
Part 1: Best Video Editing Apps for iPhone
Want to know some of the best editing apps for iPhone that can help you make attractive videos? Here you can learn about some tips and tricks to excel at YouTubing or making TikTok videos. Read more to turn your wish turn into reality:
1. Filmora - Easy-to-use and Powerful


Filmora is the best iPhone video editor app with no watermark, which is generally an issue with most video editing apps. It has a simple interface and is easy to use for beginners. Furthermore, it has many excellent features to make your video look professional such as trimming, adding transitions, adding captions, filters, etc. You can preview every single segment before saving it.
Moreover, you can edit the video and feature top-notch quality videos for your audience! It edits videos with 4K quality and offers multiple add-on options such as adding emojis, filters, text, background music, and changing background. Its intuitive interface makes editing simpler using powerful built-in tools. One of the best things about Filmora is importing custom music and adding it to any video segment. Sharing through Filmora is effortless; you can share it on various platforms directly or save it on your phone.
Additionally, the recent update from Filmora brings the plenty of new features including AR stickers, GIFs, and weekly cloud-based update. A rick integrated stock library helps you access a massive collection of GIFs and pictures from Unsplash, GIPHY and Pixabay.
Price: The monthly paid Filmora plan costs USD 6.99, and the annual plan costs USD 32.99.
Pros:
- Trim, transfer, and filter
- 4K HD video editing software
- Intuitive interface
- Cloud based weekly update
- Massive collection of AR stickers, and GIFs
Cons:
- The free version has a watermark
2. iMovie - Friendly for Beginner
The iMovie video editing app is specially developed for iOS devices and is super easy to use, making it ideal for beginners. The intuitive touch gestures and a robust assortment of editing features make it worthy of editing professional videos. Moreover, a user can use the app to create both long and short aesthetic videos. What’s crazy about this app is that it has 13 custom-designed Apple filters that make your video shots look flawless from all angles. It has eight unique themes and templates. It allows adding a solid or gradient background to videos.
Editing with iMovie becomes even simpler because it has 80 songs in the library; you do not have to pay to buy tracks. iMovie offers all essential features for free such as trimming options, transitions, filters, music, animated titles, themes, etc. Adding slow motion to your videos according to your pace choice has never been accessible before. On the other hand, a user can Airdrop videos, save them on Google Drive or iCloud for sharing or future use. The 4K quality remains intact even after downloading or sharing on various social media platforms. You know where to head when you want to make an adorable video to engage with your audience or grow your audience- iMovie has got you covered!
Price: iMovie is free iOS software; hence, a win-win situation for iPhone users.
Pros:
- 13 custom-designed Apple filters
- 80 free songs
- 4K video quality
- Eight unique themes
Cons:
- Works with only codec MP4 files
3. Quik - Best for Editing GoPro Video
Quik is a great iPhone video editor which works ideally to edit GoPro footage. The fast-paced editing capability of Quik impresses most professionals as well as beginners, especially the ones looking for a user-friendly iPhone editing app. Moving further, it does not fail to impress users with its outstanding splice feature. It is easier to merge videos by adding transitions in the middle. Twenty-four different presets help users to easily edit 4K quality videos without putting in much effort.
Here’s a crazy thing to note; you can add GIFs, emojis, and random texts to make your video more fun. It is super easy to eliminate extra footage, add voiceover, add slow-motion, and fasten a video. It has all the basic yet powerful features one needs to make a video look striking and attractive. The functionality to edit photos also makes it a multi-purpose app.
Price: Quik provides a free trial to a user, but it charges $1.99 a month and $9.99 annually after the trial is over.
Pros:
- 24 presets
- Splice videos
- Smooth transition
- Cut extra footage
Cons:
- Allows to edit 50 photos/videos
4. LumaFusion - Professional Editor for iPhone
LumaFusion is an iPhone video editor app that you can use to edit videos on the go. Isn’t it exciting to be able to edit professional videos through your iPhone? LumaFusion is known for its intense video stabilization feature through which you can eliminate shakiness from the footage. The powerful editing tools help you edit multiple segments of 4K videos.
You can resize, reframe, slow down, fasten, merge and cut out the video. It supports 10-bit HDR video export from iPhone easily. The zoom feature enables you to notice even the smallest detail in the video. It is super easy to refine the video and make it flawless according to your needs. The pre-built templates make it easier for users to edit intros, reels, Instagram stories, etc.
Price: Apple offers an in-app purchase of LumaFusion for $29.99. It is a one-time purchase; you can use it for free after that. However, you can also subscribe to storyblocks for Lumafusion for $69.99 annually and $9.99 monthly.
Pros:
- 10-bit HDR video export
- Edit 4K videos
- Easy to share
- Change video speed
Cons:
- No iCloud synchronization
5. Adobe Premiere Rush - Ideal Choice for YouTubers
Adobe Premiere Rush is great for YouTubers who want to produce content quickly without compromising on quality. The powerful tools within the app help in creating interactive and aesthetic content for all social media platforms. The built-in functionality of a camera helps you to record and edit on the go. The app has built-in royalty-free music, which you can add to different video segments to add life to it. Using pictures-in-picture features, animated graphics, overlays, and blurring, you can make your video look highly professional.
The premium features such as automatic defect and repetition detection help saving time for rewatching edited footage. The AI Sensei and auto-ducking feature help in balancing the sound. The sound automatically decreases to highlight dialogues. Adobe Premiere Rush is made for editing videos to be shared on social media. It allows the readjustment of frames to enhance its visibility on social media. The app makes it easy to share edited videos on TikTok, Facebook, Instagram, and Twitter in just one click.
Price: Adobe Premiere Rush costs $9.99 per month and gives you access to all the premium features.
Pros:
- Auto-ducking
- Royalty-free music
- Automatic problem detection
- Share on social media directly
Cons:
- No green screen feature
Part 2: Edit Video on Desktop with Filmora
Besides using an iPhone video editor to edit on the phone, you can also try desktop applications such as Filmora to edit videos on laptop . Filmora supports Mac and Windows while the Filmora is an app for iOS as well as Android. It has powerful video editing features and 300+ phenomenal effects at your disposal. YouTubers will find this app super convenient to edit videos and upload quickly. You must be wondering about its features; here are some:
1. Professional editing tools
Filmora allows you to edit professional videos by providing features such as zoom-in, zoom-out, blur, reverse audio, adding screenshots, and screen recording. Basic features such as trimming, merging, rotating, splitting merging, etc., are ideal for beginners. A user has the full ability to manage audio and video speed.

2. Video Effects
Additionally, Filmora desktop video editor supports many formats and provides advanced tools to accomplish your goals.

3. Audio tuning
Music makes a video more attractive and gets a user to stay. Through Filmora, users can edit sound also to make it sharper, remove background noise, make music fade-in or fade-out, etc. It adds more emotions and attractiveness to a video.

4. Intensify colors
Filmora has basic color gradient features through which a user can intensify video colors. It has LUT 3D effects through which you can balance out colors, add more cool or warm impact to a video.

Conclusion
There are many iPhone video editor apps available, but not all provide value to you. A good video editor app within your phone ensures that you can produce content on the go anywhere. Keeping your needs in mind, we have mentioned five of our top choices with great features. These apps do not only have outstanding features, but they are also relatively easier to use. All of the powerful editing features within these apps are ideal for creating professional videos that attract the audience. It is on you to use these apps to their maximum potential to generate content that helps you grow.
Shanoon Cox
Shanoon Cox is a writer and a lover of all things video.
Follow @Shanoon Cox
Shanoon Cox
Mar 27, 2024• Proven solutions
An iPhone is a top user choice because it can perform time-intensive tasks without any hassle. We all are inclined to make digital content as it is an easy means to earn money and showcase our creative side. Are you able to film with your iPhone but do not know how to edit on it? You can easily edit on iPhone if you have the right editing apps with excellent mobile compatibility. Stay tuned to learn about 5 iPhone video editor apps that will make editing a smooth process. Let’s begin!
Part 1: Best Video Editing Apps for iPhone
Want to know some of the best editing apps for iPhone that can help you make attractive videos? Here you can learn about some tips and tricks to excel at YouTubing or making TikTok videos. Read more to turn your wish turn into reality:
1. Filmora - Easy-to-use and Powerful
Filmora is the best iPhone video editor app with no watermark, which is generally an issue with most video editing apps. It has a simple interface and is easy to use for beginners. Furthermore, it has many excellent features to make your video look professional such as trimming, adding transitions, adding captions, filters, etc. You can preview every single segment before saving it.
Moreover, you can edit the video and feature top-notch quality videos for your audience! It edits videos with 4K quality and offers multiple add-on options such as adding emojis, filters, text, background music, and changing background. Its intuitive interface makes editing simpler using powerful built-in tools. One of the best things about Filmora is importing custom music and adding it to any video segment. Sharing through Filmora is effortless; you can share it on various platforms directly or save it on your phone.
Additionally, the recent update from Filmora brings the plenty of new features including AR stickers, GIFs, and weekly cloud-based update. A rick integrated stock library helps you access a massive collection of GIFs and pictures from Unsplash, GIPHY and Pixabay.
Price: The monthly paid Filmora plan costs USD 6.99, and the annual plan costs USD 32.99.
Pros:
- Trim, transfer, and filter
- 4K HD video editing software
- Intuitive interface
- Cloud based weekly update
- Massive collection of AR stickers, and GIFs
Cons:
- The free version has a watermark
2. iMovie - Friendly for Beginner
The iMovie video editing app is specially developed for iOS devices and is super easy to use, making it ideal for beginners. The intuitive touch gestures and a robust assortment of editing features make it worthy of editing professional videos. Moreover, a user can use the app to create both long and short aesthetic videos. What’s crazy about this app is that it has 13 custom-designed Apple filters that make your video shots look flawless from all angles. It has eight unique themes and templates. It allows adding a solid or gradient background to videos.
Editing with iMovie becomes even simpler because it has 80 songs in the library; you do not have to pay to buy tracks. iMovie offers all essential features for free such as trimming options, transitions, filters, music, animated titles, themes, etc. Adding slow motion to your videos according to your pace choice has never been accessible before. On the other hand, a user can Airdrop videos, save them on Google Drive or iCloud for sharing or future use. The 4K quality remains intact even after downloading or sharing on various social media platforms. You know where to head when you want to make an adorable video to engage with your audience or grow your audience- iMovie has got you covered!
Price: iMovie is free iOS software; hence, a win-win situation for iPhone users.
Pros:
- 13 custom-designed Apple filters
- 80 free songs
- 4K video quality
- Eight unique themes
Cons:
- Works with only codec MP4 files
3. Quik - Best for Editing GoPro Video
Quik is a great iPhone video editor which works ideally to edit GoPro footage. The fast-paced editing capability of Quik impresses most professionals as well as beginners, especially the ones looking for a user-friendly iPhone editing app. Moving further, it does not fail to impress users with its outstanding splice feature. It is easier to merge videos by adding transitions in the middle. Twenty-four different presets help users to easily edit 4K quality videos without putting in much effort.
Here’s a crazy thing to note; you can add GIFs, emojis, and random texts to make your video more fun. It is super easy to eliminate extra footage, add voiceover, add slow-motion, and fasten a video. It has all the basic yet powerful features one needs to make a video look striking and attractive. The functionality to edit photos also makes it a multi-purpose app.
Price: Quik provides a free trial to a user, but it charges $1.99 a month and $9.99 annually after the trial is over.
Pros:
- 24 presets
- Splice videos
- Smooth transition
- Cut extra footage
Cons:
- Allows to edit 50 photos/videos
4. LumaFusion - Professional Editor for iPhone
LumaFusion is an iPhone video editor app that you can use to edit videos on the go. Isn’t it exciting to be able to edit professional videos through your iPhone? LumaFusion is known for its intense video stabilization feature through which you can eliminate shakiness from the footage. The powerful editing tools help you edit multiple segments of 4K videos.
You can resize, reframe, slow down, fasten, merge and cut out the video. It supports 10-bit HDR video export from iPhone easily. The zoom feature enables you to notice even the smallest detail in the video. It is super easy to refine the video and make it flawless according to your needs. The pre-built templates make it easier for users to edit intros, reels, Instagram stories, etc.
Price: Apple offers an in-app purchase of LumaFusion for $29.99. It is a one-time purchase; you can use it for free after that. However, you can also subscribe to storyblocks for Lumafusion for $69.99 annually and $9.99 monthly.
Pros:
- 10-bit HDR video export
- Edit 4K videos
- Easy to share
- Change video speed
Cons:
- No iCloud synchronization
5. Adobe Premiere Rush - Ideal Choice for YouTubers
Adobe Premiere Rush is great for YouTubers who want to produce content quickly without compromising on quality. The powerful tools within the app help in creating interactive and aesthetic content for all social media platforms. The built-in functionality of a camera helps you to record and edit on the go. The app has built-in royalty-free music, which you can add to different video segments to add life to it. Using pictures-in-picture features, animated graphics, overlays, and blurring, you can make your video look highly professional.
The premium features such as automatic defect and repetition detection help saving time for rewatching edited footage. The AI Sensei and auto-ducking feature help in balancing the sound. The sound automatically decreases to highlight dialogues. Adobe Premiere Rush is made for editing videos to be shared on social media. It allows the readjustment of frames to enhance its visibility on social media. The app makes it easy to share edited videos on TikTok, Facebook, Instagram, and Twitter in just one click.
Price: Adobe Premiere Rush costs $9.99 per month and gives you access to all the premium features.
Pros:
- Auto-ducking
- Royalty-free music
- Automatic problem detection
- Share on social media directly
Cons:
- No green screen feature
Part 2: Edit Video on Desktop with Filmora
Besides using an iPhone video editor to edit on the phone, you can also try desktop applications such as Filmora to edit videos on laptop . Filmora supports Mac and Windows while the Filmora is an app for iOS as well as Android. It has powerful video editing features and 300+ phenomenal effects at your disposal. YouTubers will find this app super convenient to edit videos and upload quickly. You must be wondering about its features; here are some:
1. Professional editing tools
Filmora allows you to edit professional videos by providing features such as zoom-in, zoom-out, blur, reverse audio, adding screenshots, and screen recording. Basic features such as trimming, merging, rotating, splitting merging, etc., are ideal for beginners. A user has the full ability to manage audio and video speed.
2. Video Effects
Additionally, Filmora desktop video editor supports many formats and provides advanced tools to accomplish your goals.
3. Audio tuning
Music makes a video more attractive and gets a user to stay. Through Filmora, users can edit sound also to make it sharper, remove background noise, make music fade-in or fade-out, etc. It adds more emotions and attractiveness to a video.
4. Intensify colors
Filmora has basic color gradient features through which a user can intensify video colors. It has LUT 3D effects through which you can balance out colors, add more cool or warm impact to a video.
Conclusion
There are many iPhone video editor apps available, but not all provide value to you. A good video editor app within your phone ensures that you can produce content on the go anywhere. Keeping your needs in mind, we have mentioned five of our top choices with great features. These apps do not only have outstanding features, but they are also relatively easier to use. All of the powerful editing features within these apps are ideal for creating professional videos that attract the audience. It is on you to use these apps to their maximum potential to generate content that helps you grow.
Shanoon Cox
Shanoon Cox is a writer and a lover of all things video.
Follow @Shanoon Cox
Top 20 Adobe Premiere Title/Intro Templates [Free Download]
Top 20 Adobe Premiere Title/Intro Templates [Free Download]

Benjamin Arango
Mar 29, 2024• Proven solutions
One of the things that can make your output stand out from the crowd is the titles. Many people think creating eye-catching title effects is beyond them, but with Premiere Pro, you really couldn’t be more wrong.
As Premiere Pro doesn’t have built-in templates, the ability to import free Premiere Pro templates is a must. Anyone need to find a custom title style that suits the project and looks professional and carries impact.
The great thing is that there are many of these resources that are offered entirely free! If you don’t know how to add text/title to Adobe Premiere, here are steps to add text resources .
In this article, we will share with you 20 Free to download Title Templates for Premiere Pro.
- Part1: Top 15 Free Adobe Premiere Pro Title Templates
- Part2: Best 5 Premiere Pro Intro Templates Free Download
- Part3: How to Import and Customize Title Templates in Premiere
You may also like: 10 Free Star Wars Fonts to Make Your Video Amazing
Part 1: Top 15 Free Adobe Premiere Title Templates
Adding the finishing touches to a project, like creating the opening titles or end credits, is often not at the top of anyone’s priority list during the video editing process.
Nonetheless, making a unique opening sequence along with impressive animations in Adobe Premiere Pro can be a time-consuming endeavor, so instead of spending countless hours on producing a perfect combination of text and images, you can just download a title template from the Internet.
1 Premier Pro
Jarle Leirpoll runs this site, and it is a treasure trove of information, help, and advice on Premiere from a man who wrote the book (literally, it’s for sale on the site!) on Premiere.
His first title collection is consisting of 8 templates, including Lower Thirds templates, end credit template, and some special characters. However, it well worth a look around the site as there is plenty more free stuff including presets, and a whole range of tips and tricks to help with your editing.
Features:
- Free Premiere Pro templates to download
- Easy to import the title template to Premiere
- 100% ready to use
In case that you’re just a beginner of video editing software, you can start with Wondershare Filmora (Latest Filmora version 11) to add text to videos, which is powerful but easy-to-use for green hands. Download the Wondershare Filmora below.
There are hundreds of Text and Titles presets available in Filmora, which allows you to add titles, subtitles, scrolling end credits, lower 3d, and openers with ease. You can also apply some animation effects to the selected title presets.
Check the video below to find out how to add text to video with Wondershare Filmora.
Besides the built-in title presets, Wondershare Filmora (Latest Filmora version X) also provides more title templates in Filmstock , which offers lots of special effects templates.
Currently, there are Title Expansion Set, business title set, wedding title set, and lower third expansion set to download. Check the video below to watch the Title Expansion set templates.
Download Mac Version ](https://tools.techidaily.com/wondershare/filmora/download/ )
Learn more details about How to Add Text to Video with Filmora.
2 Richard Harrington
This is another site that offers templates for download but is also a great place to visit for ideas and information. Richard approaches Premiere from a photographer’s viewpoint, and so has a slightly different view on many topics that are well worth reading.
He has links to a sizable number of templates on Richard Harrington covering a range of styles and subjects, including DVD menus, animated text, and high-quality models. Still, his blog is updated regularly and often includes free downloads.
Features:
- Supports Adobe Premiere intro templates to use
- It includes various templates and presets on Windows and Mac
- More than title templates also has DVD menus and animated text
3 ProVideoCoalition
Another all-encompassing site has a huge amount of information and knowledge to be gained. The templates are just part of the story. They are available on Pro Video Coalition and include numerous files and even some free video content showing their implementation.
Also on this page are links to some other sites offering free content or advice on various aspects of Premiere, making it well worth a visit and definitely worth its place in this top 10.
Of particular interest on this site is the regularly updated news which focuses on the latest hardware and software announcements.
Features:
- Supports lower thirds for Adobe Premiere
- You can customize the Premiere Pro intro template free download
- You can create graphic elements
4 Coremelt
This is a commercial site that offers a wide variety of high-quality plugins and templates for several video editing platforms. However, we are on the lookout for that fabulous price of free here, so a little digging finds this page , here you will find ten templates from one of their best selling products offered entirely free.
All templates are quality professionally produced products and worth the visit alone. For anyone who is looking to take their editing output to the professional level, the commercial products on offer here are well worth a look, high quality, and a reasonable cost.
Features:
- It includes 3D text and motion graphics templates
- Free and safe download the Premiere template

5 Bestproaction
Another commercial site. This one has a range of free templates and presets to download for Premiere. Fourteen open items altogether can be downloaded. This site at least deserves a browse through their catalog after a download. The emphasis here is on low cost but high quality, useful templates, and plugins to suit any project.
Even for those of us with a limited budget, there may be something that catches the eye. It is an excellent site for browsing when looking for inspiration.
Features:
- Offers multimedia products like free Premiere Pro text, title templates
- Includes professional Premiere Pro template for videographers
- You can create graphic elements
6 FXFactory
This is another commercial site that has a smattering of very high-quality free downloads on offer, including a beautiful template for the original Star Wars movie style scrolling titles.
Again, it is worth browsing the catalog when you are on the site, but all the free products can be found here .
FX Factory has also created some great video tutorials on a variety of aspects of video production that are well worth a view when you are at the site.
Features:
- Free Premiere Pro effects templates to download
- Includes a step by step Premiere Pro tutorial
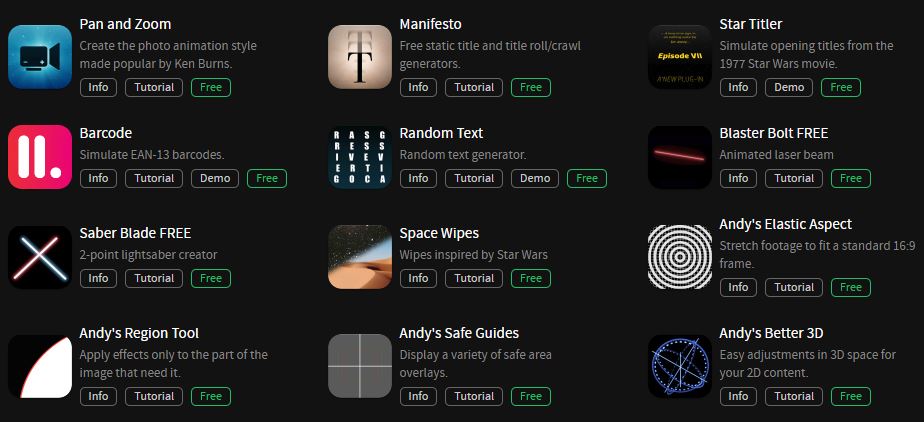
7 Creative Impatience
A fantastic site full of information, tips, and opinion on all aspects of video production, it’s a great place to spend some time, with the bonus of a bunch of free downloads for Premiere.
Of particular note are the tutorials, an excellent source of information and tricks that you may not have seen before, with their YouTube channel being a great source of free guidance for editors of any sort of experience.
Features:
- Apart from free Premiere Pro templates, you can also find blogs
- Easy steps to make Premiere Pro templates
- Safe and clean to use. All real
8Filmimpact
A commercial site is offering some great products at competitive prices. At first glance, this may not seem to be a useful place for our search for the free stuff.
However, all the products do have a free trial download, and as a bonus, the trial for pack one includes four free to use templates. They are quality products too, and well worth a look.

9 Style4Type
Style4Type is an exciting site regularly updated with new free templates as well as offering technical advice and having further templates available as commercial products.
And to the side is even a free download for a PDF file that walks you through installing and using the templates within Premiere once you have them.
There are already a lot of free templates on offer covering a wide variety of styles, but they are added to with regularity, so it is a site to bookmark for the future.
Features:
- Free title templates to use including texture templates
- Professional tools to better your video

10 Premiere Beat
Lots of information on this site as its been running for a decade, it is a website that imparts a wealth of knowledge along the way on not just video editing but music.
The pack includes 21 Premiere title templates to use. Another site that you will want to visit again and again.
Features:
- High-quality Premiere Pro templates to download
- A large number of Premiere templates to use
11 Clean Elegant Rotation Title
It is a clean title template without unnecessary parts. If you like simple titles, this one is best for you. You can customize in Premiere easily with a few clicks. For beginners, it also includes free tutorials to use.
Features:
- Simple and clean Premiere title templates
- Customizable in Premiere
12 Unfolding Titles
It is a clean title template with an unfolding effect. Each text has two unfolding effects, which are convenient to use with customization. It supports 4K and HD versions. In this pack, it wons 10 title formats. After importing Premiere, you can also change text size.
Features:
- 20 unfolding title effects
- Supports rendering your video
13 Orange83
These are five modern title packs for Premiere. With it, you don’t need to use After Effects as you can import them to edit. The best part is you can include your logo and other stuff you like.
Features:
- Include 5 title packs
- Modern and clean titles
14 Video Intro Templates - Premiere Pro intro template free download
It is a free download Premiere Pro intro template that you can add to your video. It is highly recommended to use promotion and commercial video.
This intro template can be adjusted after you import it to Premiere Pro. This Premiere Pro intro template is HD, so you don’t need to worry about the whole video quality.
Features:
- 1920X1080 (HD) is supported
- This intro template doesn’t include built-in music
15 Elegant Promo - another Premiere Pro intro template free to use
It is intro template for Premiere Pro is modern and free to use. The whole style is young and energetic, which will give viewers a fresh new feeling. It includes 12 images and 26 text layers, and all of them are free to download.
You can use it for your presentation, promotional video, and product video. Besides, it doesn’t require a plug in to use this intro template in Premiere Pro.
Features:
- It includes animated intro elements.
- Use an HD intro template to make a popular video.

These are free templates, and they are enough to get anyone up and running with a new project. As said before, with the commercial enterprises that offer freebies, it’s always worth checking out their paid for output as well, you may not be in the market for it right now, but something may stick for a later time.
Part 2: Bonus: Best 5 Premiere Pro Intro Templates Free Download
Even though all websites we featured in this article offer some free intro templates for Adobe Premiere Pro. However, it is still a much better solution to buy a subscription plan on a platform if you are working on a large number of projects each month.
Let’s see which websites you can use to download the intro and title templates for Premiere Pro.
16. Motion Array
In addition to an impressive library of intro templates, Motion Array offers presets, sound effects, royalty-free music, and stock footage.
Furthermore, you can choose the software version to make sure that the templates you download can be used with the version of Adobe Premiere Pro you have installed on your computer.
The website provides you with powerful search tools, so you can select the resolution of the template, up to 8K, or choose which types of templates are going to be displayed.
Using the free subscription plan can limit your options since you’ll only be able to download free templates, and your upload storage will be limited to just 1GB.
The Pro subscription plan that can be purchased for $54 per month will grant you access to an almost endless selection of title templates as well as a huge selection of plugins for Adobe Premiere Pro.

17. Cinecom – Simple Intro for Premiere Pro
It is a designer pack that features ten pre-animated lower-thirds intro templates. You can change the duration of the font and color of the text in each template, and you can choose if you want to download a 1080 or the 4K version of the designer pack.
The templates are compatible with CS6, CC2013, CC2014, and CC2016 versions of the Premiere Pro. The Simple Titles pack can be easily installed, as you just have to drag and drop it into the software.
However, before you can download these title templates, you have to subscribe to Cinecom’s mailing list.
Even though this can be a bit inconvenient, it is very well worth the trouble since you’ll be able to transform or build upon the intro templates and use them freely in all videos you edit in Adobe Premiere Pro.
18. EnvatoElements
You can find much more than intro templates on the EnvatoElements platform since you can choose from 740.000 items you can use for anything from creating a WordPress website to preparing your next business presentation.
The Video Templates category alone features over 4000 items, including Logo Stings or Infographics assets.
There are nearly one hundred available intro templates for Adobe Premiere Pro, but downloading any of them requires you to create an account and purchase a subscription plan.
Prices start from $16.50 per month, and packages include virtually unlimited access to stock photos and videos, video templates, and much more. The EnvatoElements platform also offers assets that can be used with Final Cut Pro, Adobe After Effects or Apple Motion.

19. Videohive
Videohive is a part of the Envato Market platform that also features Web Themes and Templates, Code, Audio, or Graphic sections. It is free to use, but only a limited amount of assets can be downloaded for free.
To download an item, you must purchase it, and prices can range from $16 to $50 for a single title template.
Videohive is also a great source of title templates for Adobe After Effects, as it offers more than 5000 titles and intros that are compatible with this software.
Furthermore, you can download presets for both Premiere Pro and After Effects that can be used to create stop-motion animations, perform color correction, or make the footage look like it was captured with a VHS camera.

20. RocketStock
This option is best suited for video editors who want to create their intros because RocketStok’s Cinematic Style Library extends the scope of options provided by Premiere Pro.
Downloading all fonts except Helvetica Neue is free, but you must check which fonts you can use in commercial projects. You will have no trouble installing the fonts since you can just double-click on the font and follow the on-screen instructions.
Once you’ve installed all the fonts from the library, you can use them to replace the software’s default library. You just have to click on the Replace Style Library option that can be accessed from Premiere Pro’s Title Style tab.
If you don’t feel comfortable creating your titles or if you simply don’t have the time to create your own titles, the Free Cinematic Style Library is not the best choice for you.
On the other hand, Premiere Pro’s users who don’t often use title templates can benefit from downloading RocketStock’s intro library.

Part 3: How to Import and Customize Title Templates in Premiere
If you download the template, all the title templates support customization. You can change its size, font, color, and add 3D effects.
It is easy to import and use it to touch up your video. Check out the steps below to know how to import title templates quickly.
- Install the title template. Choose one template you like and download it to your PC. Remember to unzip it before importing it. Now install them.
- Import the title template. You just need to go to click Effects at the top. Then at right, you will find Presets in the effects section.
- Right-click on presets, and choose Import Presets. If the title template format is .mogrt, you need to open it in Essential Graphics Panel. At the bottom right corner, click the plus icon to import the title template and install it.
- Customize the title template. Once the title template is imported, drag it to the timeline. Click the Editing tab. Here you can customize colors, text, opacities, and positions. There are more options for you to explore.
- You can also copy and paste the title template to another place in the timeline. If you change one place of the pasted template, the original one will remain the same.
Note: each version of Premiere’s interface will look different, but the workflow is similar.
Conclusion
Using title templates can help you achieve a certain visual style faster, so you don’t have to spend a lot of time looking for a perfect background or animating the text.
The Internet provides almost unlimited video editing resources, but not all of these resources can be acquired for free.
Which website you will choose as a source of fresh title templates depends on how often you work on new projects in Adobe Premiere Pro.
If you want to make professional video editing and tired of Premiere, try Filmora! It includes various titles templates to use.
You can sync audio automatically, use detailed color correction to make your title and video like a movie. Download it now (FREE)!
Benjamin Arango
Benjamin Arango is a writer and a lover of all things video.
Follow @Benjamin Arango
Benjamin Arango
Mar 29, 2024• Proven solutions
One of the things that can make your output stand out from the crowd is the titles. Many people think creating eye-catching title effects is beyond them, but with Premiere Pro, you really couldn’t be more wrong.
As Premiere Pro doesn’t have built-in templates, the ability to import free Premiere Pro templates is a must. Anyone need to find a custom title style that suits the project and looks professional and carries impact.
The great thing is that there are many of these resources that are offered entirely free! If you don’t know how to add text/title to Adobe Premiere, here are steps to add text resources .
In this article, we will share with you 20 Free to download Title Templates for Premiere Pro.
- Part1: Top 15 Free Adobe Premiere Pro Title Templates
- Part2: Best 5 Premiere Pro Intro Templates Free Download
- Part3: How to Import and Customize Title Templates in Premiere
You may also like: 10 Free Star Wars Fonts to Make Your Video Amazing
Part 1: Top 15 Free Adobe Premiere Title Templates
Adding the finishing touches to a project, like creating the opening titles or end credits, is often not at the top of anyone’s priority list during the video editing process.
Nonetheless, making a unique opening sequence along with impressive animations in Adobe Premiere Pro can be a time-consuming endeavor, so instead of spending countless hours on producing a perfect combination of text and images, you can just download a title template from the Internet.
1 Premier Pro
Jarle Leirpoll runs this site, and it is a treasure trove of information, help, and advice on Premiere from a man who wrote the book (literally, it’s for sale on the site!) on Premiere.
His first title collection is consisting of 8 templates, including Lower Thirds templates, end credit template, and some special characters. However, it well worth a look around the site as there is plenty more free stuff including presets, and a whole range of tips and tricks to help with your editing.
Features:
- Free Premiere Pro templates to download
- Easy to import the title template to Premiere
- 100% ready to use
In case that you’re just a beginner of video editing software, you can start with Wondershare Filmora (Latest Filmora version 11) to add text to videos, which is powerful but easy-to-use for green hands. Download the Wondershare Filmora below.
There are hundreds of Text and Titles presets available in Filmora, which allows you to add titles, subtitles, scrolling end credits, lower 3d, and openers with ease. You can also apply some animation effects to the selected title presets.
Check the video below to find out how to add text to video with Wondershare Filmora.
Besides the built-in title presets, Wondershare Filmora (Latest Filmora version X) also provides more title templates in Filmstock , which offers lots of special effects templates.
Currently, there are Title Expansion Set, business title set, wedding title set, and lower third expansion set to download. Check the video below to watch the Title Expansion set templates.
Download Mac Version ](https://tools.techidaily.com/wondershare/filmora/download/ )
Learn more details about How to Add Text to Video with Filmora.
2 Richard Harrington
This is another site that offers templates for download but is also a great place to visit for ideas and information. Richard approaches Premiere from a photographer’s viewpoint, and so has a slightly different view on many topics that are well worth reading.
He has links to a sizable number of templates on Richard Harrington covering a range of styles and subjects, including DVD menus, animated text, and high-quality models. Still, his blog is updated regularly and often includes free downloads.
Features:
- Supports Adobe Premiere intro templates to use
- It includes various templates and presets on Windows and Mac
- More than title templates also has DVD menus and animated text
3 ProVideoCoalition
Another all-encompassing site has a huge amount of information and knowledge to be gained. The templates are just part of the story. They are available on Pro Video Coalition and include numerous files and even some free video content showing their implementation.
Also on this page are links to some other sites offering free content or advice on various aspects of Premiere, making it well worth a visit and definitely worth its place in this top 10.
Of particular interest on this site is the regularly updated news which focuses on the latest hardware and software announcements.
Features:
- Supports lower thirds for Adobe Premiere
- You can customize the Premiere Pro intro template free download
- You can create graphic elements
4 Coremelt
This is a commercial site that offers a wide variety of high-quality plugins and templates for several video editing platforms. However, we are on the lookout for that fabulous price of free here, so a little digging finds this page , here you will find ten templates from one of their best selling products offered entirely free.
All templates are quality professionally produced products and worth the visit alone. For anyone who is looking to take their editing output to the professional level, the commercial products on offer here are well worth a look, high quality, and a reasonable cost.
Features:
- It includes 3D text and motion graphics templates
- Free and safe download the Premiere template
5 Bestproaction
Another commercial site. This one has a range of free templates and presets to download for Premiere. Fourteen open items altogether can be downloaded. This site at least deserves a browse through their catalog after a download. The emphasis here is on low cost but high quality, useful templates, and plugins to suit any project.
Even for those of us with a limited budget, there may be something that catches the eye. It is an excellent site for browsing when looking for inspiration.
Features:
- Offers multimedia products like free Premiere Pro text, title templates
- Includes professional Premiere Pro template for videographers
- You can create graphic elements
6 FXFactory
This is another commercial site that has a smattering of very high-quality free downloads on offer, including a beautiful template for the original Star Wars movie style scrolling titles.
Again, it is worth browsing the catalog when you are on the site, but all the free products can be found here .
FX Factory has also created some great video tutorials on a variety of aspects of video production that are well worth a view when you are at the site.
Features:
- Free Premiere Pro effects templates to download
- Includes a step by step Premiere Pro tutorial
7 Creative Impatience
A fantastic site full of information, tips, and opinion on all aspects of video production, it’s a great place to spend some time, with the bonus of a bunch of free downloads for Premiere.
Of particular note are the tutorials, an excellent source of information and tricks that you may not have seen before, with their YouTube channel being a great source of free guidance for editors of any sort of experience.
Features:
- Apart from free Premiere Pro templates, you can also find blogs
- Easy steps to make Premiere Pro templates
- Safe and clean to use. All real
8Filmimpact
A commercial site is offering some great products at competitive prices. At first glance, this may not seem to be a useful place for our search for the free stuff.
However, all the products do have a free trial download, and as a bonus, the trial for pack one includes four free to use templates. They are quality products too, and well worth a look.
9 Style4Type
Style4Type is an exciting site regularly updated with new free templates as well as offering technical advice and having further templates available as commercial products.
And to the side is even a free download for a PDF file that walks you through installing and using the templates within Premiere once you have them.
There are already a lot of free templates on offer covering a wide variety of styles, but they are added to with regularity, so it is a site to bookmark for the future.
Features:
- Free title templates to use including texture templates
- Professional tools to better your video
10 Premiere Beat
Lots of information on this site as its been running for a decade, it is a website that imparts a wealth of knowledge along the way on not just video editing but music.
The pack includes 21 Premiere title templates to use. Another site that you will want to visit again and again.
Features:
- High-quality Premiere Pro templates to download
- A large number of Premiere templates to use
11 Clean Elegant Rotation Title
It is a clean title template without unnecessary parts. If you like simple titles, this one is best for you. You can customize in Premiere easily with a few clicks. For beginners, it also includes free tutorials to use.
Features:
- Simple and clean Premiere title templates
- Customizable in Premiere
12 Unfolding Titles
It is a clean title template with an unfolding effect. Each text has two unfolding effects, which are convenient to use with customization. It supports 4K and HD versions. In this pack, it wons 10 title formats. After importing Premiere, you can also change text size.
Features:
- 20 unfolding title effects
- Supports rendering your video
13 Orange83
These are five modern title packs for Premiere. With it, you don’t need to use After Effects as you can import them to edit. The best part is you can include your logo and other stuff you like.
Features:
- Include 5 title packs
- Modern and clean titles
14 Video Intro Templates - Premiere Pro intro template free download
It is a free download Premiere Pro intro template that you can add to your video. It is highly recommended to use promotion and commercial video.
This intro template can be adjusted after you import it to Premiere Pro. This Premiere Pro intro template is HD, so you don’t need to worry about the whole video quality.
Features:
- 1920X1080 (HD) is supported
- This intro template doesn’t include built-in music
15 Elegant Promo - another Premiere Pro intro template free to use
It is intro template for Premiere Pro is modern and free to use. The whole style is young and energetic, which will give viewers a fresh new feeling. It includes 12 images and 26 text layers, and all of them are free to download.
You can use it for your presentation, promotional video, and product video. Besides, it doesn’t require a plug in to use this intro template in Premiere Pro.
Features:
- It includes animated intro elements.
- Use an HD intro template to make a popular video.
These are free templates, and they are enough to get anyone up and running with a new project. As said before, with the commercial enterprises that offer freebies, it’s always worth checking out their paid for output as well, you may not be in the market for it right now, but something may stick for a later time.
Part 2: Bonus: Best 5 Premiere Pro Intro Templates Free Download
Even though all websites we featured in this article offer some free intro templates for Adobe Premiere Pro. However, it is still a much better solution to buy a subscription plan on a platform if you are working on a large number of projects each month.
Let’s see which websites you can use to download the intro and title templates for Premiere Pro.
16. Motion Array
In addition to an impressive library of intro templates, Motion Array offers presets, sound effects, royalty-free music, and stock footage.
Furthermore, you can choose the software version to make sure that the templates you download can be used with the version of Adobe Premiere Pro you have installed on your computer.
The website provides you with powerful search tools, so you can select the resolution of the template, up to 8K, or choose which types of templates are going to be displayed.
Using the free subscription plan can limit your options since you’ll only be able to download free templates, and your upload storage will be limited to just 1GB.
The Pro subscription plan that can be purchased for $54 per month will grant you access to an almost endless selection of title templates as well as a huge selection of plugins for Adobe Premiere Pro.
17. Cinecom – Simple Intro for Premiere Pro
It is a designer pack that features ten pre-animated lower-thirds intro templates. You can change the duration of the font and color of the text in each template, and you can choose if you want to download a 1080 or the 4K version of the designer pack.
The templates are compatible with CS6, CC2013, CC2014, and CC2016 versions of the Premiere Pro. The Simple Titles pack can be easily installed, as you just have to drag and drop it into the software.
However, before you can download these title templates, you have to subscribe to Cinecom’s mailing list.
Even though this can be a bit inconvenient, it is very well worth the trouble since you’ll be able to transform or build upon the intro templates and use them freely in all videos you edit in Adobe Premiere Pro.
18. EnvatoElements
You can find much more than intro templates on the EnvatoElements platform since you can choose from 740.000 items you can use for anything from creating a WordPress website to preparing your next business presentation.
The Video Templates category alone features over 4000 items, including Logo Stings or Infographics assets.
There are nearly one hundred available intro templates for Adobe Premiere Pro, but downloading any of them requires you to create an account and purchase a subscription plan.
Prices start from $16.50 per month, and packages include virtually unlimited access to stock photos and videos, video templates, and much more. The EnvatoElements platform also offers assets that can be used with Final Cut Pro, Adobe After Effects or Apple Motion.
19. Videohive
Videohive is a part of the Envato Market platform that also features Web Themes and Templates, Code, Audio, or Graphic sections. It is free to use, but only a limited amount of assets can be downloaded for free.
To download an item, you must purchase it, and prices can range from $16 to $50 for a single title template.
Videohive is also a great source of title templates for Adobe After Effects, as it offers more than 5000 titles and intros that are compatible with this software.
Furthermore, you can download presets for both Premiere Pro and After Effects that can be used to create stop-motion animations, perform color correction, or make the footage look like it was captured with a VHS camera.
20. RocketStock
This option is best suited for video editors who want to create their intros because RocketStok’s Cinematic Style Library extends the scope of options provided by Premiere Pro.
Downloading all fonts except Helvetica Neue is free, but you must check which fonts you can use in commercial projects. You will have no trouble installing the fonts since you can just double-click on the font and follow the on-screen instructions.
Once you’ve installed all the fonts from the library, you can use them to replace the software’s default library. You just have to click on the Replace Style Library option that can be accessed from Premiere Pro’s Title Style tab.
If you don’t feel comfortable creating your titles or if you simply don’t have the time to create your own titles, the Free Cinematic Style Library is not the best choice for you.
On the other hand, Premiere Pro’s users who don’t often use title templates can benefit from downloading RocketStock’s intro library.
Part 3: How to Import and Customize Title Templates in Premiere
If you download the template, all the title templates support customization. You can change its size, font, color, and add 3D effects.
It is easy to import and use it to touch up your video. Check out the steps below to know how to import title templates quickly.
- Install the title template. Choose one template you like and download it to your PC. Remember to unzip it before importing it. Now install them.
- Import the title template. You just need to go to click Effects at the top. Then at right, you will find Presets in the effects section.
- Right-click on presets, and choose Import Presets. If the title template format is .mogrt, you need to open it in Essential Graphics Panel. At the bottom right corner, click the plus icon to import the title template and install it.
- Customize the title template. Once the title template is imported, drag it to the timeline. Click the Editing tab. Here you can customize colors, text, opacities, and positions. There are more options for you to explore.
- You can also copy and paste the title template to another place in the timeline. If you change one place of the pasted template, the original one will remain the same.
Note: each version of Premiere’s interface will look different, but the workflow is similar.
Conclusion
Using title templates can help you achieve a certain visual style faster, so you don’t have to spend a lot of time looking for a perfect background or animating the text.
The Internet provides almost unlimited video editing resources, but not all of these resources can be acquired for free.
Which website you will choose as a source of fresh title templates depends on how often you work on new projects in Adobe Premiere Pro.
If you want to make professional video editing and tired of Premiere, try Filmora! It includes various titles templates to use.
You can sync audio automatically, use detailed color correction to make your title and video like a movie. Download it now (FREE)!
Benjamin Arango
Benjamin Arango is a writer and a lover of all things video.
Follow @Benjamin Arango
Also read:
- Updated In 2024, From Video to Audio Insider Tips for Picking the Best Converter
- Updated 2024 Approved Optimizing Your YouTube Videos Aspect Ratio for Maximum Visual Appeal
- Updated In 2024, Effortless Text-to-MP3 Conversion Essential Tools and Techniques
- New Revolutionize Your Gameplay Videos Top Free Editing Tools for 2024
- New 2024 Approved Smartphone Video Editing Showdown IPhone and Android Apps
- YouTube Aspect Ratios Which One Is Right for Your Content Style, In 2024
- Updated In 2024, Top 5 Best Free VOB Video Editors
- New In 2024, Unlocking the Power of Chroma Keying in Final Cut Pro X
- Updated 2024 Approved No More Scrolling Find the Best Filmora Coupon Codes Inside
- Updated In 2024, Converting Text to MP3 Insider Secrets for Maximum Impact
- Updated 2024 Approved The Best Way to Convert MP3 on Mac Software Reviews and Ratings
- New 2024 Approved Visual Vibes Mastering Trendy Video Effects
- Updated In 2024, OS X Mavericks MP4 Editing Software Top Picks
- New In 2024, Top-Rated Android Apps to Download Now
- New 2024 Approved The Art of Professional Video Production A Beginners Guide to Success
- New Discover the Power of VR Converting Videos Made Easy for 2024
- New In 2024, No Crack, No Problem Free Filmora Alternatives You Can Trust
- New 2024 Approved Best Ways to Create Live Photos From Videos on Your Phone
- Updated Low-Cost Filmmaking Essentials 7 Must-Know Software 2023 Update for 2024
- New In 2024, Top 10 Best Free Video Editors for Ubuntu
- Updated Blur Photo Backgrounds for Free Top Online Editors for 2024
- New 2024 Approved Video Pace Control A Beginners Guide to Camtasia Speed Adjustment
- New In 2024, Free Video Looper Tools for Endless Playback on Windows and Mac
- New Wish to Edit Your MP4 Files in OS X 10.9 Mavericks? Video Editor for Mac Is Provided for You
- In 2024, Top 5 Tracking Apps to Track Oppo F23 5G without Them Knowing | Dr.fone
- How to get the dragon scale and evolution-enabled pokemon On OnePlus Nord CE 3 5G? | Dr.fone
- List of Pokémon Go Joysticks On Vivo S18 | Dr.fone
- How to Unlock Infinix Note 30 5G Phone without PIN
- 7 Top Ways To Resolve Apple ID Not Active Issue For Apple iPhone 7 Plus
- New Video Inspiration for Birthday Slideshow for 2024
- In 2024, Trouble with Apple iPhone SE (2022) Swipe-Up? Try These 11 Solutions | Dr.fone
- How To Unlock Infinix Hot 30i Phone Without Password?
- In 2024, How To Do Huawei Nova Y91 Screen Sharing | Dr.fone
- In 2024, Things You Must Know for Screen Mirroring Apple iPhone 12 mini | Dr.fone
- Preparation to Beat Giovani in Pokemon Go For Honor Play 8T | Dr.fone
- In 2024, How To Create an Apple Developer Account On Apple iPhone 11 Pro
- In 2024, Pokemon Go Error 12 Failed to Detect Location On Oppo A56s 5G? | Dr.fone
- What is the best Pokemon for pokemon pvp ranking On Tecno Spark 20 Pro+? | Dr.fone
- In 2024, How Can You Cast Your Apple iPhone SE (2020) to Windows PC With Ease? | Dr.fone
- In 2024, How to Change GPS Location on Oppo Reno 10 Pro 5G Easily & Safely | Dr.fone
- How to convert AVCHD MTS to MP4 for Samsung ?
- Title: Updated In 2024, Discover the Art of Bokeh Best Mobile Editing Apps
- Author: MdadeLe
- Created at : 2024-05-19 08:28:26
- Updated at : 2024-05-20 08:28:26
- Link: https://smart-video-editing.techidaily.com/updated-in-2024-discover-the-art-of-bokeh-best-mobile-editing-apps/
- License: This work is licensed under CC BY-NC-SA 4.0.
