
:max_bytes(150000):strip_icc():format(webp)/samsung-unveils-new-products-at-its-annual-unpacked-event-1200186175-0a17180ae84e47f488f43d3afbb7daa6.jpg)
Updated 2024 Approved Top 10 Free Online Subtitle Generators
Top 10 Free Online Subtitle Generators
When you watch a video online, it’s usually has a title and description. But what if the viewer doesn’t speak the same language as the speaker? Thankfully, there are subtitle maker online that you can use to create subtitles for any video.
Subtitles are excellent for those who want to learn a new language. It is also suitable for those who have trouble hearing. These subtitles can be added to the video by using subtitle maker online. Many subtitle makers are available, but we will discuss the top 10 subtitle creator online.
Best Free Subtitle Makers to Add Subtitles to Video Online
1. Adobe Creative Cloud Express
Creative Cloud Express is re-branded from Adobe Spark, a web and mobile app for creating multimeadia content. With Creative Cloud Express, you can add subtitles or captions to videos online without downloading any software on your computer. It also provides lots of editing tools such as convert video to GIF, reverse videos, merge videos, resize videos for different social , and change video speed.
You can use Creative Cloud Express for free, which includes most core features, but if you want to upgrade to use all features and assets, you may need to pay $9.99/month for the premium plan.
To add subtitles to video with Creative Cloud Express, follow the steps below:
- Visit https://www.adobe.com/express/feature/video/add-subtitle and click Add subtitles to your videos now to get started. Follow the instruction to sign up and sign in your account.
- Adobe will ask you to pick a story template, but you can always start from scratch. Here I will choose a template.
- Now import video or picture material from your computer, and adjust its position in the timeline.
- Pick from a variety of subtitle layout alternatives and change the text size as necessary.
- After adding titles and subtitles to your video, click the Download button to save your video to local computer.

If you prefer to add subtitles to video on Windows or Mac computer, you can try Filmora video editor . Compared with those online tools, Filmora video editor is undoubtedly a great choice for those who need more customized and stylish subtitles.

For Win 7 or later (64-bit)
 Secure Download
For macOS 10.12 or later
Secure Download
Whether you want to edit home movies to send to family and friends or upload to YouTube and Vimeo for sharing, this video editor from Wondershare Filmora can help take your videos to a higher level effortlessly. Here, let’s take a look at the main features of this video editing software.
Filmora is compatible with the Filmstock effects store, an online stock media including video effects, va library for your video projects,video footage, music, sound effects, and stock images as well.
2. Kapwing
As one of the best online video editors , Kapwing allows you to add subtitles to the video easily. It gives three options for adding subtitles: upload an SRT file, manually add them, or have them auto-generated . It opens the video in the online video editor in either situation.
You can place subtitles anywhere on the screen, and you can relocate them at any time. Apart from that, you can customize the text’s appearance with formatting options, text color, and background color. However, you can export videos up to 30 minutes long for free, and to export longer video, you need to pay $16 per month. And in order to download the edited video without a watermark, you must create an account.
To use Kapwing subtitle creator online, follow these steps:
- Go to https://www.kapwing.com/subtitles , and upload your video file.
- On the Add Subtitles screen, choose the method for adding subtitles: add subtitles manually, or use auto-generated, or upload .SRT file. Here I will try add subtitles manually.
- When adding subtitles, make sure the timestamps are correct on the video. (If required) Set the time for precise sync (if desired).
- Click the “Done” button to return to the main editor. Click Export Video and then download it with embedded subtitles.

3. Clideo
Clideo is a video creation app that lets users add subtitles to their own videos. You can add subtitles in any language from an official list of languages available on the website. After adding the subtitle, you can re-position it anywhere on the screen with a few clicks. For free users, Claudio only allows HD exports, and they cannot download the video without a watermark.
To use this subtitle maker online tool, follow these steps:
- Visit https://clideo.com/add-subtitles-to-video and click Add subtitles to your videos now to get started after you register yourself on Clideo with your email id and password.
- Upload the video file from local storage, Google Drive or Dropbox, and then pick an option for adding captions: manually or using a subtitle file. Select the first instance, click “Add subtitle,” type your text, and set the timings.
You can also add a title, leader lines, and subheadings to your presentation. The font, color, background, size, and slide alignment are adjustable.
4. Veed.io
Veed.io is another easy-to-use web video editing tool with several subtitle options for adding subtitles. You can add subtitles quickly and easily, type them manually or upload them in SRT file format.
Veed is an automated subtitling platform that helps people add subtitles online to their YouTube videos without using off-the-shelf subtitle processing software. It is suitable for individuals who have no time or patience to type out long sentence structures one letter at a time. You can start without an account.
You can choose the color of the text, the background of subtitles, and more, to make your film look more attractive. It allows you to share your movies with friends via social media networks like Twitter and Facebook.
To use Veed subtitle creator online, follow these steps:
- Go to https://www.veed.io/tools/auto-subtitle-generator and click on “Get Started.” You can select a blank project or a template.
- Go to the Project Settings section on the left. Choose any one of them depending on your requirements and click Next.
- While using automated transcription, you have to upload.SRT subtitle file or enter the transcript manually.
- You can also personalize the text, color, size, font, alignment, and anything else you want.Make changes to the timeline and then sync the subtitles.
- After that, go to the Export and save the video.
5. Flixier
Flixier is one of the most accessible tools to add subtitles online. Flixier is an efficient auto subtitle generation and syncing platform. You can add any video file type with auto subtitles in Flixier. You can add auto subtitles to MPEG, MP4, MOV, AVI, or any other file on your system. There is no need to convert the video or do extra work. This automatic subtitle maker takes care of everything.
Flixier allows you to make a video subtitle automatically and manually create one or add a subtitle from your computer. You may submit any type of subtitle file (SRT, VTT, ASS, SSA, TXT).
To use Flixier subtitle maker online, follow these steps:
- Go to https://flixier.com/tools/auto-subtitle-generator and click on “Get Started.”
- You must first upload your videos to the Flixier library to create subtitles automatically.
- You may do so by uploading from your computer, importing from cloud storage services, or straight from YouTube, Zoom, or Twitch.
- After importing them, you may drag and drop your movie clips on the Flixier timeline.
- In the pop-up window that appears, click on one, and a button saying “Generate Auto Subtitle” will appear on the right. After you’ve finished your work, click start to have your subtitling generated and added onto the timeline where you can continue making changes.
- Finally, Flixier’s cloud rendering engine lets you export your film in minutes.
- Now, you may save the video to your computer or send it straight to social media.
6. Subtitle Horse
Subtitle Horse is a browser-based subtitler for online video captioning. There are many features, such as real-time validation, an interactive timeline, and shortcuts. Subtitle horse is highly configurable: Subtitles may be made by both amateurs and experts. Users must create an account to upload videos.
With the free version of subtitle horse, you may add subtitles and captions to your video. You may export your subtitles in the necessary formats (SRT, TimedText, WebVTT, etc.). The video can be accessed online, on a platform like YouTube, Dropbox, or others.
To use Subtitle-Horse subtitle creator online, follow these steps:
- Go to https://subtitle-horse.com/ and click on “Create subtitles with the free version.”
- Upload your video or add a URL by clicking the “Add Project” button
- Click “Next” and select “Frame Rate” and “Waveform.”
- Click “Start Subtitling”
- After adding subtitles, you can download them for free or buy HD-quality MP4 videos.
7. Subtitle Bee
SubtitleBee understands and automatically translates more than 120 languages across the world. Before uploading your video, simply choose your language and let SubtitleBee handle the rest by adding subtitles in your desired language.
The algorithm is about 95% accurate in detecting your voice and adding automated captions based on most languages. AI subtitle translation allows you to translate subtitles into other languages. You can use it for free with limited features and watermarked files. There is a time limit on free trial accounts, so you can add videos shorter than 10 minutes in length.
To use Subtitle-Bee subtitle maker online, follow these steps:
- Go to https://subtitlebee.com/ and click on “Add subtitles now”
- Then select the language of the current media voices.
- Now, Upload your video or paste a URL from Youtube, Vimeo, or self-hosted.
- Make any modifications as needed by editing the subtitles to meet your demands.
- Simply add the text you want and customize it to your own needs.
- Choose the social networking site that you wish to publish on.
- Download and encode your video with the subtitles included.
8. Fastreel

Fastreel allows you to create a video with subs and change the text settings: font, size, color, style, and position. A free membership will allow you to produce and share videos in the format of your choice, as well as access stock media. The cost of a paid subscription is $5.95 per video.
Furthermore, there are several colorful templates for various events — explainer videos, wedding films, YouTube intros, customer testimonials, and so forth. To personalize each template, you may use your own photos, films, music, and text. Plus, every template has its own title and transition style. Fastreel is not made for professional users; it’s a tool for novices and those searching for fast answers.
To use Fastreel subtitle creator online, follow these steps:
- Go to https://www.fastreel.com/add-subtitles-to-video.html and click on “Add subtitles now”
- Click the Add Your File button to upload any MOV, MKV, AVI, WMV, or MP4 content less than 500 MB in size. You can add subtitles only to the first hour of a film; therefore, it’s best to pick one with fewer subtitles.
- To add an SRT file to a video, select Upload SRT. You can modify each caption and its timing.
- You can also alter the text’s font, size, color, style, and position. The button labeled “Download SRT” allows you to save the subtitles file for later use.
- Then, scroll down to the bottom of the page and click Continue.
- After finishing, click the Export button. Choose a name and destination for your video, then choose a format. You’ll see the export window where you can select a save option that is appropriate for you. Subtitles will be permanently added to the video.
9. EZGIF

EZGIF is a well-known website for animated GIFs. EZGIF has several tools for GIFs, Photos, and Videos. It offers an online tool to add subtitles to videos that you may use. It’s pretty simple to utilize and provides two methods for adding subtitles. You can upload a maximum of 100 MB on EZGIF. If your video is larger than 100 MB, you may compress it using EZGIF.
To add subtitles to a video on EZGIF, follow these steps:
- Go to https://ezgif.com/video-subtitles .
- Upload a video file or copy and paste the URL of a video available on the internet.
- To add subtitles, click the “Upload” button. To enter them manually, scroll to the bottom of the screen.
- Simply type the subtitle in the box, then set the time duration for when it should appear in the video. To cover the whole video, you may add more subtitles as well.
- After that, click “Add Subtitles” and then save the output.
10. PROMO

Promo is a website that makes promotion easier. This online tool lets users add basic subtitles to videos with ease as a video creation software. This site is free of charge and does not require registration to use the subtitle function, but it does give you an ad at the beginning of your finished video.
Using Promo, you may add video captions or subtitles from your browser anytime, anytime, anyplace. There’s no need to download anything; it’s as simple as clicking a link. The free version comes with a watermark. For the ad-free version, there is a $99/month fee.
To add subtitles with Promo subtitle maker online, follow the steps below:
- Go to https://promo.com/tools/add-subtitles-to-video .
- Upload the video you wish to caption or subtitle.
- You can use one of the platform’s professionally designed video templates or premium clips to construct a new film from the ground up.
- To add a caption to your video, after uploading it in Promo’s video editor, click the circular pink plus sign to the left of the timeline. Choose “Add Caption” from the dropdown menu.
- After you’ve added and positioned, and designed your subtitles with beautiful text and colors, click Save & Preview to view your creation and publish or download it.
Conclusion
If you need subtitles for your videos, it is important to find the best subtitle maker online that will suit all of your needs. Whether you are looking for a free option or want something with more customization, there are plenty of options available online. Check out our list, and make sure to choose one that suits what you need!
Creative Cloud Express is re-branded from Adobe Spark, a web and mobile app for creating multimeadia content. With Creative Cloud Express, you can add subtitles or captions to videos online without downloading any software on your computer. It also provides lots of editing tools such as convert video to GIF, reverse videos, merge videos, resize videos for different social , and change video speed.
You can use Creative Cloud Express for free, which includes most core features, but if you want to upgrade to use all features and assets, you may need to pay $9.99/month for the premium plan.
To add subtitles to video with Creative Cloud Express, follow the steps below:
- Visit https://www.adobe.com/express/feature/video/add-subtitle and click Add subtitles to your videos now to get started. Follow the instruction to sign up and sign in your account.
- Adobe will ask you to pick a story template, but you can always start from scratch. Here I will choose a template.
- Now import video or picture material from your computer, and adjust its position in the timeline.
- Pick from a variety of subtitle layout alternatives and change the text size as necessary.
- After adding titles and subtitles to your video, click the Download button to save your video to local computer.
If you prefer to add subtitles to video on Windows or Mac computer, you can try Filmora video editor . Compared with those online tools, Filmora video editor is undoubtedly a great choice for those who need more customized and stylish subtitles.
For Win 7 or later (64-bit)
Secure Download
For macOS 10.12 or later
Secure Download
Whether you want to edit home movies to send to family and friends or upload to YouTube and Vimeo for sharing, this video editor from Wondershare Filmora can help take your videos to a higher level effortlessly. Here, let’s take a look at the main features of this video editing software.
Filmora is compatible with the Filmstock effects store, an online stock media including video effects, va library for your video projects,video footage, music, sound effects, and stock images as well.
2. Kapwing
As one of the best online video editors , Kapwing allows you to add subtitles to the video easily. It gives three options for adding subtitles: upload an SRT file, manually add them, or have them auto-generated . It opens the video in the online video editor in either situation.
You can place subtitles anywhere on the screen, and you can relocate them at any time. Apart from that, you can customize the text’s appearance with formatting options, text color, and background color. However, you can export videos up to 30 minutes long for free, and to export longer video, you need to pay $16 per month. And in order to download the edited video without a watermark, you must create an account.
To use Kapwing subtitle creator online, follow these steps:
- Go to https://www.kapwing.com/subtitles , and upload your video file.
- On the Add Subtitles screen, choose the method for adding subtitles: add subtitles manually, or use auto-generated, or upload .SRT file. Here I will try add subtitles manually.
- When adding subtitles, make sure the timestamps are correct on the video. (If required) Set the time for precise sync (if desired).
- Click the “Done” button to return to the main editor. Click Export Video and then download it with embedded subtitles.
3. Clideo
Clideo is a video creation app that lets users add subtitles to their own videos. You can add subtitles in any language from an official list of languages available on the website. After adding the subtitle, you can re-position it anywhere on the screen with a few clicks. For free users, Claudio only allows HD exports, and they cannot download the video without a watermark.
To use this subtitle maker online tool, follow these steps:
- Visit https://clideo.com/add-subtitles-to-video and click Add subtitles to your videos now to get started after you register yourself on Clideo with your email id and password.
- Upload the video file from local storage, Google Drive or Dropbox, and then pick an option for adding captions: manually or using a subtitle file. Select the first instance, click “Add subtitle,” type your text, and set the timings.
You can also add a title, leader lines, and subheadings to your presentation. The font, color, background, size, and slide alignment are adjustable.
4. Veed.io
Veed.io is another easy-to-use web video editing tool with several subtitle options for adding subtitles. You can add subtitles quickly and easily, type them manually or upload them in SRT file format.
Veed is an automated subtitling platform that helps people add subtitles online to their YouTube videos without using off-the-shelf subtitle processing software. It is suitable for individuals who have no time or patience to type out long sentence structures one letter at a time. You can start without an account.
You can choose the color of the text, the background of subtitles, and more, to make your film look more attractive. It allows you to share your movies with friends via social media networks like Twitter and Facebook.
To use Veed subtitle creator online, follow these steps:
- Go to https://www.veed.io/tools/auto-subtitle-generator and click on “Get Started.” You can select a blank project or a template.
- Go to the Project Settings section on the left. Choose any one of them depending on your requirements and click Next.
- While using automated transcription, you have to upload.SRT subtitle file or enter the transcript manually.
- You can also personalize the text, color, size, font, alignment, and anything else you want.Make changes to the timeline and then sync the subtitles.
- After that, go to the Export and save the video.
5. Flixier
Flixier is one of the most accessible tools to add subtitles online. Flixier is an efficient auto subtitle generation and syncing platform. You can add any video file type with auto subtitles in Flixier. You can add auto subtitles to MPEG, MP4, MOV, AVI, or any other file on your system. There is no need to convert the video or do extra work. This automatic subtitle maker takes care of everything.
Flixier allows you to make a video subtitle automatically and manually create one or add a subtitle from your computer. You may submit any type of subtitle file (SRT, VTT, ASS, SSA, TXT).
To use Flixier subtitle maker online, follow these steps:
- Go to https://flixier.com/tools/auto-subtitle-generator and click on “Get Started.”
- You must first upload your videos to the Flixier library to create subtitles automatically.
- You may do so by uploading from your computer, importing from cloud storage services, or straight from YouTube, Zoom, or Twitch.
- After importing them, you may drag and drop your movie clips on the Flixier timeline.
- In the pop-up window that appears, click on one, and a button saying “Generate Auto Subtitle” will appear on the right. After you’ve finished your work, click start to have your subtitling generated and added onto the timeline where you can continue making changes.
- Finally, Flixier’s cloud rendering engine lets you export your film in minutes.
- Now, you may save the video to your computer or send it straight to social media.
6. Subtitle Horse
Subtitle Horse is a browser-based subtitler for online video captioning. There are many features, such as real-time validation, an interactive timeline, and shortcuts. Subtitle horse is highly configurable: Subtitles may be made by both amateurs and experts. Users must create an account to upload videos.
With the free version of subtitle horse, you may add subtitles and captions to your video. You may export your subtitles in the necessary formats (SRT, TimedText, WebVTT, etc.). The video can be accessed online, on a platform like YouTube, Dropbox, or others.
To use Subtitle-Horse subtitle creator online, follow these steps:
- Go to https://subtitle-horse.com/ and click on “Create subtitles with the free version.”
- Upload your video or add a URL by clicking the “Add Project” button
- Click “Next” and select “Frame Rate” and “Waveform.”
- Click “Start Subtitling”
- After adding subtitles, you can download them for free or buy HD-quality MP4 videos.
7. Subtitle Bee
SubtitleBee understands and automatically translates more than 120 languages across the world. Before uploading your video, simply choose your language and let SubtitleBee handle the rest by adding subtitles in your desired language.
The algorithm is about 95% accurate in detecting your voice and adding automated captions based on most languages. AI subtitle translation allows you to translate subtitles into other languages. You can use it for free with limited features and watermarked files. There is a time limit on free trial accounts, so you can add videos shorter than 10 minutes in length.
To use Subtitle-Bee subtitle maker online, follow these steps:
- Go to https://subtitlebee.com/ and click on “Add subtitles now”
- Then select the language of the current media voices.
- Now, Upload your video or paste a URL from Youtube, Vimeo, or self-hosted.
- Make any modifications as needed by editing the subtitles to meet your demands.
- Simply add the text you want and customize it to your own needs.
- Choose the social networking site that you wish to publish on.
- Download and encode your video with the subtitles included.
8. Fastreel
Fastreel allows you to create a video with subs and change the text settings: font, size, color, style, and position. A free membership will allow you to produce and share videos in the format of your choice, as well as access stock media. The cost of a paid subscription is $5.95 per video.
Furthermore, there are several colorful templates for various events — explainer videos, wedding films, YouTube intros, customer testimonials, and so forth. To personalize each template, you may use your own photos, films, music, and text. Plus, every template has its own title and transition style. Fastreel is not made for professional users; it’s a tool for novices and those searching for fast answers.
To use Fastreel subtitle creator online, follow these steps:
- Go to https://www.fastreel.com/add-subtitles-to-video.html and click on “Add subtitles now”
- Click the Add Your File button to upload any MOV, MKV, AVI, WMV, or MP4 content less than 500 MB in size. You can add subtitles only to the first hour of a film; therefore, it’s best to pick one with fewer subtitles.
- To add an SRT file to a video, select Upload SRT. You can modify each caption and its timing.
- You can also alter the text’s font, size, color, style, and position. The button labeled “Download SRT” allows you to save the subtitles file for later use.
- Then, scroll down to the bottom of the page and click Continue.
- After finishing, click the Export button. Choose a name and destination for your video, then choose a format. You’ll see the export window where you can select a save option that is appropriate for you. Subtitles will be permanently added to the video.
9. EZGIF
EZGIF is a well-known website for animated GIFs. EZGIF has several tools for GIFs, Photos, and Videos. It offers an online tool to add subtitles to videos that you may use. It’s pretty simple to utilize and provides two methods for adding subtitles. You can upload a maximum of 100 MB on EZGIF. If your video is larger than 100 MB, you may compress it using EZGIF.
To add subtitles to a video on EZGIF, follow these steps:
- Go to https://ezgif.com/video-subtitles .
- Upload a video file or copy and paste the URL of a video available on the internet.
- To add subtitles, click the “Upload” button. To enter them manually, scroll to the bottom of the screen.
- Simply type the subtitle in the box, then set the time duration for when it should appear in the video. To cover the whole video, you may add more subtitles as well.
- After that, click “Add Subtitles” and then save the output.
10. PROMO
Promo is a website that makes promotion easier. This online tool lets users add basic subtitles to videos with ease as a video creation software. This site is free of charge and does not require registration to use the subtitle function, but it does give you an ad at the beginning of your finished video.
Using Promo, you may add video captions or subtitles from your browser anytime, anytime, anyplace. There’s no need to download anything; it’s as simple as clicking a link. The free version comes with a watermark. For the ad-free version, there is a $99/month fee.
To add subtitles with Promo subtitle maker online, follow the steps below:
- Go to https://promo.com/tools/add-subtitles-to-video .
- Upload the video you wish to caption or subtitle.
- You can use one of the platform’s professionally designed video templates or premium clips to construct a new film from the ground up.
- To add a caption to your video, after uploading it in Promo’s video editor, click the circular pink plus sign to the left of the timeline. Choose “Add Caption” from the dropdown menu.
- After you’ve added and positioned, and designed your subtitles with beautiful text and colors, click Save & Preview to view your creation and publish or download it.
Conclusion
If you need subtitles for your videos, it is important to find the best subtitle maker online that will suit all of your needs. Whether you are looking for a free option or want something with more customization, there are plenty of options available online. Check out our list, and make sure to choose one that suits what you need!
12 Amazing Free Animation Programs for PC and Mac
Best 12 Free Download Animation Software for Windows and Mac

Shanoon Cox
Mar 27, 2024• Proven solutions
In your search for quality animation software, you may have found that many of the programs cost a lot of money no matter it is 2D animation software or 3D animation editor. The good news is that you can choose free animation tools to make different animation types easily.
That is why we created a list of the best animation software on both Mac and Windows. Whether you are a professional editor or just a beginner to start making animation, you will find the tools listed below are easy to use without watermark and won’t cost money to improve your skills.
The best part is you will find these free animation programs are also very useful for content creation on Mac and Windows. Besides, we have listed the pros and cons of each software. Keep reading!
- Part 1: Best Free Animation Software for Mac
- Part 2: Best Free Animation Software for Windows
- Part 3: FAQ about Animation Software for Windows and Mac
Here we have made a table of 12 free animation software without watermark on Windows and macOS. Take a look.
6 Free Animation Software for macOS
5K-3DMiddleIt is a great tool for 3D artists6KritaDifficultPerfect software for 2D animation
| Number | Software | Difficulty Level | Highlight |
|---|---|---|---|
| 1 | Synfig Studio | Easy | Calculate vector shape to animation automatically |
| 2 | Pencil2D Animation | Easiest | Straightforward interface for beginners |
| 3 | Tupi | Middle | Its community is active to offer solutions |
| 4 | Blender | Difficult | It is a powerful animation tool to render and make modeling |
6 Free Animation Software for Windows
| Number | Software | Difficulty Level | Highlight |
|---|---|---|---|
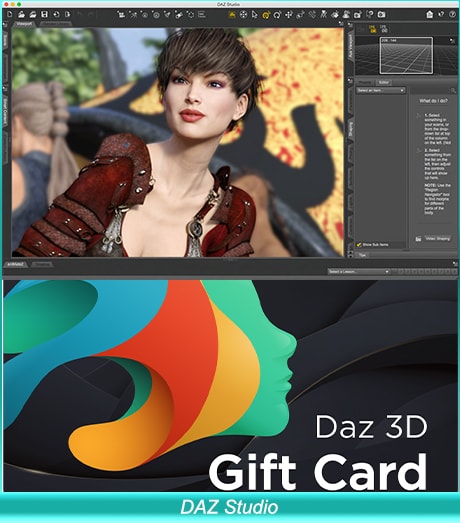
| 1 | DAZ Studio | Difficult | For professional users with the fast animation process |
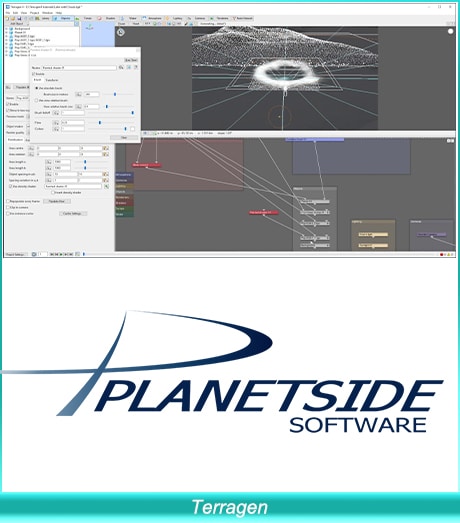
| 2 | Terragen | Middle | It can make realistic CG environments |
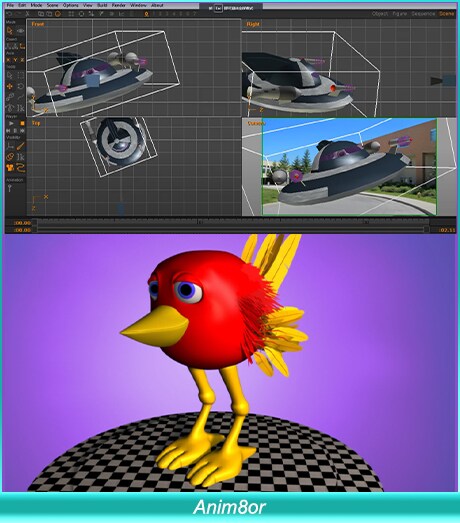
| 3 | Anim8or | Difficult | 3D animation is Anim8or’s main function |
| 4 | Seamless3d | Easy | It has many features for 3d modeling |
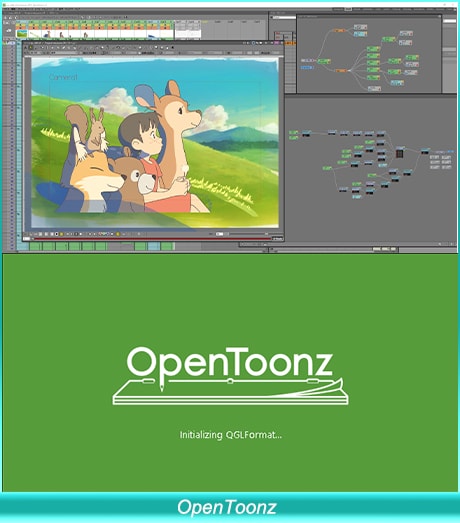
| 5 | OpenToonz | Middle | Make cartoon animation with plugins |
| 6 | Stykz | Easy | Quickly make animation if you have used Pivot StickFigure Animator |
Best Animation Software on Windows and Mac - Filmora
Looking for a simple while powerful Mac video editing tool ? We recommend using Wondershare Filmora. You can use it to create 2D/3D animated texts, shapes, or anything you like for YouTube videos.
The keyframing features will help you make animation effects smooth and precise. When exporting, you can also make it transparent.
Besides, various title templates and transitions are also available for you. Download it now to have a try! Or learn more from Wondershare Video Community .
Key features
- Create various shapes that you like
- Add keyframing to make it move
- Fine-tuning to make it smooth
- Add visual effects/text/color before export it


You can even create photo cut animation which has been very trendy on Tiktok and Instagram. Here is a video to present you how you can do it in Filmora.
Part 1 Best Free Animation Software for Mac
Listed below is free animation software on Mac. Take a look.
01 Synfig Studio - Mac Software to Animate Video
Difficulty Level: Easy
Pro: You can create many layers once a time and sync audio for your animation.
Con: This one needs much time to learn, especially for beginners.
An open-source 2D animation software that works on Macs, Synfig Studio delivers multiple players while you are creating content. Whether you want to add geometric, filters, distortions, or transformations, it is all possible! And thanks to the high-end bone system, you can create cut-out videos using bitmap images!
The thoughtful part is there are two download versions on the homepage: the stable version and the development version. If you want to enjoy a stable and smooth animation editing experience, choose the stable one. However, the development package gives you access to the use of the latest features.
For a novice, you can learn Synfig from step by step guide in Wikipedia and video tutorials. Four languages are available including English, Russian, Dutch, and French for a video course.
You can free download its latest version 1.3.11. The upcoming version is 1.4.
Features:
- It offers support for many layers within the animation.
- The program’s bone system means that you can easily create animations with bitmap images or vector artwork.
- It allows you to sync your creative work with any sound that you want. Has a full-featured audio editor.
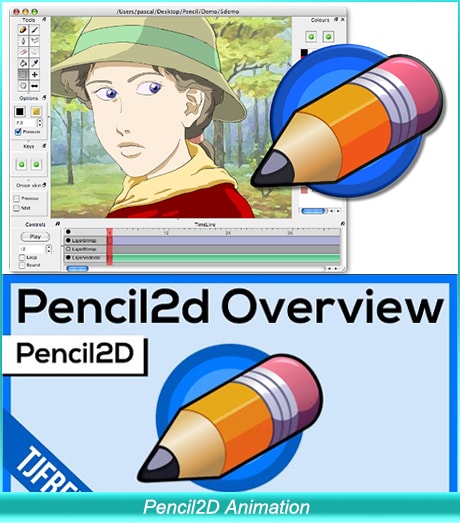
02 Pencil2D Animation - Animation Program for 2D Pencil Lover
Difficulty Level: Easiest
Pro: Easy to start and make animation as the interface is user-friendly for many people.
Con: You need to set your preference every time to open it up, so it takes up some time
Pencil2D Animation is one of the simplest 2D hand-drawn tools available. It will work flawlessly on Mac computers. It is ideal for beginners, as the commands and interface are very easy to understand.
Whether you want to create a simple one, or you want something with many layers for videos on YouTube, you can use Pencil2D animation to get it done. Its timeline is easy to use at first glance. You can add and duplicate different frames on a different track.
The frequency of releasing the new version is very fast as Pencil2D is committed to bringing the lasted features to each user. The newest version is v0.6.4 (as of August 2019). Its user guide is informative with video tutorials, FAQs, and manual material.
Features:
- Lightweight and minimalistic design that makes it very easy for beginners.
- Features raster and vector workflows, with easy switching between them. You can paint and sketch as you want!
- Will run on all platforms - Mac, Windows, and Linux.
- Completely free and open source.
03 TupiTube - Free Animation Application for Mac Users
Difficulty Level: Middle
Pro: It supports vector illustrations. Besides, various formats are available.
Con: If you want to make 3D animation, it will fail. You can only make 2D effects.
A free software application for YouTube, Tupi will allow you to create 2D animations to your heart’s content. The tool was started by animators who wanted to create something that others could use.
It is an open-source tool, which means that users can make tweaks to the program if they have some interesting ideas. The program works on both Windows and Mac. You need to use Tupi and Papagayo to make lip-sync animation with different mouth shapes.
It also offers a solution for schools with related features including academic license, technical support, and ads-free, so many schools choose to use this one to teach kids how to make an animation video.
Features:
- Support for vector illustrations. You can add rectangles, lines, polygons, and other shapes as you please. To fill areas, just use the paint bucket.
- You can import raster images using this program.
- You can export all your finished images into different file formats.
- Support for tweeting positions, scale, shear, and rotations.

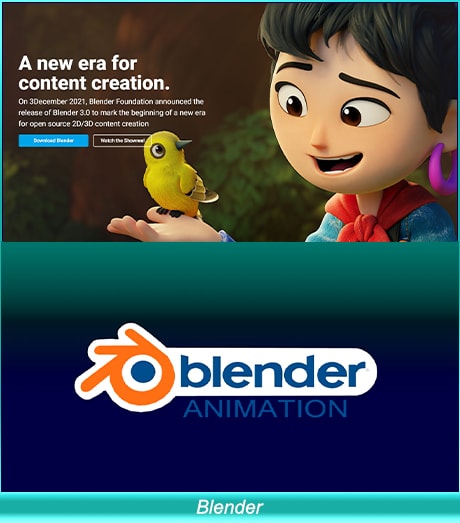
04 Blender - Need Some Time to Learn This Animation Tool
Difficulty Level: Difficult
Pro: Really powerful software that you can make for professional users.
Con: It is not easy to make image animation as it focuses on 3D.
Blender is an open-source 3D animation creation suite without a watermark. If you find that 2D is a little bit limiting, we think that you will be very happy with what this free program offers. You can take your projects to a whole new level when you can use this program on your Mac.
You can use Blender to make a video game, modeling, and high-quality animation. However, it involves a steep learning curve. Luckily, there are many tutorials to guide you through the journey. You can also ask for help in the Blender community that millions of talented people like you are there.
Features:
- Creating renders is no problem with this program.
- Modeling, such as sculpting, retopology, and creating curves is not an issue either.
- VFX and animation features are better than any option on the market.
- It offers powerful simulation tools.
- Integration with pipeline tools is easy.
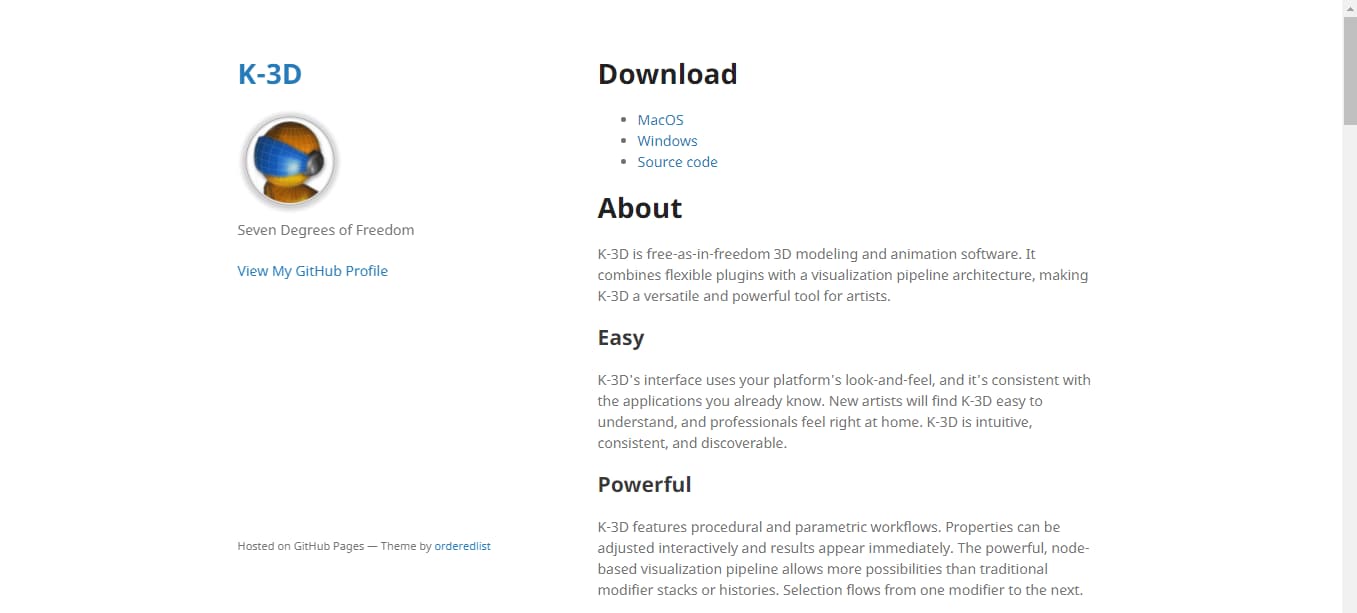
05 K-3D - Best for Animation and Modeling in 3D
Difficulty Level: Middle
Pro: Ideal for designing simple 3D animations and models.
Con: It has an old-fashioned interface. Also, the built-render (RenderMan) feature is difficult to use by beginners.
K-3D is an animation and 3D modeling software. You can download this tool for free on your Mac. Besides, you can also install and run it on your Windows and Linux systems. If you look at the design, you will find that the software is quite old. But don’t judge a book by its cover. Why so? It is because K-3D is one of the strongest and most versatile tools for 3D artists with many options.
For example, K-3D offers extremely systematic and methodological workflows. You can easily adjust the properties of the features in real-time and get instant results. It has a node-oriented visualization pipeline to enjoy more freedom. That means you can create animation using a variety of combinations.
One of the best things about K-3D is that it has three subdivisions of animation. You can work on your model on one side while showing the other side in a mirrored form. Then, experience the final result combined together. And in case you need to make the changes to the end results, you can simply work on the first subdivision and savor automatic changes to the results.
K-3D has an advanced redo and undo mechanism to ensure you can go back or move forward to make corrections or amendments without limits. Additionally, the tool is developed keeping in mind all the industrial standards. For instance, it has complete support and integration of native RenderMan™ to its user interface. This is an excellent feature because most free animation software for Mac requires third-party render plugins.
Features:
- Parametric workflow.
- 2D and 3D animation tools.
- Allows Python and K3DScript scripting.
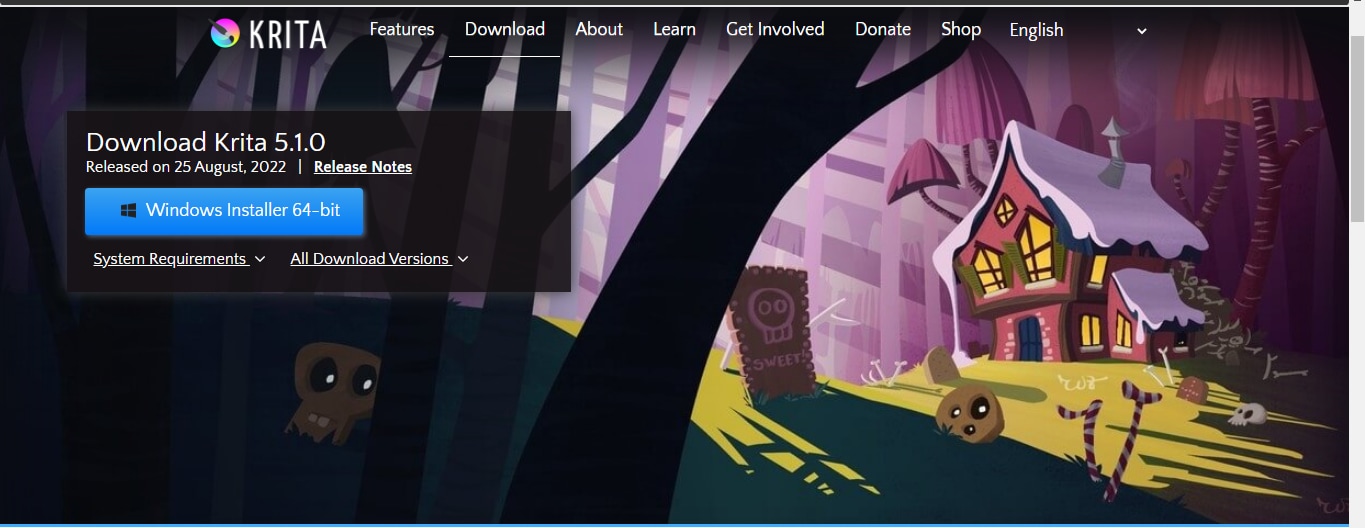
06 Krita - For Professional 2D Animators
Difficulty Level: Difficult
Pro: Advanced tools with numerous animation options and online training material.
Con: Not suitable for beginners.
If you love 2D animation, then you’ll surely love Krita. It is entirely free software available on Mac, Windows, and Linux. Also, it offers a full platform for drawing and frame-by-frame animation.
The number one reason for adoring Krita is its brush library. There are more than 100 professional brushes to give you a wide range of effects. Moreover, the strokes are pretty amazing and similar to Adobe Photoshop or Adobe Illustrator.
Another great thing about Krita is the brush stabilization feature designed for shaky hands. You can add a stabilizer to your chosen brush to smoothen its flow. Besides, there’s a special Dynamic Brush tool to make animation more fun. At the same time, you can also customize your brushes through different brush engines, including filter engines, color smudge engines, and many more.
Apart from the basic brush options, the preloaded vector tools are next to admire. These tools help you make great comic panels. All you need to do is choose and drag the word bubble template on your canvas. Then, make changes with the anchor point to make new shapes. At the same time, you can also add text to your animation by using the text tool.
Last but not least, there’s a wrap-around mode to create seamless patterns and textures. That means the image or drawing makes its own references along the x-axis and y-axis. This gives you the freedom to continue painting and enjoy updates to your animation instantly.
Features:
- HDR painting.
- PSD support.
- Python scripting.
- Selection and transformation tools.
- Proper group, filter, vector, and file layer management.
- Complete color management for extraordinary results.
- Drawing assistant to help you with straight lines and vanishing points.
Part 2 Best Free Animation Software for Windows
Below is free animation software on Windows. Keep reading.
01 Anireel - Easy to Use Animation Software
Difficulty Level: Easy
Anireel is a simple yet powerful Video Creativity tool used to make 2D animated explainer videos. Developed by Wondershare, one of the most popular Windows software and tool developers, Anireel uses rich, ready-to-use, and diverse assets to help one effortlessly make animated videos.
Features:
- There are tons of drag and drop characters, actions, props, text, and audio assets.
- Easy Text-to-Speech conversion via deep studying technology.
- Animate integrated and imported assets.
- Tons of templates that match many script types.

02 DAZ Studio - Free Software for 3D Lovers
Difficulty Level: Difficult
Pro: You can make game animation for fun. It also supports GPU accelerated real-time rendering.
Con: It has a high demand for the device, but owns a steep learning curve.
Daz 3d is a powerful and completely free 3D creation tool that will let you create the short videos that you want. Whether you are using this for business or pleasure, you will find the program is very easy to understand. Within a day, you will be completely used to its interface.
3D effects are the core focus of DAZ Studio. You can build a model, render, and pose animation within the skin texture level. It has a high requirement for the device. For Windows 64 bits, its recommended RAM is 3G.
Features:
- Options for 3D morphing, animation, and rendering.
- GPU accelerated real-time rendering, which delivers the best results.
- Interactive tutorials to help you become a better 3D artist.
- Everything you make is yours, royalty-free!
03 Terragen - Use It to Make CG Animation
Difficulty Level: Middle
Pro: The recently updated version is the best one. Ray-traced preview is a great function to help us make animation.
Con: The interface looks complicated, but it gets easy to know after you are familiar with it.
A completely free program that you can download and install on all Windows computers and tablets, Terragen is the ideal program for you to create the 3D animations and environments that you want. If you want a photo-realistic CG environment, using Terragen is the best way to do it!
Releasing imagination instantly, Terragen Creative is the one tool you’d like to consider. You can use it to make beautiful scenery.
For advanced tools, you can choose FBX to make animation quickly. The featured image gallery on its homepage will give you a deep understanding of the final outcome you can achieve with Terragen.
Features:
- Ray-traced preview. Without watermark after exporting
- Photo-realistic clouds and ozone simulation
- Rendering is twice as fast as the previous version of the program.
- Adding terrain, objects, and shader to your final product is very easy with the intuitive interface.
04 Anim8or - Free Tool to Make 3D Modeling
Difficulty Level: Difficult
Pro: Anim8or supports 3D modeler and TrueType fonts to meet advanced needs.
Con: Beginners will find it difficult to learn.
Anim8or is a free 3D modeling program that will let you create the unique work that you want. It is a personal project from an animator, but the program does get regular updates and troubleshooting.
It is not going to give you the same features as something like Studio Max or Maya, but you will get the basics. Beginners who are getting into animations will love this program.
Anim8or is a great tool to step into 3D animation ff you think other software is too different to start. In some way, it means you need to give up some advanced features. But all in all, it’s still recommended for you.
Features:
- A full 3D modeler that allows you to create spheres, cylinders, platonic solids, and any other objects that you want.
- Features support for TrueType fonts.
- Easy to create 3D scenes and output them as video files or images.
05 Seamless3d - Open-source Free Software
Difficulty Level: Easy
Pro: It is an open-source 3D modeling package. The good thing is the handy infinite Undo/Redo operation.
Con: Some advanced features are missing like drawing.
Seamless3d, an open-source 3D modeling software that you can download, is among the best animation worktables if you want to create specialized images, animated videos, or 3D characters.
It supports FFmpeg video format, so you can use AVI, MP4, and more. Besides, the forum is not active compared with before, but you still can find answers from many tutorials .
Features:
- It comes with infinite undo and redo options for complete flexibility to correct mistakes.
- It allows for partitioned and seamless texture mapping for YouTube videos.
- Has a specialized tree view interface.

06 OpenToonz - Support Plug in to Make Animation Freely
Difficulty Level: Middle
Pro: It is open-source software, so you can change the code freely.
Con: The plug-in effects are limited.
This animation program is made for beginners on Windows. It is among the best 2D animation software in the market. You can use plug-in effects to change image style, add lights, and distort details. It supports Windows 7/8/10 only for 64 bit.
Features:
- You can add provisional colors to make your animation more colorful.
- Smooth correction without frame losing.
- Compatible with black-and-white, colored, or without binarization scanning.
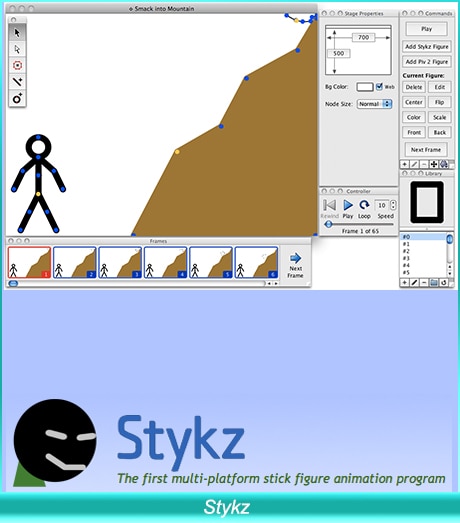
7 Stykz - Simple to Use Animation Program for Beginners
Difficulty Level: Easy
Pro: It is the best stick figure animation if you want to make this kind of video.
Con: The UI is not modern to use and needs time to adapt to using it.
Stykz is completely free to use and without a watermark. If you have used Pivot StickFigure Animator, then you will find Stykz is similar to it, but you can import the previous .stk files to animate it again. You can use it to make animation smooth frame by frame.
With its frame-based feature, Stykz is easy to customize each frame. You can change previous and current frames to get what you want. You can download it to have a try considering its easy-to-use features.
Features:
- There is some animes file on this website, so you can have a reference.
- Edit animation in the software without using another editing window.
- You can share the final work with others including information.
Part 3 FAQ about Animation Software for Windows and Mac
01 Are Macs good for animation?
To be frank, Mac is a better choice to make animation if you want to have a smooth animation experience. For example, screen resolution is a crucial factor to make excellent animation. The good is Mac’s screen will never let you disappointed.
02 What is the best animation software for Mac?
The best animation software on mac includes Synfig Studio, Pencil2D Animation, Tupi, Blender, and more. Mentioned are free-to-use. Maya is also worth considering animation software if you are a professional user. Maya offers a 1-month free trial. After it is ended, the paid plans are month, 1-year, and 3-year.
03 Can you animate in Photoshop?
Yes, you can make basic animation in Photoshop. However, it only supports frame-based animation making. In this case, you need to use other professional software to make animation. But, you still can use Photoshop to meet your needs if you are a beginner.
Conclusion
With any of these free animation maker programs on Mac and Windows, you will have an easy time creating your next 2D or 3D video. Ensure you choose the program that has the features and compatibility that you desire. Then it is up to your creative mind to come up with stunning animations! If you want to make animation easily, you can also find inspiration through classical animated cartoon types with examples .
Shanoon Cox
Shanoon Cox is a writer and a lover of all things video.
Follow @Shanoon Cox
Shanoon Cox
Mar 27, 2024• Proven solutions
In your search for quality animation software, you may have found that many of the programs cost a lot of money no matter it is 2D animation software or 3D animation editor. The good news is that you can choose free animation tools to make different animation types easily.
That is why we created a list of the best animation software on both Mac and Windows. Whether you are a professional editor or just a beginner to start making animation, you will find the tools listed below are easy to use without watermark and won’t cost money to improve your skills.
The best part is you will find these free animation programs are also very useful for content creation on Mac and Windows. Besides, we have listed the pros and cons of each software. Keep reading!
- Part 1: Best Free Animation Software for Mac
- Part 2: Best Free Animation Software for Windows
- Part 3: FAQ about Animation Software for Windows and Mac
Here we have made a table of 12 free animation software without watermark on Windows and macOS. Take a look.
6 Free Animation Software for macOS
5K-3DMiddleIt is a great tool for 3D artists6KritaDifficultPerfect software for 2D animation
| Number | Software | Difficulty Level | Highlight |
|---|---|---|---|
| 1 | Synfig Studio | Easy | Calculate vector shape to animation automatically |
| 2 | Pencil2D Animation | Easiest | Straightforward interface for beginners |
| 3 | Tupi | Middle | Its community is active to offer solutions |
| 4 | Blender | Difficult | It is a powerful animation tool to render and make modeling |
6 Free Animation Software for Windows
| Number | Software | Difficulty Level | Highlight |
|---|---|---|---|
| 1 | DAZ Studio | Difficult | For professional users with the fast animation process |
| 2 | Terragen | Middle | It can make realistic CG environments |
| 3 | Anim8or | Difficult | 3D animation is Anim8or’s main function |
| 4 | Seamless3d | Easy | It has many features for 3d modeling |
| 5 | OpenToonz | Middle | Make cartoon animation with plugins |
| 6 | Stykz | Easy | Quickly make animation if you have used Pivot StickFigure Animator |
Best Animation Software on Windows and Mac - Filmora
Looking for a simple while powerful Mac video editing tool ? We recommend using Wondershare Filmora. You can use it to create 2D/3D animated texts, shapes, or anything you like for YouTube videos.
The keyframing features will help you make animation effects smooth and precise. When exporting, you can also make it transparent.
Besides, various title templates and transitions are also available for you. Download it now to have a try! Or learn more from Wondershare Video Community .
Key features
- Create various shapes that you like
- Add keyframing to make it move
- Fine-tuning to make it smooth
- Add visual effects/text/color before export it
You can even create photo cut animation which has been very trendy on Tiktok and Instagram. Here is a video to present you how you can do it in Filmora.
Part 1 Best Free Animation Software for Mac
Listed below is free animation software on Mac. Take a look.
01 Synfig Studio - Mac Software to Animate Video
Difficulty Level: Easy
Pro: You can create many layers once a time and sync audio for your animation.
Con: This one needs much time to learn, especially for beginners.
An open-source 2D animation software that works on Macs, Synfig Studio delivers multiple players while you are creating content. Whether you want to add geometric, filters, distortions, or transformations, it is all possible! And thanks to the high-end bone system, you can create cut-out videos using bitmap images!
The thoughtful part is there are two download versions on the homepage: the stable version and the development version. If you want to enjoy a stable and smooth animation editing experience, choose the stable one. However, the development package gives you access to the use of the latest features.
For a novice, you can learn Synfig from step by step guide in Wikipedia and video tutorials. Four languages are available including English, Russian, Dutch, and French for a video course.
You can free download its latest version 1.3.11. The upcoming version is 1.4.
Features:
- It offers support for many layers within the animation.
- The program’s bone system means that you can easily create animations with bitmap images or vector artwork.
- It allows you to sync your creative work with any sound that you want. Has a full-featured audio editor.
02 Pencil2D Animation - Animation Program for 2D Pencil Lover
Difficulty Level: Easiest
Pro: Easy to start and make animation as the interface is user-friendly for many people.
Con: You need to set your preference every time to open it up, so it takes up some time
Pencil2D Animation is one of the simplest 2D hand-drawn tools available. It will work flawlessly on Mac computers. It is ideal for beginners, as the commands and interface are very easy to understand.
Whether you want to create a simple one, or you want something with many layers for videos on YouTube, you can use Pencil2D animation to get it done. Its timeline is easy to use at first glance. You can add and duplicate different frames on a different track.
The frequency of releasing the new version is very fast as Pencil2D is committed to bringing the lasted features to each user. The newest version is v0.6.4 (as of August 2019). Its user guide is informative with video tutorials, FAQs, and manual material.
Features:
- Lightweight and minimalistic design that makes it very easy for beginners.
- Features raster and vector workflows, with easy switching between them. You can paint and sketch as you want!
- Will run on all platforms - Mac, Windows, and Linux.
- Completely free and open source.
03 TupiTube - Free Animation Application for Mac Users
Difficulty Level: Middle
Pro: It supports vector illustrations. Besides, various formats are available.
Con: If you want to make 3D animation, it will fail. You can only make 2D effects.
A free software application for YouTube, Tupi will allow you to create 2D animations to your heart’s content. The tool was started by animators who wanted to create something that others could use.
It is an open-source tool, which means that users can make tweaks to the program if they have some interesting ideas. The program works on both Windows and Mac. You need to use Tupi and Papagayo to make lip-sync animation with different mouth shapes.
It also offers a solution for schools with related features including academic license, technical support, and ads-free, so many schools choose to use this one to teach kids how to make an animation video.
Features:
- Support for vector illustrations. You can add rectangles, lines, polygons, and other shapes as you please. To fill areas, just use the paint bucket.
- You can import raster images using this program.
- You can export all your finished images into different file formats.
- Support for tweeting positions, scale, shear, and rotations.
04 Blender - Need Some Time to Learn This Animation Tool
Difficulty Level: Difficult
Pro: Really powerful software that you can make for professional users.
Con: It is not easy to make image animation as it focuses on 3D.
Blender is an open-source 3D animation creation suite without a watermark. If you find that 2D is a little bit limiting, we think that you will be very happy with what this free program offers. You can take your projects to a whole new level when you can use this program on your Mac.
You can use Blender to make a video game, modeling, and high-quality animation. However, it involves a steep learning curve. Luckily, there are many tutorials to guide you through the journey. You can also ask for help in the Blender community that millions of talented people like you are there.
Features:
- Creating renders is no problem with this program.
- Modeling, such as sculpting, retopology, and creating curves is not an issue either.
- VFX and animation features are better than any option on the market.
- It offers powerful simulation tools.
- Integration with pipeline tools is easy.
05 K-3D - Best for Animation and Modeling in 3D
Difficulty Level: Middle
Pro: Ideal for designing simple 3D animations and models.
Con: It has an old-fashioned interface. Also, the built-render (RenderMan) feature is difficult to use by beginners.
K-3D is an animation and 3D modeling software. You can download this tool for free on your Mac. Besides, you can also install and run it on your Windows and Linux systems. If you look at the design, you will find that the software is quite old. But don’t judge a book by its cover. Why so? It is because K-3D is one of the strongest and most versatile tools for 3D artists with many options.
For example, K-3D offers extremely systematic and methodological workflows. You can easily adjust the properties of the features in real-time and get instant results. It has a node-oriented visualization pipeline to enjoy more freedom. That means you can create animation using a variety of combinations.
One of the best things about K-3D is that it has three subdivisions of animation. You can work on your model on one side while showing the other side in a mirrored form. Then, experience the final result combined together. And in case you need to make the changes to the end results, you can simply work on the first subdivision and savor automatic changes to the results.
K-3D has an advanced redo and undo mechanism to ensure you can go back or move forward to make corrections or amendments without limits. Additionally, the tool is developed keeping in mind all the industrial standards. For instance, it has complete support and integration of native RenderMan™ to its user interface. This is an excellent feature because most free animation software for Mac requires third-party render plugins.
Features:
- Parametric workflow.
- 2D and 3D animation tools.
- Allows Python and K3DScript scripting.
06 Krita - For Professional 2D Animators
Difficulty Level: Difficult
Pro: Advanced tools with numerous animation options and online training material.
Con: Not suitable for beginners.
If you love 2D animation, then you’ll surely love Krita. It is entirely free software available on Mac, Windows, and Linux. Also, it offers a full platform for drawing and frame-by-frame animation.
The number one reason for adoring Krita is its brush library. There are more than 100 professional brushes to give you a wide range of effects. Moreover, the strokes are pretty amazing and similar to Adobe Photoshop or Adobe Illustrator.
Another great thing about Krita is the brush stabilization feature designed for shaky hands. You can add a stabilizer to your chosen brush to smoothen its flow. Besides, there’s a special Dynamic Brush tool to make animation more fun. At the same time, you can also customize your brushes through different brush engines, including filter engines, color smudge engines, and many more.
Apart from the basic brush options, the preloaded vector tools are next to admire. These tools help you make great comic panels. All you need to do is choose and drag the word bubble template on your canvas. Then, make changes with the anchor point to make new shapes. At the same time, you can also add text to your animation by using the text tool.
Last but not least, there’s a wrap-around mode to create seamless patterns and textures. That means the image or drawing makes its own references along the x-axis and y-axis. This gives you the freedom to continue painting and enjoy updates to your animation instantly.
Features:
- HDR painting.
- PSD support.
- Python scripting.
- Selection and transformation tools.
- Proper group, filter, vector, and file layer management.
- Complete color management for extraordinary results.
- Drawing assistant to help you with straight lines and vanishing points.
Part 2 Best Free Animation Software for Windows
Below is free animation software on Windows. Keep reading.
01 Anireel - Easy to Use Animation Software
Difficulty Level: Easy
Anireel is a simple yet powerful Video Creativity tool used to make 2D animated explainer videos. Developed by Wondershare, one of the most popular Windows software and tool developers, Anireel uses rich, ready-to-use, and diverse assets to help one effortlessly make animated videos.
Features:
- There are tons of drag and drop characters, actions, props, text, and audio assets.
- Easy Text-to-Speech conversion via deep studying technology.
- Animate integrated and imported assets.
- Tons of templates that match many script types.
02 DAZ Studio - Free Software for 3D Lovers
Difficulty Level: Difficult
Pro: You can make game animation for fun. It also supports GPU accelerated real-time rendering.
Con: It has a high demand for the device, but owns a steep learning curve.
Daz 3d is a powerful and completely free 3D creation tool that will let you create the short videos that you want. Whether you are using this for business or pleasure, you will find the program is very easy to understand. Within a day, you will be completely used to its interface.
3D effects are the core focus of DAZ Studio. You can build a model, render, and pose animation within the skin texture level. It has a high requirement for the device. For Windows 64 bits, its recommended RAM is 3G.
Features:
- Options for 3D morphing, animation, and rendering.
- GPU accelerated real-time rendering, which delivers the best results.
- Interactive tutorials to help you become a better 3D artist.
- Everything you make is yours, royalty-free!
03 Terragen - Use It to Make CG Animation
Difficulty Level: Middle
Pro: The recently updated version is the best one. Ray-traced preview is a great function to help us make animation.
Con: The interface looks complicated, but it gets easy to know after you are familiar with it.
A completely free program that you can download and install on all Windows computers and tablets, Terragen is the ideal program for you to create the 3D animations and environments that you want. If you want a photo-realistic CG environment, using Terragen is the best way to do it!
Releasing imagination instantly, Terragen Creative is the one tool you’d like to consider. You can use it to make beautiful scenery.
For advanced tools, you can choose FBX to make animation quickly. The featured image gallery on its homepage will give you a deep understanding of the final outcome you can achieve with Terragen.
Features:
- Ray-traced preview. Without watermark after exporting
- Photo-realistic clouds and ozone simulation
- Rendering is twice as fast as the previous version of the program.
- Adding terrain, objects, and shader to your final product is very easy with the intuitive interface.
04 Anim8or - Free Tool to Make 3D Modeling
Difficulty Level: Difficult
Pro: Anim8or supports 3D modeler and TrueType fonts to meet advanced needs.
Con: Beginners will find it difficult to learn.
Anim8or is a free 3D modeling program that will let you create the unique work that you want. It is a personal project from an animator, but the program does get regular updates and troubleshooting.
It is not going to give you the same features as something like Studio Max or Maya, but you will get the basics. Beginners who are getting into animations will love this program.
Anim8or is a great tool to step into 3D animation ff you think other software is too different to start. In some way, it means you need to give up some advanced features. But all in all, it’s still recommended for you.
Features:
- A full 3D modeler that allows you to create spheres, cylinders, platonic solids, and any other objects that you want.
- Features support for TrueType fonts.
- Easy to create 3D scenes and output them as video files or images.
05 Seamless3d - Open-source Free Software
Difficulty Level: Easy
Pro: It is an open-source 3D modeling package. The good thing is the handy infinite Undo/Redo operation.
Con: Some advanced features are missing like drawing.
Seamless3d, an open-source 3D modeling software that you can download, is among the best animation worktables if you want to create specialized images, animated videos, or 3D characters.
It supports FFmpeg video format, so you can use AVI, MP4, and more. Besides, the forum is not active compared with before, but you still can find answers from many tutorials .
Features:
- It comes with infinite undo and redo options for complete flexibility to correct mistakes.
- It allows for partitioned and seamless texture mapping for YouTube videos.
- Has a specialized tree view interface.
06 OpenToonz - Support Plug in to Make Animation Freely
Difficulty Level: Middle
Pro: It is open-source software, so you can change the code freely.
Con: The plug-in effects are limited.
This animation program is made for beginners on Windows. It is among the best 2D animation software in the market. You can use plug-in effects to change image style, add lights, and distort details. It supports Windows 7/8/10 only for 64 bit.
Features:
- You can add provisional colors to make your animation more colorful.
- Smooth correction without frame losing.
- Compatible with black-and-white, colored, or without binarization scanning.
7 Stykz - Simple to Use Animation Program for Beginners
Difficulty Level: Easy
Pro: It is the best stick figure animation if you want to make this kind of video.
Con: The UI is not modern to use and needs time to adapt to using it.
Stykz is completely free to use and without a watermark. If you have used Pivot StickFigure Animator, then you will find Stykz is similar to it, but you can import the previous .stk files to animate it again. You can use it to make animation smooth frame by frame.
With its frame-based feature, Stykz is easy to customize each frame. You can change previous and current frames to get what you want. You can download it to have a try considering its easy-to-use features.
Features:
- There is some animes file on this website, so you can have a reference.
- Edit animation in the software without using another editing window.
- You can share the final work with others including information.
Part 3 FAQ about Animation Software for Windows and Mac
01 Are Macs good for animation?
To be frank, Mac is a better choice to make animation if you want to have a smooth animation experience. For example, screen resolution is a crucial factor to make excellent animation. The good is Mac’s screen will never let you disappointed.
02 What is the best animation software for Mac?
The best animation software on mac includes Synfig Studio, Pencil2D Animation, Tupi, Blender, and more. Mentioned are free-to-use. Maya is also worth considering animation software if you are a professional user. Maya offers a 1-month free trial. After it is ended, the paid plans are month, 1-year, and 3-year.
03 Can you animate in Photoshop?
Yes, you can make basic animation in Photoshop. However, it only supports frame-based animation making. In this case, you need to use other professional software to make animation. But, you still can use Photoshop to meet your needs if you are a beginner.
Conclusion
With any of these free animation maker programs on Mac and Windows, you will have an easy time creating your next 2D or 3D video. Ensure you choose the program that has the features and compatibility that you desire. Then it is up to your creative mind to come up with stunning animations! If you want to make animation easily, you can also find inspiration through classical animated cartoon types with examples .
Shanoon Cox
Shanoon Cox is a writer and a lover of all things video.
Follow @Shanoon Cox
Organize Your Videos with Ease: 8 Top Mac Metadata Editor Software
8 Best Video Metadata Editor on Mac (Real and Easy)

Liza Brown
Mar 27, 2024• Proven solutions
Metadata is the pieces of information that help viewers understand what a video is about without having to watch it from start to finish. Things like titles, keywords, tags, timestamps, and descriptions are some metadata that should be added to a video before it is published online.
Adding the right metadata to your video is useful for many reasons. It makes it easy for search engines to correctly identify and index your video. This in turn helps viewers find your video when they search Google, iTunes, or video sharing platforms like YouTube and Vimeo.
For more experienced videographers, metadata is useful at every stage of the process of making a video, from production to post-production and publishing. Without the right metadata, professional video production and editing would be a very uphill task.
The best multimedia editors have metadata editing features. It’s also good to have a lightweight, standalone application to edit and customize video metadata quickly. In this post, we share the 8 best video metadata editors for macOS users.
8 Best Video Metadata Editors for Mac
1. Filmora
Filmora is a powerful, easy-to-use multimedia editor released in early 2019. It’s a new and improved version of the classic Filmora video editor, with many features on par with elite video editing software like Adobe Premiere Pro. It can be purchased for roughly $60 though a trial version is available for free.
FEATURES: This software makes video editing easy with lots of extras like built-in audio tracks, sound effects, title presets, transition effects, and more. FilmoraPro lets users add metadata during the export process. Simply click the export button, which is now at the top of the media window. In the pop-up screen, click on the YouTube, Vimeo, or DVD tab, depending on how you want to publish your video, and edit the title, description, tags, category and privacy settings accordingly.
2. iFlicks
iFlicks is a media conversion and video metadata editor for macOS. In addition to being able to perform a variety of video format conversions, iFlicks supports detailed metadata editing and interacts seamlessly with iTunes. This app is available for a one-time fee or on a subscription basis.
FEATURES: The iFlicks metadata editor is superbly detailed with options for adding season and episode information for TV shows. Also available are fields for tagline, release date, genre, content rating, resolution, artwork, cast, and crew, etc. Some of these metadata will even be fetched automatically based on information available via iTunes.

3. VLC
VLC Media Player is the largest open-source media player in the world. Though primarily meant for playing media files, it has powerful features for video conversion, screen capture, downloading online videos, recording screening videos, and editing video metadata.
FEATURES: VLC’s metadata editor can be found under MEDIA INFORMATION within the TOOLS menu in the top bar. Here, you can add information about the title, artist, album, publisher, and copyright of the video. VLC also lets users add custom metadata in a separate tab.

4. Subler
Subler is a free application for editing media metadata in macOS. It’s very barebones and efficient.
FEATURES: Subler actually loads the media file to be edited as separate audio and video files, allowing users to edit information about them individually. To edit metadata for the multimedia file, make sure neither the video nor the audio file is selected and click the metadata tab. Then, click the “+” button in the lower-left corner to see the long list of metadata you can add to the video.

5. Nightbirdsevolve Meta
Meta is a macOS software described as an advanced music tag editor. It supports many file formats, including MP4, and is therefore ideal for editing video metadata. Available for just $20, it has many powerful features for organizing and tagging media files.
FEATURES: Meta has a nice user interface that can be customized to taste. It also has a batch editing feature for updating metadata for multiple files simultaneously as well as a tool for editing media artworks. This application is a great option for media pros who often have to juggle and keep track of many media files at once.

6. Griff MetaZ
MetaZ is an open-source MP4 metadata editor for macOS. It’s the successor app to MetaX and has all the features you need to prepare videos to be added to iTunes.
FEATURES: Once a video file is imported into MetaZ, a number of tabs become active allowing for valuable metadata to be added. Under the video tab, you can set the video type and add information about the actors, directors, producers, and screenwriters. MetaZ also lets users search for information from any websites of their choice and will pair relevant metadata with the media files.

7. Amvidia
Amvidia is a suite of free audio apps developed for macOS. It includes a Tag Editor that’s great for organizing files and doing batch metadata edits.
FEATURES: Amvidia’s Tag Editor can source for relevant metadata from online sources and handle media files in multiple formats, including MP4. Useful metadata tags built into this app include user-friendly ones like lyrics, album, and year, as well as technical tags like Codec, bitrate, and tempo.

8. DRmare
DRmare is a paid DRM removal tool for macOS. It converts M4V videos into alternative video formats like MP4 without losing video quality, allowing users to play them without restrictions.
FEATURES: In addition to converting M4V files into multiple formats, DRmare also lets users convert them for use on multiple devices. As part of the process, this app retrieves iTunes metadata and will let users edit them after the conversion has been completed.

Conclusion
Metadata affects how we find information about videos online and how we organize our ever-growing media libraries. With these macOS video metadata editing applications, you can add detailed metadata to your videos and enable yourself to access, share, and store them painlessly.
Liza Brown
Liza Brown is a writer and a lover of all things video.
Follow @Liza Brown
Liza Brown
Mar 27, 2024• Proven solutions
Metadata is the pieces of information that help viewers understand what a video is about without having to watch it from start to finish. Things like titles, keywords, tags, timestamps, and descriptions are some metadata that should be added to a video before it is published online.
Adding the right metadata to your video is useful for many reasons. It makes it easy for search engines to correctly identify and index your video. This in turn helps viewers find your video when they search Google, iTunes, or video sharing platforms like YouTube and Vimeo.
For more experienced videographers, metadata is useful at every stage of the process of making a video, from production to post-production and publishing. Without the right metadata, professional video production and editing would be a very uphill task.
The best multimedia editors have metadata editing features. It’s also good to have a lightweight, standalone application to edit and customize video metadata quickly. In this post, we share the 8 best video metadata editors for macOS users.
8 Best Video Metadata Editors for Mac
1. Filmora
Filmora is a powerful, easy-to-use multimedia editor released in early 2019. It’s a new and improved version of the classic Filmora video editor, with many features on par with elite video editing software like Adobe Premiere Pro. It can be purchased for roughly $60 though a trial version is available for free.
FEATURES: This software makes video editing easy with lots of extras like built-in audio tracks, sound effects, title presets, transition effects, and more. FilmoraPro lets users add metadata during the export process. Simply click the export button, which is now at the top of the media window. In the pop-up screen, click on the YouTube, Vimeo, or DVD tab, depending on how you want to publish your video, and edit the title, description, tags, category and privacy settings accordingly.
2. iFlicks
iFlicks is a media conversion and video metadata editor for macOS. In addition to being able to perform a variety of video format conversions, iFlicks supports detailed metadata editing and interacts seamlessly with iTunes. This app is available for a one-time fee or on a subscription basis.
FEATURES: The iFlicks metadata editor is superbly detailed with options for adding season and episode information for TV shows. Also available are fields for tagline, release date, genre, content rating, resolution, artwork, cast, and crew, etc. Some of these metadata will even be fetched automatically based on information available via iTunes.
3. VLC
VLC Media Player is the largest open-source media player in the world. Though primarily meant for playing media files, it has powerful features for video conversion, screen capture, downloading online videos, recording screening videos, and editing video metadata.
FEATURES: VLC’s metadata editor can be found under MEDIA INFORMATION within the TOOLS menu in the top bar. Here, you can add information about the title, artist, album, publisher, and copyright of the video. VLC also lets users add custom metadata in a separate tab.
4. Subler
Subler is a free application for editing media metadata in macOS. It’s very barebones and efficient.
FEATURES: Subler actually loads the media file to be edited as separate audio and video files, allowing users to edit information about them individually. To edit metadata for the multimedia file, make sure neither the video nor the audio file is selected and click the metadata tab. Then, click the “+” button in the lower-left corner to see the long list of metadata you can add to the video.
5. Nightbirdsevolve Meta
Meta is a macOS software described as an advanced music tag editor. It supports many file formats, including MP4, and is therefore ideal for editing video metadata. Available for just $20, it has many powerful features for organizing and tagging media files.
FEATURES: Meta has a nice user interface that can be customized to taste. It also has a batch editing feature for updating metadata for multiple files simultaneously as well as a tool for editing media artworks. This application is a great option for media pros who often have to juggle and keep track of many media files at once.
6. Griff MetaZ
MetaZ is an open-source MP4 metadata editor for macOS. It’s the successor app to MetaX and has all the features you need to prepare videos to be added to iTunes.
FEATURES: Once a video file is imported into MetaZ, a number of tabs become active allowing for valuable metadata to be added. Under the video tab, you can set the video type and add information about the actors, directors, producers, and screenwriters. MetaZ also lets users search for information from any websites of their choice and will pair relevant metadata with the media files.
7. Amvidia
Amvidia is a suite of free audio apps developed for macOS. It includes a Tag Editor that’s great for organizing files and doing batch metadata edits.
FEATURES: Amvidia’s Tag Editor can source for relevant metadata from online sources and handle media files in multiple formats, including MP4. Useful metadata tags built into this app include user-friendly ones like lyrics, album, and year, as well as technical tags like Codec, bitrate, and tempo.
8. DRmare
DRmare is a paid DRM removal tool for macOS. It converts M4V videos into alternative video formats like MP4 without losing video quality, allowing users to play them without restrictions.
FEATURES: In addition to converting M4V files into multiple formats, DRmare also lets users convert them for use on multiple devices. As part of the process, this app retrieves iTunes metadata and will let users edit them after the conversion has been completed.
Conclusion
Metadata affects how we find information about videos online and how we organize our ever-growing media libraries. With these macOS video metadata editing applications, you can add detailed metadata to your videos and enable yourself to access, share, and store them painlessly.
Liza Brown
Liza Brown is a writer and a lover of all things video.
Follow @Liza Brown
Time-Lapse Video Editing: Top Picks for Free and Paid Tools
Best Time-Lapse Video Editing Software in 2024

Ollie Mattison
Mar 27, 2024• Proven solutions
All types of vistas change as time passes. Consequently, an outdoor scene looks differently throughout different parts of the day, which makes it impossible to capture the full extent of its beauty by snapping a single photo or recording a short video of it.
That is why you must utilize the time-lapse technique to depict the passage of time at a particular shooting location and create a sequence in your video that suggests that a certain amount of time has passed by. So in this article, we will take you through some of the best time-lapse video editing software you can find on the market in 2024.
Best Time-Lapse Video Post-Production Software in 2024
There are two different recording methods you can use to create time-lapse videos. You can either record videos or take photos at a precisely set interval, but regardless of the approach you choose, you must have the right equipment for the job.
This means that you must have a time-lapse tripod that ensures the smooth movement of your camera, an intervalometer, and a camera setup capable of taking pictures or recording videos over an extended period of time.
Most importantly, you must have access to a video editor that enables you to process the footage and control its playback rate. Let’s take a look at the best post-production software products that allow its users to create stunning time-lapses video.
1. Filmora : Best Time-lapse Software for Beginners [Windows & Mac]
Price: Freemium
Compatibility: Windows, macOS
Mac and PC users can create time-lapse videos with Filmora effortlessly, even though the actual steps you will need to take throughout the process depend on the type of footage you’re using to create a time-lapse. If you decide to make a time-lapse out of still images, you must ensure that you have enough footage since the video you’re producing must have 24 or 30 frames per second. That’s why you need 30 or 24 photos for each second of your time-lapse video, and you must arrange all of these images on the editor’s timeline before you begin adjusting their duration.

Select all timeline photos placed in the timeline panel, right-click to access the Duration setting, and then set the input duration of each picture to 0.01 seconds.
Click OK to continue, and you’ll find that the duration of all timelapse photos has changed to a brief second. Click the playback button in the Preview window, and you’ll see the time-lapse video is made already.

If you are working with video files, you should double the playback rate to create the time-lapse effect. The results you will get largely depend on the quality of the footage you’ve recorded. You must do everything in your power to capture the photos or videos properly before you start the video editing process.
You can check the details about two ways of making a time-lapse video in Filmora here.
2. iMovie : Best Free Time-lapse Software for Mac
Price: Free
Compatibility: macOS and iOS
iMovie may not be the most advanced video editing software for Mac computers, but that doesn’t mean that you can’t use iMovie to create time-lapse videos. In fact, all you have to do to make a time-lapse video with this software is to arrange the photos on the editor’s timeline and change their duration to 0.1 seconds from the Clip Information panel.
However, if you do this, your time-lapse video will play only 10 frames per second, so to speed it up , you first have to export the video you’ve created in this manner and then import it back into iMovie.
Afterward, you can select the Custom option from the Speed menu that lets you select the playback speed of a video clip. Making a time-lapse video in iMovie is a slow process that requires a lot of patience, especially if you are working with a large number of photos or video clips.
If you want to edit videos further with iMovie, here is a brief tutorial about How to Use iMovie to Edit Videos .
3. VirtualDub : Free Time-lapse Video Editor for Windows
Price: Free
Compatibility: Windows
This open-source video editor is commonly used for batch-processing of AVI video files and sets of BMP image files. Even though VirtualDub doesn’t offer a lot of video editing tools, its batch-processing capabilities make it a perfect choice for all PC users who want to create time-lapse videos.
Nonetheless, the process of making a time-lapse in VirtualDub is highly technical as you’ll need to make sure that all the images you want to use in the video are the same size. Besides, you’ll have to set up the video’s frame rate , aspect ratio , and compression manually, before you can apply it to all files you imported into the video editor. That’s why you first need to familiarize yourself with VirtualDub and then start using it to make time-lapse videos.
4. GoPro Quik : Best Video Editor for Creating Time-Lapse Photos Shot With GoPro
Price: Free
Compatibility: macOS, Windows
GoPro cameras offer a plethora of ways to capture the footage you can later turn into time-lapse videos. Besides a GoPro camera, you will also need additional equipment like rotating camera mounts, extra batteries, or several memory cards to record the time-lapse footage properly.
GoPro’s Quik video editor features all the tools you’re going to need to organize large quantities of video and photo files and create time-lapse videos. The software also enables you to add panning effects to your time-lapses that simulate the camera movement. However, GoPro Quik is a good choice only for filmmakers and video content creators who record most of their footage with different models of GoPro cameras.
5. Final Cut Pro X : Best Professional Video Editing Software for Time-lapse Video on Mac
Price: $299.99
Compatibility: macOS
Controlling the playback speed of the files you import into a project in FCPX is simple, since you just have to place the photos or videos on the timeline and select them. Afterward, you should head over to the Retime submenu that is located in the Modify drop-down menu and select one of the Custom Speed, Blade Speed or Fast options.
You will have to tweak the particular settings depending on the option you select, but your main goal should be to speed up the footage just enough to suggest the rapid passage of time. Try out different values to find the playback speed that is best suited for the time-lapse video you’re working on.
Learn more details about Making a Time Lapse Video in Final Cut Pro .
6. Adobe Premiere Pro : Best Professional Video Editing Software for Time-lapse Video on Windows
Price: $20.99 per month as a single app
Compatibility: Windows, macOS
The way you capture your photos and organize them is crucial in creating a time-lapse video in Adobe Premiere Pro. You must arrange all the photos numerically, and once you’re ready to import them into the software, you must make sure that the Image Sequence checkbox is selected. Adobe Premiere Pro will automatically generate a video from the photos so you can add a video file to the timeline instead of hundreds of still images. This professional video editing software provides with a broad range of video editing tools you can use to simulate camera movement, perform color correction or control the video’s playback speed. The process of creating a time-lapse video with Adobe Premiere Pro isn’t complicated, but you must be prepared for each step of this process if you want to go through it smoothly.
7. LRTimelapse
Price: Free trial available, subscription plans start at $99.00
Compatibility: macOS, Windows
The time-lapse photos you take with your camera must be edited before you can turn them into a video. LRTimelapse software is designed to reduce the amount of time you have to spend editing the footage. It allows you to process each image in Adobe Lightroom and then import those edits into the project you created in LRTimelapse. Furthermore, this app for PC and Mac computers lets you fade in and fade out time lapses, adjust the white balance throughout the sequence you’re creating, or get rid of the unwanted flickering effect. LRTimelapse allows you to export videos in resolutions up to 8K, making it a perfect choice for all filmmakers and photographers in need of powerful time-lapse post-production software.
Conclusion
Preparation is the most important segment of the time-lapse video production process. The photos or video clips you want to include in the video must be captured perfectly to depict the passage of time seamlessly. Moreover, the video editing software you choose must provide you with all the tools you’re going to need to create a professionally-looking time-lapse video. Each of the time-lapse post-production software products we featured in this article enables you to create a time-lapse video with ease. Which video editing software are you using to create time-lapse videos? Leave a comment and let us know.
Ollie Mattison
Ollie Mattison is a writer and a lover of all things video.
Follow @Ollie Mattison
Ollie Mattison
Mar 27, 2024• Proven solutions
All types of vistas change as time passes. Consequently, an outdoor scene looks differently throughout different parts of the day, which makes it impossible to capture the full extent of its beauty by snapping a single photo or recording a short video of it.
That is why you must utilize the time-lapse technique to depict the passage of time at a particular shooting location and create a sequence in your video that suggests that a certain amount of time has passed by. So in this article, we will take you through some of the best time-lapse video editing software you can find on the market in 2024.
Best Time-Lapse Video Post-Production Software in 2024
There are two different recording methods you can use to create time-lapse videos. You can either record videos or take photos at a precisely set interval, but regardless of the approach you choose, you must have the right equipment for the job.
This means that you must have a time-lapse tripod that ensures the smooth movement of your camera, an intervalometer, and a camera setup capable of taking pictures or recording videos over an extended period of time.
Most importantly, you must have access to a video editor that enables you to process the footage and control its playback rate. Let’s take a look at the best post-production software products that allow its users to create stunning time-lapses video.
1. Filmora : Best Time-lapse Software for Beginners [Windows & Mac]
Price: Freemium
Compatibility: Windows, macOS
Mac and PC users can create time-lapse videos with Filmora effortlessly, even though the actual steps you will need to take throughout the process depend on the type of footage you’re using to create a time-lapse. If you decide to make a time-lapse out of still images, you must ensure that you have enough footage since the video you’re producing must have 24 or 30 frames per second. That’s why you need 30 or 24 photos for each second of your time-lapse video, and you must arrange all of these images on the editor’s timeline before you begin adjusting their duration.
Select all timeline photos placed in the timeline panel, right-click to access the Duration setting, and then set the input duration of each picture to 0.01 seconds.
Click OK to continue, and you’ll find that the duration of all timelapse photos has changed to a brief second. Click the playback button in the Preview window, and you’ll see the time-lapse video is made already.
If you are working with video files, you should double the playback rate to create the time-lapse effect. The results you will get largely depend on the quality of the footage you’ve recorded. You must do everything in your power to capture the photos or videos properly before you start the video editing process.
You can check the details about two ways of making a time-lapse video in Filmora here.
2. iMovie : Best Free Time-lapse Software for Mac
Price: Free
Compatibility: macOS and iOS
iMovie may not be the most advanced video editing software for Mac computers, but that doesn’t mean that you can’t use iMovie to create time-lapse videos. In fact, all you have to do to make a time-lapse video with this software is to arrange the photos on the editor’s timeline and change their duration to 0.1 seconds from the Clip Information panel.
However, if you do this, your time-lapse video will play only 10 frames per second, so to speed it up , you first have to export the video you’ve created in this manner and then import it back into iMovie.
Afterward, you can select the Custom option from the Speed menu that lets you select the playback speed of a video clip. Making a time-lapse video in iMovie is a slow process that requires a lot of patience, especially if you are working with a large number of photos or video clips.
If you want to edit videos further with iMovie, here is a brief tutorial about How to Use iMovie to Edit Videos .
3. VirtualDub : Free Time-lapse Video Editor for Windows
Price: Free
Compatibility: Windows
This open-source video editor is commonly used for batch-processing of AVI video files and sets of BMP image files. Even though VirtualDub doesn’t offer a lot of video editing tools, its batch-processing capabilities make it a perfect choice for all PC users who want to create time-lapse videos.
Nonetheless, the process of making a time-lapse in VirtualDub is highly technical as you’ll need to make sure that all the images you want to use in the video are the same size. Besides, you’ll have to set up the video’s frame rate , aspect ratio , and compression manually, before you can apply it to all files you imported into the video editor. That’s why you first need to familiarize yourself with VirtualDub and then start using it to make time-lapse videos.
4. GoPro Quik : Best Video Editor for Creating Time-Lapse Photos Shot With GoPro
Price: Free
Compatibility: macOS, Windows
GoPro cameras offer a plethora of ways to capture the footage you can later turn into time-lapse videos. Besides a GoPro camera, you will also need additional equipment like rotating camera mounts, extra batteries, or several memory cards to record the time-lapse footage properly.
GoPro’s Quik video editor features all the tools you’re going to need to organize large quantities of video and photo files and create time-lapse videos. The software also enables you to add panning effects to your time-lapses that simulate the camera movement. However, GoPro Quik is a good choice only for filmmakers and video content creators who record most of their footage with different models of GoPro cameras.
5. Final Cut Pro X : Best Professional Video Editing Software for Time-lapse Video on Mac
Price: $299.99
Compatibility: macOS
Controlling the playback speed of the files you import into a project in FCPX is simple, since you just have to place the photos or videos on the timeline and select them. Afterward, you should head over to the Retime submenu that is located in the Modify drop-down menu and select one of the Custom Speed, Blade Speed or Fast options.
You will have to tweak the particular settings depending on the option you select, but your main goal should be to speed up the footage just enough to suggest the rapid passage of time. Try out different values to find the playback speed that is best suited for the time-lapse video you’re working on.
Learn more details about Making a Time Lapse Video in Final Cut Pro .
6. Adobe Premiere Pro : Best Professional Video Editing Software for Time-lapse Video on Windows
Price: $20.99 per month as a single app
Compatibility: Windows, macOS
The way you capture your photos and organize them is crucial in creating a time-lapse video in Adobe Premiere Pro. You must arrange all the photos numerically, and once you’re ready to import them into the software, you must make sure that the Image Sequence checkbox is selected. Adobe Premiere Pro will automatically generate a video from the photos so you can add a video file to the timeline instead of hundreds of still images. This professional video editing software provides with a broad range of video editing tools you can use to simulate camera movement, perform color correction or control the video’s playback speed. The process of creating a time-lapse video with Adobe Premiere Pro isn’t complicated, but you must be prepared for each step of this process if you want to go through it smoothly.
7. LRTimelapse
Price: Free trial available, subscription plans start at $99.00
Compatibility: macOS, Windows
The time-lapse photos you take with your camera must be edited before you can turn them into a video. LRTimelapse software is designed to reduce the amount of time you have to spend editing the footage. It allows you to process each image in Adobe Lightroom and then import those edits into the project you created in LRTimelapse. Furthermore, this app for PC and Mac computers lets you fade in and fade out time lapses, adjust the white balance throughout the sequence you’re creating, or get rid of the unwanted flickering effect. LRTimelapse allows you to export videos in resolutions up to 8K, making it a perfect choice for all filmmakers and photographers in need of powerful time-lapse post-production software.
Conclusion
Preparation is the most important segment of the time-lapse video production process. The photos or video clips you want to include in the video must be captured perfectly to depict the passage of time seamlessly. Moreover, the video editing software you choose must provide you with all the tools you’re going to need to create a professionally-looking time-lapse video. Each of the time-lapse post-production software products we featured in this article enables you to create a time-lapse video with ease. Which video editing software are you using to create time-lapse videos? Leave a comment and let us know.
Ollie Mattison
Ollie Mattison is a writer and a lover of all things video.
Follow @Ollie Mattison
Also read:
- New 2024 Approved Create Stunning Time-Lapses Top Video Editing Software
- New In 2024, From Start to Finish A Comprehensive Guide to QuickTime Video Editing on Mac
- New The Ultimate List Top Video Brightening Apps for Android and iOS for 2024
- New Windows 10 Webcam Recording Top 10 Software Options for 2024
- New 2024 Approved Premiere-Free Zone 10 Linux Video Editing Software You Need
- 2024 Approved Subtitle Your Videos for Free 10 Best Online Captioning Tools
- Movie Maker for Windows Top 6 Alternatives and Competitors for 2024
- Updated 2024 Approved Here Are the Best GIF Loop Maker Tools for You to Give Expression to Your Creativity
- New Reframe Your Videos in Seconds Top Editor Recommendations for 2024
- Updated Unleash the Power of Video Metadata on Mac 8 Editor Recommendations
- Updated In 2024, Commercial Image Solutions on a Shoestring Budget
- New Adobe Premiere Pro Power-Ups The Best Plugins Free & Paid for 2024
- New In 2024, OS X Mavericks MP4 Editor Trim, Cut, and Enhance Your Videos
- Updated The Most Popular 3D Video Making Tools Among Professionals
- Updated VLC Video Cutter for Mac Preserve Quality While Trimming for 2024
- Vegas Pro for Mac 10 Competitors You Should Consider (Free & Paid) for 2024
- The Ultimate Guide to Video Editing on Windows 11 for 2024
- New 2024 Approved FCPX Audio Editing How to Minimize Background Noise for Crisp Sound
- Updated In 2024, Get the Best Picture Aspect Ratio Hacks for Amazon Prime Video
- New 2024 Approved Get Noticed on Social Media The Importance of Proper Video Resizing
- New 2024 Approved Easy Video Editing Software for Windows Microsoft Video Editor Review
- How To Leave a Life360 Group On Lava Agni 2 5G Without Anyone Knowing? | Dr.fone
- The Easiest Methods to Hard Reset Realme C53 | Dr.fone
- In 2024, Here are Some Pro Tips for Pokemon Go PvP Battles On Apple iPhone 13 Pro | Dr.fone
- New In 2024, Best 12 Sports Streaming Sites (Free & Paid)
- Fix App Not Available in Your Country Play Store Problem on Oppo Find X6 Pro | Dr.fone
- In 2024, How To Delete iCloud Account Remove Your Apple ID Permanently From Apple iPhone 11 Pro
- How to Unlock Xiaomi Redmi Note 12T Pro Phone without PIN
- Full Guide How To Fix Connection Is Not Private on Lenovo ThinkPhone | Dr.fone
- How to Unlock iCloud lock on your Apple iPhone 7 and iPad?
- In 2024, What Is a SIM Network Unlock PIN? Get Your Samsung Galaxy A05 Phone Network-Ready
- 5 Easy Ways to Change Location on YouTube TV On Xiaomi 13 Ultra | Dr.fone
- Best Android Data Recovery - Retrieve Lost Pictures from Infinix Zero 30 5G.
- Title: Updated 2024 Approved Top 10 Free Online Subtitle Generators
- Author: MdadeLe
- Created at : 2024-05-19 08:27:45
- Updated at : 2024-05-20 08:27:45
- Link: https://smart-video-editing.techidaily.com/updated-2024-approved-top-10-free-online-subtitle-generators/
- License: This work is licensed under CC BY-NC-SA 4.0.
