
:max_bytes(150000):strip_icc():format(webp)/edit-tweet-after-publish-3476767-34af9aa3b62b4bf4b11891460076916b.png)
New The Perfect Fit TikTok Aspect Ratio Guide for Creators for 2024
The Perfect Fit: TikTok Aspect Ratio Guide for Creators
2022 Full Guide about TikTok Aspect Ratio
An easy yet powerful editor
Numerous effects to choose from
Detailed tutorials provided by the official channel
TikTok videos are booming these days. The reason behind that is extraordinary content and the perfect TikTok video ratio. No videos will get popular until they are made properly.
In this article
01 [What Is TikTok Aspect Ratio?](#Part 1)
02 [Top 6 Tips for TikTok Video Ads](#Part 2)
Part 1 What Is TikTok Aspect Ratio?
01TikTok Video Maximum Size
When you talk about the TikTok videos then they can be uploaded in more than a single measurement. This means that the maximum size varies according to the dimensions, TikTok video size ratio, lengths and the device which you are using to upload the videos.
02TikTok Video Dimensions: Portrait or Landscape?
You can upload TikTok videos in both portrait and landscape form. However, it is advised to upload the videos in portrait as the social platforms prefer vertical videos. This is because the mainly used device is mobile phone and vertical videos are perfect for them. This also boosts the engagement of the audience. You can also make such videos through smartphones. Additionally, you get an option for selecting the video mode if you create videos using TikTok.
03What is the Maximum Size of a TikTok Video?
The file size for TikTok videos can vary according to iOS and android users. If you are uploading via android then it must be 72MB and for iPhone, it gets increased around 4 times. For iPhones, the maximum file size should be 287.6 MB. This size becomes 500 MB if you talk about the ad videos of TikTok.
04What is the Length of a Video on TikTok?
As far as the length of TikTok videos is concerned, if you are shooting the videos on the app then it could be no longer than 60 seconds. However, the most recommended length of the videos is 15 seconds. The videos that are more than 15 seconds get posted in different segments of 15 seconds. Also, you can upload videos of more than 60 seconds if they are made elsewhere.
Part 2 Top 6 Tips for TikTok Video Ads
01Types of TikTok Video Ads
● Infeed ads: These ads are displayed on the news feed of the user. They can see these ads as they scroll the ‘for you’ section of TikTok. They very well suited to the feed of TikTok. The user can easily scroll around the ads and news feed. When creating a feed ad you must keep in mind that the video should be full screen so that it would make the user stay back to the video. This is the most popular advertising format amongst businesses.
● Top view ads: These ads are shown on the news feed for some seconds. As the user signs in to TikTok and the news feed is opened, these video ads pop up after 3 seconds. However, you get the option to skip the ads. Also, these ads are subjected to sound and auto-play.
● Branded effects ads: These ads allow the user that they can create the videos and ads by using their own custom filters. Through this, they can optimize their videos according to their requirements.
● Brand takeover ads: user will see these ads as soon he opens TikTok. As the name suggests the takeover ads take over the screen for 3 to 4 seconds and then they change into an in-feed video ad. This can be an excellent option to create awareness and generate sales.
● Branded hash tag ads: in these ads you can ask the user to create some in line videos with your product and then post them with a particular hash tag. These ads are perfect to make a reach among the audience and also boost brand awareness.
02How to Optimize TikTok Videos with a Clideo
If you want to optimize your video using Clideo for making it smartphone perfect, then here are some simple steps to do so:
Step 1: first of all, when you are going to optimize video through Clideo, you will need to log in to Clideo.com. Further, upload the video using your personal computer, DropBox account, or Google Drive account. If your video is already posted then it can also be optimized. All you need to do is simply copy-paste the URL and edit it in Clideo.
Step 2: The next step is to resize and optimize the video. As your video will get uploaded an editor will open. Here you have to click on the input custom or preset dimensions. As you are editing TikTok videos you will need to select an aspect ratio of 9:16 or 1:If you want to crop the video you can do it using the editors and position selectors. This tool also allows zooming in and out of the particular frame. You can also change the background colors.
Step 3: After this you will need to download the edited file. Before downloading do not forget to take the preview of the output file and then simply download the video in your device.

03How to Resize Your TikTok Video File
Resizing the TikTok video file is absolutely easy. All you have to do is select or upload the video and resize it using the options given in the app. You can resize the videos according to your choice. Further, save the resized video or simply upload it.
04Top 6 Tips for TikTok Video Ads
Vertical videos: For TikTok videos ads, the easiest way to share them is in the vertical mode. This mode is specially optimized for smartphones and also it gives the best possible view of what you are sharing.
Attention of the audience: It is very essential to grab the attention of your audience. As there is so much traffic on social platforms, it is very important to get the views properly. For this, you will have to make your video eye-catching as well as insert some such things that hold the user back to your video.
Magic of music: TikTok is the platform which has a different magic of music. So don’t forget to add music in your video ads. Keep yourself updated with what is trending in the market so that you can make your videos accordingly.
Centralize the content: It is important to centralize your content or else it will not give you the expected results. Do not add stuff in your video. Make sure that your video is up to the mark and you are offering only what you want to.
Length of videos: The ideal length for TikTok videos is suggested to be 9 to 15 seconds. So assure that your video is not so lengthy and free from stuff.
Use the proper tools: like all the other things, it is also very important to use the proper tools to create and edit the videos. No matter if you creating a video or editing it, all you need to do is use the latest Wondershare Filmora Video Editor tool. By using this tool, you can make your videos exceptionally outstanding. Here you get a number of filters, transitions, text editing and much more to do with your videos. Also the color changing options make this a must using tool.
For Win 7 or later (64-bit)
For macOS 10.12 or later
Key Takeaways from This Episode
● TikTok is a leading app these days that is booming with its visual content. This is loved by the marketers as well as the customers too.
● The audience is keen to see some fresh content and this is what TikTok up to. Videos made with perfect dimensions, sizes, aspect ratios, and background filters get a massive popularity.
● The videos can also be optimized and made better using various latest tools like Wondershare Filmora. These tools are capable of making your video more engaging and interesting.
TikTok videos are booming these days. The reason behind that is extraordinary content and the perfect TikTok video ratio. No videos will get popular until they are made properly.
In this article
01 [What Is TikTok Aspect Ratio?](#Part 1)
02 [Top 6 Tips for TikTok Video Ads](#Part 2)
Part 1 What Is TikTok Aspect Ratio?
01TikTok Video Maximum Size
When you talk about the TikTok videos then they can be uploaded in more than a single measurement. This means that the maximum size varies according to the dimensions, TikTok video size ratio, lengths and the device which you are using to upload the videos.
02TikTok Video Dimensions: Portrait or Landscape?
You can upload TikTok videos in both portrait and landscape form. However, it is advised to upload the videos in portrait as the social platforms prefer vertical videos. This is because the mainly used device is mobile phone and vertical videos are perfect for them. This also boosts the engagement of the audience. You can also make such videos through smartphones. Additionally, you get an option for selecting the video mode if you create videos using TikTok.
03What is the Maximum Size of a TikTok Video?
The file size for TikTok videos can vary according to iOS and android users. If you are uploading via android then it must be 72MB and for iPhone, it gets increased around 4 times. For iPhones, the maximum file size should be 287.6 MB. This size becomes 500 MB if you talk about the ad videos of TikTok.
04What is the Length of a Video on TikTok?
As far as the length of TikTok videos is concerned, if you are shooting the videos on the app then it could be no longer than 60 seconds. However, the most recommended length of the videos is 15 seconds. The videos that are more than 15 seconds get posted in different segments of 15 seconds. Also, you can upload videos of more than 60 seconds if they are made elsewhere.
Part 2 Top 6 Tips for TikTok Video Ads
01Types of TikTok Video Ads
● Infeed ads: These ads are displayed on the news feed of the user. They can see these ads as they scroll the ‘for you’ section of TikTok. They very well suited to the feed of TikTok. The user can easily scroll around the ads and news feed. When creating a feed ad you must keep in mind that the video should be full screen so that it would make the user stay back to the video. This is the most popular advertising format amongst businesses.
● Top view ads: These ads are shown on the news feed for some seconds. As the user signs in to TikTok and the news feed is opened, these video ads pop up after 3 seconds. However, you get the option to skip the ads. Also, these ads are subjected to sound and auto-play.
● Branded effects ads: These ads allow the user that they can create the videos and ads by using their own custom filters. Through this, they can optimize their videos according to their requirements.
● Brand takeover ads: user will see these ads as soon he opens TikTok. As the name suggests the takeover ads take over the screen for 3 to 4 seconds and then they change into an in-feed video ad. This can be an excellent option to create awareness and generate sales.
● Branded hash tag ads: in these ads you can ask the user to create some in line videos with your product and then post them with a particular hash tag. These ads are perfect to make a reach among the audience and also boost brand awareness.
02How to Optimize TikTok Videos with a Clideo
If you want to optimize your video using Clideo for making it smartphone perfect, then here are some simple steps to do so:
Step 1: first of all, when you are going to optimize video through Clideo, you will need to log in to Clideo.com. Further, upload the video using your personal computer, DropBox account, or Google Drive account. If your video is already posted then it can also be optimized. All you need to do is simply copy-paste the URL and edit it in Clideo.
Step 2: The next step is to resize and optimize the video. As your video will get uploaded an editor will open. Here you have to click on the input custom or preset dimensions. As you are editing TikTok videos you will need to select an aspect ratio of 9:16 or 1:If you want to crop the video you can do it using the editors and position selectors. This tool also allows zooming in and out of the particular frame. You can also change the background colors.
Step 3: After this you will need to download the edited file. Before downloading do not forget to take the preview of the output file and then simply download the video in your device.
03How to Resize Your TikTok Video File
Resizing the TikTok video file is absolutely easy. All you have to do is select or upload the video and resize it using the options given in the app. You can resize the videos according to your choice. Further, save the resized video or simply upload it.
04Top 6 Tips for TikTok Video Ads
Vertical videos: For TikTok videos ads, the easiest way to share them is in the vertical mode. This mode is specially optimized for smartphones and also it gives the best possible view of what you are sharing.
Attention of the audience: It is very essential to grab the attention of your audience. As there is so much traffic on social platforms, it is very important to get the views properly. For this, you will have to make your video eye-catching as well as insert some such things that hold the user back to your video.
Magic of music: TikTok is the platform which has a different magic of music. So don’t forget to add music in your video ads. Keep yourself updated with what is trending in the market so that you can make your videos accordingly.
Centralize the content: It is important to centralize your content or else it will not give you the expected results. Do not add stuff in your video. Make sure that your video is up to the mark and you are offering only what you want to.
Length of videos: The ideal length for TikTok videos is suggested to be 9 to 15 seconds. So assure that your video is not so lengthy and free from stuff.
Use the proper tools: like all the other things, it is also very important to use the proper tools to create and edit the videos. No matter if you creating a video or editing it, all you need to do is use the latest Wondershare Filmora Video Editor tool. By using this tool, you can make your videos exceptionally outstanding. Here you get a number of filters, transitions, text editing and much more to do with your videos. Also the color changing options make this a must using tool.
For Win 7 or later (64-bit)
For macOS 10.12 or later
Key Takeaways from This Episode
● TikTok is a leading app these days that is booming with its visual content. This is loved by the marketers as well as the customers too.
● The audience is keen to see some fresh content and this is what TikTok up to. Videos made with perfect dimensions, sizes, aspect ratios, and background filters get a massive popularity.
● The videos can also be optimized and made better using various latest tools like Wondershare Filmora. These tools are capable of making your video more engaging and interesting.
Effortless Music Conversion on Mac: Top Software Recommendations
What is the Best MP3 Converter Mac Software?
An easy yet powerful editor
Numerous effects to choose from
Detailed tutorials provided by the official channel
Mp3 Converter Mac allows the user to obtain the audio file from your favorite video and save it on your device for having better listening experience.
This article will discuss how to convert MP3 on Mac with high quality and enlist some of the leading and popular converter tools available both online and offline.
In this article
01 [5 Ways to Convert MP3 on Mac with High Quality](#Part 1)
02 [What Is The Best MP3 Converter Software for Mac?](#Part 2)
03 [The Runner-Up MP3 Converter Software List](#Part 3)
Part 1 5 Ways to Convert MP3 on Mac with High Quality
01Way 1: Best Way to Convert MP4 to MP3 with Highest Quality and Fastest Speed
If you want to convert MP3 on Mac with high quality, the best possible method is to download the Vidmore video converter. This software is consistent with both Windows and Mac devices. It comes with a multi-core processor and hardware acceleration, which facilitate you to convert MP4 to MP3 at a 50x faster conversion speed. It also comprises the built-in video clipper, which helps you shorten the MP4 video without losing its quality.
Step 1: You have to download and install the Vidmore converter on your device. Now, drag and drop the video file you want to convert to audio file format.

Step 2: In this step, you have to unfold the “Profile list to avail all the profiles and set MP3 format as a destination from the “General Audio “option. You can even select the portable device you use to convert videos to MP3 format.

Step 3: Now click the “Clip” option to access the video splitter and drag the clipper to set the start/ finish time to trim the available video. The preview window will represent all the modifications instantly. Lastly, click again on the “Clip” option to confirm and receive a new segment.

Step 4: Now, select the “Settings” option to adjust audio settings if required and further click “Convert” to start the conversion process with high quality.

02Way 2: How to Convert MP4 to MP3 for Free Online
As we have already discussed Vidmore software, you can also convert MP3 on Mac online using the same software. All you have to do is to observe the simple steps listed below.
Step 1: You have to type https://www.vidmore.com/free-online-video-converter/ on the browser to run the converter online. Select “Add files to convert,” which help you to navigate to its launcher
Step 2: Now select the “Add File “option to import the video files. You need to discover and click the” Audio” icon and choose “MP3” as the output audio format for each video.

Step 3: If you want to adjust the sample rate, channel, audio encoder, and bit-rate, you have to select the “Setting “option and proceed to the next step by clicking the “Ok” option.

Step 4: Now click the “Convert “option to define the output folder. Successfully, you can convert MP4 to MP3 free of cost.

03Way 3: How to Convert MP4 to MP3 with VLC Media Player
If you want to convert favorite videos into MP3 format using the VLC Media player, follow some of the steps which make your conversion process look easier.
Step 1: Firstly, you have to Run VLC Media Player. Select “Convert/Save” from the “Media” drop-down menu.
Step 2: You need to select the “Add” button to browse and open the MP4 video file. Now, you are required to click the “Convert/ save” option to proceed.
Step 3: Select “Audio – MP3“ from the “Profile” list available under “Settings”.
Step 4: Now, all you have to do is click “Start” to convert MP4 to MP3 with VLC Media Player.

04Way 4: How to Convert MP4 to MP3 Using Windows Media Player
If you have Windows Media Player installed, you will convert the MP4 format to MP3 format. You have to follow the below steps to convert file format without losing its quality.
Step 1: First, open the Window Media player on your computer and select the “Open” option from the “File” list.
Step 2: Now, find the MP4 videos and click “Open” further.
Step 3: Select “Menu” and return to the home screen of Windows Media Player.
Step 4: Now select “Organize” and click on “Options”.
Step 5: In the “Rip Music” section, you have to click the “Change…” option to choose a new destination folder.
Step 6: Now, choose “MP3” as the converted audio format under “Format”.
Step 7: Click “OK” to start the converting process.

05Way 5: How to Convert MP4 to MP3 via Video to MP3 Converter
If you want to convert MP4 files to MP3, you need to download Video to MP3 Converter Apk available for Android users. By using this Apk, you will be able to extract the high quality from the video, which later be saved as an MP3 file by default. It is beneficial if you want to set a ringtone for your phone.
Part 2 What Is The Best MP3 Converter Software for Mac?
01Handbrake
It is recognized as one of the best MP3 converter software compatible with Mac and supports various formats. This tool is also available for Linux and Windows.

Features:
The software has a different feature that facilitates easy conversion of MP3 audios. It works with standard formats and tools like x265 and Libav. According to the user reviews, Handbrake is the right choice if you want to convert videos to MP3 format.
Pros:
● It is an open-source tool and free audio converter Mac.
● Advanced control option with customization settings.
Cons:
● Intimidating interfaces make navigation complex, especially for the beginner.
● Not user-friendly
Rating – 4star/ 5star
02Leawo Video converter
It is a multifunctional converter that facilitates Mac users to convert the MP3 to the most audio format supported. The software is compatible with both Windows and Mac devices.

Features:
It is a YouTube MP3 converter compatible with most audio and video formats and can convert the media files in any combination as per the requirement. It also facilitates the user to optimize the video for playback on particular devices, including iPods, iPads and gaming consoles, etc.
Pros:
● Ease of accessibility
● Facilitate users to customize the conversion settings.
Cons:
● The conversion speed is low
● Not available free of cost
● Low performance in comparison to other converters listed.
Rating – 4.2 star/ 5star
03FFmpeg
It is a cross-platform solution available to convert videos to audio format. The user is forced to enter the instruction from the terminal. Nevertheless, it is available free of cost for Mac users.

Features: This software uses the free FFmpeg encoder and also supports various audio and video formats, including MPEG4, ASF, MOV, AVI, and more. The considerable salient feature of the tool refers to the fact that it supports batch conversion.
Pros:
● Support various audio/ video formats
● Support vast range of filters and codec’s
Cons:
● The official documentation is complex
● Not ideal for beginner
Rating – 4.5 star/ 5star
04Xilisoft Audio Converter
This converter is compatible with both Windows and Mac platforms and holds a reputed position in the marketplace.

Features: This tool accepts the standard audio and video formats and converts them to FLAC, OCG, MP3, etc. It also includes the capability to deliver lossless output post-conversion.
Pros:
● You can extract the output file directly to the designation device.
● Lossless output post-conversion
Cons:
● A limited number of output formats.
Rating – 3.9star/ 5star
05Movavi Video Converter
It is another option available if you are looking to convert MP3 on MAC as it supports almost all ranges of formats and seems to be compatible with both Windows and Mac platforms.

Features:
This converter includes a user-friendly interface that improves navigation and usability and converts most of the standard audio and video formats. It has a predefined setting for different media players like iTunes and Window Media Player.
Pros:
● Sustains a wide range of audio/video formats
● User-friendly interface
● Facilitate users to convert YouTube videos into audio format.
Cons:
● Slow conversion speed
● Not available free of cost( only limited trial version)
Rating – 4.7 star/ 5star
06Switch Audio File Converter
This FLAC to mp3 Mac is developed by one of the reputed vendors, i.e., NCH Software. This tool can run on a 64-bit operating system and provide comparatively better performance than another converter available.

Features: The tool will facilitate the users to obtain the song information from the online database and facilitate a batch conversion. It can be used as a CLI plug-in concerning automated conversion.
Pros:
● Fast conversion speed.
● Carry out the automatic normalization.
Cons:
● Advanced features are only accessible to Pro members.
● Not ideal for beginner
Rating – 4.3 star/ 5star
07Aiseesoft Audio Converter
It is one efficient tool compatible with both Windows and Mac platforms. It is available for a free trial to check the feature before investing in the converter tool.

Features: It allows the user to trim the audio and video clip before choosing the output preference. This tool supports almost all file formats, and also according to a user review, it allows conversion at a reasonable speed.
Pros:
● Support batch conversion
● Support almost all major formats of audio/video
Cons:
● Not available free of cost
Rating – 4.1star/ 5star
08Stellar Audio/ video converter
You can even choose a stellar audio/ video converter to convert videos file into supported audio formats. The tool is compatible with both Windows and Mac platforms.

Features:
This tool supports the standard audio/video format for conversion and lets you save the converted audio format on your device. You can use the converted format for setting ringtones for your phone device.
Pros:
● Compatible with both Windows and Mac platforms
● User-friendly interface
Cons:
● Limited formats supported
Rating – 3.8 star/ 5star
Part 3 The Runner-Up MP3 Converter Software List
Some alternative MP4 to MP3 Converters are available for Mac, making the conversion process more accessible and practical without losing quality.
● Filmora for Mac is recognized as one of the leading and influential video editing software through which you can easily access advanced features such as keyframing and motion tracking. You can easily download the tool by visiting the official website of Wondershare and avail a hassle-free video editing and conversion experience.
● VLC is another option available to you, and the process to convert video to audio is already discussed in the article.
● Convertio is an online tool available free of cost and works as MP4 to MP3 Converter browser support. This tool allows the vast range of conversion and facilitate user to convert archives, audio, videos, eBooks, and presentation.
● QuickTime Player and iTunes is another option available to you offline and available free of cost. The tool is highly compatible with the Mac platform and almost supports all major types of formats.
● Online UniConvert allows the user to convert the videos to audio format online. It is identified as a popular online conversion program that supports a variety of audio and videos format, including iTunes to MP3.
Key Takeaways from This Episode
● An MP4 to MP3 converter Mac computers support will facilitate the user to convert the video format to audio file format.
● Various methods and tools are available to make your conversion process more straightforward.
● The best tool you can use is Filmora from Wondershare due to its salient features.
● It provides you with the best experience as it features complete video conversion and editing features.
● If you have distrust or suggestions about the reading, do let us know by dropping a comment in the box below.
● Some alternative MP4 to MP3 Converters are available for Mac, making the conversion process more accessible and practical without losing quality.
Mp3 Converter Mac allows the user to obtain the audio file from your favorite video and save it on your device for having better listening experience.
This article will discuss how to convert MP3 on Mac with high quality and enlist some of the leading and popular converter tools available both online and offline.
In this article
01 [5 Ways to Convert MP3 on Mac with High Quality](#Part 1)
02 [What Is The Best MP3 Converter Software for Mac?](#Part 2)
03 [The Runner-Up MP3 Converter Software List](#Part 3)
Part 1 5 Ways to Convert MP3 on Mac with High Quality
01Way 1: Best Way to Convert MP4 to MP3 with Highest Quality and Fastest Speed
If you want to convert MP3 on Mac with high quality, the best possible method is to download the Vidmore video converter. This software is consistent with both Windows and Mac devices. It comes with a multi-core processor and hardware acceleration, which facilitate you to convert MP4 to MP3 at a 50x faster conversion speed. It also comprises the built-in video clipper, which helps you shorten the MP4 video without losing its quality.
Step 1: You have to download and install the Vidmore converter on your device. Now, drag and drop the video file you want to convert to audio file format.
Step 2: In this step, you have to unfold the “Profile list to avail all the profiles and set MP3 format as a destination from the “General Audio “option. You can even select the portable device you use to convert videos to MP3 format.
Step 3: Now click the “Clip” option to access the video splitter and drag the clipper to set the start/ finish time to trim the available video. The preview window will represent all the modifications instantly. Lastly, click again on the “Clip” option to confirm and receive a new segment.
Step 4: Now, select the “Settings” option to adjust audio settings if required and further click “Convert” to start the conversion process with high quality.
02Way 2: How to Convert MP4 to MP3 for Free Online
As we have already discussed Vidmore software, you can also convert MP3 on Mac online using the same software. All you have to do is to observe the simple steps listed below.
Step 1: You have to type https://www.vidmore.com/free-online-video-converter/ on the browser to run the converter online. Select “Add files to convert,” which help you to navigate to its launcher
Step 2: Now select the “Add File “option to import the video files. You need to discover and click the” Audio” icon and choose “MP3” as the output audio format for each video.
Step 3: If you want to adjust the sample rate, channel, audio encoder, and bit-rate, you have to select the “Setting “option and proceed to the next step by clicking the “Ok” option.
Step 4: Now click the “Convert “option to define the output folder. Successfully, you can convert MP4 to MP3 free of cost.
03Way 3: How to Convert MP4 to MP3 with VLC Media Player
If you want to convert favorite videos into MP3 format using the VLC Media player, follow some of the steps which make your conversion process look easier.
Step 1: Firstly, you have to Run VLC Media Player. Select “Convert/Save” from the “Media” drop-down menu.
Step 2: You need to select the “Add” button to browse and open the MP4 video file. Now, you are required to click the “Convert/ save” option to proceed.
Step 3: Select “Audio – MP3“ from the “Profile” list available under “Settings”.
Step 4: Now, all you have to do is click “Start” to convert MP4 to MP3 with VLC Media Player.
04Way 4: How to Convert MP4 to MP3 Using Windows Media Player
If you have Windows Media Player installed, you will convert the MP4 format to MP3 format. You have to follow the below steps to convert file format without losing its quality.
Step 1: First, open the Window Media player on your computer and select the “Open” option from the “File” list.
Step 2: Now, find the MP4 videos and click “Open” further.
Step 3: Select “Menu” and return to the home screen of Windows Media Player.
Step 4: Now select “Organize” and click on “Options”.
Step 5: In the “Rip Music” section, you have to click the “Change…” option to choose a new destination folder.
Step 6: Now, choose “MP3” as the converted audio format under “Format”.
Step 7: Click “OK” to start the converting process.
05Way 5: How to Convert MP4 to MP3 via Video to MP3 Converter
If you want to convert MP4 files to MP3, you need to download Video to MP3 Converter Apk available for Android users. By using this Apk, you will be able to extract the high quality from the video, which later be saved as an MP3 file by default. It is beneficial if you want to set a ringtone for your phone.
Part 2 What Is The Best MP3 Converter Software for Mac?
01Handbrake
It is recognized as one of the best MP3 converter software compatible with Mac and supports various formats. This tool is also available for Linux and Windows.
Features:
The software has a different feature that facilitates easy conversion of MP3 audios. It works with standard formats and tools like x265 and Libav. According to the user reviews, Handbrake is the right choice if you want to convert videos to MP3 format.
Pros:
● It is an open-source tool and free audio converter Mac.
● Advanced control option with customization settings.
Cons:
● Intimidating interfaces make navigation complex, especially for the beginner.
● Not user-friendly
Rating – 4star/ 5star
02Leawo Video converter
It is a multifunctional converter that facilitates Mac users to convert the MP3 to the most audio format supported. The software is compatible with both Windows and Mac devices.
Features:
It is a YouTube MP3 converter compatible with most audio and video formats and can convert the media files in any combination as per the requirement. It also facilitates the user to optimize the video for playback on particular devices, including iPods, iPads and gaming consoles, etc.
Pros:
● Ease of accessibility
● Facilitate users to customize the conversion settings.
Cons:
● The conversion speed is low
● Not available free of cost
● Low performance in comparison to other converters listed.
Rating – 4.2 star/ 5star
03FFmpeg
It is a cross-platform solution available to convert videos to audio format. The user is forced to enter the instruction from the terminal. Nevertheless, it is available free of cost for Mac users.
Features: This software uses the free FFmpeg encoder and also supports various audio and video formats, including MPEG4, ASF, MOV, AVI, and more. The considerable salient feature of the tool refers to the fact that it supports batch conversion.
Pros:
● Support various audio/ video formats
● Support vast range of filters and codec’s
Cons:
● The official documentation is complex
● Not ideal for beginner
Rating – 4.5 star/ 5star
04Xilisoft Audio Converter
This converter is compatible with both Windows and Mac platforms and holds a reputed position in the marketplace.
Features: This tool accepts the standard audio and video formats and converts them to FLAC, OCG, MP3, etc. It also includes the capability to deliver lossless output post-conversion.
Pros:
● You can extract the output file directly to the designation device.
● Lossless output post-conversion
Cons:
● A limited number of output formats.
Rating – 3.9star/ 5star
05Movavi Video Converter
It is another option available if you are looking to convert MP3 on MAC as it supports almost all ranges of formats and seems to be compatible with both Windows and Mac platforms.
Features:
This converter includes a user-friendly interface that improves navigation and usability and converts most of the standard audio and video formats. It has a predefined setting for different media players like iTunes and Window Media Player.
Pros:
● Sustains a wide range of audio/video formats
● User-friendly interface
● Facilitate users to convert YouTube videos into audio format.
Cons:
● Slow conversion speed
● Not available free of cost( only limited trial version)
Rating – 4.7 star/ 5star
06Switch Audio File Converter
This FLAC to mp3 Mac is developed by one of the reputed vendors, i.e., NCH Software. This tool can run on a 64-bit operating system and provide comparatively better performance than another converter available.
Features: The tool will facilitate the users to obtain the song information from the online database and facilitate a batch conversion. It can be used as a CLI plug-in concerning automated conversion.
Pros:
● Fast conversion speed.
● Carry out the automatic normalization.
Cons:
● Advanced features are only accessible to Pro members.
● Not ideal for beginner
Rating – 4.3 star/ 5star
07Aiseesoft Audio Converter
It is one efficient tool compatible with both Windows and Mac platforms. It is available for a free trial to check the feature before investing in the converter tool.
Features: It allows the user to trim the audio and video clip before choosing the output preference. This tool supports almost all file formats, and also according to a user review, it allows conversion at a reasonable speed.
Pros:
● Support batch conversion
● Support almost all major formats of audio/video
Cons:
● Not available free of cost
Rating – 4.1star/ 5star
08Stellar Audio/ video converter
You can even choose a stellar audio/ video converter to convert videos file into supported audio formats. The tool is compatible with both Windows and Mac platforms.
Features:
This tool supports the standard audio/video format for conversion and lets you save the converted audio format on your device. You can use the converted format for setting ringtones for your phone device.
Pros:
● Compatible with both Windows and Mac platforms
● User-friendly interface
Cons:
● Limited formats supported
Rating – 3.8 star/ 5star
Part 3 The Runner-Up MP3 Converter Software List
Some alternative MP4 to MP3 Converters are available for Mac, making the conversion process more accessible and practical without losing quality.
● Filmora for Mac is recognized as one of the leading and influential video editing software through which you can easily access advanced features such as keyframing and motion tracking. You can easily download the tool by visiting the official website of Wondershare and avail a hassle-free video editing and conversion experience.
● VLC is another option available to you, and the process to convert video to audio is already discussed in the article.
● Convertio is an online tool available free of cost and works as MP4 to MP3 Converter browser support. This tool allows the vast range of conversion and facilitate user to convert archives, audio, videos, eBooks, and presentation.
● QuickTime Player and iTunes is another option available to you offline and available free of cost. The tool is highly compatible with the Mac platform and almost supports all major types of formats.
● Online UniConvert allows the user to convert the videos to audio format online. It is identified as a popular online conversion program that supports a variety of audio and videos format, including iTunes to MP3.
Key Takeaways from This Episode
● An MP4 to MP3 converter Mac computers support will facilitate the user to convert the video format to audio file format.
● Various methods and tools are available to make your conversion process more straightforward.
● The best tool you can use is Filmora from Wondershare due to its salient features.
● It provides you with the best experience as it features complete video conversion and editing features.
● If you have distrust or suggestions about the reading, do let us know by dropping a comment in the box below.
● Some alternative MP4 to MP3 Converters are available for Mac, making the conversion process more accessible and practical without losing quality.
Get Crisp Videos: Best Free Online Video Quality Enhancement Services
Top 9 Best Online Video Quality Enhancer for FREE

Ollie Mattison
Apr 24, 2024• Proven solutions
In 2024, the average person will watch 17 hours of video content every week. Improving the quality of your videos can make your content more noticeable.
Fortunately, there are many excellent video quality enhancer tools to choose from. These tools can enhance both the visual and audio clarity of your content. Ultimately, this will enhance your professionalism and reputation as a trustworthy creator.
Are you wondering where to start when selecting an effective, user-friendly video enhancer? Here are some of our top recommendations to help you begin.
- Part 2: 5 Free AI Video Enhancers [Software Options]
- Part 3: Top 2 4K Video Enhancer Online Free Options
- Part 4: How to Choose the Best Video Enhancer
- In this article
Why Do You Need an AI Video Enhancer?
AI video enhancers utilize generative AI to remove noise, stabilize shaky videos, upscale, or enhance their overall appearance. These tools employ machine learning and neural network techniques to analyze videos and apply different effects for enhancement. Trained on extensive datasets, most AI video enhancers can understand video content like faces, scenes, and objects, automatically adjusting imperfections.
Using an AI video enhancer is an excellent way to boost video quality quickly. Unlike traditional methods, AI speeds up the enhancement process significantly. There are additional benefits, such as:
- **Enhanced Media Quality:**AI video enhancers enhance videos automatically with advanced algorithms, maintaining quality, clarity, and detail.
- Noise Reduction: Many AI video enhancer tools effectively reduce visual noise in videos, resulting in cleaner and clearer footage.
- **Reviving Old Clip:**AI video enhancers are adept at restoring old video footage to make it appear more vibrant.
5 Free AI Video Enhancers [Software Options]
Are blurry videos on your large screen getting on your nerves? Thanks to advancements in artificial intelligence (AI), you can now enhance your low-resolution videos for a crystal-clear viewing experience.
Whether you’re a video editor, content creator, or streamer, incorporating an AI video upscaler into your toolkit is a wise choice. Here are the top 5 picks for the best free AI video enhancer software to improve your video editing.
1.Wondershare Filmora - AI Video Enhancer

Pricing:Filmora offers a free trial without exporting.
Wondershare Filmora stands out in video editing by combining comprehensive editing features with AI-powered enhancement tools. With 4K editing, Filmora ensures videos are improved and future-proofed.
In addition to enhancement, Filmora offers over 300 unique transitions and effects catering to creative minds. Audio enthusiasts will enjoy advanced audio tools like audio ducking and equalizers.
Filmora’s standout feature is its motion tracking capability, enabling dynamic video compositions. While beginners may find the abundance of features overwhelming, regular updates and an active online community provide ample support.
Features
- Filmora’s advanced AI video-enhancing algorithms let you convert black-and-white footage to colored ones.
- It boosts frame rates up to 240 FPS using AI-enhanced frame interpolation technology and 4x super-resolution algorithms.
- Filmora enhances videos’ clarity and quality through audio ducking, equalizers, and more.
- This AI Video Enhancer tracks and attaches objects in videos.
- The tool preserves details and enhances quality in slow-motion scenes.
- Offers over 300 unique transitions and effects.
Pros
- Versatile editing and enhancement options.
- This AI video enhancer is designed to assist both beginners and professionals.
- It supports batch processing, enhancing 10+ videos simultaneously.
Cons
- The free version adds a watermark.
2.AVCLabs Video Enhancer AI
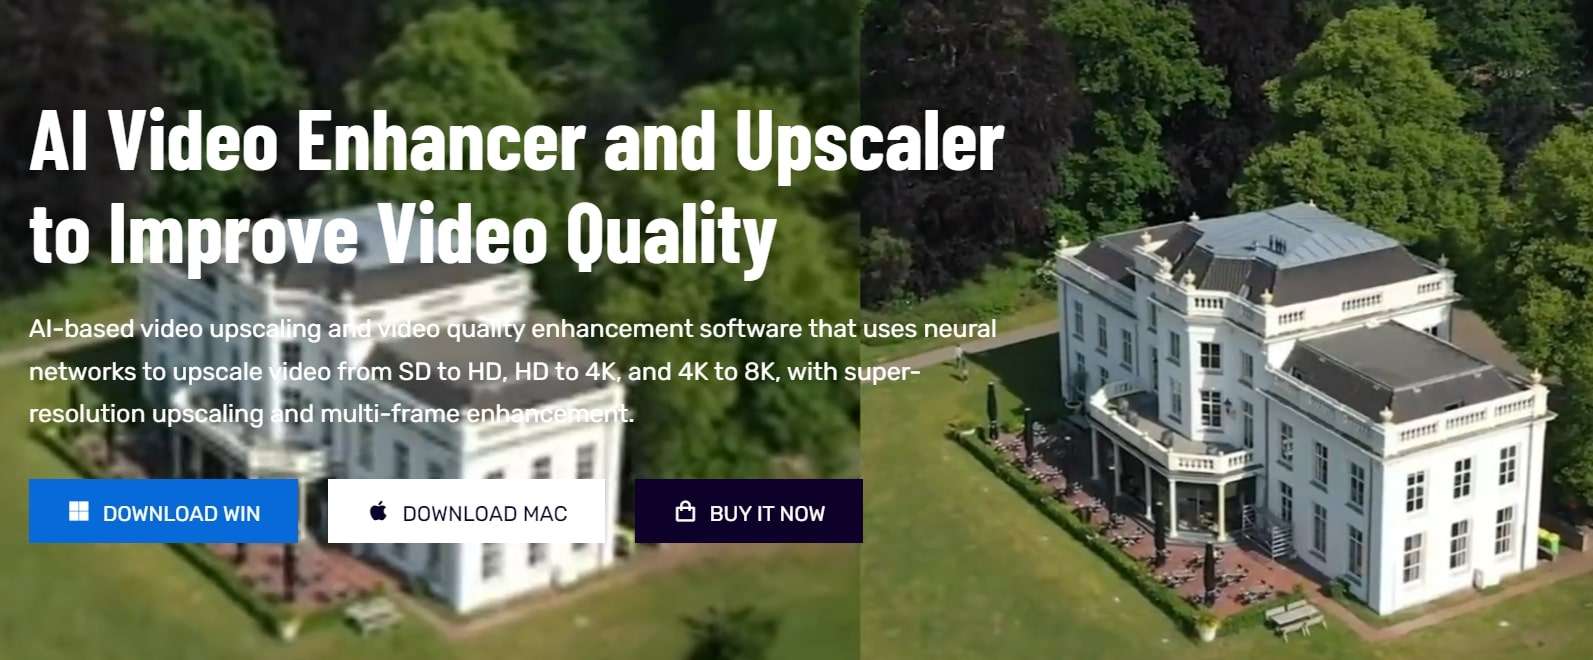
Pricing:AVCLabs offers new users a 7-day free trial.
AVCLabs Video Enhancer AI utilizes a neural network to improve video clip quality. With super-resolution AI video upscaling and multi-frame enhancement, it can easily upscale video from SD to HD (720p or 1080p) to 4K and up to 8K in just one click.
With support for various video and audio formats, users can work seamlessly without compatibility issues. A notable feature is its batch processing capability, enabling users to upscale and enhance multiple videos simultaneously, saving time. The real-time preview feature is invaluable for those who wish to see the software’s results before finalizing their project.
Features
- AVCLabs seamlessly enhances any video footage without quality loss. Whether single or multi-frame, you’ll experience smooth transitions and improved frames.
- With AVCLabs’ color correction feature, you can easily adjust each video frame’s brightness, saturation, and contrast. This tool employs AI video upscaling to create larger, more detailed images without sacrificing quality.
- This video enhancement tool offers automatic face refinement to enhance facial details, which is ideal for improving low-quality videos with excessive noise and blurriness.
- The Super Resolution feature recovers high-resolution videos from low-resolution materials by generating additional pixel data to fill gaps, resulting in enhanced output.
- AVCLabs Video Enhancer AI uses a multi-frame convolutional neural network to stabilize video shakes and remove motion artifacts, overlay noise, and grain, producing natural and enhanced results.
Pros
- AVCLabs features a color calibration algorithm that accurately portrays natural colors.
- It allows you to add color to old black-and-white videos.
- The video processing is fully automatic, requiring no manual fine-tuning.
Cons
- The app demands a significant amount of free space, up to 15 GB.
- It is only compatible with Windows and Mac operating systems.
- The free trial adds a watermark from AVC Labs to the videos.
3.UniFab Video Enhancer
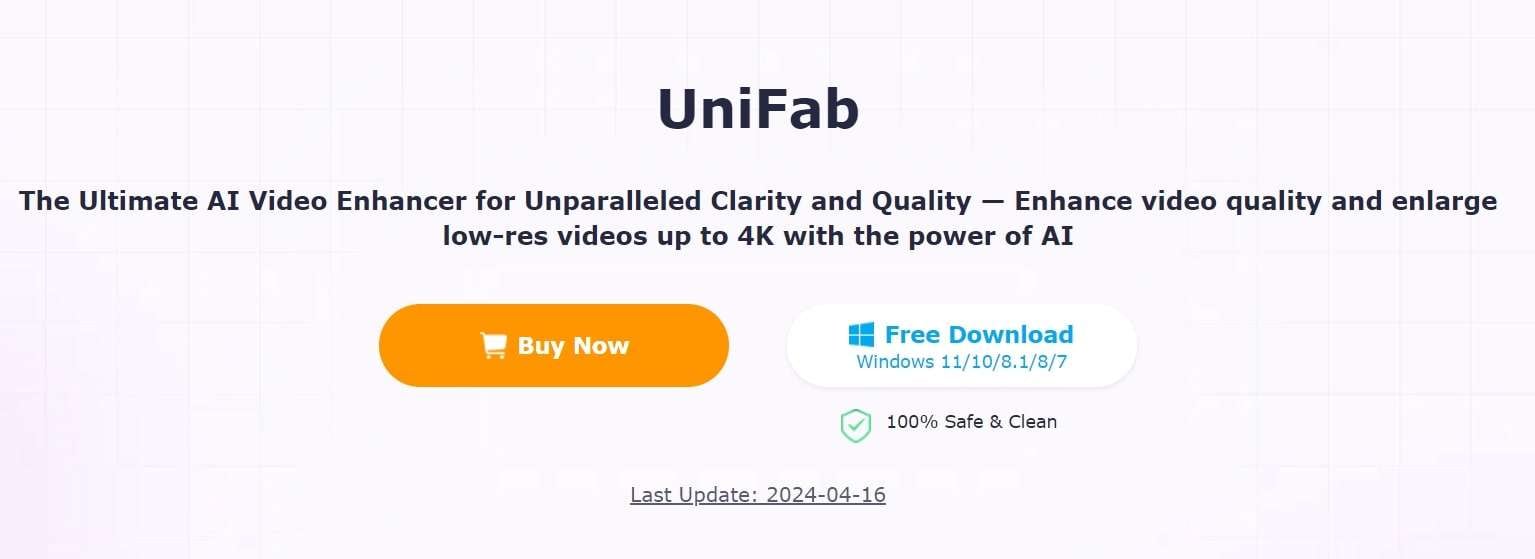
Pricing: UniFab provides a 30-day free trial for new AI users and a 30-day money-back guarantee for paid.
UniFab is a comprehensive AI-powered video enhancer to enhance video quality for all types of videos. Standout features like upscaling video to HDR10/Dolby Vision, denoising, and deinterlacing set this tool apart.
The models are regularly updated with the latest advancements in Deep Learning. Whether you’re a novice or an expert, UniFab offers both automatic and manual modes for video enhancement, making it easy to use without requiring complex settings.
Features
- Upgrade any video to 720p, 1080p, or even 4k resolution with remarkable clarity.
- Convert SDR videos to stunning HDR formats like HDR10+ and Dolby Vision. This feature revitalizes your videos, making them significantly more vibrant and immersive.
- Utilize AI technology to deinterlace your videos, ensuring smooth playback and a pristine viewing experience on modern displays.
- Specifically designed for videos captured in low-light conditions or with high ISO settings, this tool intuitively reduces grain and noise, restoring your footage’s true essence without sacrificing detail.
- Experience unprecedented fluidity as the software boosts your videos to an impressive 120FPS using AI. This transforms your content into a smooth motion stream, ideal for high-definition screens and attentive audiences.
Pros
- It allows audio up-mixing to EAC3 5.1/DTS 7.1 through AI.
- Utilizes GPU-accelerated technology.
- Supports video conversion, compression, and editing.
Cons
- The free trial is limited to 3 videos.
- Does not support Mac systems.
4.Topaz Video Enhance AI
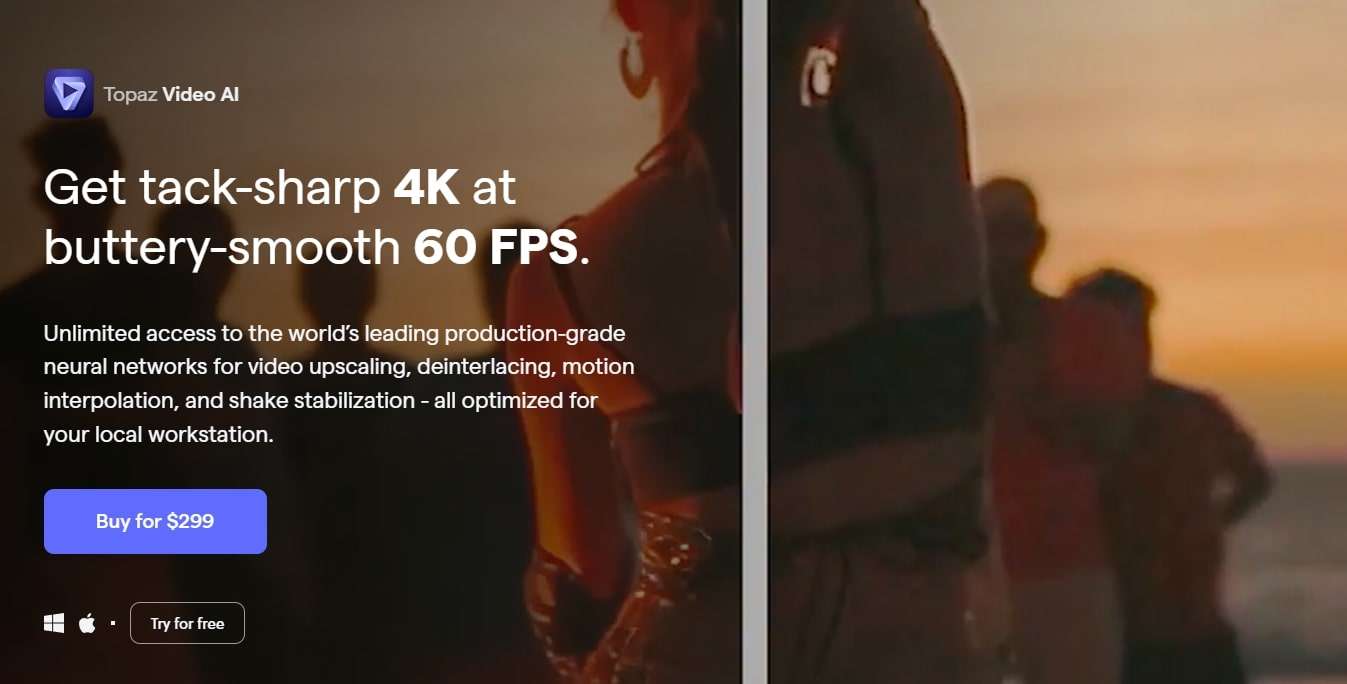
Pricing:Topaz video enhancement tool offers a 30-day no-questions-asked refund policy.
Topaz Video Enhance AI enhances video quality by increasing its resolution. It supports batch upscaling of videos and is compatible with DVD, DSLR, Game, and HD stock footage.
Many notable film studios consider Topaz Video Enhance AI one of the best video editing software tools. It is suitable for various uses, such as commercials, movie content, and YouTube videos.
Features
- This free video upscaling software swiftly analyzes video footage quality using AI tools and recreates it into high-resolution videos.
- Topaz offers Gaia CGI and Theia for enhancing CG and animated videos, along with Proteus and Artemis for noise removal and sharpening.
- Easily recover details from any video footage by injecting original details using adjacent frames’ additional information. It detects and corrects visual artifacts formed during compression.
- Topaz provides an automatic mode for quick video quality enhancement and manual fine-tuning options using available controls.
- With this free video enhancer software, preserve video audio tracks and select from different conversion options for optimal output in the final project.
Pros
- Reduces motion artifacts.
- Adds extra frames for smooth, slow-motion videos.
- Enhances video quality up to 8K.
Cons
- AI processing can be time-consuming, sometimes taking hours.
- Requires a high-quality graphics card.
5.HitPaw Video Enhancer

Pricing:HitPaw AI video enhancer offers a 30-day refund guarantee on paid plans.
HitPaw is a user-friendly video enhancer suitable for both beginners and professionals. It features an easy-to-navigate interface, ensuring even those with minimal experience can improve their videos. Despite its simplicity, HitPaw offers robust enhancement tools, including color correction and stabilization. Its extensive support for various video formats eliminates compatibility concerns.
The software prioritizes efficient video enhancement without compromising quality or speed. Comprehensive tutorials help users explore different editing tasks and unlock their content’s full potential.
Features
- Utilize advanced AI algorithms to upscale low-resolution videos for a more appealing look. The AI feature optimizes content for sharper and more vibrant visuals.
- The HitPaw video quality enhancer app uses AI tools to improve detailing on human faces. Apply filters and adjust settings to enhance facial output in videos.
- The app includes a video stabilization feature that eliminates shaky camera movements, producing smoother and clearer videos with a professional touch.
- HitPaw offers an AI video repair option to restore damaged, corrupted, and old videos. It can also use deep learning AI to colorize black-and-white videos.
- Remove noise from videos with the General Denoise feature, making them look sharper, clearer, and newer.
Pros
- Supports various video formats.
- Has a user-friendly and intuitive interface.
- Can repair and enhance animation videos.
Cons
- The free plan has limited editing features.
Top 2 4K Video Enhancer Online Free Options
The AI-enhanced video tools mentioned above excel in their field. However, there are times when you might run out of storage or need a quick fix through your browser. So, here are some online AI tools that can enhance your videos. Unlike offline video enhancer AIs, online tools are easily accessible. While they may offer fewer features than desktop solutions, they are still useful for some editors.
1.Cutout.Pro
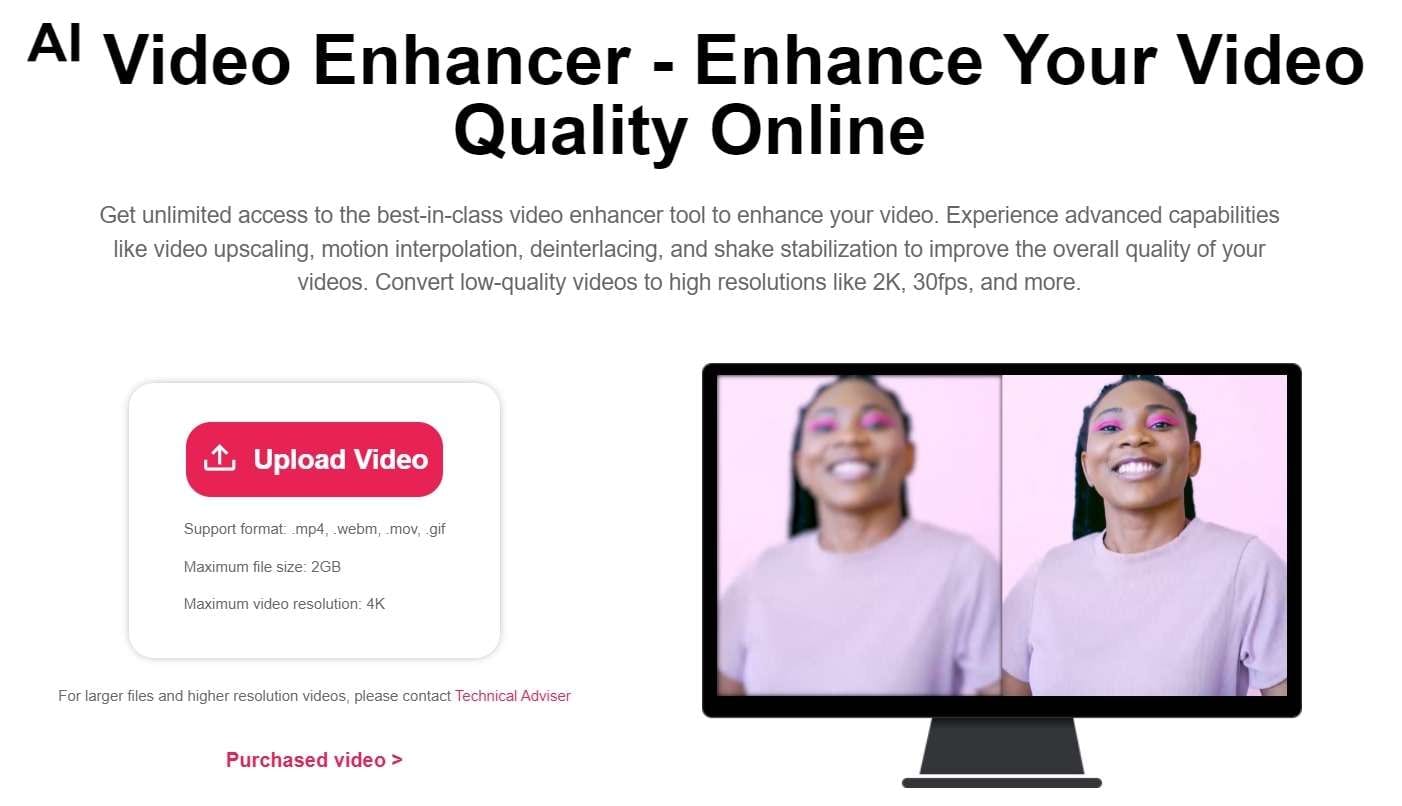
Many editing professionals rely on this free AI video enhancer for unlimited video improvements. Cutout.Pro utilizes advanced features such as video upscaling, motion interpolation, deinterlacing, and shake stabilization to enhance overall quality. This tool converts low-quality videos to higher resolutions like 2K, 30fps, and beyond. Moreover, this online tool swiftly reduces visual noise and other motion artifacts from clips using AI.
Features
- Reduce noise, motion artifacts, and improve video resolution significantly with this powerful online video quality enhancer and upscaler. Perfect for enhancing low-resolution videos like 240p, 360p, 480p, and more.
- Pro increases video frame rates without sacrificing quality. Smooth out shaky footage for better slow-motion effects.
- This tool enhances video resolution up to 2K at a maximum of 30fps effortlessly. It sharpens and defines your videos, bringing your story to life like a professional.
- This is perfect for filmmakers seeking to enhance footage quality and create professional-looking films. Improve video resolution and quality to unblur, upscale, and smooth videos for cinematic results.
- Enhance the quality of personal videos as this tool features shake stabilization for professional results.
- This video enhancer is ideal for professionals creating cinematic frames and restoring old footage. It’s also great for individuals looking to improve the quality of compressed videos downloaded from social media platforms like YouTube, Netflix, and TikTok.
Pros
- It boosts video frame rates and enables HD clip exports.
- Users can upload videos in MP4, MOV, WebM, and GIF formats for processing.
Cons
- It only offers a 5-second preview of the results after enhancement.
2.Clideo Video Enhancer
Clideo is an online video-enhancing tool that can completely transform any random video. It lets you add special AI effects and filters to adjust the video’s brightness, saturation, and contrast, making it stunning, vibrant, and attractive. You can enhance any video professionally for social media attention or business branding.
When it comes to video-enhancing tools, users seek maximum customization options. Clideo offers various features, functions, and facilities to transform average-looking videos into 4k video resolutions.
Features
- The interface is intuitive, so you don’t need any video editing experience to use it.
- You can enhance your video regardless of format because Clideo works with MP4, WMV, MOV, VOB, AVI, and other popular formats.
- You don’t need to download and install the video enhancer to your device. It’s not only faster but also more secure.
- Enhance multiple videos or images simultaneously.
- Add subtitles with customizable text fonts.
- Text Overlay feature with support for HD resolution.
- Access a media library with social sharing options.
Pros
- User-friendly tool is ideal for beginners.
- Supports multiple formats.
- As an online tool, it saves device storage space.
- Reasonable pricing.
- Provides uninterrupted video editing with customizable features.
Cons
- A premium subscription is required to remove watermarking.
- No offline app available; internet connection always necessary.
- No dedicated mobile app.
How to Choose the Best Video Enhancer
Consider the following to ensure you select the right video enhancer for your needs and creative vision.
1.Type of Content
Think about the type of content you’re working with. Are you creating short-form clips for social media or longer, more complex videos? Different enhancers may better suit different content types, so consider your file type and potential quality issues.
2.Consider The Features You Need
Consider the tools and features you need from your video quality enhancer software. Each system offers different capabilities, so planning can help you find the option that best fits your requirements.
3.Sharing Formats and Requirements
Determine the purpose of your video project and any specific sharing requirements. Understanding your goals will help you plan accordingly, whether for online sharing or commercial use.
4.Your Budget
Keep your budget in mind. Some enhancers offer free features, while others may require a purchase or subscription fee for full access. Budgeting effectively ensures you get the best value for your money while achieving great video results.
Conclusion
The video enhancement landscape has been transformed by artificial intelligence, providing numerous options to enhance your videos’ quality. Whether a professional filmmaker or a casual content creator, free AI video enhancers offer a chance to take your productions to the next level.
Each software has unique strengths, from Wondershare Filmora’s comprehensive editing features to AVCLabs’ neural network-powered upscaling and UniFab’s HDR conversion capabilities. User-friendly options like HitPaw cater to beginners while providing robust enhancement tools.
Moreover, for quick fixes or limited storage, online options like Cutout.Pro and Clideo offer accessible solutions with impressive results. With these advancements, achieving professional-quality videos is now achievable for everyone.
Ollie Mattison
Ollie Mattison is a writer and a lover of all things video.
Follow @Ollie Mattison
Ollie Mattison
Apr 24, 2024• Proven solutions
In 2024, the average person will watch 17 hours of video content every week. Improving the quality of your videos can make your content more noticeable.
Fortunately, there are many excellent video quality enhancer tools to choose from. These tools can enhance both the visual and audio clarity of your content. Ultimately, this will enhance your professionalism and reputation as a trustworthy creator.
Are you wondering where to start when selecting an effective, user-friendly video enhancer? Here are some of our top recommendations to help you begin.
- Part 2: 5 Free AI Video Enhancers [Software Options]
- Part 3: Top 2 4K Video Enhancer Online Free Options
- Part 4: How to Choose the Best Video Enhancer
- In this article
Why Do You Need an AI Video Enhancer?
AI video enhancers utilize generative AI to remove noise, stabilize shaky videos, upscale, or enhance their overall appearance. These tools employ machine learning and neural network techniques to analyze videos and apply different effects for enhancement. Trained on extensive datasets, most AI video enhancers can understand video content like faces, scenes, and objects, automatically adjusting imperfections.
Using an AI video enhancer is an excellent way to boost video quality quickly. Unlike traditional methods, AI speeds up the enhancement process significantly. There are additional benefits, such as:
- **Enhanced Media Quality:**AI video enhancers enhance videos automatically with advanced algorithms, maintaining quality, clarity, and detail.
- Noise Reduction: Many AI video enhancer tools effectively reduce visual noise in videos, resulting in cleaner and clearer footage.
- **Reviving Old Clip:**AI video enhancers are adept at restoring old video footage to make it appear more vibrant.
5 Free AI Video Enhancers [Software Options]
Are blurry videos on your large screen getting on your nerves? Thanks to advancements in artificial intelligence (AI), you can now enhance your low-resolution videos for a crystal-clear viewing experience.
Whether you’re a video editor, content creator, or streamer, incorporating an AI video upscaler into your toolkit is a wise choice. Here are the top 5 picks for the best free AI video enhancer software to improve your video editing.
1.Wondershare Filmora - AI Video Enhancer
Pricing:Filmora offers a free trial without exporting.
Wondershare Filmora stands out in video editing by combining comprehensive editing features with AI-powered enhancement tools. With 4K editing, Filmora ensures videos are improved and future-proofed.
In addition to enhancement, Filmora offers over 300 unique transitions and effects catering to creative minds. Audio enthusiasts will enjoy advanced audio tools like audio ducking and equalizers.
Filmora’s standout feature is its motion tracking capability, enabling dynamic video compositions. While beginners may find the abundance of features overwhelming, regular updates and an active online community provide ample support.
Features
- Filmora’s advanced AI video-enhancing algorithms let you convert black-and-white footage to colored ones.
- It boosts frame rates up to 240 FPS using AI-enhanced frame interpolation technology and 4x super-resolution algorithms.
- Filmora enhances videos’ clarity and quality through audio ducking, equalizers, and more.
- This AI Video Enhancer tracks and attaches objects in videos.
- The tool preserves details and enhances quality in slow-motion scenes.
- Offers over 300 unique transitions and effects.
Pros
- Versatile editing and enhancement options.
- This AI video enhancer is designed to assist both beginners and professionals.
- It supports batch processing, enhancing 10+ videos simultaneously.
Cons
- The free version adds a watermark.
2.AVCLabs Video Enhancer AI
Pricing:AVCLabs offers new users a 7-day free trial.
AVCLabs Video Enhancer AI utilizes a neural network to improve video clip quality. With super-resolution AI video upscaling and multi-frame enhancement, it can easily upscale video from SD to HD (720p or 1080p) to 4K and up to 8K in just one click.
With support for various video and audio formats, users can work seamlessly without compatibility issues. A notable feature is its batch processing capability, enabling users to upscale and enhance multiple videos simultaneously, saving time. The real-time preview feature is invaluable for those who wish to see the software’s results before finalizing their project.
Features
- AVCLabs seamlessly enhances any video footage without quality loss. Whether single or multi-frame, you’ll experience smooth transitions and improved frames.
- With AVCLabs’ color correction feature, you can easily adjust each video frame’s brightness, saturation, and contrast. This tool employs AI video upscaling to create larger, more detailed images without sacrificing quality.
- This video enhancement tool offers automatic face refinement to enhance facial details, which is ideal for improving low-quality videos with excessive noise and blurriness.
- The Super Resolution feature recovers high-resolution videos from low-resolution materials by generating additional pixel data to fill gaps, resulting in enhanced output.
- AVCLabs Video Enhancer AI uses a multi-frame convolutional neural network to stabilize video shakes and remove motion artifacts, overlay noise, and grain, producing natural and enhanced results.
Pros
- AVCLabs features a color calibration algorithm that accurately portrays natural colors.
- It allows you to add color to old black-and-white videos.
- The video processing is fully automatic, requiring no manual fine-tuning.
Cons
- The app demands a significant amount of free space, up to 15 GB.
- It is only compatible with Windows and Mac operating systems.
- The free trial adds a watermark from AVC Labs to the videos.
3.UniFab Video Enhancer
Pricing: UniFab provides a 30-day free trial for new AI users and a 30-day money-back guarantee for paid.
UniFab is a comprehensive AI-powered video enhancer to enhance video quality for all types of videos. Standout features like upscaling video to HDR10/Dolby Vision, denoising, and deinterlacing set this tool apart.
The models are regularly updated with the latest advancements in Deep Learning. Whether you’re a novice or an expert, UniFab offers both automatic and manual modes for video enhancement, making it easy to use without requiring complex settings.
Features
- Upgrade any video to 720p, 1080p, or even 4k resolution with remarkable clarity.
- Convert SDR videos to stunning HDR formats like HDR10+ and Dolby Vision. This feature revitalizes your videos, making them significantly more vibrant and immersive.
- Utilize AI technology to deinterlace your videos, ensuring smooth playback and a pristine viewing experience on modern displays.
- Specifically designed for videos captured in low-light conditions or with high ISO settings, this tool intuitively reduces grain and noise, restoring your footage’s true essence without sacrificing detail.
- Experience unprecedented fluidity as the software boosts your videos to an impressive 120FPS using AI. This transforms your content into a smooth motion stream, ideal for high-definition screens and attentive audiences.
Pros
- It allows audio up-mixing to EAC3 5.1/DTS 7.1 through AI.
- Utilizes GPU-accelerated technology.
- Supports video conversion, compression, and editing.
Cons
- The free trial is limited to 3 videos.
- Does not support Mac systems.
4.Topaz Video Enhance AI
Pricing:Topaz video enhancement tool offers a 30-day no-questions-asked refund policy.
Topaz Video Enhance AI enhances video quality by increasing its resolution. It supports batch upscaling of videos and is compatible with DVD, DSLR, Game, and HD stock footage.
Many notable film studios consider Topaz Video Enhance AI one of the best video editing software tools. It is suitable for various uses, such as commercials, movie content, and YouTube videos.
Features
- This free video upscaling software swiftly analyzes video footage quality using AI tools and recreates it into high-resolution videos.
- Topaz offers Gaia CGI and Theia for enhancing CG and animated videos, along with Proteus and Artemis for noise removal and sharpening.
- Easily recover details from any video footage by injecting original details using adjacent frames’ additional information. It detects and corrects visual artifacts formed during compression.
- Topaz provides an automatic mode for quick video quality enhancement and manual fine-tuning options using available controls.
- With this free video enhancer software, preserve video audio tracks and select from different conversion options for optimal output in the final project.
Pros
- Reduces motion artifacts.
- Adds extra frames for smooth, slow-motion videos.
- Enhances video quality up to 8K.
Cons
- AI processing can be time-consuming, sometimes taking hours.
- Requires a high-quality graphics card.
5.HitPaw Video Enhancer
Pricing:HitPaw AI video enhancer offers a 30-day refund guarantee on paid plans.
HitPaw is a user-friendly video enhancer suitable for both beginners and professionals. It features an easy-to-navigate interface, ensuring even those with minimal experience can improve their videos. Despite its simplicity, HitPaw offers robust enhancement tools, including color correction and stabilization. Its extensive support for various video formats eliminates compatibility concerns.
The software prioritizes efficient video enhancement without compromising quality or speed. Comprehensive tutorials help users explore different editing tasks and unlock their content’s full potential.
Features
- Utilize advanced AI algorithms to upscale low-resolution videos for a more appealing look. The AI feature optimizes content for sharper and more vibrant visuals.
- The HitPaw video quality enhancer app uses AI tools to improve detailing on human faces. Apply filters and adjust settings to enhance facial output in videos.
- The app includes a video stabilization feature that eliminates shaky camera movements, producing smoother and clearer videos with a professional touch.
- HitPaw offers an AI video repair option to restore damaged, corrupted, and old videos. It can also use deep learning AI to colorize black-and-white videos.
- Remove noise from videos with the General Denoise feature, making them look sharper, clearer, and newer.
Pros
- Supports various video formats.
- Has a user-friendly and intuitive interface.
- Can repair and enhance animation videos.
Cons
- The free plan has limited editing features.
Top 2 4K Video Enhancer Online Free Options
The AI-enhanced video tools mentioned above excel in their field. However, there are times when you might run out of storage or need a quick fix through your browser. So, here are some online AI tools that can enhance your videos. Unlike offline video enhancer AIs, online tools are easily accessible. While they may offer fewer features than desktop solutions, they are still useful for some editors.
1.Cutout.Pro
Many editing professionals rely on this free AI video enhancer for unlimited video improvements. Cutout.Pro utilizes advanced features such as video upscaling, motion interpolation, deinterlacing, and shake stabilization to enhance overall quality. This tool converts low-quality videos to higher resolutions like 2K, 30fps, and beyond. Moreover, this online tool swiftly reduces visual noise and other motion artifacts from clips using AI.
Features
- Reduce noise, motion artifacts, and improve video resolution significantly with this powerful online video quality enhancer and upscaler. Perfect for enhancing low-resolution videos like 240p, 360p, 480p, and more.
- Pro increases video frame rates without sacrificing quality. Smooth out shaky footage for better slow-motion effects.
- This tool enhances video resolution up to 2K at a maximum of 30fps effortlessly. It sharpens and defines your videos, bringing your story to life like a professional.
- This is perfect for filmmakers seeking to enhance footage quality and create professional-looking films. Improve video resolution and quality to unblur, upscale, and smooth videos for cinematic results.
- Enhance the quality of personal videos as this tool features shake stabilization for professional results.
- This video enhancer is ideal for professionals creating cinematic frames and restoring old footage. It’s also great for individuals looking to improve the quality of compressed videos downloaded from social media platforms like YouTube, Netflix, and TikTok.
Pros
- It boosts video frame rates and enables HD clip exports.
- Users can upload videos in MP4, MOV, WebM, and GIF formats for processing.
Cons
- It only offers a 5-second preview of the results after enhancement.
2.Clideo Video Enhancer
Clideo is an online video-enhancing tool that can completely transform any random video. It lets you add special AI effects and filters to adjust the video’s brightness, saturation, and contrast, making it stunning, vibrant, and attractive. You can enhance any video professionally for social media attention or business branding.
When it comes to video-enhancing tools, users seek maximum customization options. Clideo offers various features, functions, and facilities to transform average-looking videos into 4k video resolutions.
Features
- The interface is intuitive, so you don’t need any video editing experience to use it.
- You can enhance your video regardless of format because Clideo works with MP4, WMV, MOV, VOB, AVI, and other popular formats.
- You don’t need to download and install the video enhancer to your device. It’s not only faster but also more secure.
- Enhance multiple videos or images simultaneously.
- Add subtitles with customizable text fonts.
- Text Overlay feature with support for HD resolution.
- Access a media library with social sharing options.
Pros
- User-friendly tool is ideal for beginners.
- Supports multiple formats.
- As an online tool, it saves device storage space.
- Reasonable pricing.
- Provides uninterrupted video editing with customizable features.
Cons
- A premium subscription is required to remove watermarking.
- No offline app available; internet connection always necessary.
- No dedicated mobile app.
How to Choose the Best Video Enhancer
Consider the following to ensure you select the right video enhancer for your needs and creative vision.
1.Type of Content
Think about the type of content you’re working with. Are you creating short-form clips for social media or longer, more complex videos? Different enhancers may better suit different content types, so consider your file type and potential quality issues.
2.Consider The Features You Need
Consider the tools and features you need from your video quality enhancer software. Each system offers different capabilities, so planning can help you find the option that best fits your requirements.
3.Sharing Formats and Requirements
Determine the purpose of your video project and any specific sharing requirements. Understanding your goals will help you plan accordingly, whether for online sharing or commercial use.
4.Your Budget
Keep your budget in mind. Some enhancers offer free features, while others may require a purchase or subscription fee for full access. Budgeting effectively ensures you get the best value for your money while achieving great video results.
Conclusion
The video enhancement landscape has been transformed by artificial intelligence, providing numerous options to enhance your videos’ quality. Whether a professional filmmaker or a casual content creator, free AI video enhancers offer a chance to take your productions to the next level.
Each software has unique strengths, from Wondershare Filmora’s comprehensive editing features to AVCLabs’ neural network-powered upscaling and UniFab’s HDR conversion capabilities. User-friendly options like HitPaw cater to beginners while providing robust enhancement tools.
Moreover, for quick fixes or limited storage, online options like Cutout.Pro and Clideo offer accessible solutions with impressive results. With these advancements, achieving professional-quality videos is now achievable for everyone.
Ollie Mattison
Ollie Mattison is a writer and a lover of all things video.
Follow @Ollie Mattison
How to Easily Match Color in Video Clips with Final Cut Pro
How to Easily Match Color in Video Clips with Final Cut Pro

Benjamin Arango
Aug 18, 2022• Proven solutions
If you are involved in video editing or post-production activities, then you might be familiar with color matching. In this, we make sure that the overall color and tone of our videos are matched throughout. Thankfully, you can easily do color match in Final Cut Pro or any other reliable video editing tool. In this detailed Final Cut Pro match color tutorial, I will help you do the same and would also share details about its best alternative.
Part 1: How to Use Final Cut Pro X to Match Colors: A Stepwise Guide
Final Cut Pro X has to be one of the most resourceful Mac applications that you can use to edit your videos. If you want, you can use the automatic FCPX match color tool in the application to automatically apply the effect. Besides that, you can manually match color in Final Cut Pro X by using its inbuilt features.
Method 1: Using the Final Cut Pro Match Color Tool
To use the Final Cut Pro X Match Color feature, you can simply go through these simple steps:
Step 1: Load and import the video clips
To begin with, you can just launch Final Cut Pro on your Mac and go to its File > Import > Media to load any video clip of your choice. You can simply drag and drop your videos to the Final Cut Pro interface.
Step 2: Apply the FCPX Match Color effect
Now, simply select the clip you want to edit, go to the Enhancement menu, and click on the Match Color icon (below the viewer). You can also find it under the Modify > Match Color option or get the feature by pressing the Option + Command + M key combination.
Afterward, the Color Match FCPX tool will display two different screens in the viewer. On the right, you would have the clip from where you can match the source while the target clip will be displayed on the left.
From the Final Cut Pro timeline or the browser, you can find the appropriate clips. If you want, you can even import a still image to source the respective colors for matching. Simply preview the changes that the FCPX Color Match tool will make and click on the “Apply Match” in the end.
Method 2: Adjust the Video Color Manually
Apart from the match color tool in Final Cut, you can also manually set the color grading and saturation feature. While this will not get you instant or exact results to color match in Final Cut Pro, you can still give it a try.
Once the video clip is loaded on Filmora, just go to the Effects Browser > Inspector and add the Color Correction effect to the video. Now, you can go to the Color Correction tab from the sidebar to manually adjust the value for color, saturation, and exposure to get the desired effects.
Part 2: Wondershare Filmora: The Best Alternative to FCPX Color Match Tool
Since Final Cut Pro is not the most user-friendly application, a lot of people look for other alternatives to perform operations like color match. Therefore, you can also take the assistance of Wondershare Filmora . It is a powerful video editing and post-production tool that is extremely easy to use and runs on all the major macOS versions.
- On Filmora, you can find seamless options like color matching, color tuning, splitting, resizing, scene detection, and so on.
- There are also tons of advanced video editing features in Filmora like keyframing, motion detection, green screen edits, etc.
- You can find a wide range of effects, presets, texts, stickers, transitions, and more in the Filmora library.
- There are also dedicated options to edit audio in your media files or add voiceovers.
- Filmora is one of the easiest video editing tools out there with import/export options for all the leading formats.
To perform automatic color matching in your videos using Wondershare Filmora, the following steps can be taken:
Step 1: Import the video to edit on Filmora
At first, you can just launch Filmora on your Mac and drag-and-drop the video you want to edit. You can also go to its File > Import Media to load any video of your choice on Filmora and just drag the clips to the timeline (at the bottom).
Step 2: Apply Color Correction to your Clips
If you want, you can add multiple clips on Filmora and simply add them to the timeline as per your requirements.
You can now take the playhead and place it from where you wish to edit the video. You can select the remaining clip (or photos), right-click, and choose the Color Match option. Alternatively, you can also click on the color palette icon on the timeline’s toolbar and select the “Color Match” button.
This will change the viewer into two screens. Here, you can select the reference picture or clip as a source and preview its effects on the target clip. You can also go to the Color tab on the side and adjust its level under the Comparison View section.
On the viewer window, you can see all the changes, and click on the “Match” button to apply the effect.
Step 3: Export your video to a preferred format
After making the needed changes and applying the color correction feature, you can go to the Export option of the tool. Here, you can choose a preferred format to export your file and even choose its resolution and video quality.
I’m sure that after reading this post you would be able to apply color match in Final Cut Pro. As you can see, I have included a stepwise tutorial that anyone can follow to use the Final Cut Pro Match Color tool. Though, if you are looking for a better and more user-friendly option, then explore Wondershare Filmora. The free video editing application offers a wide range of features and will certainly meet every post-production need of yours in no time!
Benjamin Arango
Benjamin Arango is a writer and a lover of all things video.
Follow @Benjamin Arango
Benjamin Arango
Aug 18, 2022• Proven solutions
If you are involved in video editing or post-production activities, then you might be familiar with color matching. In this, we make sure that the overall color and tone of our videos are matched throughout. Thankfully, you can easily do color match in Final Cut Pro or any other reliable video editing tool. In this detailed Final Cut Pro match color tutorial, I will help you do the same and would also share details about its best alternative.
Part 1: How to Use Final Cut Pro X to Match Colors: A Stepwise Guide
Final Cut Pro X has to be one of the most resourceful Mac applications that you can use to edit your videos. If you want, you can use the automatic FCPX match color tool in the application to automatically apply the effect. Besides that, you can manually match color in Final Cut Pro X by using its inbuilt features.
Method 1: Using the Final Cut Pro Match Color Tool
To use the Final Cut Pro X Match Color feature, you can simply go through these simple steps:
Step 1: Load and import the video clips
To begin with, you can just launch Final Cut Pro on your Mac and go to its File > Import > Media to load any video clip of your choice. You can simply drag and drop your videos to the Final Cut Pro interface.
Step 2: Apply the FCPX Match Color effect
Now, simply select the clip you want to edit, go to the Enhancement menu, and click on the Match Color icon (below the viewer). You can also find it under the Modify > Match Color option or get the feature by pressing the Option + Command + M key combination.
Afterward, the Color Match FCPX tool will display two different screens in the viewer. On the right, you would have the clip from where you can match the source while the target clip will be displayed on the left.
From the Final Cut Pro timeline or the browser, you can find the appropriate clips. If you want, you can even import a still image to source the respective colors for matching. Simply preview the changes that the FCPX Color Match tool will make and click on the “Apply Match” in the end.
Method 2: Adjust the Video Color Manually
Apart from the match color tool in Final Cut, you can also manually set the color grading and saturation feature. While this will not get you instant or exact results to color match in Final Cut Pro, you can still give it a try.
Once the video clip is loaded on Filmora, just go to the Effects Browser > Inspector and add the Color Correction effect to the video. Now, you can go to the Color Correction tab from the sidebar to manually adjust the value for color, saturation, and exposure to get the desired effects.
Part 2: Wondershare Filmora: The Best Alternative to FCPX Color Match Tool
Since Final Cut Pro is not the most user-friendly application, a lot of people look for other alternatives to perform operations like color match. Therefore, you can also take the assistance of Wondershare Filmora . It is a powerful video editing and post-production tool that is extremely easy to use and runs on all the major macOS versions.
- On Filmora, you can find seamless options like color matching, color tuning, splitting, resizing, scene detection, and so on.
- There are also tons of advanced video editing features in Filmora like keyframing, motion detection, green screen edits, etc.
- You can find a wide range of effects, presets, texts, stickers, transitions, and more in the Filmora library.
- There are also dedicated options to edit audio in your media files or add voiceovers.
- Filmora is one of the easiest video editing tools out there with import/export options for all the leading formats.
To perform automatic color matching in your videos using Wondershare Filmora, the following steps can be taken:
Step 1: Import the video to edit on Filmora
At first, you can just launch Filmora on your Mac and drag-and-drop the video you want to edit. You can also go to its File > Import Media to load any video of your choice on Filmora and just drag the clips to the timeline (at the bottom).
Step 2: Apply Color Correction to your Clips
If you want, you can add multiple clips on Filmora and simply add them to the timeline as per your requirements.
You can now take the playhead and place it from where you wish to edit the video. You can select the remaining clip (or photos), right-click, and choose the Color Match option. Alternatively, you can also click on the color palette icon on the timeline’s toolbar and select the “Color Match” button.
This will change the viewer into two screens. Here, you can select the reference picture or clip as a source and preview its effects on the target clip. You can also go to the Color tab on the side and adjust its level under the Comparison View section.
On the viewer window, you can see all the changes, and click on the “Match” button to apply the effect.
Step 3: Export your video to a preferred format
After making the needed changes and applying the color correction feature, you can go to the Export option of the tool. Here, you can choose a preferred format to export your file and even choose its resolution and video quality.
I’m sure that after reading this post you would be able to apply color match in Final Cut Pro. As you can see, I have included a stepwise tutorial that anyone can follow to use the Final Cut Pro Match Color tool. Though, if you are looking for a better and more user-friendly option, then explore Wondershare Filmora. The free video editing application offers a wide range of features and will certainly meet every post-production need of yours in no time!
Benjamin Arango
Benjamin Arango is a writer and a lover of all things video.
Follow @Benjamin Arango
Also read:
- The Most Talented Lego Stop Motion Creators of the Year for 2024
- Updated 2024 Approved The Art of Flawless Conversion Video to MP3 without Quality Drop
- Updated 2024 Approved Get Back on Track Resetting Final Cut Pro X to Resolve Common Problems
- Updated MovieMagic for Mac for 2024
- Updated Vertical Video Victory The Top Tip for Resizing Like a Pro for 2024
- Updated Convert WebM to MP3 Top-Rated Conversion Tools for 2024
- Updated 2024 Approved The Best Way to Convert MP3 on Mac Software Reviews and Ratings
- Updated In 2024, The Ultimate Cloud Stop Motion Solution Tips and Alternatives
- Updated Speed Up or Slow Down Your Camtasia Recordings
- New In 2024, Free Video Dubbing Software for PC Top Picks
- Updated 2024 Approved Whats Better Than Subtitle Edit for Mac? Explore These Alternatives
- New 2024 Approved Top-Rated Web-Based Solutions for Vertical Video Editing
- Updated 2024 Approved 8 Best Stop Motion Animation Software for Mac and Windows
- Updated In 2024, Portrait Perfection The Best Video Editing Apps for iOS and Android
- In 2024, The Ultimate List 10 Best Video Editing Apps for Vloggers
- Updated In 2024, Unlocking the Secret to Ideal Pixel Dimensions
- New In 2024, The Ultimate Guide to Glitch Video Editors Top Picks for Windows, Mac, and Web
- Updated IPad Video Editing Software The Best of the Best for 2024
- New Say Goodbye to Boring Videos Top Time-Lapse Apps for iPhone and Android Users
- Simplify Your Workflow Top Video Editors with Reframe for 2024
- New In 2024, Simplify Video Editing on Mac MKVtoolnix Review
- Updated In 2024, Adobe Premiere Pro Secrets 6 Time-Saving Tips for Better Video Edits
- 2024 Approved Optimizing Video Output with Compressor in FCPX
- Updated 2024 Approved Elevate Your Editing Skills Top 10 Final Cut Pro X Plugins for Professionals and Beginners
- 2024 Approved Top Free Dual-Screen Video Editing Software Web & Desktop
- Updated 2024 Approved Trim and Cut MOV Files without Spending a Dime
- New In 2024, MP4 to MP3 Conversion Made Easy Best Software
- Updated Get Creative Top Free Mobile Apps for Adding Video Special Effects for 2024
- New GoPro Quik Vs. The Competition A Review & Alternative Options for PC for 2024
- Updated In 2024, Transform Videos Into GIFs with These 28 Top Converters
- YouTube to MP3 The Complete Conversion Guide for 2024
- In 2024, The Best Free Video Editing Software 10 Windows Movie Maker Alternatives
- 2024 Approved Online Audio Waveform Animation Makers A Comprehensive Guide
- Updated In 2024, From Zero to Hero Master Lip Syncing with These 5 Amazing Apps
- Mastering Video to MP3 Conversion Techniques for Maintaining Audio Fidelity for 2024
- Updated In 2024, No-Cost Visuals Finding Free Images for Commercial Projects
- The Ultimate Guide to Finding a Reliable YouTube MP3 Converter for 2024
- Updated 2024 Approved Ditch iMovie Discover the Best Android Video Editing Apps
- New Fast and Furious The Quickest Video Editing Software for Busy Creators for 2024
- Updated In 2024, The Ultimate List Top 10 Video Trimmers for PC
- New Unlock 3D Magic A Beginners Guide to Video Effects on Windows PC for 2024
- New Seamless Video Editing on ARM Devices Filmora X Makes It Happen for 2024
- In 2024, Windows Video Editing Software Top iMovie Alternatives
- Updated In 2024, 15 Camera Shake Preset for Premiere Pro to Add Camera Shake with Simple Keyframes. Each Preset Is Editable with Easy Steps. Make Your Video Shocking and Impressive with These Camera Shake Effects
- Fix Cant Take Screenshot Due to Security Policy on Honor Magic 5 Lite | Dr.fone
- In 2024, 9 Mind-Blowing Tricks to Hatch Eggs in Pokemon Go Without Walking On Tecno Spark 10 4G | Dr.fone
- Finding The Finest Way to Add Subtitles to Videos | Filmora
- In 2024, How To Reset the Security Questions of Your Apple ID From Your iPhone 11
- 4 solution to get rid of pokemon fail to detect location On Samsung Galaxy S21 FE 5G (2023) | Dr.fone
- Updated Cut, Edit, Repeat Top 10 Free Ubuntu Video Editors for 2024
- In 2024, Sim Unlock Vivo Y100i Phones without Code 2 Ways to Remove Android Sim Lock
- How to Make the Most of Your iPhone 13 mini Lock Screen with Notifications?
- In 2024, How to Unlock Xiaomi Redmi Note 12 Pro 4G Bootloader Easily
- Latest Guide How To Bypass Lava Blaze Pro 5G FRP Without Computer
- In 2024, The Complete Guide to Oppo F25 Pro 5G FRP Bypass Everything You Need to Know
- In 2024, Here Are Some Reliable Ways to Get Pokemon Go Friend Codes For Lava Blaze Curve 5G | Dr.fone
- In 2024, A Working Guide For Pachirisu Pokemon Go Map On Samsung Galaxy XCover 7 | Dr.fone
- How to Screen Mirroring Itel P55+ to PC? | Dr.fone
- How To Change Realme C67 4G Lock Screen Clock in Seconds
- Best Android Data Recovery - Retrieve Lost Contacts from Samsung Galaxy F14 5G.
- Fix Unfortunately Settings Has Stopped on Motorola Moto G84 5G Quickly | Dr.fone
- Prevent Cross-Site Tracking on Apple iPhone 13 and Browser | Dr.fone
- How to Use Pokémon Emerald Master Ball Cheat On Tecno Camon 30 Pro 5G | Dr.fone
- Translate Any Hindi Video Into English With AI
- 4 Most-Known Ways to Find Someone on Tinder For Tecno Spark 20 Pro+ by Name | Dr.fone
- Title: New The Perfect Fit TikTok Aspect Ratio Guide for Creators for 2024
- Author: MdadeLe
- Created at : 2024-04-28 15:03:57
- Updated at : 2024-04-29 15:03:57
- Link: https://smart-video-editing.techidaily.com/new-the-perfect-fit-tiktok-aspect-ratio-guide-for-creators-for-2024/
- License: This work is licensed under CC BY-NC-SA 4.0.
