
:max_bytes(150000):strip_icc():format(webp)/best-instagram-captions-4171697-ae21b04e6866470c80a50c9bef1cc26e.png)
New The Last Wav Converter Guide Youll Ever Need
The Last Wav Converter Guide You’ll Ever Need
The Only Guide You’ll Ever Need to Learn About Wav Converter
An easy yet powerful editor
Numerous effects to choose from
Detailed tutorials provided by the official channel
Nowadays, people are more addicted to making reels, short videos, YouTube shorts, etc. This is where the WAV converter comes in.
It is the most versatile audio format that is compatible with almost all devices. WAV audio format is very useful for digital content creators. So, without any further ado, let’s dive into detailed facts and benefits of WAV audio format:

In this article
01 [Basic Knowledge About the WAV Format](#Part 1)
02 [The Best 6 Fast and Easy WAV Converter Online Free ](#Part 2)
03 [5 Quick Ways to Convert MP4 to WAV Audio Files Online and Offline](#Part 3)
04 [5 Best YouTube to WAV Converter](#Part 4)
Part 1 Basic Knowledge About the WAV Format
01What is a WAV file?
WAV is an audio format that is developed by IBM & Microsoft. This audio file format is specially created to be used for uncompressed audio files on Microsoft Windows systems. It is used for storing audio bitstreams on PCs, which are encoded in the Linear Pulse-Code Modulation (LPCM) format.
02What’s the WAV audio format?
WAV audio file format is also known as Waveform audio file format. It is a subset of Microsoft’s RIFF specification. This audio format starts with a file header, which is followed by data chunks. There are three main types of chunks in a WAV file, which are given as follows:
● ‘fmt” chunk – This chunk is used to specify the data format.
● ‘data” chunk – This chunk contains the actual sample of data.
● ‘RIFF” chunk – This chunk is mainly used to identify a WAV file.
03Advantages of Using WAV
There are the following advantages of using a WAV audio file format:
● WAV audio file gives the best sound quality, which resembles the sound coming from the original source of the sound.
● WAV files are primarily used for storing the recordings.
● WAV files can efficiently be converted into other different audio formats like MP3, and AIFF.
● This audio file format also allows the developers to move audio files between different computer platforms easily and freely.
● WAV file provides the benefit of easy editing to developers, podcasters, and other digital content creators.
04Is WAV Format Better than MP3?
Yes, WAV format is way better than MP3. It provides a better audio quality as compared to the MP3 file. Although MP3 files are smaller in size, they lack a good sound quality. Another major difference between a WAV file and an MP3 file is that the MP3 file enables easy editing and storage of compressed files, while on the other hand, the WAV file enables easy editing and storage of uncompressed audio files. Uncompressed files can always be easily converted into compressed files, which also helps in retaining the sound quality.
Part 2 The Best 6 Fast and Easy WAV Converter Online Free
There are numerous online tools that can be used to convert different audio file formats into WAV audio file format and vice versa. The best 6 tools that can be used for free to convert audio to WAV are given below:
● Zamzar : Zamzar is a free online tool that supports almost all types of audio files like MP3, MP4, WAV, etc. It allows the users to convert any type of audio file quickly and easily. The best part about this WAV converter is that it doesn’t require any additional software to be installed. Its simple user interface makes it easy for anyone to convert audio files into different formats.
● File ZigZag : This is an online WAV converter and supports many types of audio formats like MP2, MP3, M4A, WAV, etc. You just require to upload an audio file in this online tool and once it is converted into your desired format you will receive it through the mail.
● Free Audio Converter : This is a practical transcoding tool for audio files, capable of converting a sound file to multiple formats like MP3, OGG, WAV, and WMA, etc. It is an extremely easy-to-use interface and offers you the batch processing of files. It is one of the most demanded audio converters because of its ability to convert M4A to WAV.
● Online Audio Converter : Online audio converter is a free online app that can be used to convert audio files to other formats. This app supports all types of audio formats. This app also allows you to extract audio from a video.
● 3CX : Being one of the easiest programs used for conversion of files and formats it is widely used for the same. The most prominent advantage of this is that it can even convert the unsupported audio files to WAV format.
● To video WAV Converter: For mac, this audio converter is one of the best. It is easy to use and along with that, it supports a lot of different audio formats like MP3, M4A, WAV, etc. The finest thing about this converter is that it can process a large number of files and folders simultaneously.
Part 3 5 Quick Ways to Convert MP4 to WAV Audio Files Online and Offline
MP4 is the most familiar and widely used audio format, as it is compatible with almost every device nowadays. But podcasters and other digital content creators require to convert these files into WAV audio file format to retain the best sound quality. Here are some of the quick ways that can be used to convert MP4 to WAV format both online and offline:
● MediaHuman Audio Converter : This is software that can be used to convert MP4 to WAV format very easily. It has a drag and drops functionality that makes it easier to use. This software can be downloaded for free and is available for both Microsoft and MAC versions.
● Online uniconverter : Being one of the most popularly used online audio converters online uniconverter is extremely simple to use. This program not only converts MP4 to WAV but also supports other file formats like MP3, WAV, WMA, etc. It entitles you to select the quality of the output file.
● Cool Utilis: Another online converter that comprises a simple interface. It is widely available in 13 languages. The program supports the conversion of many other File types and formats. With this, you can also add files from google drive.
● ByClick Downloader : This is an amazing converter tool for Windows systems, which you can use to convert your file to WAV formats. With this downloader, you can also extract audio from YouTube videos. This tool also supports multiple formats like HD, MP3, MP4, AVI, etc.
● Switch Sound File Converter : It is one of the most suitable, easy to use, and comprehensive multi-format audio converters available out there. This supports different file formats and converts different files in seconds. The converter allows you to convert MP4 to WAV
Part 4 5 Best YouTube to WAV Converter
No matter your go-to genre, YouTube has always been the best place to listen to your choice. Since YouTube has practically endless content, which cannot be used for other tasks in their format, so here are a few tools that can be used to convert the format from YouTube to WAV:
● iTubeGo: This software comprises a wide variety of features that can allow you to perform multiple stuff on YouTube videos. This tool can simply be used to convert the YouTube video to any other format you wish to use it in.

● Ontiva: This web-based platform allows you to download as well as convert your YouTube videos to WAV audio format in an easy way. All you ought to do is just copy the URL of the video and paste it into the box given on this platform to convert its format.

● Freemake: Freemake is another tool that can convert your YouTube video to a WAV format in just three simple steps. All you need to do is copy and paste the URL from YouTube to Freemake and then the conversion will become a piece of cake.

● to: If you are someone, who is tired of converting your favorite YouTube video into WAV format at a slow speed? Then this is a solution to your problem, the tool offers you a high-speed conversion of YouTube video to WAV format.

● CoConvert: Another impressive web-based platform that allows you to convert YouTube video to the WAV format. This can be done in easy steps like copying and pasting the URL of the video.

Key Takeaways from This Episode
● The WAV file is an audio format that many digital content creators prefer because of its various advantages like high-quality sound.
● An enormous tech approach is that now it has become formally easier to convert multiple formats to WAV through multiple converters.
● These converters can easily be used to convert MP4 to WAV, M4A to WAV, soundcloud to WAV, and even YouTube videos to WAV format.
● In addition to this, many online and offline tools are used to convert these audio files very easily and quickly.
Nowadays, people are more addicted to making reels, short videos, YouTube shorts, etc. This is where the WAV converter comes in.
It is the most versatile audio format that is compatible with almost all devices. WAV audio format is very useful for digital content creators. So, without any further ado, let’s dive into detailed facts and benefits of WAV audio format:
In this article
01 [Basic Knowledge About the WAV Format](#Part 1)
02 [The Best 6 Fast and Easy WAV Converter Online Free ](#Part 2)
03 [5 Quick Ways to Convert MP4 to WAV Audio Files Online and Offline](#Part 3)
04 [5 Best YouTube to WAV Converter](#Part 4)
Part 1 Basic Knowledge About the WAV Format
01What is a WAV file?
WAV is an audio format that is developed by IBM & Microsoft. This audio file format is specially created to be used for uncompressed audio files on Microsoft Windows systems. It is used for storing audio bitstreams on PCs, which are encoded in the Linear Pulse-Code Modulation (LPCM) format.
02What’s the WAV audio format?
WAV audio file format is also known as Waveform audio file format. It is a subset of Microsoft’s RIFF specification. This audio format starts with a file header, which is followed by data chunks. There are three main types of chunks in a WAV file, which are given as follows:
● ‘fmt” chunk – This chunk is used to specify the data format.
● ‘data” chunk – This chunk contains the actual sample of data.
● ‘RIFF” chunk – This chunk is mainly used to identify a WAV file.
03Advantages of Using WAV
There are the following advantages of using a WAV audio file format:
● WAV audio file gives the best sound quality, which resembles the sound coming from the original source of the sound.
● WAV files are primarily used for storing the recordings.
● WAV files can efficiently be converted into other different audio formats like MP3, and AIFF.
● This audio file format also allows the developers to move audio files between different computer platforms easily and freely.
● WAV file provides the benefit of easy editing to developers, podcasters, and other digital content creators.
04Is WAV Format Better than MP3?
Yes, WAV format is way better than MP3. It provides a better audio quality as compared to the MP3 file. Although MP3 files are smaller in size, they lack a good sound quality. Another major difference between a WAV file and an MP3 file is that the MP3 file enables easy editing and storage of compressed files, while on the other hand, the WAV file enables easy editing and storage of uncompressed audio files. Uncompressed files can always be easily converted into compressed files, which also helps in retaining the sound quality.
Part 2 The Best 6 Fast and Easy WAV Converter Online Free
There are numerous online tools that can be used to convert different audio file formats into WAV audio file format and vice versa. The best 6 tools that can be used for free to convert audio to WAV are given below:
● Zamzar : Zamzar is a free online tool that supports almost all types of audio files like MP3, MP4, WAV, etc. It allows the users to convert any type of audio file quickly and easily. The best part about this WAV converter is that it doesn’t require any additional software to be installed. Its simple user interface makes it easy for anyone to convert audio files into different formats.
● File ZigZag : This is an online WAV converter and supports many types of audio formats like MP2, MP3, M4A, WAV, etc. You just require to upload an audio file in this online tool and once it is converted into your desired format you will receive it through the mail.
● Free Audio Converter : This is a practical transcoding tool for audio files, capable of converting a sound file to multiple formats like MP3, OGG, WAV, and WMA, etc. It is an extremely easy-to-use interface and offers you the batch processing of files. It is one of the most demanded audio converters because of its ability to convert M4A to WAV.
● Online Audio Converter : Online audio converter is a free online app that can be used to convert audio files to other formats. This app supports all types of audio formats. This app also allows you to extract audio from a video.
● 3CX : Being one of the easiest programs used for conversion of files and formats it is widely used for the same. The most prominent advantage of this is that it can even convert the unsupported audio files to WAV format.
● To video WAV Converter: For mac, this audio converter is one of the best. It is easy to use and along with that, it supports a lot of different audio formats like MP3, M4A, WAV, etc. The finest thing about this converter is that it can process a large number of files and folders simultaneously.
Part 3 5 Quick Ways to Convert MP4 to WAV Audio Files Online and Offline
MP4 is the most familiar and widely used audio format, as it is compatible with almost every device nowadays. But podcasters and other digital content creators require to convert these files into WAV audio file format to retain the best sound quality. Here are some of the quick ways that can be used to convert MP4 to WAV format both online and offline:
● MediaHuman Audio Converter : This is software that can be used to convert MP4 to WAV format very easily. It has a drag and drops functionality that makes it easier to use. This software can be downloaded for free and is available for both Microsoft and MAC versions.
● Online uniconverter : Being one of the most popularly used online audio converters online uniconverter is extremely simple to use. This program not only converts MP4 to WAV but also supports other file formats like MP3, WAV, WMA, etc. It entitles you to select the quality of the output file.
● Cool Utilis: Another online converter that comprises a simple interface. It is widely available in 13 languages. The program supports the conversion of many other File types and formats. With this, you can also add files from google drive.
● ByClick Downloader : This is an amazing converter tool for Windows systems, which you can use to convert your file to WAV formats. With this downloader, you can also extract audio from YouTube videos. This tool also supports multiple formats like HD, MP3, MP4, AVI, etc.
● Switch Sound File Converter : It is one of the most suitable, easy to use, and comprehensive multi-format audio converters available out there. This supports different file formats and converts different files in seconds. The converter allows you to convert MP4 to WAV
Part 4 5 Best YouTube to WAV Converter
No matter your go-to genre, YouTube has always been the best place to listen to your choice. Since YouTube has practically endless content, which cannot be used for other tasks in their format, so here are a few tools that can be used to convert the format from YouTube to WAV:
● iTubeGo: This software comprises a wide variety of features that can allow you to perform multiple stuff on YouTube videos. This tool can simply be used to convert the YouTube video to any other format you wish to use it in.
● Ontiva: This web-based platform allows you to download as well as convert your YouTube videos to WAV audio format in an easy way. All you ought to do is just copy the URL of the video and paste it into the box given on this platform to convert its format.
● Freemake: Freemake is another tool that can convert your YouTube video to a WAV format in just three simple steps. All you need to do is copy and paste the URL from YouTube to Freemake and then the conversion will become a piece of cake.
● to: If you are someone, who is tired of converting your favorite YouTube video into WAV format at a slow speed? Then this is a solution to your problem, the tool offers you a high-speed conversion of YouTube video to WAV format.
● CoConvert: Another impressive web-based platform that allows you to convert YouTube video to the WAV format. This can be done in easy steps like copying and pasting the URL of the video.
Key Takeaways from This Episode
● The WAV file is an audio format that many digital content creators prefer because of its various advantages like high-quality sound.
● An enormous tech approach is that now it has become formally easier to convert multiple formats to WAV through multiple converters.
● These converters can easily be used to convert MP4 to WAV, M4A to WAV, soundcloud to WAV, and even YouTube videos to WAV format.
● In addition to this, many online and offline tools are used to convert these audio files very easily and quickly.
Bring Your Ideas to Life with These 12 Free Animation Software Options
Best 12 Free Download Animation Software for Windows and Mac

Shanoon Cox
Mar 27, 2024• Proven solutions
In your search for quality animation software, you may have found that many of the programs cost a lot of money no matter it is 2D animation software or 3D animation editor. The good news is that you can choose free animation tools to make different animation types easily.
That is why we created a list of the best animation software on both Mac and Windows. Whether you are a professional editor or just a beginner to start making animation, you will find the tools listed below are easy to use without watermark and won’t cost money to improve your skills.
The best part is you will find these free animation programs are also very useful for content creation on Mac and Windows. Besides, we have listed the pros and cons of each software. Keep reading!
- Part 1: Best Free Animation Software for Mac
- Part 2: Best Free Animation Software for Windows
- Part 3: FAQ about Animation Software for Windows and Mac
Here we have made a table of 12 free animation software without watermark on Windows and macOS. Take a look.
6 Free Animation Software for macOS
5K-3DMiddleIt is a great tool for 3D artists6KritaDifficultPerfect software for 2D animation
| Number | Software | Difficulty Level | Highlight |
|---|---|---|---|
| 1 | Synfig Studio | Easy | Calculate vector shape to animation automatically |
| 2 | Pencil2D Animation | Easiest | Straightforward interface for beginners |
| 3 | Tupi | Middle | Its community is active to offer solutions |
| 4 | Blender | Difficult | It is a powerful animation tool to render and make modeling |
6 Free Animation Software for Windows
| Number | Software | Difficulty Level | Highlight |
|---|---|---|---|
| 1 | DAZ Studio | Difficult | For professional users with the fast animation process |
| 2 | Terragen | Middle | It can make realistic CG environments |
| 3 | Anim8or | Difficult | 3D animation is Anim8or’s main function |
| 4 | Seamless3d | Easy | It has many features for 3d modeling |
| 5 | OpenToonz | Middle | Make cartoon animation with plugins |
| 6 | Stykz | Easy | Quickly make animation if you have used Pivot StickFigure Animator |
Best Animation Software on Windows and Mac - Filmora
Looking for a simple while powerful Mac video editing tool ? We recommend using Wondershare Filmora. You can use it to create 2D/3D animated texts, shapes, or anything you like for YouTube videos.
The keyframing features will help you make animation effects smooth and precise. When exporting, you can also make it transparent.
Besides, various title templates and transitions are also available for you. Download it now to have a try! Or learn more from Wondershare Video Community .
Key features
- Create various shapes that you like
- Add keyframing to make it move
- Fine-tuning to make it smooth
- Add visual effects/text/color before export it


You can even create photo cut animation which has been very trendy on Tiktok and Instagram. Here is a video to present you how you can do it in Filmora.
Part 1 Best Free Animation Software for Mac
Listed below is free animation software on Mac. Take a look.
01 Synfig Studio - Mac Software to Animate Video
Difficulty Level: Easy
Pro: You can create many layers once a time and sync audio for your animation.
Con: This one needs much time to learn, especially for beginners.
An open-source 2D animation software that works on Macs, Synfig Studio delivers multiple players while you are creating content. Whether you want to add geometric, filters, distortions, or transformations, it is all possible! And thanks to the high-end bone system, you can create cut-out videos using bitmap images!
The thoughtful part is there are two download versions on the homepage: the stable version and the development version. If you want to enjoy a stable and smooth animation editing experience, choose the stable one. However, the development package gives you access to the use of the latest features.
For a novice, you can learn Synfig from step by step guide in Wikipedia and video tutorials. Four languages are available including English, Russian, Dutch, and French for a video course.
You can free download its latest version 1.3.11. The upcoming version is 1.4.
Features:
- It offers support for many layers within the animation.
- The program’s bone system means that you can easily create animations with bitmap images or vector artwork.
- It allows you to sync your creative work with any sound that you want. Has a full-featured audio editor.
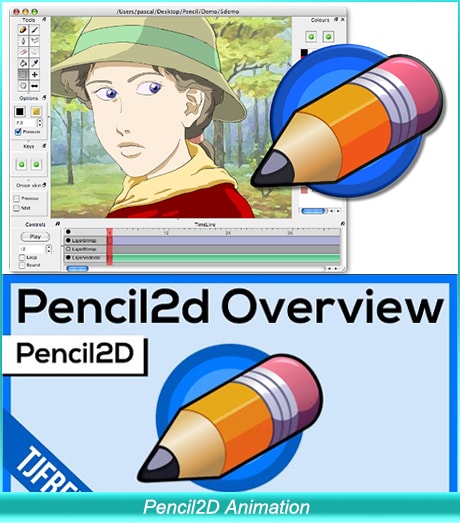
02 Pencil2D Animation - Animation Program for 2D Pencil Lover
Difficulty Level: Easiest
Pro: Easy to start and make animation as the interface is user-friendly for many people.
Con: You need to set your preference every time to open it up, so it takes up some time
Pencil2D Animation is one of the simplest 2D hand-drawn tools available. It will work flawlessly on Mac computers. It is ideal for beginners, as the commands and interface are very easy to understand.
Whether you want to create a simple one, or you want something with many layers for videos on YouTube, you can use Pencil2D animation to get it done. Its timeline is easy to use at first glance. You can add and duplicate different frames on a different track.
The frequency of releasing the new version is very fast as Pencil2D is committed to bringing the lasted features to each user. The newest version is v0.6.4 (as of August 2019). Its user guide is informative with video tutorials, FAQs, and manual material.
Features:
- Lightweight and minimalistic design that makes it very easy for beginners.
- Features raster and vector workflows, with easy switching between them. You can paint and sketch as you want!
- Will run on all platforms - Mac, Windows, and Linux.
- Completely free and open source.
03 TupiTube - Free Animation Application for Mac Users
Difficulty Level: Middle
Pro: It supports vector illustrations. Besides, various formats are available.
Con: If you want to make 3D animation, it will fail. You can only make 2D effects.
A free software application for YouTube, Tupi will allow you to create 2D animations to your heart’s content. The tool was started by animators who wanted to create something that others could use.
It is an open-source tool, which means that users can make tweaks to the program if they have some interesting ideas. The program works on both Windows and Mac. You need to use Tupi and Papagayo to make lip-sync animation with different mouth shapes.
It also offers a solution for schools with related features including academic license, technical support, and ads-free, so many schools choose to use this one to teach kids how to make an animation video.
Features:
- Support for vector illustrations. You can add rectangles, lines, polygons, and other shapes as you please. To fill areas, just use the paint bucket.
- You can import raster images using this program.
- You can export all your finished images into different file formats.
- Support for tweeting positions, scale, shear, and rotations.

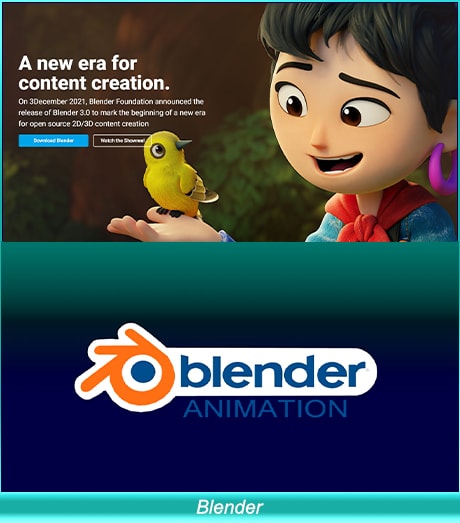
04 Blender - Need Some Time to Learn This Animation Tool
Difficulty Level: Difficult
Pro: Really powerful software that you can make for professional users.
Con: It is not easy to make image animation as it focuses on 3D.
Blender is an open-source 3D animation creation suite without a watermark. If you find that 2D is a little bit limiting, we think that you will be very happy with what this free program offers. You can take your projects to a whole new level when you can use this program on your Mac.
You can use Blender to make a video game, modeling, and high-quality animation. However, it involves a steep learning curve. Luckily, there are many tutorials to guide you through the journey. You can also ask for help in the Blender community that millions of talented people like you are there.
Features:
- Creating renders is no problem with this program.
- Modeling, such as sculpting, retopology, and creating curves is not an issue either.
- VFX and animation features are better than any option on the market.
- It offers powerful simulation tools.
- Integration with pipeline tools is easy.
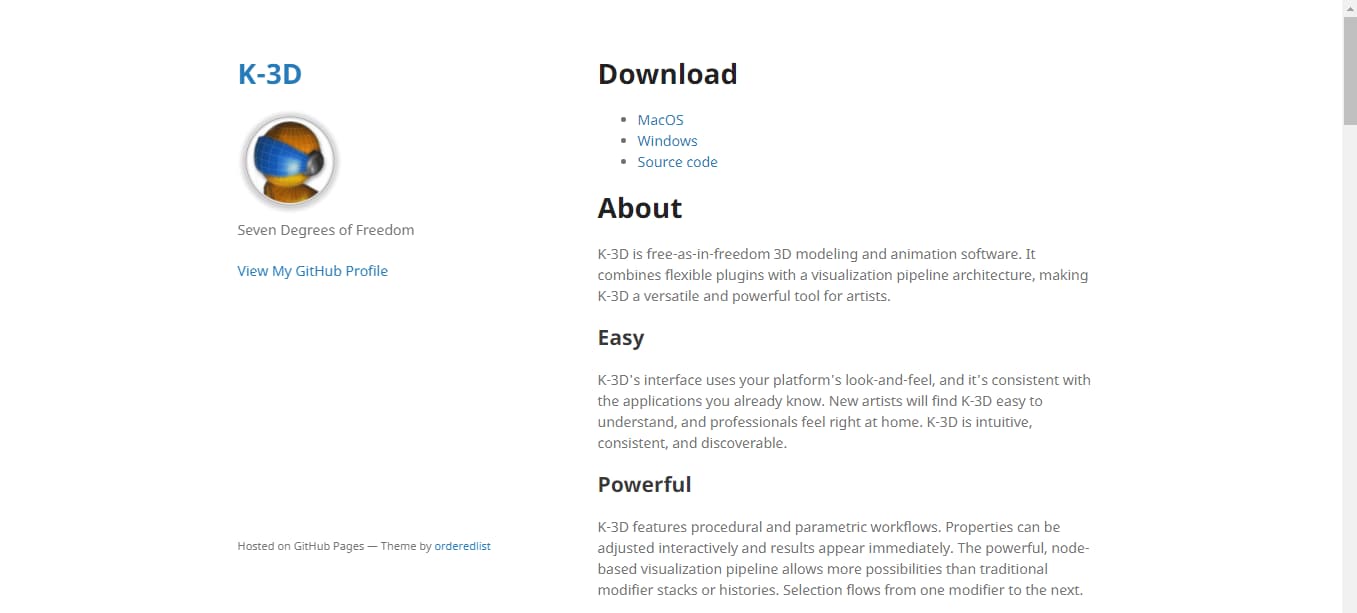
05 K-3D - Best for Animation and Modeling in 3D
Difficulty Level: Middle
Pro: Ideal for designing simple 3D animations and models.
Con: It has an old-fashioned interface. Also, the built-render (RenderMan) feature is difficult to use by beginners.
K-3D is an animation and 3D modeling software. You can download this tool for free on your Mac. Besides, you can also install and run it on your Windows and Linux systems. If you look at the design, you will find that the software is quite old. But don’t judge a book by its cover. Why so? It is because K-3D is one of the strongest and most versatile tools for 3D artists with many options.
For example, K-3D offers extremely systematic and methodological workflows. You can easily adjust the properties of the features in real-time and get instant results. It has a node-oriented visualization pipeline to enjoy more freedom. That means you can create animation using a variety of combinations.
One of the best things about K-3D is that it has three subdivisions of animation. You can work on your model on one side while showing the other side in a mirrored form. Then, experience the final result combined together. And in case you need to make the changes to the end results, you can simply work on the first subdivision and savor automatic changes to the results.
K-3D has an advanced redo and undo mechanism to ensure you can go back or move forward to make corrections or amendments without limits. Additionally, the tool is developed keeping in mind all the industrial standards. For instance, it has complete support and integration of native RenderMan™ to its user interface. This is an excellent feature because most free animation software for Mac requires third-party render plugins.
Features:
- Parametric workflow.
- 2D and 3D animation tools.
- Allows Python and K3DScript scripting.
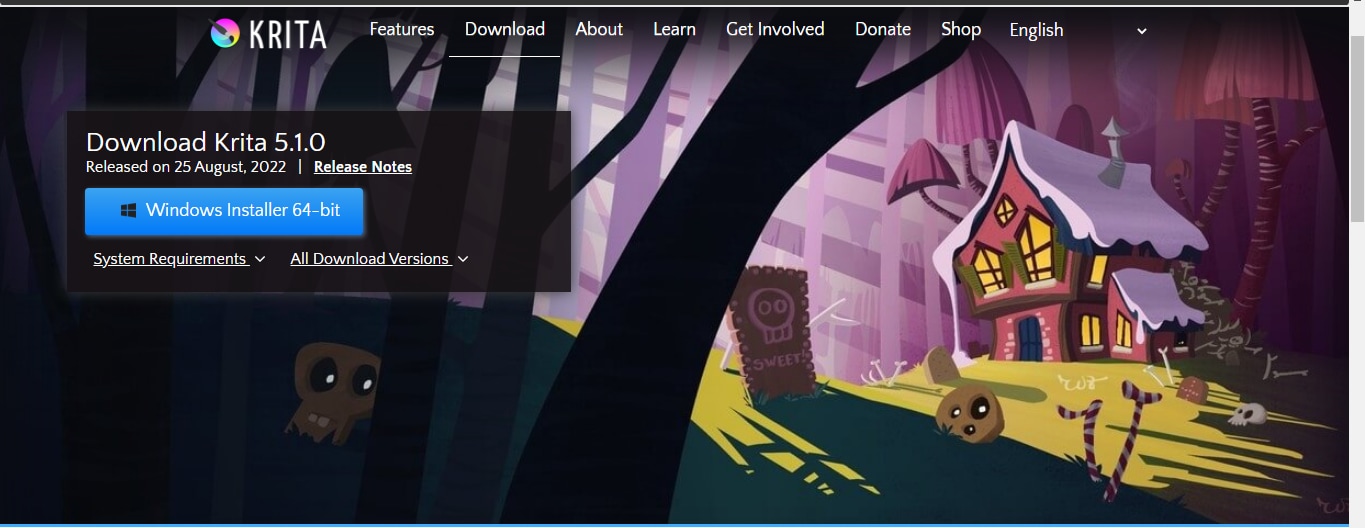
06 Krita - For Professional 2D Animators
Difficulty Level: Difficult
Pro: Advanced tools with numerous animation options and online training material.
Con: Not suitable for beginners.
If you love 2D animation, then you’ll surely love Krita. It is entirely free software available on Mac, Windows, and Linux. Also, it offers a full platform for drawing and frame-by-frame animation.
The number one reason for adoring Krita is its brush library. There are more than 100 professional brushes to give you a wide range of effects. Moreover, the strokes are pretty amazing and similar to Adobe Photoshop or Adobe Illustrator.
Another great thing about Krita is the brush stabilization feature designed for shaky hands. You can add a stabilizer to your chosen brush to smoothen its flow. Besides, there’s a special Dynamic Brush tool to make animation more fun. At the same time, you can also customize your brushes through different brush engines, including filter engines, color smudge engines, and many more.
Apart from the basic brush options, the preloaded vector tools are next to admire. These tools help you make great comic panels. All you need to do is choose and drag the word bubble template on your canvas. Then, make changes with the anchor point to make new shapes. At the same time, you can also add text to your animation by using the text tool.
Last but not least, there’s a wrap-around mode to create seamless patterns and textures. That means the image or drawing makes its own references along the x-axis and y-axis. This gives you the freedom to continue painting and enjoy updates to your animation instantly.
Features:
- HDR painting.
- PSD support.
- Python scripting.
- Selection and transformation tools.
- Proper group, filter, vector, and file layer management.
- Complete color management for extraordinary results.
- Drawing assistant to help you with straight lines and vanishing points.
Part 2 Best Free Animation Software for Windows
Below is free animation software on Windows. Keep reading.
01 Anireel - Easy to Use Animation Software
Difficulty Level: Easy
Anireel is a simple yet powerful Video Creativity tool used to make 2D animated explainer videos. Developed by Wondershare, one of the most popular Windows software and tool developers, Anireel uses rich, ready-to-use, and diverse assets to help one effortlessly make animated videos.
Features:
- There are tons of drag and drop characters, actions, props, text, and audio assets.
- Easy Text-to-Speech conversion via deep studying technology.
- Animate integrated and imported assets.
- Tons of templates that match many script types.

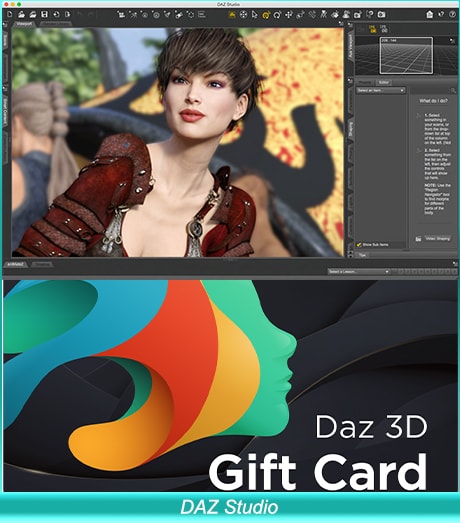
02 DAZ Studio - Free Software for 3D Lovers
Difficulty Level: Difficult
Pro: You can make game animation for fun. It also supports GPU accelerated real-time rendering.
Con: It has a high demand for the device, but owns a steep learning curve.
Daz 3d is a powerful and completely free 3D creation tool that will let you create the short videos that you want. Whether you are using this for business or pleasure, you will find the program is very easy to understand. Within a day, you will be completely used to its interface.
3D effects are the core focus of DAZ Studio. You can build a model, render, and pose animation within the skin texture level. It has a high requirement for the device. For Windows 64 bits, its recommended RAM is 3G.
Features:
- Options for 3D morphing, animation, and rendering.
- GPU accelerated real-time rendering, which delivers the best results.
- Interactive tutorials to help you become a better 3D artist.
- Everything you make is yours, royalty-free!
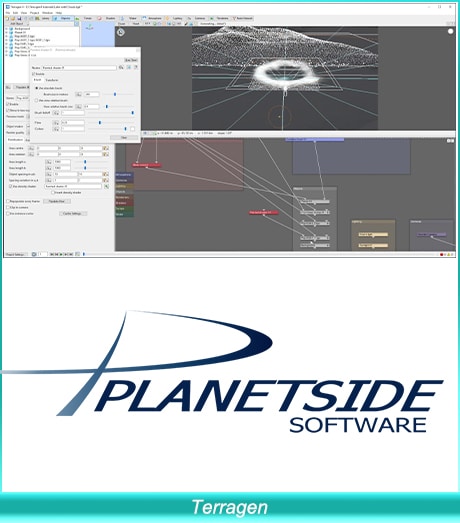
03 Terragen - Use It to Make CG Animation
Difficulty Level: Middle
Pro: The recently updated version is the best one. Ray-traced preview is a great function to help us make animation.
Con: The interface looks complicated, but it gets easy to know after you are familiar with it.
A completely free program that you can download and install on all Windows computers and tablets, Terragen is the ideal program for you to create the 3D animations and environments that you want. If you want a photo-realistic CG environment, using Terragen is the best way to do it!
Releasing imagination instantly, Terragen Creative is the one tool you’d like to consider. You can use it to make beautiful scenery.
For advanced tools, you can choose FBX to make animation quickly. The featured image gallery on its homepage will give you a deep understanding of the final outcome you can achieve with Terragen.
Features:
- Ray-traced preview. Without watermark after exporting
- Photo-realistic clouds and ozone simulation
- Rendering is twice as fast as the previous version of the program.
- Adding terrain, objects, and shader to your final product is very easy with the intuitive interface.
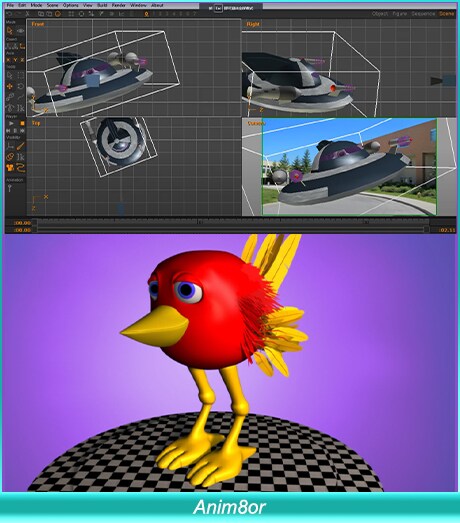
04 Anim8or - Free Tool to Make 3D Modeling
Difficulty Level: Difficult
Pro: Anim8or supports 3D modeler and TrueType fonts to meet advanced needs.
Con: Beginners will find it difficult to learn.
Anim8or is a free 3D modeling program that will let you create the unique work that you want. It is a personal project from an animator, but the program does get regular updates and troubleshooting.
It is not going to give you the same features as something like Studio Max or Maya, but you will get the basics. Beginners who are getting into animations will love this program.
Anim8or is a great tool to step into 3D animation ff you think other software is too different to start. In some way, it means you need to give up some advanced features. But all in all, it’s still recommended for you.
Features:
- A full 3D modeler that allows you to create spheres, cylinders, platonic solids, and any other objects that you want.
- Features support for TrueType fonts.
- Easy to create 3D scenes and output them as video files or images.
05 Seamless3d - Open-source Free Software
Difficulty Level: Easy
Pro: It is an open-source 3D modeling package. The good thing is the handy infinite Undo/Redo operation.
Con: Some advanced features are missing like drawing.
Seamless3d, an open-source 3D modeling software that you can download, is among the best animation worktables if you want to create specialized images, animated videos, or 3D characters.
It supports FFmpeg video format, so you can use AVI, MP4, and more. Besides, the forum is not active compared with before, but you still can find answers from many tutorials .
Features:
- It comes with infinite undo and redo options for complete flexibility to correct mistakes.
- It allows for partitioned and seamless texture mapping for YouTube videos.
- Has a specialized tree view interface.

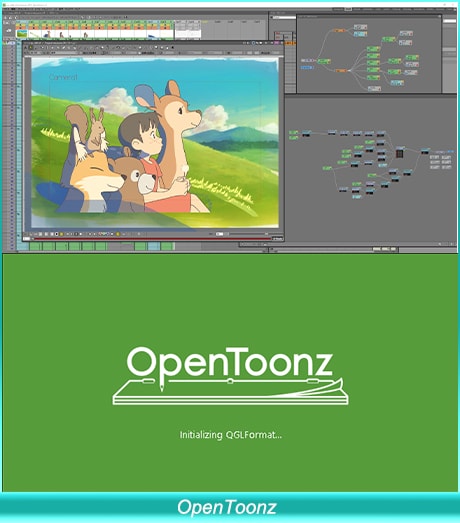
06 OpenToonz - Support Plug in to Make Animation Freely
Difficulty Level: Middle
Pro: It is open-source software, so you can change the code freely.
Con: The plug-in effects are limited.
This animation program is made for beginners on Windows. It is among the best 2D animation software in the market. You can use plug-in effects to change image style, add lights, and distort details. It supports Windows 7/8/10 only for 64 bit.
Features:
- You can add provisional colors to make your animation more colorful.
- Smooth correction without frame losing.
- Compatible with black-and-white, colored, or without binarization scanning.
7 Stykz - Simple to Use Animation Program for Beginners
Difficulty Level: Easy
Pro: It is the best stick figure animation if you want to make this kind of video.
Con: The UI is not modern to use and needs time to adapt to using it.
Stykz is completely free to use and without a watermark. If you have used Pivot StickFigure Animator, then you will find Stykz is similar to it, but you can import the previous .stk files to animate it again. You can use it to make animation smooth frame by frame.
With its frame-based feature, Stykz is easy to customize each frame. You can change previous and current frames to get what you want. You can download it to have a try considering its easy-to-use features.
Features:
- There is some animes file on this website, so you can have a reference.
- Edit animation in the software without using another editing window.
- You can share the final work with others including information.
Part 3 FAQ about Animation Software for Windows and Mac
01 Are Macs good for animation?
To be frank, Mac is a better choice to make animation if you want to have a smooth animation experience. For example, screen resolution is a crucial factor to make excellent animation. The good is Mac’s screen will never let you disappointed.
02 What is the best animation software for Mac?
The best animation software on mac includes Synfig Studio, Pencil2D Animation, Tupi, Blender, and more. Mentioned are free-to-use. Maya is also worth considering animation software if you are a professional user. Maya offers a 1-month free trial. After it is ended, the paid plans are month, 1-year, and 3-year.
03 Can you animate in Photoshop?
Yes, you can make basic animation in Photoshop. However, it only supports frame-based animation making. In this case, you need to use other professional software to make animation. But, you still can use Photoshop to meet your needs if you are a beginner.
Conclusion
With any of these free animation maker programs on Mac and Windows, you will have an easy time creating your next 2D or 3D video. Ensure you choose the program that has the features and compatibility that you desire. Then it is up to your creative mind to come up with stunning animations! If you want to make animation easily, you can also find inspiration through classical animated cartoon types with examples .
Shanoon Cox
Shanoon Cox is a writer and a lover of all things video.
Follow @Shanoon Cox
Shanoon Cox
Mar 27, 2024• Proven solutions
In your search for quality animation software, you may have found that many of the programs cost a lot of money no matter it is 2D animation software or 3D animation editor. The good news is that you can choose free animation tools to make different animation types easily.
That is why we created a list of the best animation software on both Mac and Windows. Whether you are a professional editor or just a beginner to start making animation, you will find the tools listed below are easy to use without watermark and won’t cost money to improve your skills.
The best part is you will find these free animation programs are also very useful for content creation on Mac and Windows. Besides, we have listed the pros and cons of each software. Keep reading!
- Part 1: Best Free Animation Software for Mac
- Part 2: Best Free Animation Software for Windows
- Part 3: FAQ about Animation Software for Windows and Mac
Here we have made a table of 12 free animation software without watermark on Windows and macOS. Take a look.
6 Free Animation Software for macOS
5K-3DMiddleIt is a great tool for 3D artists6KritaDifficultPerfect software for 2D animation
| Number | Software | Difficulty Level | Highlight |
|---|---|---|---|
| 1 | Synfig Studio | Easy | Calculate vector shape to animation automatically |
| 2 | Pencil2D Animation | Easiest | Straightforward interface for beginners |
| 3 | Tupi | Middle | Its community is active to offer solutions |
| 4 | Blender | Difficult | It is a powerful animation tool to render and make modeling |
6 Free Animation Software for Windows
| Number | Software | Difficulty Level | Highlight |
|---|---|---|---|
| 1 | DAZ Studio | Difficult | For professional users with the fast animation process |
| 2 | Terragen | Middle | It can make realistic CG environments |
| 3 | Anim8or | Difficult | 3D animation is Anim8or’s main function |
| 4 | Seamless3d | Easy | It has many features for 3d modeling |
| 5 | OpenToonz | Middle | Make cartoon animation with plugins |
| 6 | Stykz | Easy | Quickly make animation if you have used Pivot StickFigure Animator |
Best Animation Software on Windows and Mac - Filmora
Looking for a simple while powerful Mac video editing tool ? We recommend using Wondershare Filmora. You can use it to create 2D/3D animated texts, shapes, or anything you like for YouTube videos.
The keyframing features will help you make animation effects smooth and precise. When exporting, you can also make it transparent.
Besides, various title templates and transitions are also available for you. Download it now to have a try! Or learn more from Wondershare Video Community .
Key features
- Create various shapes that you like
- Add keyframing to make it move
- Fine-tuning to make it smooth
- Add visual effects/text/color before export it
You can even create photo cut animation which has been very trendy on Tiktok and Instagram. Here is a video to present you how you can do it in Filmora.
Part 1 Best Free Animation Software for Mac
Listed below is free animation software on Mac. Take a look.
01 Synfig Studio - Mac Software to Animate Video
Difficulty Level: Easy
Pro: You can create many layers once a time and sync audio for your animation.
Con: This one needs much time to learn, especially for beginners.
An open-source 2D animation software that works on Macs, Synfig Studio delivers multiple players while you are creating content. Whether you want to add geometric, filters, distortions, or transformations, it is all possible! And thanks to the high-end bone system, you can create cut-out videos using bitmap images!
The thoughtful part is there are two download versions on the homepage: the stable version and the development version. If you want to enjoy a stable and smooth animation editing experience, choose the stable one. However, the development package gives you access to the use of the latest features.
For a novice, you can learn Synfig from step by step guide in Wikipedia and video tutorials. Four languages are available including English, Russian, Dutch, and French for a video course.
You can free download its latest version 1.3.11. The upcoming version is 1.4.
Features:
- It offers support for many layers within the animation.
- The program’s bone system means that you can easily create animations with bitmap images or vector artwork.
- It allows you to sync your creative work with any sound that you want. Has a full-featured audio editor.
02 Pencil2D Animation - Animation Program for 2D Pencil Lover
Difficulty Level: Easiest
Pro: Easy to start and make animation as the interface is user-friendly for many people.
Con: You need to set your preference every time to open it up, so it takes up some time
Pencil2D Animation is one of the simplest 2D hand-drawn tools available. It will work flawlessly on Mac computers. It is ideal for beginners, as the commands and interface are very easy to understand.
Whether you want to create a simple one, or you want something with many layers for videos on YouTube, you can use Pencil2D animation to get it done. Its timeline is easy to use at first glance. You can add and duplicate different frames on a different track.
The frequency of releasing the new version is very fast as Pencil2D is committed to bringing the lasted features to each user. The newest version is v0.6.4 (as of August 2019). Its user guide is informative with video tutorials, FAQs, and manual material.
Features:
- Lightweight and minimalistic design that makes it very easy for beginners.
- Features raster and vector workflows, with easy switching between them. You can paint and sketch as you want!
- Will run on all platforms - Mac, Windows, and Linux.
- Completely free and open source.
03 TupiTube - Free Animation Application for Mac Users
Difficulty Level: Middle
Pro: It supports vector illustrations. Besides, various formats are available.
Con: If you want to make 3D animation, it will fail. You can only make 2D effects.
A free software application for YouTube, Tupi will allow you to create 2D animations to your heart’s content. The tool was started by animators who wanted to create something that others could use.
It is an open-source tool, which means that users can make tweaks to the program if they have some interesting ideas. The program works on both Windows and Mac. You need to use Tupi and Papagayo to make lip-sync animation with different mouth shapes.
It also offers a solution for schools with related features including academic license, technical support, and ads-free, so many schools choose to use this one to teach kids how to make an animation video.
Features:
- Support for vector illustrations. You can add rectangles, lines, polygons, and other shapes as you please. To fill areas, just use the paint bucket.
- You can import raster images using this program.
- You can export all your finished images into different file formats.
- Support for tweeting positions, scale, shear, and rotations.
04 Blender - Need Some Time to Learn This Animation Tool
Difficulty Level: Difficult
Pro: Really powerful software that you can make for professional users.
Con: It is not easy to make image animation as it focuses on 3D.
Blender is an open-source 3D animation creation suite without a watermark. If you find that 2D is a little bit limiting, we think that you will be very happy with what this free program offers. You can take your projects to a whole new level when you can use this program on your Mac.
You can use Blender to make a video game, modeling, and high-quality animation. However, it involves a steep learning curve. Luckily, there are many tutorials to guide you through the journey. You can also ask for help in the Blender community that millions of talented people like you are there.
Features:
- Creating renders is no problem with this program.
- Modeling, such as sculpting, retopology, and creating curves is not an issue either.
- VFX and animation features are better than any option on the market.
- It offers powerful simulation tools.
- Integration with pipeline tools is easy.
05 K-3D - Best for Animation and Modeling in 3D
Difficulty Level: Middle
Pro: Ideal for designing simple 3D animations and models.
Con: It has an old-fashioned interface. Also, the built-render (RenderMan) feature is difficult to use by beginners.
K-3D is an animation and 3D modeling software. You can download this tool for free on your Mac. Besides, you can also install and run it on your Windows and Linux systems. If you look at the design, you will find that the software is quite old. But don’t judge a book by its cover. Why so? It is because K-3D is one of the strongest and most versatile tools for 3D artists with many options.
For example, K-3D offers extremely systematic and methodological workflows. You can easily adjust the properties of the features in real-time and get instant results. It has a node-oriented visualization pipeline to enjoy more freedom. That means you can create animation using a variety of combinations.
One of the best things about K-3D is that it has three subdivisions of animation. You can work on your model on one side while showing the other side in a mirrored form. Then, experience the final result combined together. And in case you need to make the changes to the end results, you can simply work on the first subdivision and savor automatic changes to the results.
K-3D has an advanced redo and undo mechanism to ensure you can go back or move forward to make corrections or amendments without limits. Additionally, the tool is developed keeping in mind all the industrial standards. For instance, it has complete support and integration of native RenderMan™ to its user interface. This is an excellent feature because most free animation software for Mac requires third-party render plugins.
Features:
- Parametric workflow.
- 2D and 3D animation tools.
- Allows Python and K3DScript scripting.
06 Krita - For Professional 2D Animators
Difficulty Level: Difficult
Pro: Advanced tools with numerous animation options and online training material.
Con: Not suitable for beginners.
If you love 2D animation, then you’ll surely love Krita. It is entirely free software available on Mac, Windows, and Linux. Also, it offers a full platform for drawing and frame-by-frame animation.
The number one reason for adoring Krita is its brush library. There are more than 100 professional brushes to give you a wide range of effects. Moreover, the strokes are pretty amazing and similar to Adobe Photoshop or Adobe Illustrator.
Another great thing about Krita is the brush stabilization feature designed for shaky hands. You can add a stabilizer to your chosen brush to smoothen its flow. Besides, there’s a special Dynamic Brush tool to make animation more fun. At the same time, you can also customize your brushes through different brush engines, including filter engines, color smudge engines, and many more.
Apart from the basic brush options, the preloaded vector tools are next to admire. These tools help you make great comic panels. All you need to do is choose and drag the word bubble template on your canvas. Then, make changes with the anchor point to make new shapes. At the same time, you can also add text to your animation by using the text tool.
Last but not least, there’s a wrap-around mode to create seamless patterns and textures. That means the image or drawing makes its own references along the x-axis and y-axis. This gives you the freedom to continue painting and enjoy updates to your animation instantly.
Features:
- HDR painting.
- PSD support.
- Python scripting.
- Selection and transformation tools.
- Proper group, filter, vector, and file layer management.
- Complete color management for extraordinary results.
- Drawing assistant to help you with straight lines and vanishing points.
Part 2 Best Free Animation Software for Windows
Below is free animation software on Windows. Keep reading.
01 Anireel - Easy to Use Animation Software
Difficulty Level: Easy
Anireel is a simple yet powerful Video Creativity tool used to make 2D animated explainer videos. Developed by Wondershare, one of the most popular Windows software and tool developers, Anireel uses rich, ready-to-use, and diverse assets to help one effortlessly make animated videos.
Features:
- There are tons of drag and drop characters, actions, props, text, and audio assets.
- Easy Text-to-Speech conversion via deep studying technology.
- Animate integrated and imported assets.
- Tons of templates that match many script types.
02 DAZ Studio - Free Software for 3D Lovers
Difficulty Level: Difficult
Pro: You can make game animation for fun. It also supports GPU accelerated real-time rendering.
Con: It has a high demand for the device, but owns a steep learning curve.
Daz 3d is a powerful and completely free 3D creation tool that will let you create the short videos that you want. Whether you are using this for business or pleasure, you will find the program is very easy to understand. Within a day, you will be completely used to its interface.
3D effects are the core focus of DAZ Studio. You can build a model, render, and pose animation within the skin texture level. It has a high requirement for the device. For Windows 64 bits, its recommended RAM is 3G.
Features:
- Options for 3D morphing, animation, and rendering.
- GPU accelerated real-time rendering, which delivers the best results.
- Interactive tutorials to help you become a better 3D artist.
- Everything you make is yours, royalty-free!
03 Terragen - Use It to Make CG Animation
Difficulty Level: Middle
Pro: The recently updated version is the best one. Ray-traced preview is a great function to help us make animation.
Con: The interface looks complicated, but it gets easy to know after you are familiar with it.
A completely free program that you can download and install on all Windows computers and tablets, Terragen is the ideal program for you to create the 3D animations and environments that you want. If you want a photo-realistic CG environment, using Terragen is the best way to do it!
Releasing imagination instantly, Terragen Creative is the one tool you’d like to consider. You can use it to make beautiful scenery.
For advanced tools, you can choose FBX to make animation quickly. The featured image gallery on its homepage will give you a deep understanding of the final outcome you can achieve with Terragen.
Features:
- Ray-traced preview. Without watermark after exporting
- Photo-realistic clouds and ozone simulation
- Rendering is twice as fast as the previous version of the program.
- Adding terrain, objects, and shader to your final product is very easy with the intuitive interface.
04 Anim8or - Free Tool to Make 3D Modeling
Difficulty Level: Difficult
Pro: Anim8or supports 3D modeler and TrueType fonts to meet advanced needs.
Con: Beginners will find it difficult to learn.
Anim8or is a free 3D modeling program that will let you create the unique work that you want. It is a personal project from an animator, but the program does get regular updates and troubleshooting.
It is not going to give you the same features as something like Studio Max or Maya, but you will get the basics. Beginners who are getting into animations will love this program.
Anim8or is a great tool to step into 3D animation ff you think other software is too different to start. In some way, it means you need to give up some advanced features. But all in all, it’s still recommended for you.
Features:
- A full 3D modeler that allows you to create spheres, cylinders, platonic solids, and any other objects that you want.
- Features support for TrueType fonts.
- Easy to create 3D scenes and output them as video files or images.
05 Seamless3d - Open-source Free Software
Difficulty Level: Easy
Pro: It is an open-source 3D modeling package. The good thing is the handy infinite Undo/Redo operation.
Con: Some advanced features are missing like drawing.
Seamless3d, an open-source 3D modeling software that you can download, is among the best animation worktables if you want to create specialized images, animated videos, or 3D characters.
It supports FFmpeg video format, so you can use AVI, MP4, and more. Besides, the forum is not active compared with before, but you still can find answers from many tutorials .
Features:
- It comes with infinite undo and redo options for complete flexibility to correct mistakes.
- It allows for partitioned and seamless texture mapping for YouTube videos.
- Has a specialized tree view interface.
06 OpenToonz - Support Plug in to Make Animation Freely
Difficulty Level: Middle
Pro: It is open-source software, so you can change the code freely.
Con: The plug-in effects are limited.
This animation program is made for beginners on Windows. It is among the best 2D animation software in the market. You can use plug-in effects to change image style, add lights, and distort details. It supports Windows 7/8/10 only for 64 bit.
Features:
- You can add provisional colors to make your animation more colorful.
- Smooth correction without frame losing.
- Compatible with black-and-white, colored, or without binarization scanning.
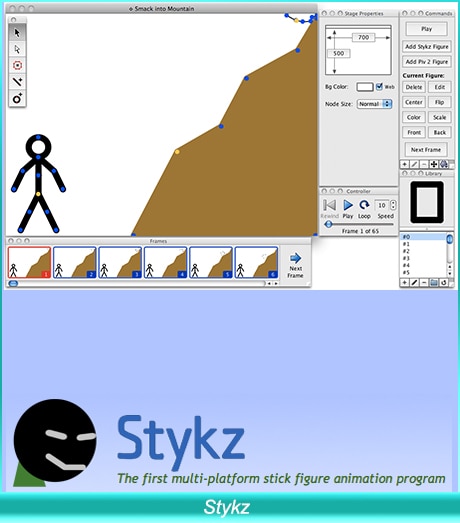
7 Stykz - Simple to Use Animation Program for Beginners
Difficulty Level: Easy
Pro: It is the best stick figure animation if you want to make this kind of video.
Con: The UI is not modern to use and needs time to adapt to using it.
Stykz is completely free to use and without a watermark. If you have used Pivot StickFigure Animator, then you will find Stykz is similar to it, but you can import the previous .stk files to animate it again. You can use it to make animation smooth frame by frame.
With its frame-based feature, Stykz is easy to customize each frame. You can change previous and current frames to get what you want. You can download it to have a try considering its easy-to-use features.
Features:
- There is some animes file on this website, so you can have a reference.
- Edit animation in the software without using another editing window.
- You can share the final work with others including information.
Part 3 FAQ about Animation Software for Windows and Mac
01 Are Macs good for animation?
To be frank, Mac is a better choice to make animation if you want to have a smooth animation experience. For example, screen resolution is a crucial factor to make excellent animation. The good is Mac’s screen will never let you disappointed.
02 What is the best animation software for Mac?
The best animation software on mac includes Synfig Studio, Pencil2D Animation, Tupi, Blender, and more. Mentioned are free-to-use. Maya is also worth considering animation software if you are a professional user. Maya offers a 1-month free trial. After it is ended, the paid plans are month, 1-year, and 3-year.
03 Can you animate in Photoshop?
Yes, you can make basic animation in Photoshop. However, it only supports frame-based animation making. In this case, you need to use other professional software to make animation. But, you still can use Photoshop to meet your needs if you are a beginner.
Conclusion
With any of these free animation maker programs on Mac and Windows, you will have an easy time creating your next 2D or 3D video. Ensure you choose the program that has the features and compatibility that you desire. Then it is up to your creative mind to come up with stunning animations! If you want to make animation easily, you can also find inspiration through classical animated cartoon types with examples .
Shanoon Cox
Shanoon Cox is a writer and a lover of all things video.
Follow @Shanoon Cox
Find the Detailed Guide for Using a Picture Ratio Calculator to Determine the Best Video Aspect Ratio. Also, Learn How to Find and Adjust the Right Size of Images
You might have noticed that earlier DVDs came with full screen or widescreen viewing choices. Moreover, when you choose the wrong option, it cuts off the movie parts, or the video gets surrounded by black padding.
The standard resolution of your screen stretched from a 4:3 aspect ratio to the wider one. So, producers started making movies that fit on both screens. After the standardization of aspect ratio display, broadcasters pay attention to the image ratio of clips.
So, below is the guide to find, calculate and adjust image ratio with a picture ratio calculator. Let’s get started.
In this article
01 [What is the image ratio?](#Part 1)
02 [Where Can I Find the Image ratio?](#Part 2)
03 [How to adjust image ratio](#Part 3)
Part 1 What is the image ratio?
The image or aspect ratio is the ratio of width to the height of a picture without any pixels attached. It is expressed with two a colon that separates two numbers, for example, 16:9.
In cinematography, common image ratios are 1.85:1 and 2.39:1, and in TV photography, it is 4:3 and 16:9. However, in still photography, the standard aspect ratio is 3:2.
Part 2 Where Can I Find the Image ratio?
To select the right photo print size, you must consider the photo ratio and the print ratio. You can not accidentally choose the balance that needs cropping from the sides of the photo.
So, first, you must know how or where you can find the image ratio. The following are the methods to do so:
Method 1: Check your Camera
The image ratio depends directly on the camera’s sensor. You can find the correct balance for photo print based on your camera type. For example, APS-C and Full-frame cameras shoot in a 3:2 ratio. But compact cameras often shoot in a 4:3 ratio.
The photos that you click with your smartphones have a 16:9 or 4:3 ratio. The picture below shows some common photo ratios by type of camera and where it will look great in the home.

Method 2: Find Image Information
Unlike the photo ratios, image information determines the original width and height of the image in pixels. You can measure the picture dimensions in any unit, but you will always see the web or digital images in pixels.
Always remember that two different pictures with the same image ratio may not have the same dimensions. For example, a picture with size 1920X1080 pixels and a photo with size 1280x720 pixels can both have a 16:9 aspect ratio.
Method 3: Check with Photoshop
You can quickly check the image ratio in Photoshop (picture ratio calculator) using a crop tool. To do so, follow the steps mentioned below:
● Open the image in Photoshop.
● Choose a crop tool.
● Select the photo ratio.
● Test different image ratios. You can begin with the standard ratios like 3:2, 16:9, 4:3, or 5:4.
● If the crop frame captures the whole picture, it means you have already found the correct ratio.
Do you want a photo print in panorama or square shape? If yes, crop the picture to make it fit a different image ratio. For instance, edit the photo to fit a 1:1 ratio for a square shape.
Or crop a picture to 2:1. 3:1. 4:1, 5:1, or 6:1 ratio for a panorama photo.

Method 4: Image Ratio Calculation
You can find the image ratio using the resolution of a photo easily on a window’s system. To do so, right-click on an image file and scroll down to the Properties. Under details, you will notice, size of a photo in pixels.
To calculate the photo ratio, divide the width by the height of an image. If the total is an integer, multiply it by other numbers. These numbers are photo ratios.
Example 1:
● Photo is 4966px by 3312px
● Divide 4966 by 3312= 1.5
● Now, multiply 1.5 with 2 to obtain a whole number (1.5 X 2= 3)
● The photo’s ratio is 3:2
Example 2:
● Photo is 4416 x 3312 px
● Divide 4416 by 3312= 1.3
● Multiply 1.3 with 3 to obtain a whole number(1.3 x 3= 3.9 or approx. 4)
● The photo’s ratio is 4:3
Part 3 How to adjust image ratio
Image ratio is significant in the videography business. But adjusting the video aspect ratio is more critical. Therefore, if you are a video editor, you must know how to do it. There are plenty of options to adjust the aspect ratio, and one of them is to use a photo aspect ratio calculator.
If you want to make permanent adjustments, use a convertor or editor. “Wondershare Filmora” is the best video editor that allows you to create videos with different aspect ratios and adjust these ratios easily.

Wondershare Filmora - Best Video Editor for Mac/Windows
5,481,435 people have downloaded it.
Build unique custom animations without breaking a sweat.
Focus on creating epic stories and leave the details to Filmora’s auto features.
Start a creative adventure with drag & drop effects and endless possibilities.
Filmora simplifies advanced features to save you time and effort.
Filmora cuts out repetition so you can move on to your next creative breakthrough.
The following are different methods to adjust the aspect ratio in Wondershare Filmora:
Method 1: Adjust Aspect Ratio at the Starting Interface
Wondershare Filmora helps you to adjust the video aspect ratio once you launch the editor program. To begin, go to the “drop-down” menu button. Now, press on it to check some commonly used photo ratios such as 16:9, 1:1, 4:3, 9:16, or 21:9.
Choose the ratio that you want by simply clicking on it.

Method 2: Adjust Aspect Ratio under Project Settings
You can adjust the aspect ratio by clicking on the “Project Settings.” Then, decide the target aspect ratio depending on the aspect ratio of the media source.
For instance, if the aspect ratio of media source files is 4:3, select the standard aspect ratio of 4:3. Then, media files with other aspect ratios will shoe black bars.
So, if any discordance occurs or you want to change the video aspect ratio, select the proper balance from project settings.

Method 3: Adjust Aspect Ratio during Editing
Once you import the videos into the timeline of the Wondershare Filmora, you can easily adjust the ratio from the Crop and Zoom tool.
● Go to timeline and right-click on the video clip. Then, select “Crop and Zoom.” You will see the pop-up window.
● Click on 16:9, 4:3, 1:1, or 9:16 manually at the bottom to change the video aspect ratio.
● You can also manually enter the video aspect ratio. Then, click on the “Ok” button.

Once you make the adjustments in the aspect ratio, add background blur effects if you notice a black bar. It will enhance the video. You can also intensify your video by using filters, visual effects, overlays, or titles.

Method 4: Adjust Video Aspect Ratio with Auto-Reframe
If you use the latest versions of Filmora, you will see Auto Reframe helps adjust the aspect ratio. Other
Wondershare Filmora
Get started easily with Filmora’s powerful performance, intuitive interface, and countless effects!
Try It Free Try It Free Try It Free Learn More about Filmora>
The following are steps to change the aspect ratio using the Auto-Reframe option:
Step1
Once you upload the video clips to the media library, right-click on it and select the Auto-Reframe option.

Step2
You will see the Auto Reframe window appear on the screen. Replace the existing video with a new clip. Then, change the video aspect ratio and video motion speed. Make sure to change the aspect ratio that fits most with different social media platforms.

Step3
Once you select the aspect ratio, click on the “Analyze” button. Filmora will Auto-Reframe the video itself. Once the process completes, you can see results in the preview window. Drag box to adjust the frame or to keep the object in it. It will automatically delete the content outside the box.

Step4
After completing adjustment or reframing, click on the “Export” button to save your video.
Change the name of the video and select the location where you want to save the video.
Now, click on the “Export” again to save.

Method 5: Adjust Aspect Ratio at Exporting
You can save the clip to your system or smartphones, depending on your requirements. Then, upload them directly to Youtube or burn them into DVD by clicking on the “Export button.” In this way, you can watch it on widescreen or standard TV whenever you want with an image size aspect ratio calculator.

● Adjust Aspect Ratio for the Local Computer
First, you will see the “Local” tab. There you can save the clip in a particular aspect ratio to your system. You can see all resolutions with various aspect ratios after selecting the format. The output video depends on the media click resolution.
● Adjust Aspect Ratio for a Device
Change the “Device” tab to save the video in formats compatible with popular devices, including iPod, iPhone, PSP, iPad, etc. Choose your favorite or the best resolution. Once you choose the device, you will see all resolutions.
The video quality will continue improving with higher resolutions. But it will also increase the size of the file.
● Adjust Aspect Ratio for YouTube
Go to the “YouTube” tab and fill in the information. Then, click the “Export” button. Selecting the aspect ratio again is not necessary. It will directly upload your videos to YouTube.
● Adjust Aspect Ratio for DVD TV
When you go to the “DVD” tab, you will notice various aspect ratio options. Switching the aspect ratio for TV from 4:3 to 16:9 is pretty straightforward. To do so, select what you think is right. Try to use image size aspect ratio calculator to get the right ratio.
Conclusion
● Aspect ratio holds great importance in the proper display. So, it would be best to learn the calculation and adjustment of the image ratio using photo aspect ratio calculator or image size proportion calculator.
● Hopefully, the above points will help you to learn calculation and adjustment processes. Also, do not forget to use Wondersahe Filmora to set the image ratio and edit the video with ease.
02 [Where Can I Find the Image ratio?](#Part 2)
03 [How to adjust image ratio](#Part 3)
Part 1 What is the image ratio?
The image or aspect ratio is the ratio of width to the height of a picture without any pixels attached. It is expressed with two a colon that separates two numbers, for example, 16:9.
In cinematography, common image ratios are 1.85:1 and 2.39:1, and in TV photography, it is 4:3 and 16:9. However, in still photography, the standard aspect ratio is 3:2.
Part 2 Where Can I Find the Image ratio?
To select the right photo print size, you must consider the photo ratio and the print ratio. You can not accidentally choose the balance that needs cropping from the sides of the photo.
So, first, you must know how or where you can find the image ratio. The following are the methods to do so:
Method 1: Check your Camera
The image ratio depends directly on the camera’s sensor. You can find the correct balance for photo print based on your camera type. For example, APS-C and Full-frame cameras shoot in a 3:2 ratio. But compact cameras often shoot in a 4:3 ratio.
The photos that you click with your smartphones have a 16:9 or 4:3 ratio. The picture below shows some common photo ratios by type of camera and where it will look great in the home.
Method 2: Find Image Information
Unlike the photo ratios, image information determines the original width and height of the image in pixels. You can measure the picture dimensions in any unit, but you will always see the web or digital images in pixels.
Always remember that two different pictures with the same image ratio may not have the same dimensions. For example, a picture with size 1920X1080 pixels and a photo with size 1280x720 pixels can both have a 16:9 aspect ratio.
Method 3: Check with Photoshop
You can quickly check the image ratio in Photoshop (picture ratio calculator) using a crop tool. To do so, follow the steps mentioned below:
● Open the image in Photoshop.
● Choose a crop tool.
● Select the photo ratio.
● Test different image ratios. You can begin with the standard ratios like 3:2, 16:9, 4:3, or 5:4.
● If the crop frame captures the whole picture, it means you have already found the correct ratio.
Do you want a photo print in panorama or square shape? If yes, crop the picture to make it fit a different image ratio. For instance, edit the photo to fit a 1:1 ratio for a square shape.
Or crop a picture to 2:1. 3:1. 4:1, 5:1, or 6:1 ratio for a panorama photo.
Method 4: Image Ratio Calculation
You can find the image ratio using the resolution of a photo easily on a window’s system. To do so, right-click on an image file and scroll down to the Properties. Under details, you will notice, size of a photo in pixels.
To calculate the photo ratio, divide the width by the height of an image. If the total is an integer, multiply it by other numbers. These numbers are photo ratios.
Example 1:
● Photo is 4966px by 3312px
● Divide 4966 by 3312= 1.5
● Now, multiply 1.5 with 2 to obtain a whole number (1.5 X 2= 3)
● The photo’s ratio is 3:2
Example 2:
● Photo is 4416 x 3312 px
● Divide 4416 by 3312= 1.3
● Multiply 1.3 with 3 to obtain a whole number(1.3 x 3= 3.9 or approx. 4)
● The photo’s ratio is 4:3
Part 3 How to adjust image ratio
Image ratio is significant in the videography business. But adjusting the video aspect ratio is more critical. Therefore, if you are a video editor, you must know how to do it. There are plenty of options to adjust the aspect ratio, and one of them is to use a photo aspect ratio calculator.
If you want to make permanent adjustments, use a convertor or editor. “Wondershare Filmora” is the best video editor that allows you to create videos with different aspect ratios and adjust these ratios easily.
Wondershare Filmora - Best Video Editor for Mac/Windows
5,481,435 people have downloaded it.
Build unique custom animations without breaking a sweat.
Focus on creating epic stories and leave the details to Filmora’s auto features.
Start a creative adventure with drag & drop effects and endless possibilities.
Filmora simplifies advanced features to save you time and effort.
Filmora cuts out repetition so you can move on to your next creative breakthrough.
The following are different methods to adjust the aspect ratio in Wondershare Filmora:
Method 1: Adjust Aspect Ratio at the Starting Interface
Wondershare Filmora helps you to adjust the video aspect ratio once you launch the editor program. To begin, go to the “drop-down” menu button. Now, press on it to check some commonly used photo ratios such as 16:9, 1:1, 4:3, 9:16, or 21:9.
Choose the ratio that you want by simply clicking on it.
Method 2: Adjust Aspect Ratio under Project Settings
You can adjust the aspect ratio by clicking on the “Project Settings.” Then, decide the target aspect ratio depending on the aspect ratio of the media source.
For instance, if the aspect ratio of media source files is 4:3, select the standard aspect ratio of 4:3. Then, media files with other aspect ratios will shoe black bars.
So, if any discordance occurs or you want to change the video aspect ratio, select the proper balance from project settings.
Method 3: Adjust Aspect Ratio during Editing
Once you import the videos into the timeline of the Wondershare Filmora, you can easily adjust the ratio from the Crop and Zoom tool.
● Go to timeline and right-click on the video clip. Then, select “Crop and Zoom.” You will see the pop-up window.
● Click on 16:9, 4:3, 1:1, or 9:16 manually at the bottom to change the video aspect ratio.
● You can also manually enter the video aspect ratio. Then, click on the “Ok” button.
Once you make the adjustments in the aspect ratio, add background blur effects if you notice a black bar. It will enhance the video. You can also intensify your video by using filters, visual effects, overlays, or titles.
Method 4: Adjust Video Aspect Ratio with Auto-Reframe
If you use the latest versions of Filmora, you will see Auto Reframe helps adjust the aspect ratio. Other
Wondershare Filmora
Get started easily with Filmora’s powerful performance, intuitive interface, and countless effects!
Try It Free Try It Free Try It Free Learn More about Filmora>
The following are steps to change the aspect ratio using the Auto-Reframe option:
Step1
Once you upload the video clips to the media library, right-click on it and select the Auto-Reframe option.
Step2
You will see the Auto Reframe window appear on the screen. Replace the existing video with a new clip. Then, change the video aspect ratio and video motion speed. Make sure to change the aspect ratio that fits most with different social media platforms.
Step3
Once you select the aspect ratio, click on the “Analyze” button. Filmora will Auto-Reframe the video itself. Once the process completes, you can see results in the preview window. Drag box to adjust the frame or to keep the object in it. It will automatically delete the content outside the box.
Step4
After completing adjustment or reframing, click on the “Export” button to save your video.
Change the name of the video and select the location where you want to save the video.
Now, click on the “Export” again to save.
Method 5: Adjust Aspect Ratio at Exporting
You can save the clip to your system or smartphones, depending on your requirements. Then, upload them directly to Youtube or burn them into DVD by clicking on the “Export button.” In this way, you can watch it on widescreen or standard TV whenever you want with an image size aspect ratio calculator.
● Adjust Aspect Ratio for the Local Computer
First, you will see the “Local” tab. There you can save the clip in a particular aspect ratio to your system. You can see all resolutions with various aspect ratios after selecting the format. The output video depends on the media click resolution.
● Adjust Aspect Ratio for a Device
Change the “Device” tab to save the video in formats compatible with popular devices, including iPod, iPhone, PSP, iPad, etc. Choose your favorite or the best resolution. Once you choose the device, you will see all resolutions.
The video quality will continue improving with higher resolutions. But it will also increase the size of the file.
● Adjust Aspect Ratio for YouTube
Go to the “YouTube” tab and fill in the information. Then, click the “Export” button. Selecting the aspect ratio again is not necessary. It will directly upload your videos to YouTube.
● Adjust Aspect Ratio for DVD TV
When you go to the “DVD” tab, you will notice various aspect ratio options. Switching the aspect ratio for TV from 4:3 to 16:9 is pretty straightforward. To do so, select what you think is right. Try to use image size aspect ratio calculator to get the right ratio.
Conclusion
● Aspect ratio holds great importance in the proper display. So, it would be best to learn the calculation and adjustment of the image ratio using photo aspect ratio calculator or image size proportion calculator.
● Hopefully, the above points will help you to learn calculation and adjustment processes. Also, do not forget to use Wondersahe Filmora to set the image ratio and edit the video with ease.
Learn the Best Green Screen Video Editors for Mac Users, Including Green Screen Final Cut Pro
Best Green Screen Software for Mac

Liza Brown
Mar 27, 2024• Proven solutions
Previously we’ve talked about the Best green screen editors in which there’re 2 green screen software especially for Mac users: iMovie and Final Cut Pro.
If you’re an iMovie ‘09 or later user or you bought your Mac on or after October 20, 2010, iMovie is the first solution for you, if you’re looking for a free green screen software for Mac. Be sure to enable green screen function in iMovie! Check this tutorial about How to Use iMovie Green Screen Effect.
- Powerful yet easy-to-use green screen software for Mac
- Powerful yet advanced green screen software for Mac
Powerful and Easy green screen software for Mac - Wondershare Filmora
Find more details about how to composite a green screen video in Filmora
Wondershare Filmora for Mac (Latest version 9) is not only a green screen software, but also an all-in-one powerful, fun and easy video editing software. It is a better solution for prosumers (amateurs that want to look professional). With hundreds of effects and filters built-in, you could finish any advanced video editing with limitless possibilities within minutes. Download it to get started with your project now, here’s the free trial version!
Compared with Final Cut Pro($299), Filmora as an advanced video editing software for Mac is pretty affordable ($79.99/perpetual license). But trust me, it’s worth every penny as a professional video editor and high-end movie production. What you need is just more practices.
Liza Brown
Liza Brown is a writer and a lover of all things video.
Follow @Liza Brown
Liza Brown
Mar 27, 2024• Proven solutions
Previously we’ve talked about the Best green screen editors in which there’re 2 green screen software especially for Mac users: iMovie and Final Cut Pro.
If you’re an iMovie ‘09 or later user or you bought your Mac on or after October 20, 2010, iMovie is the first solution for you, if you’re looking for a free green screen software for Mac. Be sure to enable green screen function in iMovie! Check this tutorial about How to Use iMovie Green Screen Effect.
- Powerful yet easy-to-use green screen software for Mac
- Powerful yet advanced green screen software for Mac
Powerful and Easy green screen software for Mac - Wondershare Filmora
Find more details about how to composite a green screen video in Filmora
Wondershare Filmora for Mac (Latest version 9) is not only a green screen software, but also an all-in-one powerful, fun and easy video editing software. It is a better solution for prosumers (amateurs that want to look professional). With hundreds of effects and filters built-in, you could finish any advanced video editing with limitless possibilities within minutes. Download it to get started with your project now, here’s the free trial version!
Compared with Final Cut Pro($299), Filmora as an advanced video editing software for Mac is pretty affordable ($79.99/perpetual license). But trust me, it’s worth every penny as a professional video editor and high-end movie production. What you need is just more practices.
Liza Brown
Liza Brown is a writer and a lover of all things video.
Follow @Liza Brown
Also read:
- In 2024, Record Your Desktop in Minutes A Quick Start Guide to Filmora Scrn
- Updated In 2024, Lyric Video Magic Top Online Tools to Bring Your Songs to Life
- New 2024 Approved Top-Rated WebM to MP3 Conversion Software
- New In 2024, HD Video for Beginners Mastering Pixel Size and Quality
- Updated 14 Leading Picture Video Makers with Music for 2024
- Updated 2024 Approved How to Convert Video Files to MP3 without Compromising Sound
- New VLLO on Mac Your Ultimate Guide to Downloads and Alternatives
- In 2024, Unlock the Best Aiff Conversion Experience A Step-by-Step Guide
- Updated 2024 Approved Simple and Free The Best Online Tone Creators
- New Unlock the Secret to Balanced Photos Finding Your Ideal Ratio for 2024
- Updated 2024 Approved Bringing Your Nikon Videos to Life Essential Editing Skills and Tools
- Updated 2024 Approved The Ultimate Guide to Video Collage Apps for iPhone and iPad
- New GoPro Quik Vs. The Competition A Review & Alternative Options for PC for 2024
- Updated Make This Valentines Day Unforgettable DIY Video Gift Ideas
- New In 2024, Video Editing Made Easy Top 10 Trimming Tools for PC
- Updated Beyond PowerDirector The Best Mobile Video Editing Apps for 2024
- Updated In 2024, How to Stabilize Videos in Adobe Premiere Pro ?
- In 2024, The Best Free and Paid Sony Vegas Alternatives for Windows
- Updated Why Apple Discontinued Final Cut Express? What Are the Major Differences Between Final Cut Express and Final Cut Pro?
- Updated Best Video Loopers to Loop Videos for Free on Windows and Mac for 2024
- Updated Reaction Video Makers That Will Take Your Content to the Next Level for 2024
- Updated 2024 Approved 10 Essential Animated Text Makers for Unbeatable Engagement
- The Ultimate List 10 Final Cut Pro X Competitors Worth Exploring for 2024
- New In 2024, In This Article, We Will Introduce You Vn Video Editor Pro Apk Download and Bring You some of Its Alternatives
- 2024 Approved Top Video Trailer Creators for Mac and PC
- Updated Create Stunning Videos Online with Music and Transitions for 2024
- New 2024 Approved Download Instagram Videos with Audio as MP3
- New In 2024, 10 Free Video Editing Software for Windows 10 Trim, Cut, and More
- New Video Perfection Made Easy The Top 10 Free Online Stabilizers You Need
- Updated In 2024, Rise and Shine Wondershare Filmora Easter Sale Brings You Unbeatable Offers
- Updated Adjust Video Playback Speed in Camtasia for 2024
- Updated 2024 Approved Get Started with Free Video Editing Top Tools for 32-Bit Windows
- New In 2024, Your Greatest Tip to Resize Social Media Vertical Video Ratio
- 2024 Approved Unleash Your Creativity Top Mac Video Editing Software Like Windows Movie Maker
- Updated In 2024, Top-Rated Desktop and Online Video Editors for Trimming
- New 2024 Approved Streaming Supremacy TiVo and Comcasts DVR Offerings Compared
- The Best Ways to Convert Video Files to MP3 without Sacrificing Sound Quality for 2024
- New AVS Video Editor Review Does It Live Up to the Hype, In 2024
- New Top 14 Apps to Turn Photos Into Music Videos for 2024
- Updated In 2024, Stream the Hottest Trailers Top 10 iPhone and iPad Movie Apps
- Updated 2024 Approved The Ultimate Guide to Downloading Instagram Soundtracks
- New iPhone SE (2022) Restore from iCloud Stuck on Time Remaining Estimating | Stellar
- Complete Guide on Unlocking Apple iPhone SE with a Broken Screen? | Dr.fone
- App Wont Open on Your Oppo A78? Here Are All Fixes | Dr.fone
- In 2024, How To Bypass Vivo S18 FRP In 3 Different Ways
- Life360 Learn How Everything Works On Motorola Edge 40 Pro | Dr.fone
- All Must-Knows to Use Fake GPS GO Location Spoofer On Motorola Defy 2 | Dr.fone
- How to Transfer Videos from Honor Magic V2 to iPad | Dr.fone
- How to Recover Deleted Photos from Android Gallery App on Infinix Hot 40
- 2024 Approved How to Add a Green Screen to Zoom
- How to Successfully Bypass iCloud Activation Lock from iPhone 12
- How To Transfer Data From iPhone 6s To Other iPhone 13 Pro devices? | Dr.fone
- In 2024, How to Reset Apple ID and Apple Password On iPhone 13 Pro Max
- In 2024, How Do You Get Sun Stone Evolutions in Pokémon For Apple iPhone 12? | Dr.fone
- In 2024, Fixing Foneazy MockGo Not Working On Oppo Find N3 Flip | Dr.fone
- How to Rescue Lost Messages from Xiaomi Redmi K70
- New In 2024, 8 Free Photo Collage with Music Video Maker
- How do i sign a Word 2019 electronically
- How to Get and Use Pokemon Go Promo Codes On Nokia C02 | Dr.fone
- Updated Top 10 Sketch Animation Video Makers
- In 2024, Troubleshooting Error Connecting to the Apple ID Server From iPhone 13 mini
- Downloading SamFw FRP Tool 3.0 for Oppo Reno 10 Pro+ 5G
- In 2024, How To Change Xiaomi Redmi Note 12 4G Lock Screen Clock in Seconds
- Can’t view HEVC H.265 content on Samsung Galaxy F04
- How To Transfer WhatsApp From iPhone 6 Plus to other iPhone 14 Pro devices? | Dr.fone
- New In 2024, 5 Best Adobe Animate Courses & Classes | Beginners Complete Tutorial
- In 2024, How to Change GPS Location on Realme 10T 5G Easily & Safely | Dr.fone
- 2024 Approved Change Aspect Ratio with These 10 Powerful Tools
- Why Your Lava Agni 2 5G Screen Might be Unresponsive and How to Fix It | Dr.fone
- How to Upgrade Apple iPhone SE (2020) to the Latest iOS/iPadOS Version? | Dr.fone
- Stuck at Android System Recovery Of Nokia C02 ? Fix It Easily | Dr.fone
- How to Soft Reset Xiaomi Redmi 13C 5G phone? | Dr.fone
- In 2024, Forgot Locked iPhone 12 Pro Max Password? Learn the Best Methods To Unlock | Dr.fone
- How to Wipe iPhone SE (2022) Data Permanently? | Stellar
- Spotify Keeps Crashing A Complete List of Fixes You Can Use on Infinix Smart 8 HD | Dr.fone
- Can I use iTools gpx file to catch the rare Pokemon On Infinix Note 30 | Dr.fone
- Transfer your Apple iPhone 14 Apps to New iPhone | Dr.fone
- 5 Ways to Track Vivo T2 Pro 5G without App | Dr.fone
- Title: New The Last Wav Converter Guide Youll Ever Need
- Author: MdadeLe
- Created at : 2024-05-19 08:26:49
- Updated at : 2024-05-20 08:26:49
- Link: https://smart-video-editing.techidaily.com/new-the-last-wav-converter-guide-youll-ever-need/
- License: This work is licensed under CC BY-NC-SA 4.0.
