
:max_bytes(150000):strip_icc():format(webp)/before-you-buy-a-video-projector-1847845-v3-ED-8a08e03f2cfc4835a13872618bd4ad00.png)
New In 2024, The Ultimate Guide to Trimming Videos Online with Kapwing
The Ultimate Guide to Trimming Videos Online with Kapwing
Create High-Quality Video - Wondershare Filmora
An easy and powerful YouTube video editor
Numerous video and audio effects to choose from
Detailed tutorials provided by the official channel
When you make a video, you’re competing for people’s attention. Trimming videos is a fundamental element of editing. Strategic video trimming with Kapwing Trimmer allows you to cut out anything unnecessary, leaving you with the content your audience desires. Many people also use this tool to trim the end or beginning of their videos to help them get the attention they deserve. We’ll explain how to trim videos with the Kapwing Trim online tool.
In this article
02 How to Trim a Video with Kapwing
03 Extra Information About Kapwing Editor
What Is Kapwing Editor?
Kapwing is an online GIF, video, and image editing platform designed to enable digital storytelling. This online tool helps you trim videos and add subtitles. It’s user-friendly, and anyone with an idea of video production can use it. You do not need tutorials or software download to start using this tool; you only need efficient creativity, as you can edit a video as much as your creativity will allow you.
The selling point for Kapwing is how easy you can use the online editing tool, making it suitable for both professional and amateur video producers. For this reason, the popularity of Kapwing Video Trimmer has grown 10x, with over 1 million people using this editing tool.
With Kapwing editor, you can filter, trim, resize, and loop videos. The tool also allows you to add audio to your video and sync it with the video. What’s more? You can convert images to videos and watermark them.
Having multiple templates and tools makes things easy, and this will help you make professional-like videos that people will think you used high-end software.
How to Trim a Video with Kapwing
To start using Kapwing Video Trim, you need to follow the steps below:
Step 1
Visit Kapwing.com with your browser using your tablet, smartphone, or computer.Hit the Start Editing button to enter the Studio; no need to create an account.

Step 2
You have several options to upload your video from the web or your device. The Upload button allows you to upload videos from your system.

Step 3
You can also drag and drop the file onto the workspace or the Studio canvas. Alternatively, you can copy and paste the URL of your video from sites GIPHY, Google Drive, or YouTube and import it directly.
Once you have uploaded your video, you can start using Kapwing Video Trimmer to trim unnecessary content or make it shorter.
Step 4
A box will pop up at the bottom of the screen; this is referred to as the Timeline, and it’s where the different pieces you’re adding to the video will appear, including images layers, text layers, and video clips.

Step 5
Your video plays from the left side to the right side. The Play icon allows you to play the video and preview your project. Use the seeker to go to any point of your video that you want to see how it will look like.

Step 6
If you want more precision while editing individual video clips in the Timeline, use the Zoom In and Zoom out buttons to see a more precise view.

Step 7
To trim the video, click the Trim button.

Click and drag the ends of your video to adjust the end and start times of the video layer. Anything that you remove won’t be in the final video.

If you have more layers on your project, click and select the layer you would like to trim.
Step 8
You can also use the Timing tab to trim your video. To do this, click your clip and head over to the top right side of your screen.

You can now specify the exact time you would like the video to start and end instead of using the clicking and dragging method.

Clicking the numerals will allow you to use the up and down arrow keys and trim the video to start and end where you have specified.
You can also use the seeker to set the time where you would like the video to start and end, and then go to the numerals and click set to the current time.
Kapwing Video Trimmer will create a huge gap when you select this option. You’ll see a blank white canvas until the video starts.
You can leave this white space and add other clips or remove it so that your video starts at zero by clicking it and hitting the Delete key on your keyboard.
Step 9
Once you have finished trimming your video with Video Trimmer Kapwing, click the Export Video button.

You’ll have to sign in to remove the watermark. Click the Download button to download the trimmed video to your device.
Extra Information About Kapwing Editor
Now that you know how to trim videos with Kapwing Video Trimmer let’s look at five things about this online editing tool that you need to know.
1. You Can Cut and Split Parts of Your Videos
With the Kapwing Video Editing tool, you can cut out the middle of your video clip by using the split key. You only need to drag the seeker to where you would like to cut out, then click the Split button. Doing this will turn the original video clip into two clips that you drag to trim down any part that you do not want to appear in your video.

2. How to Collaborate With Kapwing
Kapwing allows you to work as a group remotely and in real-time while accessing each other’s files. The tool is also ideal for teams, outsourced workers, and virtual assistants. All you have to do is invite your peers or colleagues to a Workspace, and Kaping will allow you to work together on GIF, video, and image edits.
To share your Kapwing Workspace to collaborate with other users without giving them your log-in information, follow the steps below.
- Simply go to the folder you would like to share and hit the Share button.
- You’ll then have to type in the email address of the person you want to share the folder with.
- Once you have done this, click the Send Invite button to copy and send a link to an invitation to your folder.
Your collaborator needs to open the email with the link and click Join Now. They’ll also have to create an account by linking their Facebook or Google account and then accept the invite again once they have signed in.
3. You Can Add Audio and Text to Your Video
Kapwing editor allows you to add audio and text using two methods: subtitles and text boxes. Use single text boxes for information, names, titles, and labels. To do this, hit the Text button located in the upper toolbar, then enter the text you want into the box.
All the text editing options will appear on the right, including angle, position, style, outline, color, and font. The Anime tab allows you to add up to 10 different animations to the text box. Additionally, you can add subtitles to your videos if you want your audience to follow along while listening to the spoken words in the video.
4. Share Your Videos With Others
After creating your video project, you can share it with others from the download page. You can share your video directly on Instagram. Twitter, and Facebook. You can also copy the video’s link and then send it to anyone you want, and they will be able to view it.
Desktop solution for video trimming - Filmora
Filmora is also a video editing tool that allows you to create HD videos. The software lets you crop, trim, merge, and rotate videos. This simple-to-use tool empowers your stories by making your videos eyecatching to attract more viewers. You can also adjust contrast, brightness, temperature, saturation, and tint.
Moreover, you can remove background and apply effects. Filmora has tons of effects on its Effects library that you can just drag and drop onto your video clip after placing it on the timeline.
The 4K editing support feature allows you to edit and export your videos at 4K resolution. You can also adjust the dynamic range and white balance of your videos.
Conclusion
● Kapwing Trimmer allows you to trim videos and remove unwanted scenes and let you start the videos where you want them to begin. The best part is: After you have finished working on your videos, the platform allows you to share them with other websites. Use Filmora to edit your videos and enhance their quality.
When you make a video, you’re competing for people’s attention. Trimming videos is a fundamental element of editing. Strategic video trimming with Kapwing Trimmer allows you to cut out anything unnecessary, leaving you with the content your audience desires. Many people also use this tool to trim the end or beginning of their videos to help them get the attention they deserve. We’ll explain how to trim videos with the Kapwing Trim online tool.
In this article
02 How to Trim a Video with Kapwing
03 Extra Information About Kapwing Editor
What Is Kapwing Editor?
Kapwing is an online GIF, video, and image editing platform designed to enable digital storytelling. This online tool helps you trim videos and add subtitles. It’s user-friendly, and anyone with an idea of video production can use it. You do not need tutorials or software download to start using this tool; you only need efficient creativity, as you can edit a video as much as your creativity will allow you.
The selling point for Kapwing is how easy you can use the online editing tool, making it suitable for both professional and amateur video producers. For this reason, the popularity of Kapwing Video Trimmer has grown 10x, with over 1 million people using this editing tool.
With Kapwing editor, you can filter, trim, resize, and loop videos. The tool also allows you to add audio to your video and sync it with the video. What’s more? You can convert images to videos and watermark them.
Having multiple templates and tools makes things easy, and this will help you make professional-like videos that people will think you used high-end software.
How to Trim a Video with Kapwing
To start using Kapwing Video Trim, you need to follow the steps below:
Step 1
Visit Kapwing.com with your browser using your tablet, smartphone, or computer.Hit the Start Editing button to enter the Studio; no need to create an account.
Step 2
You have several options to upload your video from the web or your device. The Upload button allows you to upload videos from your system.
Step 3
You can also drag and drop the file onto the workspace or the Studio canvas. Alternatively, you can copy and paste the URL of your video from sites GIPHY, Google Drive, or YouTube and import it directly.
Once you have uploaded your video, you can start using Kapwing Video Trimmer to trim unnecessary content or make it shorter.
Step 4
A box will pop up at the bottom of the screen; this is referred to as the Timeline, and it’s where the different pieces you’re adding to the video will appear, including images layers, text layers, and video clips.
Step 5
Your video plays from the left side to the right side. The Play icon allows you to play the video and preview your project. Use the seeker to go to any point of your video that you want to see how it will look like.
Step 6
If you want more precision while editing individual video clips in the Timeline, use the Zoom In and Zoom out buttons to see a more precise view.
Step 7
To trim the video, click the Trim button.
Click and drag the ends of your video to adjust the end and start times of the video layer. Anything that you remove won’t be in the final video.
If you have more layers on your project, click and select the layer you would like to trim.
Step 8
You can also use the Timing tab to trim your video. To do this, click your clip and head over to the top right side of your screen.
You can now specify the exact time you would like the video to start and end instead of using the clicking and dragging method.
Clicking the numerals will allow you to use the up and down arrow keys and trim the video to start and end where you have specified.
You can also use the seeker to set the time where you would like the video to start and end, and then go to the numerals and click set to the current time.
Kapwing Video Trimmer will create a huge gap when you select this option. You’ll see a blank white canvas until the video starts.
You can leave this white space and add other clips or remove it so that your video starts at zero by clicking it and hitting the Delete key on your keyboard.
Step 9
Once you have finished trimming your video with Video Trimmer Kapwing, click the Export Video button.
You’ll have to sign in to remove the watermark. Click the Download button to download the trimmed video to your device.
Extra Information About Kapwing Editor
Now that you know how to trim videos with Kapwing Video Trimmer let’s look at five things about this online editing tool that you need to know.
1. You Can Cut and Split Parts of Your Videos
With the Kapwing Video Editing tool, you can cut out the middle of your video clip by using the split key. You only need to drag the seeker to where you would like to cut out, then click the Split button. Doing this will turn the original video clip into two clips that you drag to trim down any part that you do not want to appear in your video.
2. How to Collaborate With Kapwing
Kapwing allows you to work as a group remotely and in real-time while accessing each other’s files. The tool is also ideal for teams, outsourced workers, and virtual assistants. All you have to do is invite your peers or colleagues to a Workspace, and Kaping will allow you to work together on GIF, video, and image edits.
To share your Kapwing Workspace to collaborate with other users without giving them your log-in information, follow the steps below.
- Simply go to the folder you would like to share and hit the Share button.
- You’ll then have to type in the email address of the person you want to share the folder with.
- Once you have done this, click the Send Invite button to copy and send a link to an invitation to your folder.
Your collaborator needs to open the email with the link and click Join Now. They’ll also have to create an account by linking their Facebook or Google account and then accept the invite again once they have signed in.
3. You Can Add Audio and Text to Your Video
Kapwing editor allows you to add audio and text using two methods: subtitles and text boxes. Use single text boxes for information, names, titles, and labels. To do this, hit the Text button located in the upper toolbar, then enter the text you want into the box.
All the text editing options will appear on the right, including angle, position, style, outline, color, and font. The Anime tab allows you to add up to 10 different animations to the text box. Additionally, you can add subtitles to your videos if you want your audience to follow along while listening to the spoken words in the video.
4. Share Your Videos With Others
After creating your video project, you can share it with others from the download page. You can share your video directly on Instagram. Twitter, and Facebook. You can also copy the video’s link and then send it to anyone you want, and they will be able to view it.
Desktop solution for video trimming - Filmora
Filmora is also a video editing tool that allows you to create HD videos. The software lets you crop, trim, merge, and rotate videos. This simple-to-use tool empowers your stories by making your videos eyecatching to attract more viewers. You can also adjust contrast, brightness, temperature, saturation, and tint.
Moreover, you can remove background and apply effects. Filmora has tons of effects on its Effects library that you can just drag and drop onto your video clip after placing it on the timeline.
The 4K editing support feature allows you to edit and export your videos at 4K resolution. You can also adjust the dynamic range and white balance of your videos.
Conclusion
● Kapwing Trimmer allows you to trim videos and remove unwanted scenes and let you start the videos where you want them to begin. The best part is: After you have finished working on your videos, the platform allows you to share them with other websites. Use Filmora to edit your videos and enhance their quality.
Gaming on a Budget: Top 10 Free Game Download Platforms for PC and Android
Top 10 Best Free Game Download Sites [PC & Android][2024]

Ollie Mattison
Mar 27, 2024• Proven solutions


We all know and firmly believe that games are an integral part of our life. But the world has progressed, and we yearn to achieve real-life experiences through virtual reality instead of experiencing the actual thing. Online games are not only mentally stimulating, but they are also very addictive. Not everyone wants to pay to play games for a couple of hours, so here is a list of top free game downloading sites. You can download full versions of your favorite games for free.
Recommended Video Recorder & Editor for Gameplay: Filmora
If you want to edit a video recorded from games with more effects and templates, we recommend using Filmora . It is an easy-to-use video editor. It offers various title templates. You can also use it to record game videos. Just download it to have a try. Don’t know how to make a video? Visit the Wondershare Video Community and get some inspiration in video creation.
Part 1: Best Free PC Game Download Sites
1 Acid Play
Platforms: OS X and Windows

Key Features:
- Huge gaming library
The acid play has a gigantic collection of games of various types. The games at acid play have been categorized into action, arcade, board games, RPG, card games, puzzles, driving games, simulation, etc.
- Custom Search
The customized search helps you find the exact game you are looking for. It saves time since you cannot browse through thousands of games.
- Ratings
If you are new to this site or looking for a new game to play, you can choose only without trying every game to decide the best one. Just check the ratings provided by other players, and it will solve your problem. You can also rate a game according to your liking.
Pros:
- The games are easily downloadable and free.
- There is a large variety of games available to play.
Cons:
- The site is not updated, and no new games are introduced.
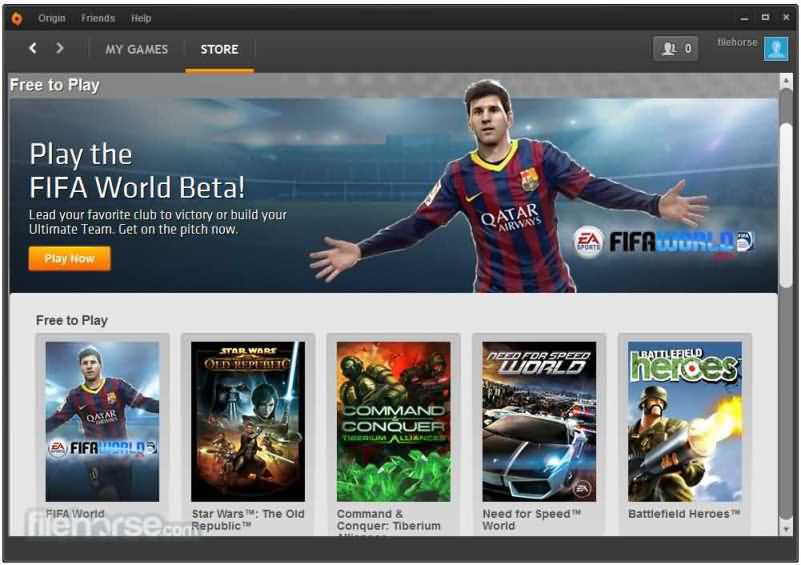
2 Origin Games
Platforms: OS X and Windows
Origin games are another best-known digital distribution platform for a free online gaming experience. It contains a fairly large library of premium games, but origin games provide links for free downloads for a limited time.
Key Features:
- Social Features
Origin provides its users with many social features like profile management, networking with friends through chatting, and video streaming via TwitchTV. You can also share your game library and community integration through social media and networking sites like Facebook, Xbox Live, PlayStation Network, and Nintendo Network.
- Variety in games
It provides various games, from PC games to Fifa and even classic games like Plant Vs. Zombies are also available.
- On-the-house games
The on-the-house features allow the customers to download a free trial of a premium game.
Pros:
- It provides great game streaming features.
- is developed by a renowned and successful company so that it can be trusted.
- The ‘on-the-house specials’ are appreciated by many gamers, allowing them to play a paid game for free now and then.
Cons:
- It has a lot of updates and takes an unreasonable amount of time to install and update the software.
- Customers have complained that they provide expired discount codes.
- Customer service needs to be improved as it is not very responsive.
3 AllGamesAtoZ
Platforms: OS X and Windows
If you want the best full version of a game for free, then AllGamesAtoZ is where you should go.
Key Features:
- The website is full of addictive games from different genres like action, arcade, shooting, role-playing, adventure, racing, simulation, etc.
- Multiple links for downloading a single game are available.
- A customized search bar is available so that you can locate the exact game you are looking for without having to browse through thousands of games.
- The games on AllGamesAtoZ are available on Windows, Linux, and Mac.
- A forum for game reviews is provided, so it is easier to decide which game you want to download without trying them all.
Pros:
- The gaming library is enormous.
- The game reviews make it easier to make a decision and save time.
- The website does not transfer viruses and is entirely safe from scams.
Cons:
- The downloading process is quite long.
- The website is not updated with new games.
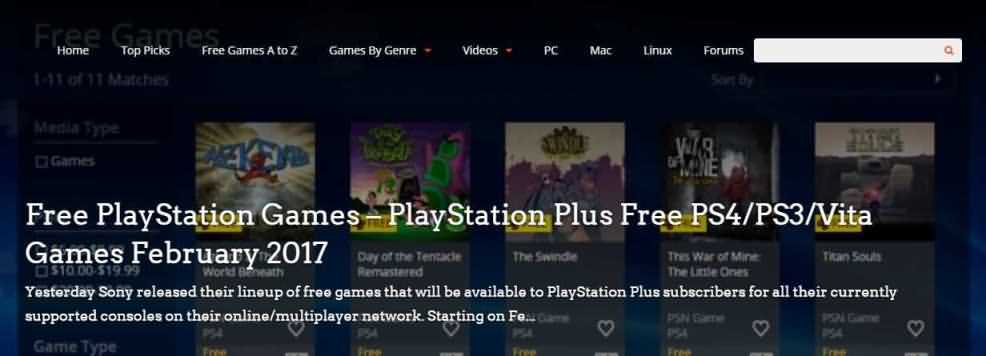
4 Mega Games
Platforms: OS X and Windows
It is another highly recommended online gaming site. It not only provides PC games for free but also offers 3D PlayStation games to be downloaded on your PC without any charge.

Key Features:
- Search and download
Mega games allow a search and download option for every game published on their site.
- PlayStation games
It has provided its customers with not only PC games but also 3D PlayStation games that can be downloaded for free.
- Cheat codes
Apart from all the standard gaming features, mega games also provide free cheat codes for the games.
Pros:
- The games are easily downloaded.
- The games have variety.
Cons:
- The website stops working after a while, and the download gets interrupted
5 Caiman.us
Platforms: OS X and Windows
It is another digital distribution platform for free online gaming. After the death of the site’s developer, the site has gone offline.

Key Features:
- It has a vast collection of games and over twenty free games categories.
- 2D and 3D gaming experiences are also provided.
- A customized search is available to make it easier for players to find the game they are looking for.
Pros:
- There is a vast collection of free games to download and play.
Cons:
- The site is not well organized and confusing.
- The search bar is at the very bottom of the page, so a person might find it hard to locate.
- Since the site has gone offline, the games are not updated, so there are no new games.
Part 2: Best Android Game Download Sites to Download Free Android Games
Android is growing very fast; now, almost everyone uses it and prefers it over any other software. Here are the best websites from where you can download free android apps:
1 Google Play
Google Play is the most common website to download free android apps. It is free, it is fast, and it is efficient. You can not only use this from your android mobile but also operate it and download apps using your laptop.

Key Features:
- The apps are easily downloaded, depending upon your internet connection.
- The purchase methods are through credit cards, and the procedure is straightforward.
- The platform allows everyone and anyone to sell their games.
- Sign up through your Google account is necessary to access these features.
Pros:
- It is easily accessible.
- It is pre-installed on all android supported devices.
- It contains a massive collection of unique apps, from books to music, workout, and games of various types.
Cons:
- Since everyone and anyone can access it without paying any registration fee, it is exposed to scams and harassment.
- A few games do not function and keep crashing.
2 Android Games Room

It contains thousands of free gaming apps in different categories like action, arcade, adventure, simulation, song games, and puzzle games. The download links are readily available; you can even access this site from your mobile by scanning a QR code. This site is a pretty good platform to download free games but has certain flaws. It does not allow a multiplayer gaming experience, and no customer services are provided.
3 Android Apps
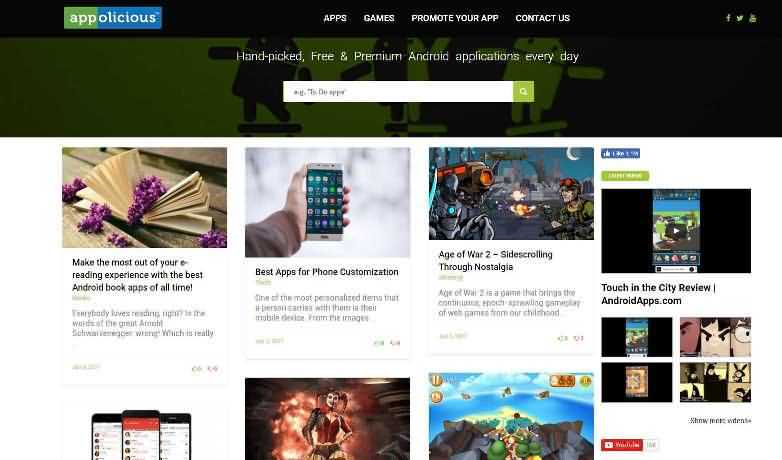
It is another platform to download android apps for free. This site is pretty good since it updates games that developers handpick almost daily. You can also promote your app using the ‘promote your app’ feature. The site has a lot of updates and takes an unreasonable amount of time to install and update the software. Furthermore, you can say that they do not have a customer service function because nobody ever responds to the customer’s queries.
4 1 Mobile
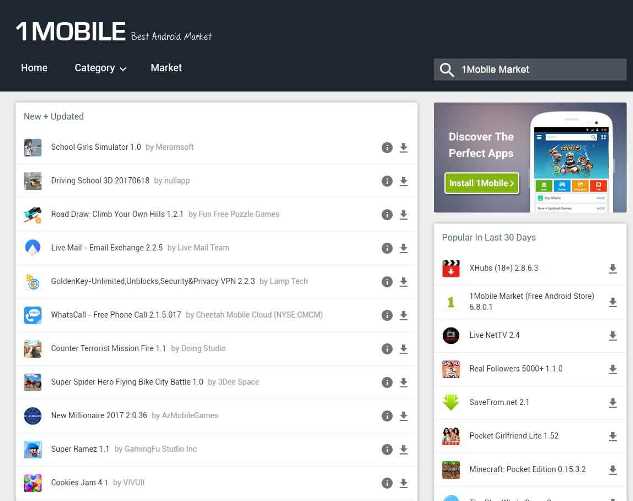
One mobile is a free android store. It provides its users the easiest way to locate, download and manage free apps. 1 Mobile has over eighty (80) million apps. One mobile has just been recently updated, has a brand new interface design, and operates much smoother. The content is more prosperous, smoother, and a thousand times better than before the latest update. All the apps and games are 100% free forever without hidden charges. It supports various languages like English, Korean, Chinese, French, Spanish, Japanese, and Portugal.
5 Approx

It provides the best free apps not only for android but OS as well. You can download it on your phone by scanning a QR code. This software has been functioning for the past six years and is free from viruses or malware.
To furnish your gameplay videos, Filmora also provides some cool effects, transitions, and elements, such as camera shake chaos effects, distortion effects, 3D change, speed blur transitions, and more. Moreover, you can always find some specially designed gaming effects in the Filmstock effects store.
Ollie Mattison
Ollie Mattison is a writer and a lover of all things video.
Follow @Ollie Mattison
Ollie Mattison
Mar 27, 2024• Proven solutions
We all know and firmly believe that games are an integral part of our life. But the world has progressed, and we yearn to achieve real-life experiences through virtual reality instead of experiencing the actual thing. Online games are not only mentally stimulating, but they are also very addictive. Not everyone wants to pay to play games for a couple of hours, so here is a list of top free game downloading sites. You can download full versions of your favorite games for free.
Recommended Video Recorder & Editor for Gameplay: Filmora
If you want to edit a video recorded from games with more effects and templates, we recommend using Filmora . It is an easy-to-use video editor. It offers various title templates. You can also use it to record game videos. Just download it to have a try. Don’t know how to make a video? Visit the Wondershare Video Community and get some inspiration in video creation.
Part 1: Best Free PC Game Download Sites
1 Acid Play
Platforms: OS X and Windows
Key Features:
- Huge gaming library
The acid play has a gigantic collection of games of various types. The games at acid play have been categorized into action, arcade, board games, RPG, card games, puzzles, driving games, simulation, etc.
- Custom Search
The customized search helps you find the exact game you are looking for. It saves time since you cannot browse through thousands of games.
- Ratings
If you are new to this site or looking for a new game to play, you can choose only without trying every game to decide the best one. Just check the ratings provided by other players, and it will solve your problem. You can also rate a game according to your liking.
Pros:
- The games are easily downloadable and free.
- There is a large variety of games available to play.
Cons:
- The site is not updated, and no new games are introduced.
2 Origin Games
Platforms: OS X and Windows
Origin games are another best-known digital distribution platform for a free online gaming experience. It contains a fairly large library of premium games, but origin games provide links for free downloads for a limited time.
Key Features:
- Social Features
Origin provides its users with many social features like profile management, networking with friends through chatting, and video streaming via TwitchTV. You can also share your game library and community integration through social media and networking sites like Facebook, Xbox Live, PlayStation Network, and Nintendo Network.
- Variety in games
It provides various games, from PC games to Fifa and even classic games like Plant Vs. Zombies are also available.
- On-the-house games
The on-the-house features allow the customers to download a free trial of a premium game.
Pros:
- It provides great game streaming features.
- is developed by a renowned and successful company so that it can be trusted.
- The ‘on-the-house specials’ are appreciated by many gamers, allowing them to play a paid game for free now and then.
Cons:
- It has a lot of updates and takes an unreasonable amount of time to install and update the software.
- Customers have complained that they provide expired discount codes.
- Customer service needs to be improved as it is not very responsive.
3 AllGamesAtoZ
Platforms: OS X and Windows
If you want the best full version of a game for free, then AllGamesAtoZ is where you should go.
Key Features:
- The website is full of addictive games from different genres like action, arcade, shooting, role-playing, adventure, racing, simulation, etc.
- Multiple links for downloading a single game are available.
- A customized search bar is available so that you can locate the exact game you are looking for without having to browse through thousands of games.
- The games on AllGamesAtoZ are available on Windows, Linux, and Mac.
- A forum for game reviews is provided, so it is easier to decide which game you want to download without trying them all.
Pros:
- The gaming library is enormous.
- The game reviews make it easier to make a decision and save time.
- The website does not transfer viruses and is entirely safe from scams.
Cons:
- The downloading process is quite long.
- The website is not updated with new games.
4 Mega Games
Platforms: OS X and Windows
It is another highly recommended online gaming site. It not only provides PC games for free but also offers 3D PlayStation games to be downloaded on your PC without any charge.
Key Features:
- Search and download
Mega games allow a search and download option for every game published on their site.
- PlayStation games
It has provided its customers with not only PC games but also 3D PlayStation games that can be downloaded for free.
- Cheat codes
Apart from all the standard gaming features, mega games also provide free cheat codes for the games.
Pros:
- The games are easily downloaded.
- The games have variety.
Cons:
- The website stops working after a while, and the download gets interrupted
5 Caiman.us
Platforms: OS X and Windows
It is another digital distribution platform for free online gaming. After the death of the site’s developer, the site has gone offline.
Key Features:
- It has a vast collection of games and over twenty free games categories.
- 2D and 3D gaming experiences are also provided.
- A customized search is available to make it easier for players to find the game they are looking for.
Pros:
- There is a vast collection of free games to download and play.
Cons:
- The site is not well organized and confusing.
- The search bar is at the very bottom of the page, so a person might find it hard to locate.
- Since the site has gone offline, the games are not updated, so there are no new games.
Part 2: Best Android Game Download Sites to Download Free Android Games
Android is growing very fast; now, almost everyone uses it and prefers it over any other software. Here are the best websites from where you can download free android apps:
1 Google Play
Google Play is the most common website to download free android apps. It is free, it is fast, and it is efficient. You can not only use this from your android mobile but also operate it and download apps using your laptop.
Key Features:
- The apps are easily downloaded, depending upon your internet connection.
- The purchase methods are through credit cards, and the procedure is straightforward.
- The platform allows everyone and anyone to sell their games.
- Sign up through your Google account is necessary to access these features.
Pros:
- It is easily accessible.
- It is pre-installed on all android supported devices.
- It contains a massive collection of unique apps, from books to music, workout, and games of various types.
Cons:
- Since everyone and anyone can access it without paying any registration fee, it is exposed to scams and harassment.
- A few games do not function and keep crashing.
2 Android Games Room
It contains thousands of free gaming apps in different categories like action, arcade, adventure, simulation, song games, and puzzle games. The download links are readily available; you can even access this site from your mobile by scanning a QR code. This site is a pretty good platform to download free games but has certain flaws. It does not allow a multiplayer gaming experience, and no customer services are provided.
3 Android Apps
It is another platform to download android apps for free. This site is pretty good since it updates games that developers handpick almost daily. You can also promote your app using the ‘promote your app’ feature. The site has a lot of updates and takes an unreasonable amount of time to install and update the software. Furthermore, you can say that they do not have a customer service function because nobody ever responds to the customer’s queries.
4 1 Mobile
One mobile is a free android store. It provides its users the easiest way to locate, download and manage free apps. 1 Mobile has over eighty (80) million apps. One mobile has just been recently updated, has a brand new interface design, and operates much smoother. The content is more prosperous, smoother, and a thousand times better than before the latest update. All the apps and games are 100% free forever without hidden charges. It supports various languages like English, Korean, Chinese, French, Spanish, Japanese, and Portugal.
5 Approx
It provides the best free apps not only for android but OS as well. You can download it on your phone by scanning a QR code. This software has been functioning for the past six years and is free from viruses or malware.
To furnish your gameplay videos, Filmora also provides some cool effects, transitions, and elements, such as camera shake chaos effects, distortion effects, 3D change, speed blur transitions, and more. Moreover, you can always find some specially designed gaming effects in the Filmstock effects store.
Ollie Mattison
Ollie Mattison is a writer and a lover of all things video.
Follow @Ollie Mattison
Fixing the Shake: Essential Techniques for Smoother Videos in AE
Stabilize Shaky Videos After Recording Easily
Wondershare Filmora is one of the most popular video editing software among YouTubers , which provides the video stabilization tool to remove shake from videos within one-click. Download and have a try now.
Video content is becoming increasingly popular; with the proliferation of online content, practically every product now needs its mini-documentary or video clip. Experienced filmmakers and VFX artists used to be the only ones who could get smooth footage. Those days, however, are over.
Adobe After Effects is an excellent tool for smoothing out video footage, in addition to being a great blending and motion animation software; although it’s usually preferable to maintain your film as seamless as possible on location, it’s not the end of the world if you take a seat to edit your video and decide it’s too shaky. In truth, there are several options available to you. In After Effects, there are three options for stabilizing footage. What are they – and how to use After Effects to stabilize footage? Let’s find out!
In this article
01 Stabilize Video with Built-in Warp Stabilizer in AE
02 Stabilize Shaky Video with Track Motion Feature in AE
03 Using Stabilization Plugins for Smoother Video in AE
Part 1: Stabilize Video with Built-in Warp Stabilizer in AE
The Warp Stabilizer effect is a new technique to cope with unsteady video. In this part, I will show you how to apply Warp Stabilizer to a layer, adjust the effect’s essential parameters, and demonstrate how they work briefly.
Step 1: The Warp Stabilizer is the most excellent built-in choice for After Effects. This may be found under the Distort tools section of the Effects & Presets panel. You may also go to the effects tab and look for “Warp“ in the search box.

Step 2: When you’ve identified Warp Stabilizer, you’ll have to add it to the layer you want to stabilize. You may accomplish this in one of three different ways. You may either drag and drop the filter into the chosen layer in the composing window, place it on the desired layer in the timeline, or double-tap on the effect while selecting your choice footage layer.

Step 3: Once you apply the warp stabilizer, it will start immediately. So now, all you have to do is lay back and let the stabilizer do its job.
(Note: The procedure should take no more than a few minutes, and a blue bar will appear across your composition window, indicating that the warp stabilizer is evaluating the film. The composition panel would then display an orange bar, indicating that the effect is applied).
Step 4: After stabilization, use the spacebar to begin a RAM peek. Choose the layer you added to and click to display the drop-down menu or go to the Effects Control panel whenever you need to tweak the stabilizing effect.
Part 2: Stabilize Shaky Video with Track Motion Feature in AE
Using Stabilize Motion feature to stabilize video is an old-school heritage function from the era of the Creative Suite, it will still be there in After Effects presently and performs admirably.
Step 1: The tracker panel is most likely open by default in your edition of After Effects, but if it isn’t, go to Window in the top menu to open it. Once you’ve arrived here, scroll to the bottom until you locate Tracker and double-check that it has a checkbox beside it.
![]()
Step 2: Select Stabilize Motion from the drop-down menu whenever the tracker panel is open. You’ll see that a tracker box appears in your Layer Panel once you’ve done this.
(Note: You’ll need to identify a proper location in your film for the tracker to operate at this stage. We’re monitoring a vehicle using a camera operator’s drone in the instance below).
![]()
Step 3: Let’s press the Play button on the tracker panel once we’ve set up the tracker box. The tracker box should adhere to the location or item you chose when you do this.
(Note: When your tracking points start to go astray, use the Pause button, personally modify the tracking point, and then push play to resume the journey).

Step 4: When the tracker is done and satisfied with the results, click Edit target to verify that the tracking data is transferred to the correct layer. Then proceed to the bottom of the page and click the Apply option.
(Note A dialogue window with choices for applying them. Usually, you’ll want to choose X and Y here).

Hit the spacebar to evaluate how well the stabilize motion tracker performed now when you’re back in the composition window. When you’re not pleased with the outcomes, you might have to go back to try again. Although this approach is best used for photos with a clear point of focus that doesn’t go out of frame, it could still be helpful in some situations.
Part 3: Using Stabilization Plugins for Smoother Video in AE
As a graphic and motion designer, animator, or 3D artist, After Effects plugins may completely change the way you operate. Since it can handle so much right out of the box, Adobe After Effects CC is already a go-to motion graphic and compositing program for many artists.
However, as with any good program, third-party plugins could only help you take your work to the next level by adding new features or streamlining your process.
It should be unsurprising that After Effects has many plugins for a program that is over 30 years old. Here are the best stabilization plugins for smoother video in AE:
1. Orb
Orb is focused on generating realistic planets and includes a range of unique features to make planetary creation easy. It utilizes a similar 3D engine to Video Copilot’s great Element 3D plugin, and it employs a similar 3D engine to Video Copilot’s outstanding Element 3D plugin.
You would believe that making planets in 3D is simple —create a circle, add textures, and you’re done! Getting a world to ‘look’ properly, on the other hand, might be more complicated than it appears.
For example, how can the line between night and day be altered in a model of a populated planet such that cities may be visible at night but not during the day?
Although Orb doesn’t work for every planetary picture, this would function for 90% of them and is a helpful previs tool. This is particularly true when used in conjunction with other After Effects plugins or paired with a 3D lens from a 3D program, which may be brought into After Effects with background plates for things like spacecraft.
2. Depth of Field Generator PRO (DOF PRO)
Richard Rosenman’s renowned Photoshop depth of field generator plugin, DOF PRO (Depth of Field Generator PRO), is now downloadable for After Effects. DOF PRO has become the industry’s professional option for an unprecedented and complex depth of field effects rapidly and effectively as a post-process.
This is thanks to almost a decade of discovery and application since the first launch in 2005. DOF PRO’s cutting-edge characteristics offer new and advanced technologies not found anywhere else, resulting in one of the industry’s most potent and sophisticated depth of field processors.
Capability for chromatic and achromatic aberration, focal plane bokeh distinction, astigmatism and vignetting effects, bespoke aperture maps, and noise recovery are among the advanced features.
There will also be compatibility with the alpha channel and transparency, 32-bit floating-point color, correct aperture displays, and an iris array display. A feature comparison between the plugin and After Effects’ Camera Lens Blur effect can be found here.
3. ReelSteady
ReelSteady for After Effects is a recent addition to the stabilization marketplace. ReelSteady is similar to After Effects’ warp stabilizer plugin. However, the stabilization in ReelSteady is far superior.
ReelSteady also has several other features that make it ideal for creating next-level tunes. Users may design filters to block off specific sections of your frame. This is useful for removing a subject that travels around the frame a lot.
In terms of performance, the After Effects plugin is pretty similar to the warp stabilizer but with a few more features. To begin with, ReelSteady includes a built-in rolling shutter repair tool that operates in tandem with its built-in stabilizer.
The ReelSteady effect is a two-pass effect. For instance, after the effect has been executed for the first time, you will likely wish to level out certain places. You’ll successfully isolate specific parts in the effect to “iron out” sections of the footage.
You would like to record your film at a more excellent resolution than your expected outcome to get the most out of ReelSteady. If you wish to output your video in 4K, you might capture it in 4.6K or 5K. You’ll have some leeway for ReelSteady to work its magic.
ReelSteady’s sole flaw is its high price ($399). ReelSteady is not available in After Effects, unlike some of the other choices on this list. ReelSteady, on the other hand, is the way to go if you would like the smoothest footage imaginable.
Conclusion
Shaky video footage would be the last thing any video creator wants unless it’s done intentionally for artistic or creative reasons. As a result, they employ methods and equipment to keep the camera safe from any undesired movement.
However, occasionally those tools aren’t available, and the outcome is questionable. That is why we decided to compile this article to add to the knowledge of our readers how they can use After Effects to stabilize videos to enhance their video content!
Video content is becoming increasingly popular; with the proliferation of online content, practically every product now needs its mini-documentary or video clip. Experienced filmmakers and VFX artists used to be the only ones who could get smooth footage. Those days, however, are over.
Adobe After Effects is an excellent tool for smoothing out video footage, in addition to being a great blending and motion animation software; although it’s usually preferable to maintain your film as seamless as possible on location, it’s not the end of the world if you take a seat to edit your video and decide it’s too shaky. In truth, there are several options available to you. In After Effects, there are three options for stabilizing footage. What are they – and how to use After Effects to stabilize footage? Let’s find out!
In this article
01 Stabilize Video with Built-in Warp Stabilizer in AE
02 Stabilize Shaky Video with Track Motion Feature in AE
03 Using Stabilization Plugins for Smoother Video in AE
Part 1: Stabilize Video with Built-in Warp Stabilizer in AE
The Warp Stabilizer effect is a new technique to cope with unsteady video. In this part, I will show you how to apply Warp Stabilizer to a layer, adjust the effect’s essential parameters, and demonstrate how they work briefly.
Step 1: The Warp Stabilizer is the most excellent built-in choice for After Effects. This may be found under the Distort tools section of the Effects & Presets panel. You may also go to the effects tab and look for “Warp“ in the search box.
Step 2: When you’ve identified Warp Stabilizer, you’ll have to add it to the layer you want to stabilize. You may accomplish this in one of three different ways. You may either drag and drop the filter into the chosen layer in the composing window, place it on the desired layer in the timeline, or double-tap on the effect while selecting your choice footage layer.
Step 3: Once you apply the warp stabilizer, it will start immediately. So now, all you have to do is lay back and let the stabilizer do its job.
(Note: The procedure should take no more than a few minutes, and a blue bar will appear across your composition window, indicating that the warp stabilizer is evaluating the film. The composition panel would then display an orange bar, indicating that the effect is applied).
Step 4: After stabilization, use the spacebar to begin a RAM peek. Choose the layer you added to and click to display the drop-down menu or go to the Effects Control panel whenever you need to tweak the stabilizing effect.
Part 2: Stabilize Shaky Video with Track Motion Feature in AE
Using Stabilize Motion feature to stabilize video is an old-school heritage function from the era of the Creative Suite, it will still be there in After Effects presently and performs admirably.
Step 1: The tracker panel is most likely open by default in your edition of After Effects, but if it isn’t, go to Window in the top menu to open it. Once you’ve arrived here, scroll to the bottom until you locate Tracker and double-check that it has a checkbox beside it.
![]()
Step 2: Select Stabilize Motion from the drop-down menu whenever the tracker panel is open. You’ll see that a tracker box appears in your Layer Panel once you’ve done this.
(Note: You’ll need to identify a proper location in your film for the tracker to operate at this stage. We’re monitoring a vehicle using a camera operator’s drone in the instance below).
![]()
Step 3: Let’s press the Play button on the tracker panel once we’ve set up the tracker box. The tracker box should adhere to the location or item you chose when you do this.
(Note: When your tracking points start to go astray, use the Pause button, personally modify the tracking point, and then push play to resume the journey).
Step 4: When the tracker is done and satisfied with the results, click Edit target to verify that the tracking data is transferred to the correct layer. Then proceed to the bottom of the page and click the Apply option.
(Note A dialogue window with choices for applying them. Usually, you’ll want to choose X and Y here).
Hit the spacebar to evaluate how well the stabilize motion tracker performed now when you’re back in the composition window. When you’re not pleased with the outcomes, you might have to go back to try again. Although this approach is best used for photos with a clear point of focus that doesn’t go out of frame, it could still be helpful in some situations.
Part 3: Using Stabilization Plugins for Smoother Video in AE
As a graphic and motion designer, animator, or 3D artist, After Effects plugins may completely change the way you operate. Since it can handle so much right out of the box, Adobe After Effects CC is already a go-to motion graphic and compositing program for many artists.
However, as with any good program, third-party plugins could only help you take your work to the next level by adding new features or streamlining your process.
It should be unsurprising that After Effects has many plugins for a program that is over 30 years old. Here are the best stabilization plugins for smoother video in AE:
1. Orb
Orb is focused on generating realistic planets and includes a range of unique features to make planetary creation easy. It utilizes a similar 3D engine to Video Copilot’s great Element 3D plugin, and it employs a similar 3D engine to Video Copilot’s outstanding Element 3D plugin.
You would believe that making planets in 3D is simple —create a circle, add textures, and you’re done! Getting a world to ‘look’ properly, on the other hand, might be more complicated than it appears.
For example, how can the line between night and day be altered in a model of a populated planet such that cities may be visible at night but not during the day?
Although Orb doesn’t work for every planetary picture, this would function for 90% of them and is a helpful previs tool. This is particularly true when used in conjunction with other After Effects plugins or paired with a 3D lens from a 3D program, which may be brought into After Effects with background plates for things like spacecraft.
2. Depth of Field Generator PRO (DOF PRO)
Richard Rosenman’s renowned Photoshop depth of field generator plugin, DOF PRO (Depth of Field Generator PRO), is now downloadable for After Effects. DOF PRO has become the industry’s professional option for an unprecedented and complex depth of field effects rapidly and effectively as a post-process.
This is thanks to almost a decade of discovery and application since the first launch in 2005. DOF PRO’s cutting-edge characteristics offer new and advanced technologies not found anywhere else, resulting in one of the industry’s most potent and sophisticated depth of field processors.
Capability for chromatic and achromatic aberration, focal plane bokeh distinction, astigmatism and vignetting effects, bespoke aperture maps, and noise recovery are among the advanced features.
There will also be compatibility with the alpha channel and transparency, 32-bit floating-point color, correct aperture displays, and an iris array display. A feature comparison between the plugin and After Effects’ Camera Lens Blur effect can be found here.
3. ReelSteady
ReelSteady for After Effects is a recent addition to the stabilization marketplace. ReelSteady is similar to After Effects’ warp stabilizer plugin. However, the stabilization in ReelSteady is far superior.
ReelSteady also has several other features that make it ideal for creating next-level tunes. Users may design filters to block off specific sections of your frame. This is useful for removing a subject that travels around the frame a lot.
In terms of performance, the After Effects plugin is pretty similar to the warp stabilizer but with a few more features. To begin with, ReelSteady includes a built-in rolling shutter repair tool that operates in tandem with its built-in stabilizer.
The ReelSteady effect is a two-pass effect. For instance, after the effect has been executed for the first time, you will likely wish to level out certain places. You’ll successfully isolate specific parts in the effect to “iron out” sections of the footage.
You would like to record your film at a more excellent resolution than your expected outcome to get the most out of ReelSteady. If you wish to output your video in 4K, you might capture it in 4.6K or 5K. You’ll have some leeway for ReelSteady to work its magic.
ReelSteady’s sole flaw is its high price ($399). ReelSteady is not available in After Effects, unlike some of the other choices on this list. ReelSteady, on the other hand, is the way to go if you would like the smoothest footage imaginable.
Conclusion
Shaky video footage would be the last thing any video creator wants unless it’s done intentionally for artistic or creative reasons. As a result, they employ methods and equipment to keep the camera safe from any undesired movement.
However, occasionally those tools aren’t available, and the outcome is questionable. That is why we decided to compile this article to add to the knowledge of our readers how they can use After Effects to stabilize videos to enhance their video content!
Minitool Movie Maker Review, Guideline and Alternatives
We all spend so much time on YouTube, watching our favorite YouTubers’ videos. There are two reasons why we get attracted to any video. One attraction factor is the content. Whereas the other attractive factor to any video is the editing.
The internet is full of great videos, and the market is flooded with amazing editors. This is all because of the competition and the editing skills everyone has. If you are not confident with your editing, then this article might be a miracle for you. MiniTool Movie Maker will be discussed in detail. This article will be a complete guide on MiniTool MovieMaker; along with that, we will also share its alternatives.
In this article
01 What Is Minitool Movie Maker?
02 How to Use Minitool Movie Maker [Step by Step]
03 4 Best Alternatives for Minitool Movie Maker
Part 1. What Is MiniTool Movie Maker?
MiniTool Movie Maker is a very powerful tool used to edit videos. With MiniTool movie maker, you can create unlimited videos. The tool is free. Using MiniTool, you can edit stunning, eye-catching videos that everyone will love to watch. Mini Tool MovieMaker is the secret behind every mind-blowing video that you love to watch.
The best thing about Mini movie maker is that it has a very easy-to-use interface. Even beginners can easily create videos on MiniTool. You don’t need any video designing experience to create a video on this movie maker. The procedure to edit videos is also very basic. You just have to import the media to MiniTool MovieMaker, and then the cool editing elements will do a magical makeover to your video.
MiniTool MovieMaker is a well-known and very famous tool because of its unmatched features. With MiniTool MovieMaker, you can create perfect aesthetic videos that everyone loves to watch. The tool is full of wonders and surprises. If you are impatient to learn about its features, then the wait is over. Let us shed light on its incomparable features.
- MiniTool movie makersupports Windows 8.1 and Windows 10. Whereas from old Windows version, it supports Windows 7.
- With the stunning Mini movie maker, you can do batch processing where you can edit multiple videos and images with just one click.
- The MovieMaker also lets you edit the audio from the original video. Which includes mute, fade in/ fade out, and volume control.
- The tool offers a variety of effects, transitions, text templates, and a lot more. All these elements enhance your video visually.
Part 2. How to Use MiniTool Movie Maker [Step by Step]
Now that the features of MiniTool Moviemaker have been discussed, you all must be very impressed by the tool. It is the secret ingredient that we all fall for because this makes your video stand out. Editing is a very crucial part of movie-making. It is said that editing can either make it or break it. This is why you should always select a powerful tool for editing.
One such tool is being discussed here today. Mini Tool Movie Maker is the editor that falls perfectly in this category where you can edit brilliant movies. If this tool is new for you, then you can take guidance from this article because we are going to share its step-by-step guideline with you.
Step 1: The first step to start using MiniTool movie maker is to launch it on your device. Then, from the main screen, the Project Library window, select ‘New Project.’

Step 2: Now, it’s time to import the media files. For this, click on ‘Import Media Files. After that, you have to locate the files that you want to import. Once done, click on ‘Open’; this will load all the media files. You will be able to see the files in the Media Library.

Step 3: After the media has been imported, now comes the fun part where you have to edit the movie. With MiniTool movie maker, you can add various transitions to your clips. By visiting the “Transitions” tab, you can select your favorite transition, and then by right-clicking on it, you can apply it.

Step 4: Like transitions, you can also add multiple effects to your movie and make it visually attractive. The “Effects” tab is full of classic and cool effects. You just have to explore the effects and then drag and drop the best effect on the target clip.

Step 5: With MiniTool Movie Maker, you can also add text to your movie. The wonderful tool has several title templates that could be used to add text to your videos. All these templates are under the “Text” section. You can completely customize the text.

Step 6: Along with these amazing services, Mini Tool Movie Maker has a lot to offer. You can add “Motion” effects to your movie clips. With this tool, you can trim and even split the video. Even editing audio of the original video and reversing a video are offered by this tool.

Step 7: Lastly, after all the fancy edits, you can export the movie to your device. For this, click on the Export option from the toolbar. You can select a file format and hit the ‘Export’ button to get the movie.

Part 3. 4 Best Alternatives for Minitool Movie Maker
This article is a complete guide on Mini Tool moviemaker. Everything you need to know about this crazy powerful tool is in this article. Not just this tool, but we also promised to talk about its alternatives. In this section, we will discuss the 4 best alternatives for MiniTool moviemaker.
1. Wondershare Filmora
The very first and best alternative for mini-movie makers is Wondershare Filmora. This movie editing software rules over the editing world because of its unique and impressive features. You can do professional editing with Filmora.
It lets you do countless edits. Filmora owns a massive asset library that is full of images, audio effects, transitions, filters, elements, and whatnot. Filmora is a one-stop-shop where you can get every possible thing required for editing.

For Win 7 or later (64-bit)
For macOS 10.12 or later
2. OpenShot
The next famous and amazing alternative is OpenShot. With OpenShot, you can trim, merge and even cut your movie clips. Another very interesting and attractive element seen in movies is the split-screen. OpenShot also offers a split-screen. You can export movies without a watermark in 2.5K and also in 4K.

3. VSDC Free Video Editor
Another alternative is VSDC Free Video Editor. The editor is very beneficial to use because of its unmatched features. The fascinating thing about this editor is that it has a built-in DVD Burning Tool. The video editor offers color blending along with various amazing filters. It supports HD and 4K file formats.

4. Windows Movie Maker
The last alternative to be discussed is Windows Movie Maker. The Windows Movie Maker is famous because it has simple controls, a user-friendly interface, and automatic preview. This Movie Maker has transition overlays that enhance the movie visually. The editor also has a title customization tool from which you can add and edit stylish titles.

Final Thoughts
As mentioned earlier that this article is a complete pack of information on moviemakers. After learning about MiniTool Movie Maker from this article, you will surely use it to edit your movies. The MovieMaker promises to deliver quality material. Its unique and matchless features make the tool worthy of trying.
Versatile Video Editor - Wondershare Filmora
An easy yet powerful editor
Numerous effects to choose from
Detailed tutorials provided by the official channel
02 How to Use Minitool Movie Maker [Step by Step]
03 4 Best Alternatives for Minitool Movie Maker
Part 1. What Is MiniTool Movie Maker?
MiniTool Movie Maker is a very powerful tool used to edit videos. With MiniTool movie maker, you can create unlimited videos. The tool is free. Using MiniTool, you can edit stunning, eye-catching videos that everyone will love to watch. Mini Tool MovieMaker is the secret behind every mind-blowing video that you love to watch.
The best thing about Mini movie maker is that it has a very easy-to-use interface. Even beginners can easily create videos on MiniTool. You don’t need any video designing experience to create a video on this movie maker. The procedure to edit videos is also very basic. You just have to import the media to MiniTool MovieMaker, and then the cool editing elements will do a magical makeover to your video.
MiniTool MovieMaker is a well-known and very famous tool because of its unmatched features. With MiniTool MovieMaker, you can create perfect aesthetic videos that everyone loves to watch. The tool is full of wonders and surprises. If you are impatient to learn about its features, then the wait is over. Let us shed light on its incomparable features.
- MiniTool movie makersupports Windows 8.1 and Windows 10. Whereas from old Windows version, it supports Windows 7.
- With the stunning Mini movie maker, you can do batch processing where you can edit multiple videos and images with just one click.
- The MovieMaker also lets you edit the audio from the original video. Which includes mute, fade in/ fade out, and volume control.
- The tool offers a variety of effects, transitions, text templates, and a lot more. All these elements enhance your video visually.
Part 2. How to Use MiniTool Movie Maker [Step by Step]
Now that the features of MiniTool Moviemaker have been discussed, you all must be very impressed by the tool. It is the secret ingredient that we all fall for because this makes your video stand out. Editing is a very crucial part of movie-making. It is said that editing can either make it or break it. This is why you should always select a powerful tool for editing.
One such tool is being discussed here today. Mini Tool Movie Maker is the editor that falls perfectly in this category where you can edit brilliant movies. If this tool is new for you, then you can take guidance from this article because we are going to share its step-by-step guideline with you.
Step 1: The first step to start using MiniTool movie maker is to launch it on your device. Then, from the main screen, the Project Library window, select ‘New Project.’
Step 2: Now, it’s time to import the media files. For this, click on ‘Import Media Files. After that, you have to locate the files that you want to import. Once done, click on ‘Open’; this will load all the media files. You will be able to see the files in the Media Library.
Step 3: After the media has been imported, now comes the fun part where you have to edit the movie. With MiniTool movie maker, you can add various transitions to your clips. By visiting the “Transitions” tab, you can select your favorite transition, and then by right-clicking on it, you can apply it.
Step 4: Like transitions, you can also add multiple effects to your movie and make it visually attractive. The “Effects” tab is full of classic and cool effects. You just have to explore the effects and then drag and drop the best effect on the target clip.
Step 5: With MiniTool Movie Maker, you can also add text to your movie. The wonderful tool has several title templates that could be used to add text to your videos. All these templates are under the “Text” section. You can completely customize the text.
Step 6: Along with these amazing services, Mini Tool Movie Maker has a lot to offer. You can add “Motion” effects to your movie clips. With this tool, you can trim and even split the video. Even editing audio of the original video and reversing a video are offered by this tool.
Step 7: Lastly, after all the fancy edits, you can export the movie to your device. For this, click on the Export option from the toolbar. You can select a file format and hit the ‘Export’ button to get the movie.
Part 3. 4 Best Alternatives for Minitool Movie Maker
This article is a complete guide on Mini Tool moviemaker. Everything you need to know about this crazy powerful tool is in this article. Not just this tool, but we also promised to talk about its alternatives. In this section, we will discuss the 4 best alternatives for MiniTool moviemaker.
1. Wondershare Filmora
The very first and best alternative for mini-movie makers is Wondershare Filmora. This movie editing software rules over the editing world because of its unique and impressive features. You can do professional editing with Filmora.
It lets you do countless edits. Filmora owns a massive asset library that is full of images, audio effects, transitions, filters, elements, and whatnot. Filmora is a one-stop-shop where you can get every possible thing required for editing.
For Win 7 or later (64-bit)
For macOS 10.12 or later
2. OpenShot
The next famous and amazing alternative is OpenShot. With OpenShot, you can trim, merge and even cut your movie clips. Another very interesting and attractive element seen in movies is the split-screen. OpenShot also offers a split-screen. You can export movies without a watermark in 2.5K and also in 4K.
3. VSDC Free Video Editor
Another alternative is VSDC Free Video Editor. The editor is very beneficial to use because of its unmatched features. The fascinating thing about this editor is that it has a built-in DVD Burning Tool. The video editor offers color blending along with various amazing filters. It supports HD and 4K file formats.
4. Windows Movie Maker
The last alternative to be discussed is Windows Movie Maker. The Windows Movie Maker is famous because it has simple controls, a user-friendly interface, and automatic preview. This Movie Maker has transition overlays that enhance the movie visually. The editor also has a title customization tool from which you can add and edit stylish titles.
Final Thoughts
As mentioned earlier that this article is a complete pack of information on moviemakers. After learning about MiniTool Movie Maker from this article, you will surely use it to edit your movies. The MovieMaker promises to deliver quality material. Its unique and matchless features make the tool worthy of trying.
Versatile Video Editor - Wondershare Filmora
An easy yet powerful editor
Numerous effects to choose from
Detailed tutorials provided by the official channel
Also read:
- New Make It Shine Professional Video Editing Tips for Creating Breathtaking Home Videos for 2024
- Top Video Editing Software Replacing Windows Movie Maker for 2024
- New Best of the Best Video Editing Apps for Windows, Mac, iOS, Android, and Linux for 2024
- New 2024 Approved Free and Fabulous The 5 Best Online Video Mergers to Use This Year
- Zero-Cost 4K Video Conversion Top 10 Solutions for 2024
- New Top 10 Gaming Intro Software for Windows and Mac A Mix of Free and Paid Options for 2024
- New PowerDirector Not Your Cup of Tea? Try These Alternatives for Android & iOS
- Top-Rated Free Online Video Rotators for Flipping Videos for 2024
- New 10 Free Android Video Editing Apps Without Watermarks or Subscriptions for 2024
- Updated Top 5 Best Free MOV Video Rotators
- In 2024, The Best Free Video Hosting Platforms for Monetizing Your Content
- 2024 Approved Watermark-Free Video Trimming The Top 7 Free Options
- Updated What You Need to Know Before Converting Your Music to Video for 2024
- Updated No Budget? No Problem! Top Free WMV Video Editors
- Updated 2024 Approved Top Video Editing Apps for Mac
- Updated 2024 Approved The Ultimate Guide to 16X9 Ratio Calculations Top 5 Takeaways
- Updated In 2024, From 4 3 to 16 9 Changing Aspect Ratio in Final Cut Pro Made Easy
- Updated 2024 Approved Picture-in-Picture Made Easy A Final Cut Pro Tutorial
- Updated 2024 Approved 10 Best Video Clipper Tools for Computer
- In 2024, A Complete Guide To OEM Unlocking on Realme 12 Pro+ 5G
- Updated What This Post Can Teach You About Clay Animation for 2024
- In 2024, How Can I Catch the Regional Pokémon without Traveling On Vivo S17 Pro | Dr.fone
- In 2024, How to Unlock Samsung Galaxy A05s Phone without Google Account?
- How To Stream Anything From Vivo Y27 5G to Apple TV | Dr.fone
- How to Mirror PC Screen to Realme Narzo 60 5G Phones? | Dr.fone
- In 2024, 8 Ways to Transfer Photos from Vivo Y27 4G to iPhone Easily | Dr.fone
- In 2024, How to Track a Lost Oppo Find X7 for Free? | Dr.fone
- A Complete Guide To OEM Unlocking on Vivo Y100i Power 5G
- New In 2024, Revolutionize Creative Tasks With Proficiency AI Voice Cloning
- Video File Repair - How to Fix Corrupted video files of Motorola Moto G73 5G on Windows?
- Title: New In 2024, The Ultimate Guide to Trimming Videos Online with Kapwing
- Author: MdadeLe
- Created at : 2024-05-19 08:27:56
- Updated at : 2024-05-20 08:27:56
- Link: https://smart-video-editing.techidaily.com/new-in-2024-the-ultimate-guide-to-trimming-videos-online-with-kapwing/
- License: This work is licensed under CC BY-NC-SA 4.0.
