New FCPX Power User Mastering Freeze Frames, Slow Motion, and Beyond for 2024

FCPX Power User: Mastering Freeze Frames, Slow Motion, and Beyond
Final Cut Pro X: Freeze-Frames and Slow Motion

Benjamin Arango
Mar 27, 2024• Proven solutions
A very simple, yet very effective effect is changing the speed of a video clip. This could be a simple still-frame (also called “Freeze Frame”) or playing a clip in slow or fast motion.
This article shows you how to do this using Final Cut Pro X.
For more tutorials on slow-motion please refer to this article: Top 10 Slow Motion Video Editing Software.
Freeze-Frames and Slow Motion in Final Cut Pro X
1. STILL FRAMES

A still-frame freezes action. For instance, here is a clip of a hummingbird getting ready to land on a bird feeder. I want to create a freeze-frame of the bird in flight. (Um, yeah, I use “freeze-frame” and “still-frame” interchangeably.)
In Final Cut Pro X, put the playhead (or skimmer) on the frame you want to freeze and type Option+F.

This creates a two-second freeze-frame at the position of the playhead.

Adjust the duration of the frame by trimming the edge; just like any other clip. Here, for example, I’m making the duration of the freeze-frame 11 frames shorter.

In case you were wondering, this is what the freeze looks like. It freezes the flight of the hummingbird in the middle of playback, allowing us to add graphics or other text then resume the action as though nothing had happened.
Very cool, except….
Well, the good news is that this is fast and easy. The bad news is that we can’t change the location of the still frame.
So, here’s another way to do this.
Put the playhead (or skimmer, but I prefer the playhead) on the frame you want to freeze, select the clip, then type Shift+F.

This locates the source clip in the Browser, selects both the Browser and the clip, and matches the position of the In, Out, and playhead.

Now, with the Browser selected, type Option+F. This creates a freeze-frame of the Browser clip and places it at the location of the playhead as a connected clip in the Timeline.
As a connected clip, we can move this new freeze-frame wherever we want. However, be careful in moving the clip, because, unless you mark the original frame with a marker (type “M”), there’s no easy way to match the still frame with the source frame, once the still frame is moved somewhere else.
I use both these techniques in many different projects.
2. HOLD FRAME
A Hold Frame is similar to an in-line still frame, but with more flexibility.

Put the playhead (or skimmer) on the frame you want to hold. Then, Then, using either Modify > Retime or the “Smurf-on-a-headset” Toolbar icon, choose Hold Frame (or type: Shift+H).

This displays the orange Retime editor bar above the clip, with a small red portion indicating the Hold frame.

Change the duration of the Hold frame by dragging the small thumb at the right end of the red bar.

Add a speed ramp transition at the end of the Hold frame by clicking the downward-pointing arrow next to the word “Hold” in the Retime Editor.

To change the actual frame being held, double-click the bar icon to the LEFT of the red Hold section and choose Source Frame (Edit). This allows you to slide the Hold frame selection left or right.
NOTE: Changing the source frame is a feature that I like a LOT!
3. SLOW (or FAST) MOTION

We use slow-motion to show events that are too fast for the unaided eye to see. And fast motion to speed up very slow events. Both of these effects use what’s called a “constant speed change,” where the entire clip changes by the same amount - either faster or slower.
WE create either effect using the same tools, just different values. Here’s how.

Select the clip who’s speed you want to change. Then, using either Modify > Retime or the “Smurf” Toolbar icon, select Slow (or Fast).
Choose one of the available speeds; in this case, 50%. (Yes, you can change this to any value you want, I’ll show you how in a minute.)

Three things happen at once:
- The duration of the clip changes
- The orange Retiming bar appears over the top of the clip
- The speed of the clip changes

To reset the speed back to normal (100%), click the downward-pointing arrow in the Retiming bar and choose Normal (100%).
There are two ways to change the speed of a clip.

The easy way is to grab the small handle at the end of the clip and drag left or right. The speed will change as you drag it.
Or, for more precision, click the downward-pointing arrow in the Retiming bar and choose Custom.

This opens a new dialog allowing a number of changes:
- Reverse. Plays the clip in reverse.
- Rate. Select a specific speed change as a percentage of normal speed for a clip. Less than 100% is slow-motion. More than 100% is fast-motion.
- Duration. Select a specific duration for a clip and FCP X will calculate how fast or slow it needs to go.
- Ripple. When checked, adjusts the duration of a clip based upon the speed. When unchecked, the clip duration remains fixed even when speed changes.
You will get the smoothest speed changes when the percentage you choose divides evenly into 200. For example, 100, 66, 50, 40, 33, 25, 20, 10 and so on.
4. EXTRA CREDIT
There is one more setting to consider when slowing a clip. (This does not apply when creating fast motion.)

Using, again, either Modify > Retime or the “Smurf” menu, select Video Quality.
- Normal. This is the best choice for speeds of 50% or faster.
- Frame Blending. This is the best choice for speeds of about 20% to 50%.
- Optical Flow. This is the best choice for speeds slower than about 20%.
Frame blending puts a short dissolve between frames when running in slow motion to improve the illusion of motion. Optical Flow invents in-between frames to minimize the jerkiness of extremely slow motion.
Frame blending is relatively fast and easy. Optical Flow will look better in most cases, but takes a long time to render.
This is a basic tutorial about Apple Final Cut Pro X, a professional video editing software. However, if video editing is new to you, consider Wondershare Filmora for Mac . This is a powerful but easy-to-use tool for users just starting out. Download the free trial version below.
 Download Mac Version ](https://tools.techidaily.com/wondershare/filmora/download/ )
SUMMARY
Whether you want your clips to speed up, slow down or just plain stop, Final Cut Pro X makes the entire process easy.

Benjamin Arango
Benjamin Arango is a writer and a lover of all things video.
Follow @Benjamin Arango
Benjamin Arango
Mar 27, 2024• Proven solutions
A very simple, yet very effective effect is changing the speed of a video clip. This could be a simple still-frame (also called “Freeze Frame”) or playing a clip in slow or fast motion.
This article shows you how to do this using Final Cut Pro X.
For more tutorials on slow-motion please refer to this article: Top 10 Slow Motion Video Editing Software.
Freeze-Frames and Slow Motion in Final Cut Pro X
1. STILL FRAMES

A still-frame freezes action. For instance, here is a clip of a hummingbird getting ready to land on a bird feeder. I want to create a freeze-frame of the bird in flight. (Um, yeah, I use “freeze-frame” and “still-frame” interchangeably.)
In Final Cut Pro X, put the playhead (or skimmer) on the frame you want to freeze and type Option+F.

This creates a two-second freeze-frame at the position of the playhead.

Adjust the duration of the frame by trimming the edge; just like any other clip. Here, for example, I’m making the duration of the freeze-frame 11 frames shorter.

In case you were wondering, this is what the freeze looks like. It freezes the flight of the hummingbird in the middle of playback, allowing us to add graphics or other text then resume the action as though nothing had happened.
Very cool, except….
Well, the good news is that this is fast and easy. The bad news is that we can’t change the location of the still frame.
So, here’s another way to do this.
Put the playhead (or skimmer, but I prefer the playhead) on the frame you want to freeze, select the clip, then type Shift+F.

This locates the source clip in the Browser, selects both the Browser and the clip, and matches the position of the In, Out, and playhead.

Now, with the Browser selected, type Option+F. This creates a freeze-frame of the Browser clip and places it at the location of the playhead as a connected clip in the Timeline.
As a connected clip, we can move this new freeze-frame wherever we want. However, be careful in moving the clip, because, unless you mark the original frame with a marker (type “M”), there’s no easy way to match the still frame with the source frame, once the still frame is moved somewhere else.
I use both these techniques in many different projects.
2. HOLD FRAME
A Hold Frame is similar to an in-line still frame, but with more flexibility.

Put the playhead (or skimmer) on the frame you want to hold. Then, Then, using either Modify > Retime or the “Smurf-on-a-headset” Toolbar icon, choose Hold Frame (or type: Shift+H).

This displays the orange Retime editor bar above the clip, with a small red portion indicating the Hold frame.

Change the duration of the Hold frame by dragging the small thumb at the right end of the red bar.

Add a speed ramp transition at the end of the Hold frame by clicking the downward-pointing arrow next to the word “Hold” in the Retime Editor.

To change the actual frame being held, double-click the bar icon to the LEFT of the red Hold section and choose Source Frame (Edit). This allows you to slide the Hold frame selection left or right.
NOTE: Changing the source frame is a feature that I like a LOT!
3. SLOW (or FAST) MOTION

We use slow-motion to show events that are too fast for the unaided eye to see. And fast motion to speed up very slow events. Both of these effects use what’s called a “constant speed change,” where the entire clip changes by the same amount - either faster or slower.
WE create either effect using the same tools, just different values. Here’s how.

Select the clip who’s speed you want to change. Then, using either Modify > Retime or the “Smurf” Toolbar icon, select Slow (or Fast).
Choose one of the available speeds; in this case, 50%. (Yes, you can change this to any value you want, I’ll show you how in a minute.)

Three things happen at once:
- The duration of the clip changes
- The orange Retiming bar appears over the top of the clip
- The speed of the clip changes

To reset the speed back to normal (100%), click the downward-pointing arrow in the Retiming bar and choose Normal (100%).
There are two ways to change the speed of a clip.

The easy way is to grab the small handle at the end of the clip and drag left or right. The speed will change as you drag it.
Or, for more precision, click the downward-pointing arrow in the Retiming bar and choose Custom.

This opens a new dialog allowing a number of changes:
- Reverse. Plays the clip in reverse.
- Rate. Select a specific speed change as a percentage of normal speed for a clip. Less than 100% is slow-motion. More than 100% is fast-motion.
- Duration. Select a specific duration for a clip and FCP X will calculate how fast or slow it needs to go.
- Ripple. When checked, adjusts the duration of a clip based upon the speed. When unchecked, the clip duration remains fixed even when speed changes.
You will get the smoothest speed changes when the percentage you choose divides evenly into 200. For example, 100, 66, 50, 40, 33, 25, 20, 10 and so on.
4. EXTRA CREDIT
There is one more setting to consider when slowing a clip. (This does not apply when creating fast motion.)

Using, again, either Modify > Retime or the “Smurf” menu, select Video Quality.
- Normal. This is the best choice for speeds of 50% or faster.
- Frame Blending. This is the best choice for speeds of about 20% to 50%.
- Optical Flow. This is the best choice for speeds slower than about 20%.
Frame blending puts a short dissolve between frames when running in slow motion to improve the illusion of motion. Optical Flow invents in-between frames to minimize the jerkiness of extremely slow motion.
Frame blending is relatively fast and easy. Optical Flow will look better in most cases, but takes a long time to render.
This is a basic tutorial about Apple Final Cut Pro X, a professional video editing software. However, if video editing is new to you, consider Wondershare Filmora for Mac . This is a powerful but easy-to-use tool for users just starting out. Download the free trial version below.
 Download Mac Version ](https://tools.techidaily.com/wondershare/filmora/download/ )
SUMMARY
Whether you want your clips to speed up, slow down or just plain stop, Final Cut Pro X makes the entire process easy.

Benjamin Arango
Benjamin Arango is a writer and a lover of all things video.
Follow @Benjamin Arango
Benjamin Arango
Mar 27, 2024• Proven solutions
A very simple, yet very effective effect is changing the speed of a video clip. This could be a simple still-frame (also called “Freeze Frame”) or playing a clip in slow or fast motion.
This article shows you how to do this using Final Cut Pro X.
For more tutorials on slow-motion please refer to this article: Top 10 Slow Motion Video Editing Software.
Freeze-Frames and Slow Motion in Final Cut Pro X
1. STILL FRAMES

A still-frame freezes action. For instance, here is a clip of a hummingbird getting ready to land on a bird feeder. I want to create a freeze-frame of the bird in flight. (Um, yeah, I use “freeze-frame” and “still-frame” interchangeably.)
In Final Cut Pro X, put the playhead (or skimmer) on the frame you want to freeze and type Option+F.

This creates a two-second freeze-frame at the position of the playhead.

Adjust the duration of the frame by trimming the edge; just like any other clip. Here, for example, I’m making the duration of the freeze-frame 11 frames shorter.

In case you were wondering, this is what the freeze looks like. It freezes the flight of the hummingbird in the middle of playback, allowing us to add graphics or other text then resume the action as though nothing had happened.
Very cool, except….
Well, the good news is that this is fast and easy. The bad news is that we can’t change the location of the still frame.
So, here’s another way to do this.
Put the playhead (or skimmer, but I prefer the playhead) on the frame you want to freeze, select the clip, then type Shift+F.

This locates the source clip in the Browser, selects both the Browser and the clip, and matches the position of the In, Out, and playhead.

Now, with the Browser selected, type Option+F. This creates a freeze-frame of the Browser clip and places it at the location of the playhead as a connected clip in the Timeline.
As a connected clip, we can move this new freeze-frame wherever we want. However, be careful in moving the clip, because, unless you mark the original frame with a marker (type “M”), there’s no easy way to match the still frame with the source frame, once the still frame is moved somewhere else.
I use both these techniques in many different projects.
2. HOLD FRAME
A Hold Frame is similar to an in-line still frame, but with more flexibility.

Put the playhead (or skimmer) on the frame you want to hold. Then, Then, using either Modify > Retime or the “Smurf-on-a-headset” Toolbar icon, choose Hold Frame (or type: Shift+H).

This displays the orange Retime editor bar above the clip, with a small red portion indicating the Hold frame.

Change the duration of the Hold frame by dragging the small thumb at the right end of the red bar.

Add a speed ramp transition at the end of the Hold frame by clicking the downward-pointing arrow next to the word “Hold” in the Retime Editor.

To change the actual frame being held, double-click the bar icon to the LEFT of the red Hold section and choose Source Frame (Edit). This allows you to slide the Hold frame selection left or right.
NOTE: Changing the source frame is a feature that I like a LOT!
3. SLOW (or FAST) MOTION

We use slow-motion to show events that are too fast for the unaided eye to see. And fast motion to speed up very slow events. Both of these effects use what’s called a “constant speed change,” where the entire clip changes by the same amount - either faster or slower.
WE create either effect using the same tools, just different values. Here’s how.

Select the clip who’s speed you want to change. Then, using either Modify > Retime or the “Smurf” Toolbar icon, select Slow (or Fast).
Choose one of the available speeds; in this case, 50%. (Yes, you can change this to any value you want, I’ll show you how in a minute.)

Three things happen at once:
- The duration of the clip changes
- The orange Retiming bar appears over the top of the clip
- The speed of the clip changes

To reset the speed back to normal (100%), click the downward-pointing arrow in the Retiming bar and choose Normal (100%).
There are two ways to change the speed of a clip.

The easy way is to grab the small handle at the end of the clip and drag left or right. The speed will change as you drag it.
Or, for more precision, click the downward-pointing arrow in the Retiming bar and choose Custom.

This opens a new dialog allowing a number of changes:
- Reverse. Plays the clip in reverse.
- Rate. Select a specific speed change as a percentage of normal speed for a clip. Less than 100% is slow-motion. More than 100% is fast-motion.
- Duration. Select a specific duration for a clip and FCP X will calculate how fast or slow it needs to go.
- Ripple. When checked, adjusts the duration of a clip based upon the speed. When unchecked, the clip duration remains fixed even when speed changes.
You will get the smoothest speed changes when the percentage you choose divides evenly into 200. For example, 100, 66, 50, 40, 33, 25, 20, 10 and so on.
4. EXTRA CREDIT
There is one more setting to consider when slowing a clip. (This does not apply when creating fast motion.)

Using, again, either Modify > Retime or the “Smurf” menu, select Video Quality.
- Normal. This is the best choice for speeds of 50% or faster.
- Frame Blending. This is the best choice for speeds of about 20% to 50%.
- Optical Flow. This is the best choice for speeds slower than about 20%.
Frame blending puts a short dissolve between frames when running in slow motion to improve the illusion of motion. Optical Flow invents in-between frames to minimize the jerkiness of extremely slow motion.
Frame blending is relatively fast and easy. Optical Flow will look better in most cases, but takes a long time to render.
This is a basic tutorial about Apple Final Cut Pro X, a professional video editing software. However, if video editing is new to you, consider Wondershare Filmora for Mac . This is a powerful but easy-to-use tool for users just starting out. Download the free trial version below.
 Download Mac Version ](https://tools.techidaily.com/wondershare/filmora/download/ )
SUMMARY
Whether you want your clips to speed up, slow down or just plain stop, Final Cut Pro X makes the entire process easy.

Benjamin Arango
Benjamin Arango is a writer and a lover of all things video.
Follow @Benjamin Arango
Benjamin Arango
Mar 27, 2024• Proven solutions
A very simple, yet very effective effect is changing the speed of a video clip. This could be a simple still-frame (also called “Freeze Frame”) or playing a clip in slow or fast motion.
This article shows you how to do this using Final Cut Pro X.
For more tutorials on slow-motion please refer to this article: Top 10 Slow Motion Video Editing Software.
Freeze-Frames and Slow Motion in Final Cut Pro X
1. STILL FRAMES

A still-frame freezes action. For instance, here is a clip of a hummingbird getting ready to land on a bird feeder. I want to create a freeze-frame of the bird in flight. (Um, yeah, I use “freeze-frame” and “still-frame” interchangeably.)
In Final Cut Pro X, put the playhead (or skimmer) on the frame you want to freeze and type Option+F.

This creates a two-second freeze-frame at the position of the playhead.

Adjust the duration of the frame by trimming the edge; just like any other clip. Here, for example, I’m making the duration of the freeze-frame 11 frames shorter.

In case you were wondering, this is what the freeze looks like. It freezes the flight of the hummingbird in the middle of playback, allowing us to add graphics or other text then resume the action as though nothing had happened.
Very cool, except….
Well, the good news is that this is fast and easy. The bad news is that we can’t change the location of the still frame.
So, here’s another way to do this.
Put the playhead (or skimmer, but I prefer the playhead) on the frame you want to freeze, select the clip, then type Shift+F.

This locates the source clip in the Browser, selects both the Browser and the clip, and matches the position of the In, Out, and playhead.

Now, with the Browser selected, type Option+F. This creates a freeze-frame of the Browser clip and places it at the location of the playhead as a connected clip in the Timeline.
As a connected clip, we can move this new freeze-frame wherever we want. However, be careful in moving the clip, because, unless you mark the original frame with a marker (type “M”), there’s no easy way to match the still frame with the source frame, once the still frame is moved somewhere else.
I use both these techniques in many different projects.
2. HOLD FRAME
A Hold Frame is similar to an in-line still frame, but with more flexibility.

Put the playhead (or skimmer) on the frame you want to hold. Then, Then, using either Modify > Retime or the “Smurf-on-a-headset” Toolbar icon, choose Hold Frame (or type: Shift+H).

This displays the orange Retime editor bar above the clip, with a small red portion indicating the Hold frame.

Change the duration of the Hold frame by dragging the small thumb at the right end of the red bar.

Add a speed ramp transition at the end of the Hold frame by clicking the downward-pointing arrow next to the word “Hold” in the Retime Editor.

To change the actual frame being held, double-click the bar icon to the LEFT of the red Hold section and choose Source Frame (Edit). This allows you to slide the Hold frame selection left or right.
NOTE: Changing the source frame is a feature that I like a LOT!
3. SLOW (or FAST) MOTION

We use slow-motion to show events that are too fast for the unaided eye to see. And fast motion to speed up very slow events. Both of these effects use what’s called a “constant speed change,” where the entire clip changes by the same amount - either faster or slower.
WE create either effect using the same tools, just different values. Here’s how.

Select the clip who’s speed you want to change. Then, using either Modify > Retime or the “Smurf” Toolbar icon, select Slow (or Fast).
Choose one of the available speeds; in this case, 50%. (Yes, you can change this to any value you want, I’ll show you how in a minute.)

Three things happen at once:
- The duration of the clip changes
- The orange Retiming bar appears over the top of the clip
- The speed of the clip changes

To reset the speed back to normal (100%), click the downward-pointing arrow in the Retiming bar and choose Normal (100%).
There are two ways to change the speed of a clip.

The easy way is to grab the small handle at the end of the clip and drag left or right. The speed will change as you drag it.
Or, for more precision, click the downward-pointing arrow in the Retiming bar and choose Custom.

This opens a new dialog allowing a number of changes:
- Reverse. Plays the clip in reverse.
- Rate. Select a specific speed change as a percentage of normal speed for a clip. Less than 100% is slow-motion. More than 100% is fast-motion.
- Duration. Select a specific duration for a clip and FCP X will calculate how fast or slow it needs to go.
- Ripple. When checked, adjusts the duration of a clip based upon the speed. When unchecked, the clip duration remains fixed even when speed changes.
You will get the smoothest speed changes when the percentage you choose divides evenly into 200. For example, 100, 66, 50, 40, 33, 25, 20, 10 and so on.
4. EXTRA CREDIT
There is one more setting to consider when slowing a clip. (This does not apply when creating fast motion.)

Using, again, either Modify > Retime or the “Smurf” menu, select Video Quality.
- Normal. This is the best choice for speeds of 50% or faster.
- Frame Blending. This is the best choice for speeds of about 20% to 50%.
- Optical Flow. This is the best choice for speeds slower than about 20%.
Frame blending puts a short dissolve between frames when running in slow motion to improve the illusion of motion. Optical Flow invents in-between frames to minimize the jerkiness of extremely slow motion.
Frame blending is relatively fast and easy. Optical Flow will look better in most cases, but takes a long time to render.
This is a basic tutorial about Apple Final Cut Pro X, a professional video editing software. However, if video editing is new to you, consider Wondershare Filmora for Mac . This is a powerful but easy-to-use tool for users just starting out. Download the free trial version below.
 Download Mac Version ](https://tools.techidaily.com/wondershare/filmora/download/ )
SUMMARY
Whether you want your clips to speed up, slow down or just plain stop, Final Cut Pro X makes the entire process easy.

Benjamin Arango
Benjamin Arango is a writer and a lover of all things video.
Follow @Benjamin Arango
The Ultimate Time-Lapse Video Editing Software Roundup
Best Time-Lapse Video Editing Software in 2024

Ollie Mattison
Mar 27, 2024• Proven solutions
All types of vistas change as time passes. Consequently, an outdoor scene looks differently throughout different parts of the day, which makes it impossible to capture the full extent of its beauty by snapping a single photo or recording a short video of it.
That is why you must utilize the time-lapse technique to depict the passage of time at a particular shooting location and create a sequence in your video that suggests that a certain amount of time has passed by. So in this article, we will take you through some of the best time-lapse video editing software you can find on the market in 2024.
Best Time-Lapse Video Post-Production Software in 2024
There are two different recording methods you can use to create time-lapse videos. You can either record videos or take photos at a precisely set interval, but regardless of the approach you choose, you must have the right equipment for the job.
This means that you must have a time-lapse tripod that ensures the smooth movement of your camera, an intervalometer, and a camera setup capable of taking pictures or recording videos over an extended period of time.
Most importantly, you must have access to a video editor that enables you to process the footage and control its playback rate. Let’s take a look at the best post-production software products that allow its users to create stunning time-lapses video.
1. Filmora : Best Time-lapse Software for Beginners [Windows & Mac]
Price: Freemium
Compatibility: Windows, macOS
Mac and PC users can create time-lapse videos with Filmora effortlessly, even though the actual steps you will need to take throughout the process depend on the type of footage you’re using to create a time-lapse. If you decide to make a time-lapse out of still images, you must ensure that you have enough footage since the video you’re producing must have 24 or 30 frames per second. That’s why you need 30 or 24 photos for each second of your time-lapse video, and you must arrange all of these images on the editor’s timeline before you begin adjusting their duration.

Select all timeline photos placed in the timeline panel, right-click to access the Duration setting, and then set the input duration of each picture to 0.01 seconds.
Click OK to continue, and you’ll find that the duration of all timelapse photos has changed to a brief second. Click the playback button in the Preview window, and you’ll see the time-lapse video is made already.

If you are working with video files, you should double the playback rate to create the time-lapse effect. The results you will get largely depend on the quality of the footage you’ve recorded. You must do everything in your power to capture the photos or videos properly before you start the video editing process.
You can check the details about two ways of making a time-lapse video in Filmora here.
2. iMovie : Best Free Time-lapse Software for Mac
Price: Free
Compatibility: macOS and iOS
iMovie may not be the most advanced video editing software for Mac computers, but that doesn’t mean that you can’t use iMovie to create time-lapse videos. In fact, all you have to do to make a time-lapse video with this software is to arrange the photos on the editor’s timeline and change their duration to 0.1 seconds from the Clip Information panel.
However, if you do this, your time-lapse video will play only 10 frames per second, so to speed it up , you first have to export the video you’ve created in this manner and then import it back into iMovie.
Afterward, you can select the Custom option from the Speed menu that lets you select the playback speed of a video clip. Making a time-lapse video in iMovie is a slow process that requires a lot of patience, especially if you are working with a large number of photos or video clips.
If you want to edit videos further with iMovie, here is a brief tutorial about How to Use iMovie to Edit Videos .
3. VirtualDub : Free Time-lapse Video Editor for Windows
Price: Free
Compatibility: Windows
This open-source video editor is commonly used for batch-processing of AVI video files and sets of BMP image files. Even though VirtualDub doesn’t offer a lot of video editing tools, its batch-processing capabilities make it a perfect choice for all PC users who want to create time-lapse videos.
Nonetheless, the process of making a time-lapse in VirtualDub is highly technical as you’ll need to make sure that all the images you want to use in the video are the same size. Besides, you’ll have to set up the video’s frame rate , aspect ratio , and compression manually, before you can apply it to all files you imported into the video editor. That’s why you first need to familiarize yourself with VirtualDub and then start using it to make time-lapse videos.
4. GoPro Quik : Best Video Editor for Creating Time-Lapse Photos Shot With GoPro
Price: Free
Compatibility: macOS, Windows
GoPro cameras offer a plethora of ways to capture the footage you can later turn into time-lapse videos. Besides a GoPro camera, you will also need additional equipment like rotating camera mounts, extra batteries, or several memory cards to record the time-lapse footage properly.
GoPro’s Quik video editor features all the tools you’re going to need to organize large quantities of video and photo files and create time-lapse videos. The software also enables you to add panning effects to your time-lapses that simulate the camera movement. However, GoPro Quik is a good choice only for filmmakers and video content creators who record most of their footage with different models of GoPro cameras.
5. Final Cut Pro X : Best Professional Video Editing Software for Time-lapse Video on Mac
Price: $299.99
Compatibility: macOS
Controlling the playback speed of the files you import into a project in FCPX is simple, since you just have to place the photos or videos on the timeline and select them. Afterward, you should head over to the Retime submenu that is located in the Modify drop-down menu and select one of the Custom Speed, Blade Speed or Fast options.
You will have to tweak the particular settings depending on the option you select, but your main goal should be to speed up the footage just enough to suggest the rapid passage of time. Try out different values to find the playback speed that is best suited for the time-lapse video you’re working on.
Learn more details about Making a Time Lapse Video in Final Cut Pro .
6. Adobe Premiere Pro : Best Professional Video Editing Software for Time-lapse Video on Windows
Price: $20.99 per month as a single app
Compatibility: Windows, macOS
The way you capture your photos and organize them is crucial in creating a time-lapse video in Adobe Premiere Pro. You must arrange all the photos numerically, and once you’re ready to import them into the software, you must make sure that the Image Sequence checkbox is selected. Adobe Premiere Pro will automatically generate a video from the photos so you can add a video file to the timeline instead of hundreds of still images. This professional video editing software provides with a broad range of video editing tools you can use to simulate camera movement, perform color correction or control the video’s playback speed. The process of creating a time-lapse video with Adobe Premiere Pro isn’t complicated, but you must be prepared for each step of this process if you want to go through it smoothly.
7. LRTimelapse
Price: Free trial available, subscription plans start at $99.00
Compatibility: macOS, Windows
The time-lapse photos you take with your camera must be edited before you can turn them into a video. LRTimelapse software is designed to reduce the amount of time you have to spend editing the footage. It allows you to process each image in Adobe Lightroom and then import those edits into the project you created in LRTimelapse. Furthermore, this app for PC and Mac computers lets you fade in and fade out time lapses, adjust the white balance throughout the sequence you’re creating, or get rid of the unwanted flickering effect. LRTimelapse allows you to export videos in resolutions up to 8K, making it a perfect choice for all filmmakers and photographers in need of powerful time-lapse post-production software.
Conclusion
Preparation is the most important segment of the time-lapse video production process. The photos or video clips you want to include in the video must be captured perfectly to depict the passage of time seamlessly. Moreover, the video editing software you choose must provide you with all the tools you’re going to need to create a professionally-looking time-lapse video. Each of the time-lapse post-production software products we featured in this article enables you to create a time-lapse video with ease. Which video editing software are you using to create time-lapse videos? Leave a comment and let us know.

Ollie Mattison
Ollie Mattison is a writer and a lover of all things video.
Follow @Ollie Mattison
Ollie Mattison
Mar 27, 2024• Proven solutions
All types of vistas change as time passes. Consequently, an outdoor scene looks differently throughout different parts of the day, which makes it impossible to capture the full extent of its beauty by snapping a single photo or recording a short video of it.
That is why you must utilize the time-lapse technique to depict the passage of time at a particular shooting location and create a sequence in your video that suggests that a certain amount of time has passed by. So in this article, we will take you through some of the best time-lapse video editing software you can find on the market in 2024.
Best Time-Lapse Video Post-Production Software in 2024
There are two different recording methods you can use to create time-lapse videos. You can either record videos or take photos at a precisely set interval, but regardless of the approach you choose, you must have the right equipment for the job.
This means that you must have a time-lapse tripod that ensures the smooth movement of your camera, an intervalometer, and a camera setup capable of taking pictures or recording videos over an extended period of time.
Most importantly, you must have access to a video editor that enables you to process the footage and control its playback rate. Let’s take a look at the best post-production software products that allow its users to create stunning time-lapses video.
1. Filmora : Best Time-lapse Software for Beginners [Windows & Mac]
Price: Freemium
Compatibility: Windows, macOS
Mac and PC users can create time-lapse videos with Filmora effortlessly, even though the actual steps you will need to take throughout the process depend on the type of footage you’re using to create a time-lapse. If you decide to make a time-lapse out of still images, you must ensure that you have enough footage since the video you’re producing must have 24 or 30 frames per second. That’s why you need 30 or 24 photos for each second of your time-lapse video, and you must arrange all of these images on the editor’s timeline before you begin adjusting their duration.

Select all timeline photos placed in the timeline panel, right-click to access the Duration setting, and then set the input duration of each picture to 0.01 seconds.
Click OK to continue, and you’ll find that the duration of all timelapse photos has changed to a brief second. Click the playback button in the Preview window, and you’ll see the time-lapse video is made already.

If you are working with video files, you should double the playback rate to create the time-lapse effect. The results you will get largely depend on the quality of the footage you’ve recorded. You must do everything in your power to capture the photos or videos properly before you start the video editing process.
You can check the details about two ways of making a time-lapse video in Filmora here.
2. iMovie : Best Free Time-lapse Software for Mac
Price: Free
Compatibility: macOS and iOS
iMovie may not be the most advanced video editing software for Mac computers, but that doesn’t mean that you can’t use iMovie to create time-lapse videos. In fact, all you have to do to make a time-lapse video with this software is to arrange the photos on the editor’s timeline and change their duration to 0.1 seconds from the Clip Information panel.
However, if you do this, your time-lapse video will play only 10 frames per second, so to speed it up , you first have to export the video you’ve created in this manner and then import it back into iMovie.
Afterward, you can select the Custom option from the Speed menu that lets you select the playback speed of a video clip. Making a time-lapse video in iMovie is a slow process that requires a lot of patience, especially if you are working with a large number of photos or video clips.
If you want to edit videos further with iMovie, here is a brief tutorial about How to Use iMovie to Edit Videos .
3. VirtualDub : Free Time-lapse Video Editor for Windows
Price: Free
Compatibility: Windows
This open-source video editor is commonly used for batch-processing of AVI video files and sets of BMP image files. Even though VirtualDub doesn’t offer a lot of video editing tools, its batch-processing capabilities make it a perfect choice for all PC users who want to create time-lapse videos.
Nonetheless, the process of making a time-lapse in VirtualDub is highly technical as you’ll need to make sure that all the images you want to use in the video are the same size. Besides, you’ll have to set up the video’s frame rate , aspect ratio , and compression manually, before you can apply it to all files you imported into the video editor. That’s why you first need to familiarize yourself with VirtualDub and then start using it to make time-lapse videos.
4. GoPro Quik : Best Video Editor for Creating Time-Lapse Photos Shot With GoPro
Price: Free
Compatibility: macOS, Windows
GoPro cameras offer a plethora of ways to capture the footage you can later turn into time-lapse videos. Besides a GoPro camera, you will also need additional equipment like rotating camera mounts, extra batteries, or several memory cards to record the time-lapse footage properly.
GoPro’s Quik video editor features all the tools you’re going to need to organize large quantities of video and photo files and create time-lapse videos. The software also enables you to add panning effects to your time-lapses that simulate the camera movement. However, GoPro Quik is a good choice only for filmmakers and video content creators who record most of their footage with different models of GoPro cameras.
5. Final Cut Pro X : Best Professional Video Editing Software for Time-lapse Video on Mac
Price: $299.99
Compatibility: macOS
Controlling the playback speed of the files you import into a project in FCPX is simple, since you just have to place the photos or videos on the timeline and select them. Afterward, you should head over to the Retime submenu that is located in the Modify drop-down menu and select one of the Custom Speed, Blade Speed or Fast options.
You will have to tweak the particular settings depending on the option you select, but your main goal should be to speed up the footage just enough to suggest the rapid passage of time. Try out different values to find the playback speed that is best suited for the time-lapse video you’re working on.
Learn more details about Making a Time Lapse Video in Final Cut Pro .
6. Adobe Premiere Pro : Best Professional Video Editing Software for Time-lapse Video on Windows
Price: $20.99 per month as a single app
Compatibility: Windows, macOS
The way you capture your photos and organize them is crucial in creating a time-lapse video in Adobe Premiere Pro. You must arrange all the photos numerically, and once you’re ready to import them into the software, you must make sure that the Image Sequence checkbox is selected. Adobe Premiere Pro will automatically generate a video from the photos so you can add a video file to the timeline instead of hundreds of still images. This professional video editing software provides with a broad range of video editing tools you can use to simulate camera movement, perform color correction or control the video’s playback speed. The process of creating a time-lapse video with Adobe Premiere Pro isn’t complicated, but you must be prepared for each step of this process if you want to go through it smoothly.
7. LRTimelapse
Price: Free trial available, subscription plans start at $99.00
Compatibility: macOS, Windows
The time-lapse photos you take with your camera must be edited before you can turn them into a video. LRTimelapse software is designed to reduce the amount of time you have to spend editing the footage. It allows you to process each image in Adobe Lightroom and then import those edits into the project you created in LRTimelapse. Furthermore, this app for PC and Mac computers lets you fade in and fade out time lapses, adjust the white balance throughout the sequence you’re creating, or get rid of the unwanted flickering effect. LRTimelapse allows you to export videos in resolutions up to 8K, making it a perfect choice for all filmmakers and photographers in need of powerful time-lapse post-production software.
Conclusion
Preparation is the most important segment of the time-lapse video production process. The photos or video clips you want to include in the video must be captured perfectly to depict the passage of time seamlessly. Moreover, the video editing software you choose must provide you with all the tools you’re going to need to create a professionally-looking time-lapse video. Each of the time-lapse post-production software products we featured in this article enables you to create a time-lapse video with ease. Which video editing software are you using to create time-lapse videos? Leave a comment and let us know.

Ollie Mattison
Ollie Mattison is a writer and a lover of all things video.
Follow @Ollie Mattison
Ollie Mattison
Mar 27, 2024• Proven solutions
All types of vistas change as time passes. Consequently, an outdoor scene looks differently throughout different parts of the day, which makes it impossible to capture the full extent of its beauty by snapping a single photo or recording a short video of it.
That is why you must utilize the time-lapse technique to depict the passage of time at a particular shooting location and create a sequence in your video that suggests that a certain amount of time has passed by. So in this article, we will take you through some of the best time-lapse video editing software you can find on the market in 2024.
Best Time-Lapse Video Post-Production Software in 2024
There are two different recording methods you can use to create time-lapse videos. You can either record videos or take photos at a precisely set interval, but regardless of the approach you choose, you must have the right equipment for the job.
This means that you must have a time-lapse tripod that ensures the smooth movement of your camera, an intervalometer, and a camera setup capable of taking pictures or recording videos over an extended period of time.
Most importantly, you must have access to a video editor that enables you to process the footage and control its playback rate. Let’s take a look at the best post-production software products that allow its users to create stunning time-lapses video.
1. Filmora : Best Time-lapse Software for Beginners [Windows & Mac]
Price: Freemium
Compatibility: Windows, macOS
Mac and PC users can create time-lapse videos with Filmora effortlessly, even though the actual steps you will need to take throughout the process depend on the type of footage you’re using to create a time-lapse. If you decide to make a time-lapse out of still images, you must ensure that you have enough footage since the video you’re producing must have 24 or 30 frames per second. That’s why you need 30 or 24 photos for each second of your time-lapse video, and you must arrange all of these images on the editor’s timeline before you begin adjusting their duration.

Select all timeline photos placed in the timeline panel, right-click to access the Duration setting, and then set the input duration of each picture to 0.01 seconds.
Click OK to continue, and you’ll find that the duration of all timelapse photos has changed to a brief second. Click the playback button in the Preview window, and you’ll see the time-lapse video is made already.

If you are working with video files, you should double the playback rate to create the time-lapse effect. The results you will get largely depend on the quality of the footage you’ve recorded. You must do everything in your power to capture the photos or videos properly before you start the video editing process.
You can check the details about two ways of making a time-lapse video in Filmora here.
2. iMovie : Best Free Time-lapse Software for Mac
Price: Free
Compatibility: macOS and iOS
iMovie may not be the most advanced video editing software for Mac computers, but that doesn’t mean that you can’t use iMovie to create time-lapse videos. In fact, all you have to do to make a time-lapse video with this software is to arrange the photos on the editor’s timeline and change their duration to 0.1 seconds from the Clip Information panel.
However, if you do this, your time-lapse video will play only 10 frames per second, so to speed it up , you first have to export the video you’ve created in this manner and then import it back into iMovie.
Afterward, you can select the Custom option from the Speed menu that lets you select the playback speed of a video clip. Making a time-lapse video in iMovie is a slow process that requires a lot of patience, especially if you are working with a large number of photos or video clips.
If you want to edit videos further with iMovie, here is a brief tutorial about How to Use iMovie to Edit Videos .
3. VirtualDub : Free Time-lapse Video Editor for Windows
Price: Free
Compatibility: Windows
This open-source video editor is commonly used for batch-processing of AVI video files and sets of BMP image files. Even though VirtualDub doesn’t offer a lot of video editing tools, its batch-processing capabilities make it a perfect choice for all PC users who want to create time-lapse videos.
Nonetheless, the process of making a time-lapse in VirtualDub is highly technical as you’ll need to make sure that all the images you want to use in the video are the same size. Besides, you’ll have to set up the video’s frame rate , aspect ratio , and compression manually, before you can apply it to all files you imported into the video editor. That’s why you first need to familiarize yourself with VirtualDub and then start using it to make time-lapse videos.
4. GoPro Quik : Best Video Editor for Creating Time-Lapse Photos Shot With GoPro
Price: Free
Compatibility: macOS, Windows
GoPro cameras offer a plethora of ways to capture the footage you can later turn into time-lapse videos. Besides a GoPro camera, you will also need additional equipment like rotating camera mounts, extra batteries, or several memory cards to record the time-lapse footage properly.
GoPro’s Quik video editor features all the tools you’re going to need to organize large quantities of video and photo files and create time-lapse videos. The software also enables you to add panning effects to your time-lapses that simulate the camera movement. However, GoPro Quik is a good choice only for filmmakers and video content creators who record most of their footage with different models of GoPro cameras.
5. Final Cut Pro X : Best Professional Video Editing Software for Time-lapse Video on Mac
Price: $299.99
Compatibility: macOS
Controlling the playback speed of the files you import into a project in FCPX is simple, since you just have to place the photos or videos on the timeline and select them. Afterward, you should head over to the Retime submenu that is located in the Modify drop-down menu and select one of the Custom Speed, Blade Speed or Fast options.
You will have to tweak the particular settings depending on the option you select, but your main goal should be to speed up the footage just enough to suggest the rapid passage of time. Try out different values to find the playback speed that is best suited for the time-lapse video you’re working on.
Learn more details about Making a Time Lapse Video in Final Cut Pro .
6. Adobe Premiere Pro : Best Professional Video Editing Software for Time-lapse Video on Windows
Price: $20.99 per month as a single app
Compatibility: Windows, macOS
The way you capture your photos and organize them is crucial in creating a time-lapse video in Adobe Premiere Pro. You must arrange all the photos numerically, and once you’re ready to import them into the software, you must make sure that the Image Sequence checkbox is selected. Adobe Premiere Pro will automatically generate a video from the photos so you can add a video file to the timeline instead of hundreds of still images. This professional video editing software provides with a broad range of video editing tools you can use to simulate camera movement, perform color correction or control the video’s playback speed. The process of creating a time-lapse video with Adobe Premiere Pro isn’t complicated, but you must be prepared for each step of this process if you want to go through it smoothly.
7. LRTimelapse
Price: Free trial available, subscription plans start at $99.00
Compatibility: macOS, Windows
The time-lapse photos you take with your camera must be edited before you can turn them into a video. LRTimelapse software is designed to reduce the amount of time you have to spend editing the footage. It allows you to process each image in Adobe Lightroom and then import those edits into the project you created in LRTimelapse. Furthermore, this app for PC and Mac computers lets you fade in and fade out time lapses, adjust the white balance throughout the sequence you’re creating, or get rid of the unwanted flickering effect. LRTimelapse allows you to export videos in resolutions up to 8K, making it a perfect choice for all filmmakers and photographers in need of powerful time-lapse post-production software.
Conclusion
Preparation is the most important segment of the time-lapse video production process. The photos or video clips you want to include in the video must be captured perfectly to depict the passage of time seamlessly. Moreover, the video editing software you choose must provide you with all the tools you’re going to need to create a professionally-looking time-lapse video. Each of the time-lapse post-production software products we featured in this article enables you to create a time-lapse video with ease. Which video editing software are you using to create time-lapse videos? Leave a comment and let us know.

Ollie Mattison
Ollie Mattison is a writer and a lover of all things video.
Follow @Ollie Mattison
Ollie Mattison
Mar 27, 2024• Proven solutions
All types of vistas change as time passes. Consequently, an outdoor scene looks differently throughout different parts of the day, which makes it impossible to capture the full extent of its beauty by snapping a single photo or recording a short video of it.
That is why you must utilize the time-lapse technique to depict the passage of time at a particular shooting location and create a sequence in your video that suggests that a certain amount of time has passed by. So in this article, we will take you through some of the best time-lapse video editing software you can find on the market in 2024.
Best Time-Lapse Video Post-Production Software in 2024
There are two different recording methods you can use to create time-lapse videos. You can either record videos or take photos at a precisely set interval, but regardless of the approach you choose, you must have the right equipment for the job.
This means that you must have a time-lapse tripod that ensures the smooth movement of your camera, an intervalometer, and a camera setup capable of taking pictures or recording videos over an extended period of time.
Most importantly, you must have access to a video editor that enables you to process the footage and control its playback rate. Let’s take a look at the best post-production software products that allow its users to create stunning time-lapses video.
1. Filmora : Best Time-lapse Software for Beginners [Windows & Mac]
Price: Freemium
Compatibility: Windows, macOS
Mac and PC users can create time-lapse videos with Filmora effortlessly, even though the actual steps you will need to take throughout the process depend on the type of footage you’re using to create a time-lapse. If you decide to make a time-lapse out of still images, you must ensure that you have enough footage since the video you’re producing must have 24 or 30 frames per second. That’s why you need 30 or 24 photos for each second of your time-lapse video, and you must arrange all of these images on the editor’s timeline before you begin adjusting their duration.

Select all timeline photos placed in the timeline panel, right-click to access the Duration setting, and then set the input duration of each picture to 0.01 seconds.
Click OK to continue, and you’ll find that the duration of all timelapse photos has changed to a brief second. Click the playback button in the Preview window, and you’ll see the time-lapse video is made already.

If you are working with video files, you should double the playback rate to create the time-lapse effect. The results you will get largely depend on the quality of the footage you’ve recorded. You must do everything in your power to capture the photos or videos properly before you start the video editing process.
You can check the details about two ways of making a time-lapse video in Filmora here.
2. iMovie : Best Free Time-lapse Software for Mac
Price: Free
Compatibility: macOS and iOS
iMovie may not be the most advanced video editing software for Mac computers, but that doesn’t mean that you can’t use iMovie to create time-lapse videos. In fact, all you have to do to make a time-lapse video with this software is to arrange the photos on the editor’s timeline and change their duration to 0.1 seconds from the Clip Information panel.
However, if you do this, your time-lapse video will play only 10 frames per second, so to speed it up , you first have to export the video you’ve created in this manner and then import it back into iMovie.
Afterward, you can select the Custom option from the Speed menu that lets you select the playback speed of a video clip. Making a time-lapse video in iMovie is a slow process that requires a lot of patience, especially if you are working with a large number of photos or video clips.
If you want to edit videos further with iMovie, here is a brief tutorial about How to Use iMovie to Edit Videos .
3. VirtualDub : Free Time-lapse Video Editor for Windows
Price: Free
Compatibility: Windows
This open-source video editor is commonly used for batch-processing of AVI video files and sets of BMP image files. Even though VirtualDub doesn’t offer a lot of video editing tools, its batch-processing capabilities make it a perfect choice for all PC users who want to create time-lapse videos.
Nonetheless, the process of making a time-lapse in VirtualDub is highly technical as you’ll need to make sure that all the images you want to use in the video are the same size. Besides, you’ll have to set up the video’s frame rate , aspect ratio , and compression manually, before you can apply it to all files you imported into the video editor. That’s why you first need to familiarize yourself with VirtualDub and then start using it to make time-lapse videos.
4. GoPro Quik : Best Video Editor for Creating Time-Lapse Photos Shot With GoPro
Price: Free
Compatibility: macOS, Windows
GoPro cameras offer a plethora of ways to capture the footage you can later turn into time-lapse videos. Besides a GoPro camera, you will also need additional equipment like rotating camera mounts, extra batteries, or several memory cards to record the time-lapse footage properly.
GoPro’s Quik video editor features all the tools you’re going to need to organize large quantities of video and photo files and create time-lapse videos. The software also enables you to add panning effects to your time-lapses that simulate the camera movement. However, GoPro Quik is a good choice only for filmmakers and video content creators who record most of their footage with different models of GoPro cameras.
5. Final Cut Pro X : Best Professional Video Editing Software for Time-lapse Video on Mac
Price: $299.99
Compatibility: macOS
Controlling the playback speed of the files you import into a project in FCPX is simple, since you just have to place the photos or videos on the timeline and select them. Afterward, you should head over to the Retime submenu that is located in the Modify drop-down menu and select one of the Custom Speed, Blade Speed or Fast options.
You will have to tweak the particular settings depending on the option you select, but your main goal should be to speed up the footage just enough to suggest the rapid passage of time. Try out different values to find the playback speed that is best suited for the time-lapse video you’re working on.
Learn more details about Making a Time Lapse Video in Final Cut Pro .
6. Adobe Premiere Pro : Best Professional Video Editing Software for Time-lapse Video on Windows
Price: $20.99 per month as a single app
Compatibility: Windows, macOS
The way you capture your photos and organize them is crucial in creating a time-lapse video in Adobe Premiere Pro. You must arrange all the photos numerically, and once you’re ready to import them into the software, you must make sure that the Image Sequence checkbox is selected. Adobe Premiere Pro will automatically generate a video from the photos so you can add a video file to the timeline instead of hundreds of still images. This professional video editing software provides with a broad range of video editing tools you can use to simulate camera movement, perform color correction or control the video’s playback speed. The process of creating a time-lapse video with Adobe Premiere Pro isn’t complicated, but you must be prepared for each step of this process if you want to go through it smoothly.
7. LRTimelapse
Price: Free trial available, subscription plans start at $99.00
Compatibility: macOS, Windows
The time-lapse photos you take with your camera must be edited before you can turn them into a video. LRTimelapse software is designed to reduce the amount of time you have to spend editing the footage. It allows you to process each image in Adobe Lightroom and then import those edits into the project you created in LRTimelapse. Furthermore, this app for PC and Mac computers lets you fade in and fade out time lapses, adjust the white balance throughout the sequence you’re creating, or get rid of the unwanted flickering effect. LRTimelapse allows you to export videos in resolutions up to 8K, making it a perfect choice for all filmmakers and photographers in need of powerful time-lapse post-production software.
Conclusion
Preparation is the most important segment of the time-lapse video production process. The photos or video clips you want to include in the video must be captured perfectly to depict the passage of time seamlessly. Moreover, the video editing software you choose must provide you with all the tools you’re going to need to create a professionally-looking time-lapse video. Each of the time-lapse post-production software products we featured in this article enables you to create a time-lapse video with ease. Which video editing software are you using to create time-lapse videos? Leave a comment and let us know.

Ollie Mattison
Ollie Mattison is a writer and a lover of all things video.
Follow @Ollie Mattison
Unlock Live Photos From Videos: Top Converter Apps and Tips
Best Video to Live Photos Apps

Ollie Mattison
Mar 27, 2024• Proven solutions
Live Photo is a wonderful feature of the iPhone. You can capture a short series of frames to make your pictures look lively. Do you know you can also convert your video to Live Photos?
That’s right! You can turn video into Live Photo very easily using a few apps. Then you can use your converted Live Photos as wallpaper on your iPhones and iPads. Surely, that will make unlocking and browsing your phone more exciting!
Moreover, you can also show the Live Photos to your friends and enjoy quality time. Here are the top ways to turn your videos into Live Photos.
- Part 1: Best Video to Live Photo Apps
- Part 2: Convert Video to Live Photos with TikTok
- Part 3: Convert GIFs to Live Photos with GIPHY
- Part 4: How to Set Up A Live Photo as Your iPhone Wallpaper
Part 1: Best Video to Live Photo Apps
You can use the following video to Live Photo apps to create wallpapers for iPhone-
1. intoLive
intoLive is a simple video to Live Photo wallpaper converter. It’s very user-friendly and comes with a rating of 4.6 stars. The app is a favorite to many users who rely on it to create beautiful Live Photos. The app supports iOS 12.0 or later versions for iPhones and iPads.
The best thing about intoLive is it’s completely free to use! Plus, it is also available in many languages, even Chinese and Italian.
Converting your videos into Live Photos is a cake with intoLive. Just follow the steps below-

- Download the app and launch it from your home screen.
- Now select the video you want to turn into a Live Photo.
- Use the red sliders to choose the part of the video you wish to convert into a Live Photo. Next, set the duration for the same. You can also edit your video if you want, using the features available.
- Now save your video as a Live Photo.
2. VideoToLive
VideoToLive is another free video to Live Photo iPhone converter. The app has a rating of 4.1 stars and is suitable for iOS 11.2 or more current versions. VideoToLive lets you create Live Photos without any the 5-second restriction. You can also share Live Photos with friends and family using the app.
Additionally, VideoToLive lets you make GIFs from videos and Live Photos. You can say it’s a versatile app to have on your iPhone.
Here is how to create your Live Photo-

- The first thing to do is to download and launch VideoToLive.
- Now select the video you desire to configure to Live Photos.
- Select the part of the video for creating your Live Photo. You can choose frames from the videos on the upper part of the screen.
- ap on “Convert” on the upper right part of the interface. Your video is now turned into a Live Photo.
3. Video to Live Photo Wallpapers
This is another convenient video to Live Photos converter . Video to Live Photo Wallpapers is also a free app and has a 4.3-star rating. It can work with iOS versions 10.0 or later. So, you can also use old iPhones and iPads.
Video to Live Photo Wallpapers comes with paid features if you want to upgrade.
Follow the steps to turn your videos into Live Photos-

- Download and launch the app from your home screen of the iPhone. Now choose the video you want to convert.
- Select a part of your video to turn into a Live Photo. You can also choose the primary photo or frame that will feature at the beginning of your Live Photo. The app lets you create any sequence you want.
- Preview your Live Photo using the 3D Touch feature. Save your picture as a Live Photo.
- Next, we will check out some more ways to create Live Photos from videos.
Part 2: How to Convert Video to Live Photos with TikTok?
TikTok is a cool video-sharing platform with countless users. But do you know TikTok is also a handy video to Live Photo app?
You can use TikTok to convert any video into a Live Photo. Let’s see how you can do that-
- Launch the TikTok app on your iPhone. Choose the video you want to convert into a Live Photo.
- Now, tap on the share button, represented by a curved arrow. You will see several options appearing on your screen. Choose “Live Photo” from the 2nd line of options.
- You can find the Live Photo saved in your Photos app.
Part 3: How to Convert GIFs to Live Photos with GIPHY?
GIPHY is a popular platform for GIFs. You can find endless GIFs to share and enjoy on GIPHY. Now you can use the GIPHY app to turn your video into Live Photos.
The feature is really simple but provides a lot of benefits. Many people want to convert GIFs to Live Photos. GIPHY has made it possible for the first time.
Here are the steps you need to follow-
- Download and open the GIPHY app on your iPhone.
- Choose the GIF you want to transform into a Live Photo. Now, press the three white dots below the GIF on the right side.
- You will see three options on the screen. Tap on “Convert to Live Photo.”
- Select if you want your Live Photo to be full-screen or fit-to-screen. GIPHY will now convert and save your GIF as a Live Photo. You can also select it as wallpaper.
Part 4: How to Set Up A Live Photo as Your iPhone Wallpaper?
Congrats on creating your Live Photo. Let’s now set it as your wallpaper.
- Access the “Settings” menu on your iPhone. Scroll down to find “Wallpaper” and tap on it.
- Now, press on “Choose a New Wallpaper.” You will get all your photos as options, including Live Photos.
- Choose “Live Photos” on the screen. Then tap on the Live Photo you want to set as wallpaper.
- Press “Set” to get three options. You can tap to set the Live Photo as “Set Lock Screen,” ‘Set Home Screen,” and “Set Both.” Tap on your preferred option.
For Win 7 or later (64-bit)
 Secure Download
For macOS 10.14 or later
 Secure Download
Click here to get Filmora for PC by email
or Try Filmora App for mobile >>>
download filmora app for ios ](https://app.adjust.com/b0k9hf2%5F4bsu85t ) download filmora app for android ](https://app.adjust.com/b0k9hf2%5F4bsu85t )

Ollie Mattison
Ollie Mattison is a writer and a lover of all things video.
Follow @Ollie Mattison
Ollie Mattison
Mar 27, 2024• Proven solutions
Live Photo is a wonderful feature of the iPhone. You can capture a short series of frames to make your pictures look lively. Do you know you can also convert your video to Live Photos?
That’s right! You can turn video into Live Photo very easily using a few apps. Then you can use your converted Live Photos as wallpaper on your iPhones and iPads. Surely, that will make unlocking and browsing your phone more exciting!
Moreover, you can also show the Live Photos to your friends and enjoy quality time. Here are the top ways to turn your videos into Live Photos.
- Part 1: Best Video to Live Photo Apps
- Part 2: Convert Video to Live Photos with TikTok
- Part 3: Convert GIFs to Live Photos with GIPHY
- Part 4: How to Set Up A Live Photo as Your iPhone Wallpaper
Part 1: Best Video to Live Photo Apps
You can use the following video to Live Photo apps to create wallpapers for iPhone-
1. intoLive
intoLive is a simple video to Live Photo wallpaper converter. It’s very user-friendly and comes with a rating of 4.6 stars. The app is a favorite to many users who rely on it to create beautiful Live Photos. The app supports iOS 12.0 or later versions for iPhones and iPads.
The best thing about intoLive is it’s completely free to use! Plus, it is also available in many languages, even Chinese and Italian.
Converting your videos into Live Photos is a cake with intoLive. Just follow the steps below-

- Download the app and launch it from your home screen.
- Now select the video you want to turn into a Live Photo.
- Use the red sliders to choose the part of the video you wish to convert into a Live Photo. Next, set the duration for the same. You can also edit your video if you want, using the features available.
- Now save your video as a Live Photo.
2. VideoToLive
VideoToLive is another free video to Live Photo iPhone converter. The app has a rating of 4.1 stars and is suitable for iOS 11.2 or more current versions. VideoToLive lets you create Live Photos without any the 5-second restriction. You can also share Live Photos with friends and family using the app.
Additionally, VideoToLive lets you make GIFs from videos and Live Photos. You can say it’s a versatile app to have on your iPhone.
Here is how to create your Live Photo-

- The first thing to do is to download and launch VideoToLive.
- Now select the video you desire to configure to Live Photos.
- Select the part of the video for creating your Live Photo. You can choose frames from the videos on the upper part of the screen.
- ap on “Convert” on the upper right part of the interface. Your video is now turned into a Live Photo.
3. Video to Live Photo Wallpapers
This is another convenient video to Live Photos converter . Video to Live Photo Wallpapers is also a free app and has a 4.3-star rating. It can work with iOS versions 10.0 or later. So, you can also use old iPhones and iPads.
Video to Live Photo Wallpapers comes with paid features if you want to upgrade.
Follow the steps to turn your videos into Live Photos-

- Download and launch the app from your home screen of the iPhone. Now choose the video you want to convert.
- Select a part of your video to turn into a Live Photo. You can also choose the primary photo or frame that will feature at the beginning of your Live Photo. The app lets you create any sequence you want.
- Preview your Live Photo using the 3D Touch feature. Save your picture as a Live Photo.
- Next, we will check out some more ways to create Live Photos from videos.
Part 2: How to Convert Video to Live Photos with TikTok?
TikTok is a cool video-sharing platform with countless users. But do you know TikTok is also a handy video to Live Photo app?
You can use TikTok to convert any video into a Live Photo. Let’s see how you can do that-
- Launch the TikTok app on your iPhone. Choose the video you want to convert into a Live Photo.
- Now, tap on the share button, represented by a curved arrow. You will see several options appearing on your screen. Choose “Live Photo” from the 2nd line of options.
- You can find the Live Photo saved in your Photos app.
Part 3: How to Convert GIFs to Live Photos with GIPHY?
GIPHY is a popular platform for GIFs. You can find endless GIFs to share and enjoy on GIPHY. Now you can use the GIPHY app to turn your video into Live Photos.
The feature is really simple but provides a lot of benefits. Many people want to convert GIFs to Live Photos. GIPHY has made it possible for the first time.
Here are the steps you need to follow-
- Download and open the GIPHY app on your iPhone.
- Choose the GIF you want to transform into a Live Photo. Now, press the three white dots below the GIF on the right side.
- You will see three options on the screen. Tap on “Convert to Live Photo.”
- Select if you want your Live Photo to be full-screen or fit-to-screen. GIPHY will now convert and save your GIF as a Live Photo. You can also select it as wallpaper.
Part 4: How to Set Up A Live Photo as Your iPhone Wallpaper?
Congrats on creating your Live Photo. Let’s now set it as your wallpaper.
- Access the “Settings” menu on your iPhone. Scroll down to find “Wallpaper” and tap on it.
- Now, press on “Choose a New Wallpaper.” You will get all your photos as options, including Live Photos.
- Choose “Live Photos” on the screen. Then tap on the Live Photo you want to set as wallpaper.
- Press “Set” to get three options. You can tap to set the Live Photo as “Set Lock Screen,” ‘Set Home Screen,” and “Set Both.” Tap on your preferred option.
For Win 7 or later (64-bit)
 Secure Download
For macOS 10.14 or later
 Secure Download
Click here to get Filmora for PC by email
or Try Filmora App for mobile >>>
download filmora app for ios ](https://app.adjust.com/b0k9hf2%5F4bsu85t ) download filmora app for android ](https://app.adjust.com/b0k9hf2%5F4bsu85t )

Ollie Mattison
Ollie Mattison is a writer and a lover of all things video.
Follow @Ollie Mattison
Ollie Mattison
Mar 27, 2024• Proven solutions
Live Photo is a wonderful feature of the iPhone. You can capture a short series of frames to make your pictures look lively. Do you know you can also convert your video to Live Photos?
That’s right! You can turn video into Live Photo very easily using a few apps. Then you can use your converted Live Photos as wallpaper on your iPhones and iPads. Surely, that will make unlocking and browsing your phone more exciting!
Moreover, you can also show the Live Photos to your friends and enjoy quality time. Here are the top ways to turn your videos into Live Photos.
- Part 1: Best Video to Live Photo Apps
- Part 2: Convert Video to Live Photos with TikTok
- Part 3: Convert GIFs to Live Photos with GIPHY
- Part 4: How to Set Up A Live Photo as Your iPhone Wallpaper
Part 1: Best Video to Live Photo Apps
You can use the following video to Live Photo apps to create wallpapers for iPhone-
1. intoLive
intoLive is a simple video to Live Photo wallpaper converter. It’s very user-friendly and comes with a rating of 4.6 stars. The app is a favorite to many users who rely on it to create beautiful Live Photos. The app supports iOS 12.0 or later versions for iPhones and iPads.
The best thing about intoLive is it’s completely free to use! Plus, it is also available in many languages, even Chinese and Italian.
Converting your videos into Live Photos is a cake with intoLive. Just follow the steps below-

- Download the app and launch it from your home screen.
- Now select the video you want to turn into a Live Photo.
- Use the red sliders to choose the part of the video you wish to convert into a Live Photo. Next, set the duration for the same. You can also edit your video if you want, using the features available.
- Now save your video as a Live Photo.
2. VideoToLive
VideoToLive is another free video to Live Photo iPhone converter. The app has a rating of 4.1 stars and is suitable for iOS 11.2 or more current versions. VideoToLive lets you create Live Photos without any the 5-second restriction. You can also share Live Photos with friends and family using the app.
Additionally, VideoToLive lets you make GIFs from videos and Live Photos. You can say it’s a versatile app to have on your iPhone.
Here is how to create your Live Photo-

- The first thing to do is to download and launch VideoToLive.
- Now select the video you desire to configure to Live Photos.
- Select the part of the video for creating your Live Photo. You can choose frames from the videos on the upper part of the screen.
- ap on “Convert” on the upper right part of the interface. Your video is now turned into a Live Photo.
3. Video to Live Photo Wallpapers
This is another convenient video to Live Photos converter . Video to Live Photo Wallpapers is also a free app and has a 4.3-star rating. It can work with iOS versions 10.0 or later. So, you can also use old iPhones and iPads.
Video to Live Photo Wallpapers comes with paid features if you want to upgrade.
Follow the steps to turn your videos into Live Photos-

- Download and launch the app from your home screen of the iPhone. Now choose the video you want to convert.
- Select a part of your video to turn into a Live Photo. You can also choose the primary photo or frame that will feature at the beginning of your Live Photo. The app lets you create any sequence you want.
- Preview your Live Photo using the 3D Touch feature. Save your picture as a Live Photo.
- Next, we will check out some more ways to create Live Photos from videos.
Part 2: How to Convert Video to Live Photos with TikTok?
TikTok is a cool video-sharing platform with countless users. But do you know TikTok is also a handy video to Live Photo app?
You can use TikTok to convert any video into a Live Photo. Let’s see how you can do that-
- Launch the TikTok app on your iPhone. Choose the video you want to convert into a Live Photo.
- Now, tap on the share button, represented by a curved arrow. You will see several options appearing on your screen. Choose “Live Photo” from the 2nd line of options.
- You can find the Live Photo saved in your Photos app.
Part 3: How to Convert GIFs to Live Photos with GIPHY?
GIPHY is a popular platform for GIFs. You can find endless GIFs to share and enjoy on GIPHY. Now you can use the GIPHY app to turn your video into Live Photos.
The feature is really simple but provides a lot of benefits. Many people want to convert GIFs to Live Photos. GIPHY has made it possible for the first time.
Here are the steps you need to follow-
- Download and open the GIPHY app on your iPhone.
- Choose the GIF you want to transform into a Live Photo. Now, press the three white dots below the GIF on the right side.
- You will see three options on the screen. Tap on “Convert to Live Photo.”
- Select if you want your Live Photo to be full-screen or fit-to-screen. GIPHY will now convert and save your GIF as a Live Photo. You can also select it as wallpaper.
Part 4: How to Set Up A Live Photo as Your iPhone Wallpaper?
Congrats on creating your Live Photo. Let’s now set it as your wallpaper.
- Access the “Settings” menu on your iPhone. Scroll down to find “Wallpaper” and tap on it.
- Now, press on “Choose a New Wallpaper.” You will get all your photos as options, including Live Photos.
- Choose “Live Photos” on the screen. Then tap on the Live Photo you want to set as wallpaper.
- Press “Set” to get three options. You can tap to set the Live Photo as “Set Lock Screen,” ‘Set Home Screen,” and “Set Both.” Tap on your preferred option.
For Win 7 or later (64-bit)
 Secure Download
For macOS 10.14 or later
 Secure Download
Click here to get Filmora for PC by email
or Try Filmora App for mobile >>>
download filmora app for ios ](https://app.adjust.com/b0k9hf2%5F4bsu85t ) download filmora app for android ](https://app.adjust.com/b0k9hf2%5F4bsu85t )

Ollie Mattison
Ollie Mattison is a writer and a lover of all things video.
Follow @Ollie Mattison
Ollie Mattison
Mar 27, 2024• Proven solutions
Live Photo is a wonderful feature of the iPhone. You can capture a short series of frames to make your pictures look lively. Do you know you can also convert your video to Live Photos?
That’s right! You can turn video into Live Photo very easily using a few apps. Then you can use your converted Live Photos as wallpaper on your iPhones and iPads. Surely, that will make unlocking and browsing your phone more exciting!
Moreover, you can also show the Live Photos to your friends and enjoy quality time. Here are the top ways to turn your videos into Live Photos.
- Part 1: Best Video to Live Photo Apps
- Part 2: Convert Video to Live Photos with TikTok
- Part 3: Convert GIFs to Live Photos with GIPHY
- Part 4: How to Set Up A Live Photo as Your iPhone Wallpaper
Part 1: Best Video to Live Photo Apps
You can use the following video to Live Photo apps to create wallpapers for iPhone-
1. intoLive
intoLive is a simple video to Live Photo wallpaper converter. It’s very user-friendly and comes with a rating of 4.6 stars. The app is a favorite to many users who rely on it to create beautiful Live Photos. The app supports iOS 12.0 or later versions for iPhones and iPads.
The best thing about intoLive is it’s completely free to use! Plus, it is also available in many languages, even Chinese and Italian.
Converting your videos into Live Photos is a cake with intoLive. Just follow the steps below-

- Download the app and launch it from your home screen.
- Now select the video you want to turn into a Live Photo.
- Use the red sliders to choose the part of the video you wish to convert into a Live Photo. Next, set the duration for the same. You can also edit your video if you want, using the features available.
- Now save your video as a Live Photo.
2. VideoToLive
VideoToLive is another free video to Live Photo iPhone converter. The app has a rating of 4.1 stars and is suitable for iOS 11.2 or more current versions. VideoToLive lets you create Live Photos without any the 5-second restriction. You can also share Live Photos with friends and family using the app.
Additionally, VideoToLive lets you make GIFs from videos and Live Photos. You can say it’s a versatile app to have on your iPhone.
Here is how to create your Live Photo-

- The first thing to do is to download and launch VideoToLive.
- Now select the video you desire to configure to Live Photos.
- Select the part of the video for creating your Live Photo. You can choose frames from the videos on the upper part of the screen.
- ap on “Convert” on the upper right part of the interface. Your video is now turned into a Live Photo.
3. Video to Live Photo Wallpapers
This is another convenient video to Live Photos converter . Video to Live Photo Wallpapers is also a free app and has a 4.3-star rating. It can work with iOS versions 10.0 or later. So, you can also use old iPhones and iPads.
Video to Live Photo Wallpapers comes with paid features if you want to upgrade.
Follow the steps to turn your videos into Live Photos-

- Download and launch the app from your home screen of the iPhone. Now choose the video you want to convert.
- Select a part of your video to turn into a Live Photo. You can also choose the primary photo or frame that will feature at the beginning of your Live Photo. The app lets you create any sequence you want.
- Preview your Live Photo using the 3D Touch feature. Save your picture as a Live Photo.
- Next, we will check out some more ways to create Live Photos from videos.
Part 2: How to Convert Video to Live Photos with TikTok?
TikTok is a cool video-sharing platform with countless users. But do you know TikTok is also a handy video to Live Photo app?
You can use TikTok to convert any video into a Live Photo. Let’s see how you can do that-
- Launch the TikTok app on your iPhone. Choose the video you want to convert into a Live Photo.
- Now, tap on the share button, represented by a curved arrow. You will see several options appearing on your screen. Choose “Live Photo” from the 2nd line of options.
- You can find the Live Photo saved in your Photos app.
Part 3: How to Convert GIFs to Live Photos with GIPHY?
GIPHY is a popular platform for GIFs. You can find endless GIFs to share and enjoy on GIPHY. Now you can use the GIPHY app to turn your video into Live Photos.
The feature is really simple but provides a lot of benefits. Many people want to convert GIFs to Live Photos. GIPHY has made it possible for the first time.
Here are the steps you need to follow-
- Download and open the GIPHY app on your iPhone.
- Choose the GIF you want to transform into a Live Photo. Now, press the three white dots below the GIF on the right side.
- You will see three options on the screen. Tap on “Convert to Live Photo.”
- Select if you want your Live Photo to be full-screen or fit-to-screen. GIPHY will now convert and save your GIF as a Live Photo. You can also select it as wallpaper.
Part 4: How to Set Up A Live Photo as Your iPhone Wallpaper?
Congrats on creating your Live Photo. Let’s now set it as your wallpaper.
- Access the “Settings” menu on your iPhone. Scroll down to find “Wallpaper” and tap on it.
- Now, press on “Choose a New Wallpaper.” You will get all your photos as options, including Live Photos.
- Choose “Live Photos” on the screen. Then tap on the Live Photo you want to set as wallpaper.
- Press “Set” to get three options. You can tap to set the Live Photo as “Set Lock Screen,” ‘Set Home Screen,” and “Set Both.” Tap on your preferred option.
For Win 7 or later (64-bit)
 Secure Download
For macOS 10.14 or later
 Secure Download
Click here to get Filmora for PC by email
or Try Filmora App for mobile >>>
download filmora app for ios ](https://app.adjust.com/b0k9hf2%5F4bsu85t ) download filmora app for android ](https://app.adjust.com/b0k9hf2%5F4bsu85t )

Ollie Mattison
Ollie Mattison is a writer and a lover of all things video.
Follow @Ollie Mattison
Get Noticed: 20 Stunning Adobe Premiere Intro Templates Free to Download
Top 20 Adobe Premiere Title/Intro Templates [Free Download]

Benjamin Arango
Mar 29, 2024• Proven solutions
One of the things that can make your output stand out from the crowd is the titles. Many people think creating eye-catching title effects is beyond them, but with Premiere Pro, you really couldn’t be more wrong.
As Premiere Pro doesn’t have built-in templates, the ability to import free Premiere Pro templates is a must. Anyone need to find a custom title style that suits the project and looks professional and carries impact.
The great thing is that there are many of these resources that are offered entirely free! If you don’t know how to add text/title to Adobe Premiere, here are steps to add text resources .
In this article, we will share with you 20 Free to download Title Templates for Premiere Pro.
- Part1: Top 15 Free Adobe Premiere Pro Title Templates
- Part2: Best 5 Premiere Pro Intro Templates Free Download
- Part3: How to Import and Customize Title Templates in Premiere
You may also like: 10 Free Star Wars Fonts to Make Your Video Amazing
Part 1: Top 15 Free Adobe Premiere Title Templates
Adding the finishing touches to a project, like creating the opening titles or end credits, is often not at the top of anyone’s priority list during the video editing process.
Nonetheless, making a unique opening sequence along with impressive animations in Adobe Premiere Pro can be a time-consuming endeavor, so instead of spending countless hours on producing a perfect combination of text and images, you can just download a title template from the Internet.
1 Premier Pro
Jarle Leirpoll runs this site, and it is a treasure trove of information, help, and advice on Premiere from a man who wrote the book (literally, it’s for sale on the site!) on Premiere.
His first title collection is consisting of 8 templates, including Lower Thirds templates, end credit template, and some special characters. However, it well worth a look around the site as there is plenty more free stuff including presets, and a whole range of tips and tricks to help with your editing.
Features:
- Free Premiere Pro templates to download
- Easy to import the title template to Premiere
- 100% ready to use
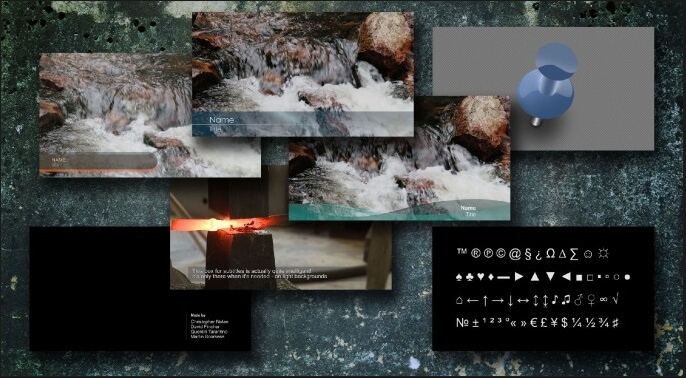
In case that you’re just a beginner of video editing software, you can start with Wondershare Filmora (Latest Filmora version 11) to add text to videos, which is powerful but easy-to-use for green hands. Download the Wondershare Filmora below.
There are hundreds of Text and Titles presets available in Filmora, which allows you to add titles, subtitles, scrolling end credits, lower 3d, and openers with ease. You can also apply some animation effects to the selected title presets.
Check the video below to find out how to add text to video with Wondershare Filmora.
Besides the built-in title presets, Wondershare Filmora (Latest Filmora version X) also provides more title templates in Filmstock , which offers lots of special effects templates.
Currently, there are Title Expansion Set, business title set, wedding title set, and lower third expansion set to download. Check the video below to watch the Title Expansion set templates.
 Download Mac Version ](https://tools.techidaily.com/wondershare/filmora/download/ )
Learn more details about How to Add Text to Video with Filmora.
2 Richard Harrington
This is another site that offers templates for download but is also a great place to visit for ideas and information. Richard approaches Premiere from a photographer’s viewpoint, and so has a slightly different view on many topics that are well worth reading.
He has links to a sizable number of templates on Richard Harrington covering a range of styles and subjects, including DVD menus, animated text, and high-quality models. Still, his blog is updated regularly and often includes free downloads.
Features:
- Supports Adobe Premiere intro templates to use
- It includes various templates and presets on Windows and Mac
- More than title templates also has DVD menus and animated text
3 ProVideoCoalition
Another all-encompassing site has a huge amount of information and knowledge to be gained. The templates are just part of the story. They are available on Pro Video Coalition and include numerous files and even some free video content showing their implementation.
Also on this page are links to some other sites offering free content or advice on various aspects of Premiere, making it well worth a visit and definitely worth its place in this top 10.
Of particular interest on this site is the regularly updated news which focuses on the latest hardware and software announcements.
Features:
- Supports lower thirds for Adobe Premiere
- You can customize the Premiere Pro intro template free download
- You can create graphic elements
4 Coremelt
This is a commercial site that offers a wide variety of high-quality plugins and templates for several video editing platforms. However, we are on the lookout for that fabulous price of free here, so a little digging finds this page , here you will find ten templates from one of their best selling products offered entirely free.
All templates are quality professionally produced products and worth the visit alone. For anyone who is looking to take their editing output to the professional level, the commercial products on offer here are well worth a look, high quality, and a reasonable cost.
Features:
- It includes 3D text and motion graphics templates
- Free and safe download the Premiere template

5 Bestproaction
Another commercial site. This one has a range of free templates and presets to download for Premiere. Fourteen open items altogether can be downloaded. This site at least deserves a browse through their catalog after a download. The emphasis here is on low cost but high quality, useful templates, and plugins to suit any project.
Even for those of us with a limited budget, there may be something that catches the eye. It is an excellent site for browsing when looking for inspiration.
Features:
- Offers multimedia products like free Premiere Pro text, title templates
- Includes professional Premiere Pro template for videographers
- You can create graphic elements

6 FXFactory
This is another commercial site that has a smattering of very high-quality free downloads on offer, including a beautiful template for the original Star Wars movie style scrolling titles.
Again, it is worth browsing the catalog when you are on the site, but all the free products can be found here .
FX Factory has also created some great video tutorials on a variety of aspects of video production that are well worth a view when you are at the site.
Features:
- Free Premiere Pro effects templates to download
- Includes a step by step Premiere Pro tutorial
7 Creative Impatience
A fantastic site full of information, tips, and opinion on all aspects of video production, it’s a great place to spend some time, with the bonus of a bunch of free downloads for Premiere.
Of particular note are the tutorials, an excellent source of information and tricks that you may not have seen before, with their YouTube channel being a great source of free guidance for editors of any sort of experience.
Features:
- Apart from free Premiere Pro templates, you can also find blogs
- Easy steps to make Premiere Pro templates
- Safe and clean to use. All real
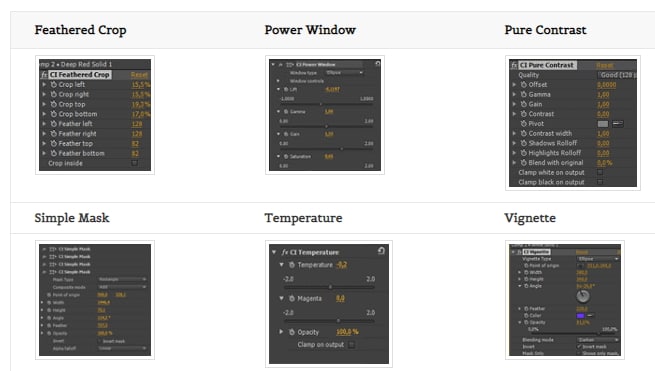
8Filmimpact
A commercial site is offering some great products at competitive prices. At first glance, this may not seem to be a useful place for our search for the free stuff.
However, all the products do have a free trial download, and as a bonus, the trial for pack one includes four free to use templates. They are quality products too, and well worth a look.

9 Style4Type
Style4Type is an exciting site regularly updated with new free templates as well as offering technical advice and having further templates available as commercial products.
And to the side is even a free download for a PDF file that walks you through installing and using the templates within Premiere once you have them.
There are already a lot of free templates on offer covering a wide variety of styles, but they are added to with regularity, so it is a site to bookmark for the future.
Features:
- Free title templates to use including texture templates
- Professional tools to better your video

10 Premiere Beat
Lots of information on this site as its been running for a decade, it is a website that imparts a wealth of knowledge along the way on not just video editing but music.
The pack includes 21 Premiere title templates to use. Another site that you will want to visit again and again.
Features:
- High-quality Premiere Pro templates to download
- A large number of Premiere templates to use
11 Clean Elegant Rotation Title
It is a clean title template without unnecessary parts. If you like simple titles, this one is best for you. You can customize in Premiere easily with a few clicks. For beginners, it also includes free tutorials to use.
Features:
- Simple and clean Premiere title templates
- Customizable in Premiere
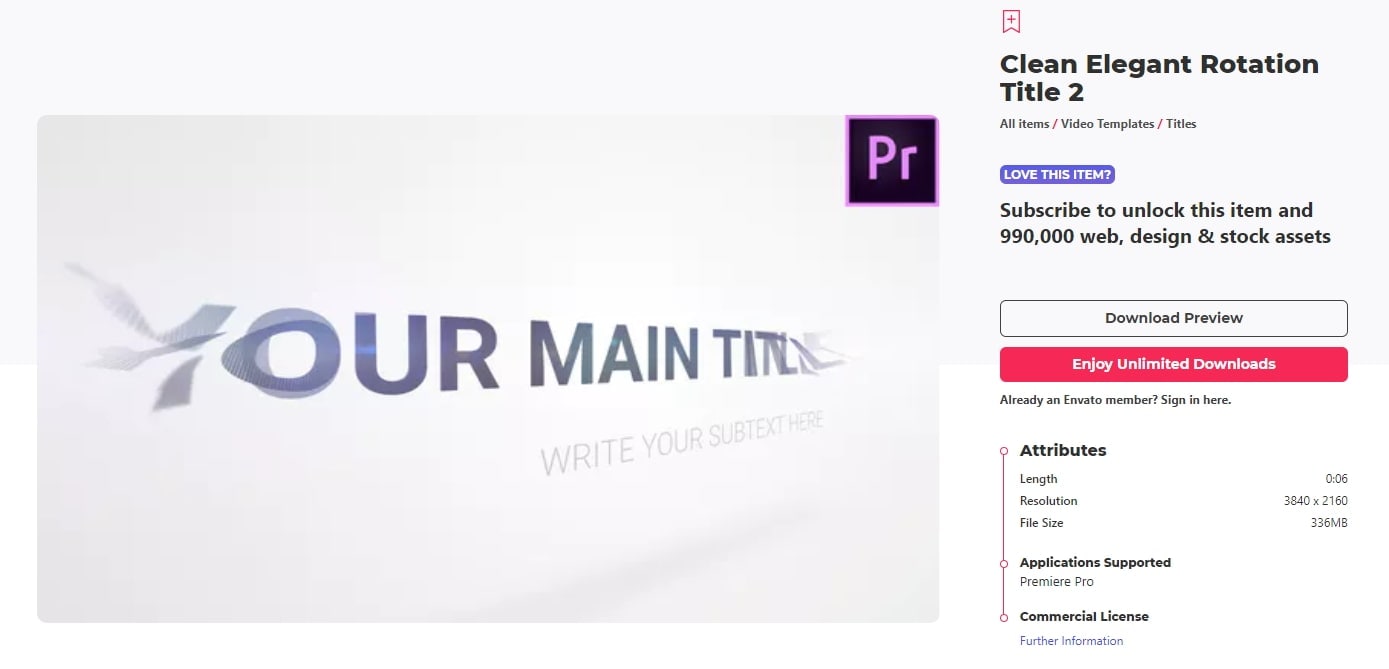
12 Unfolding Titles
It is a clean title template with an unfolding effect. Each text has two unfolding effects, which are convenient to use with customization. It supports 4K and HD versions. In this pack, it wons 10 title formats. After importing Premiere, you can also change text size.
Features:
- 20 unfolding title effects
- Supports rendering your video
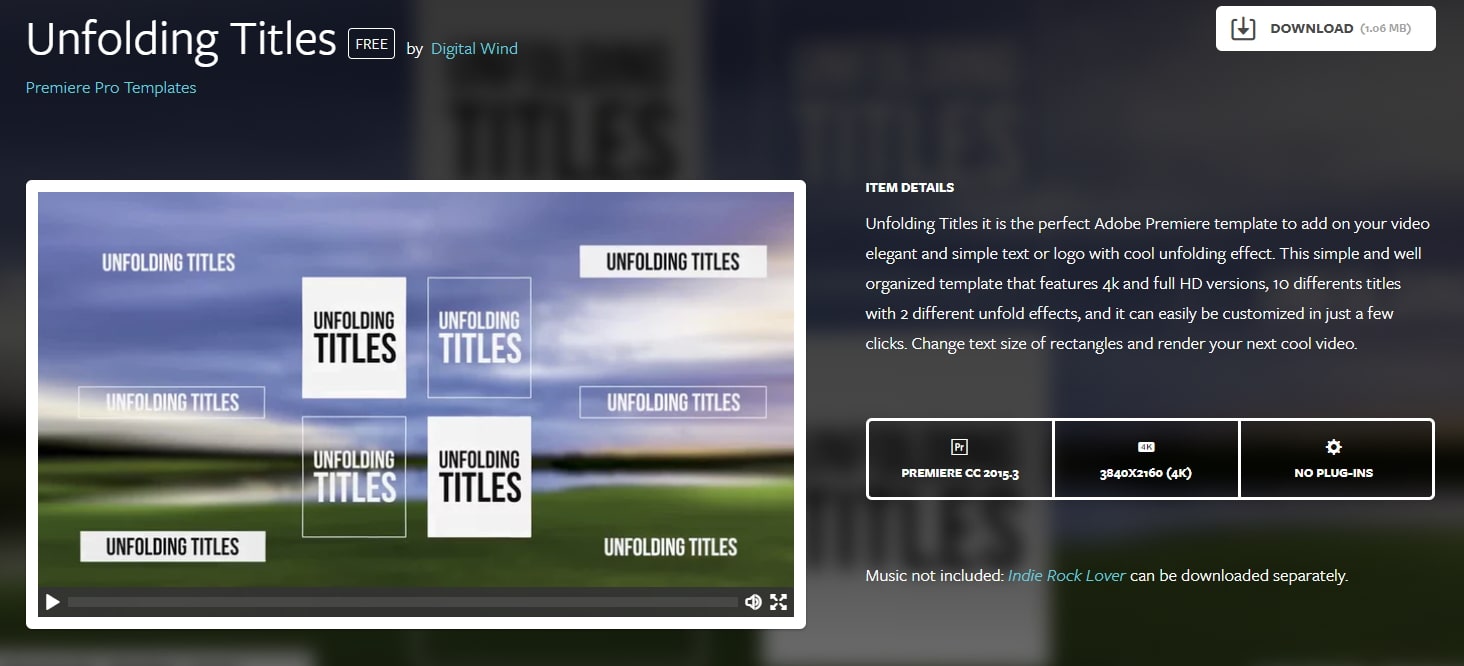
13 Orange83
These are five modern title packs for Premiere. With it, you don’t need to use After Effects as you can import them to edit. The best part is you can include your logo and other stuff you like.
Features:
- Include 5 title packs
- Modern and clean titles
14 Video Intro Templates - Premiere Pro intro template free download
It is a free download Premiere Pro intro template that you can add to your video. It is highly recommended to use promotion and commercial video.
This intro template can be adjusted after you import it to Premiere Pro. This Premiere Pro intro template is HD, so you don’t need to worry about the whole video quality.
Features:
- 1920X1080 (HD) is supported
- This intro template doesn’t include built-in music
15 Elegant Promo - another Premiere Pro intro template free to use
It is intro template for Premiere Pro is modern and free to use. The whole style is young and energetic, which will give viewers a fresh new feeling. It includes 12 images and 26 text layers, and all of them are free to download.
You can use it for your presentation, promotional video, and product video. Besides, it doesn’t require a plug in to use this intro template in Premiere Pro.
Features:
- It includes animated intro elements.
- Use an HD intro template to make a popular video.

These are free templates, and they are enough to get anyone up and running with a new project. As said before, with the commercial enterprises that offer freebies, it’s always worth checking out their paid for output as well, you may not be in the market for it right now, but something may stick for a later time.
Part 2: Bonus: Best 5 Premiere Pro Intro Templates Free Download
Even though all websites we featured in this article offer some free intro templates for Adobe Premiere Pro. However, it is still a much better solution to buy a subscription plan on a platform if you are working on a large number of projects each month.
Let’s see which websites you can use to download the intro and title templates for Premiere Pro.
16. Motion Array
In addition to an impressive library of intro templates, Motion Array offers presets, sound effects, royalty-free music, and stock footage.
Furthermore, you can choose the software version to make sure that the templates you download can be used with the version of Adobe Premiere Pro you have installed on your computer.
The website provides you with powerful search tools, so you can select the resolution of the template, up to 8K, or choose which types of templates are going to be displayed.
Using the free subscription plan can limit your options since you’ll only be able to download free templates, and your upload storage will be limited to just 1GB.
The Pro subscription plan that can be purchased for $54 per month will grant you access to an almost endless selection of title templates as well as a huge selection of plugins for Adobe Premiere Pro.

17. Cinecom – Simple Intro for Premiere Pro
It is a designer pack that features ten pre-animated lower-thirds intro templates. You can change the duration of the font and color of the text in each template, and you can choose if you want to download a 1080 or the 4K version of the designer pack.
The templates are compatible with CS6, CC2013, CC2014, and CC2016 versions of the Premiere Pro. The Simple Titles pack can be easily installed, as you just have to drag and drop it into the software.
However, before you can download these title templates, you have to subscribe to Cinecom’s mailing list.
Even though this can be a bit inconvenient, it is very well worth the trouble since you’ll be able to transform or build upon the intro templates and use them freely in all videos you edit in Adobe Premiere Pro.
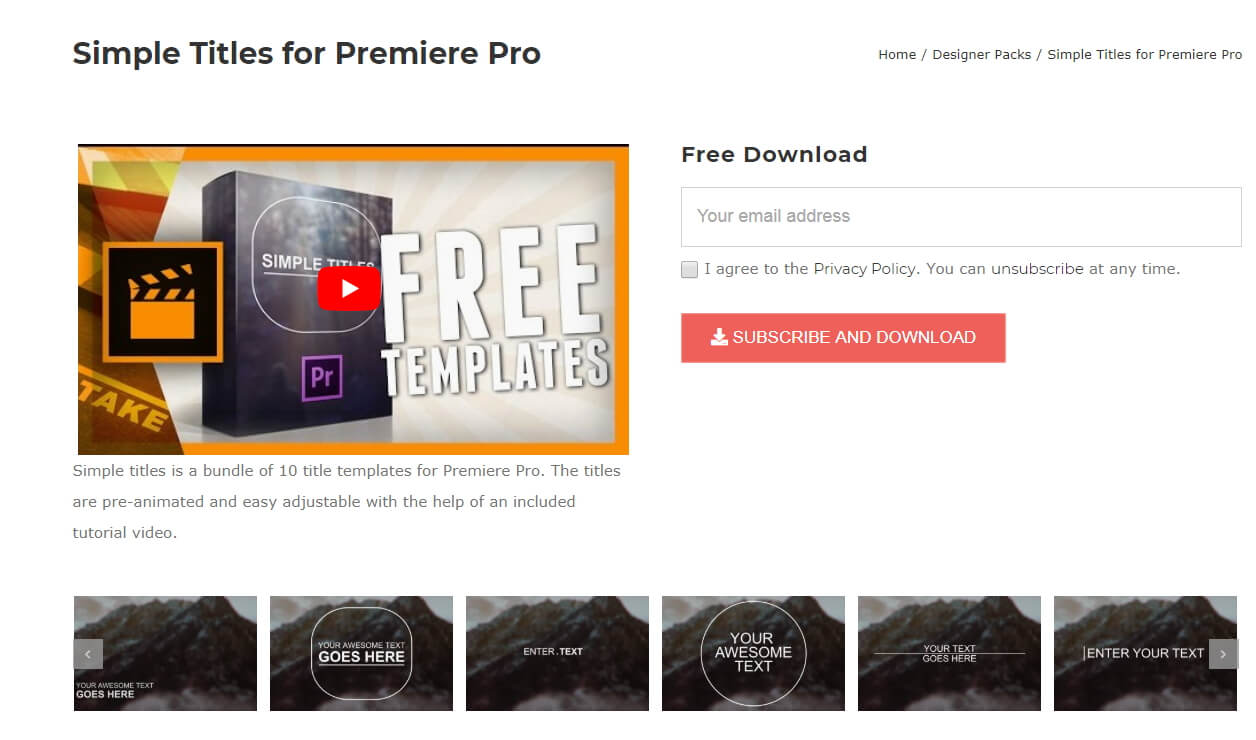
18. EnvatoElements
You can find much more than intro templates on the EnvatoElements platform since you can choose from 740.000 items you can use for anything from creating a WordPress website to preparing your next business presentation.
The Video Templates category alone features over 4000 items, including Logo Stings or Infographics assets.
There are nearly one hundred available intro templates for Adobe Premiere Pro, but downloading any of them requires you to create an account and purchase a subscription plan.
Prices start from $16.50 per month, and packages include virtually unlimited access to stock photos and videos, video templates, and much more. The EnvatoElements platform also offers assets that can be used with Final Cut Pro, Adobe After Effects or Apple Motion.

19. Videohive
Videohive is a part of the Envato Market platform that also features Web Themes and Templates, Code, Audio, or Graphic sections. It is free to use, but only a limited amount of assets can be downloaded for free.
To download an item, you must purchase it, and prices can range from $16 to $50 for a single title template.
Videohive is also a great source of title templates for Adobe After Effects, as it offers more than 5000 titles and intros that are compatible with this software.
Furthermore, you can download presets for both Premiere Pro and After Effects that can be used to create stop-motion animations, perform color correction, or make the footage look like it was captured with a VHS camera.

20. RocketStock
This option is best suited for video editors who want to create their intros because RocketStok’s Cinematic Style Library extends the scope of options provided by Premiere Pro.
Downloading all fonts except Helvetica Neue is free, but you must check which fonts you can use in commercial projects. You will have no trouble installing the fonts since you can just double-click on the font and follow the on-screen instructions.
Once you’ve installed all the fonts from the library, you can use them to replace the software’s default library. You just have to click on the Replace Style Library option that can be accessed from Premiere Pro’s Title Style tab.
If you don’t feel comfortable creating your titles or if you simply don’t have the time to create your own titles, the Free Cinematic Style Library is not the best choice for you.
On the other hand, Premiere Pro’s users who don’t often use title templates can benefit from downloading RocketStock’s intro library.

Part 3: How to Import and Customize Title Templates in Premiere
If you download the template, all the title templates support customization. You can change its size, font, color, and add 3D effects.
It is easy to import and use it to touch up your video. Check out the steps below to know how to import title templates quickly.
- Install the title template. Choose one template you like and download it to your PC. Remember to unzip it before importing it. Now install them.
- Import the title template. You just need to go to click Effects at the top. Then at right, you will find Presets in the effects section.
- Right-click on presets, and choose Import Presets. If the title template format is .mogrt, you need to open it in Essential Graphics Panel. At the bottom right corner, click the plus icon to import the title template and install it.
- Customize the title template. Once the title template is imported, drag it to the timeline. Click the Editing tab. Here you can customize colors, text, opacities, and positions. There are more options for you to explore.
- You can also copy and paste the title template to another place in the timeline. If you change one place of the pasted template, the original one will remain the same.
Note: each version of Premiere’s interface will look different, but the workflow is similar.
Conclusion
Using title templates can help you achieve a certain visual style faster, so you don’t have to spend a lot of time looking for a perfect background or animating the text.
The Internet provides almost unlimited video editing resources, but not all of these resources can be acquired for free.
Which website you will choose as a source of fresh title templates depends on how often you work on new projects in Adobe Premiere Pro.
If you want to make professional video editing and tired of Premiere, try Filmora! It includes various titles templates to use.
You can sync audio automatically, use detailed color correction to make your title and video like a movie. Download it now (FREE)!

Benjamin Arango
Benjamin Arango is a writer and a lover of all things video.
Follow @Benjamin Arango
Benjamin Arango
Mar 29, 2024• Proven solutions
One of the things that can make your output stand out from the crowd is the titles. Many people think creating eye-catching title effects is beyond them, but with Premiere Pro, you really couldn’t be more wrong.
As Premiere Pro doesn’t have built-in templates, the ability to import free Premiere Pro templates is a must. Anyone need to find a custom title style that suits the project and looks professional and carries impact.
The great thing is that there are many of these resources that are offered entirely free! If you don’t know how to add text/title to Adobe Premiere, here are steps to add text resources .
In this article, we will share with you 20 Free to download Title Templates for Premiere Pro.
- Part1: Top 15 Free Adobe Premiere Pro Title Templates
- Part2: Best 5 Premiere Pro Intro Templates Free Download
- Part3: How to Import and Customize Title Templates in Premiere
You may also like: 10 Free Star Wars Fonts to Make Your Video Amazing
Part 1: Top 15 Free Adobe Premiere Title Templates
Adding the finishing touches to a project, like creating the opening titles or end credits, is often not at the top of anyone’s priority list during the video editing process.
Nonetheless, making a unique opening sequence along with impressive animations in Adobe Premiere Pro can be a time-consuming endeavor, so instead of spending countless hours on producing a perfect combination of text and images, you can just download a title template from the Internet.
1 Premier Pro
Jarle Leirpoll runs this site, and it is a treasure trove of information, help, and advice on Premiere from a man who wrote the book (literally, it’s for sale on the site!) on Premiere.
His first title collection is consisting of 8 templates, including Lower Thirds templates, end credit template, and some special characters. However, it well worth a look around the site as there is plenty more free stuff including presets, and a whole range of tips and tricks to help with your editing.
Features:
- Free Premiere Pro templates to download
- Easy to import the title template to Premiere
- 100% ready to use

In case that you’re just a beginner of video editing software, you can start with Wondershare Filmora (Latest Filmora version 11) to add text to videos, which is powerful but easy-to-use for green hands. Download the Wondershare Filmora below.
There are hundreds of Text and Titles presets available in Filmora, which allows you to add titles, subtitles, scrolling end credits, lower 3d, and openers with ease. You can also apply some animation effects to the selected title presets.
Check the video below to find out how to add text to video with Wondershare Filmora.
Besides the built-in title presets, Wondershare Filmora (Latest Filmora version X) also provides more title templates in Filmstock , which offers lots of special effects templates.
Currently, there are Title Expansion Set, business title set, wedding title set, and lower third expansion set to download. Check the video below to watch the Title Expansion set templates.
 Download Mac Version ](https://tools.techidaily.com/wondershare/filmora/download/ )
Learn more details about How to Add Text to Video with Filmora.
2 Richard Harrington
This is another site that offers templates for download but is also a great place to visit for ideas and information. Richard approaches Premiere from a photographer’s viewpoint, and so has a slightly different view on many topics that are well worth reading.
He has links to a sizable number of templates on Richard Harrington covering a range of styles and subjects, including DVD menus, animated text, and high-quality models. Still, his blog is updated regularly and often includes free downloads.
Features:
- Supports Adobe Premiere intro templates to use
- It includes various templates and presets on Windows and Mac
- More than title templates also has DVD menus and animated text

3 ProVideoCoalition
Another all-encompassing site has a huge amount of information and knowledge to be gained. The templates are just part of the story. They are available on Pro Video Coalition and include numerous files and even some free video content showing their implementation.
Also on this page are links to some other sites offering free content or advice on various aspects of Premiere, making it well worth a visit and definitely worth its place in this top 10.
Of particular interest on this site is the regularly updated news which focuses on the latest hardware and software announcements.
Features:
- Supports lower thirds for Adobe Premiere
- You can customize the Premiere Pro intro template free download
- You can create graphic elements
4 Coremelt
This is a commercial site that offers a wide variety of high-quality plugins and templates for several video editing platforms. However, we are on the lookout for that fabulous price of free here, so a little digging finds this page , here you will find ten templates from one of their best selling products offered entirely free.
All templates are quality professionally produced products and worth the visit alone. For anyone who is looking to take their editing output to the professional level, the commercial products on offer here are well worth a look, high quality, and a reasonable cost.
Features:
- It includes 3D text and motion graphics templates
- Free and safe download the Premiere template

5 Bestproaction
Another commercial site. This one has a range of free templates and presets to download for Premiere. Fourteen open items altogether can be downloaded. This site at least deserves a browse through their catalog after a download. The emphasis here is on low cost but high quality, useful templates, and plugins to suit any project.
Even for those of us with a limited budget, there may be something that catches the eye. It is an excellent site for browsing when looking for inspiration.
Features:
- Offers multimedia products like free Premiere Pro text, title templates
- Includes professional Premiere Pro template for videographers
- You can create graphic elements

6 FXFactory
This is another commercial site that has a smattering of very high-quality free downloads on offer, including a beautiful template for the original Star Wars movie style scrolling titles.
Again, it is worth browsing the catalog when you are on the site, but all the free products can be found here .
FX Factory has also created some great video tutorials on a variety of aspects of video production that are well worth a view when you are at the site.
Features:
- Free Premiere Pro effects templates to download
- Includes a step by step Premiere Pro tutorial
7 Creative Impatience
A fantastic site full of information, tips, and opinion on all aspects of video production, it’s a great place to spend some time, with the bonus of a bunch of free downloads for Premiere.
Of particular note are the tutorials, an excellent source of information and tricks that you may not have seen before, with their YouTube channel being a great source of free guidance for editors of any sort of experience.
Features:
- Apart from free Premiere Pro templates, you can also find blogs
- Easy steps to make Premiere Pro templates
- Safe and clean to use. All real

8Filmimpact
A commercial site is offering some great products at competitive prices. At first glance, this may not seem to be a useful place for our search for the free stuff.
However, all the products do have a free trial download, and as a bonus, the trial for pack one includes four free to use templates. They are quality products too, and well worth a look.

9 Style4Type
Style4Type is an exciting site regularly updated with new free templates as well as offering technical advice and having further templates available as commercial products.
And to the side is even a free download for a PDF file that walks you through installing and using the templates within Premiere once you have them.
There are already a lot of free templates on offer covering a wide variety of styles, but they are added to with regularity, so it is a site to bookmark for the future.
Features:
- Free title templates to use including texture templates
- Professional tools to better your video

10 Premiere Beat
Lots of information on this site as its been running for a decade, it is a website that imparts a wealth of knowledge along the way on not just video editing but music.
The pack includes 21 Premiere title templates to use. Another site that you will want to visit again and again.
Features:
- High-quality Premiere Pro templates to download
- A large number of Premiere templates to use
11 Clean Elegant Rotation Title
It is a clean title template without unnecessary parts. If you like simple titles, this one is best for you. You can customize in Premiere easily with a few clicks. For beginners, it also includes free tutorials to use.
Features:
- Simple and clean Premiere title templates
- Customizable in Premiere

12 Unfolding Titles
It is a clean title template with an unfolding effect. Each text has two unfolding effects, which are convenient to use with customization. It supports 4K and HD versions. In this pack, it wons 10 title formats. After importing Premiere, you can also change text size.
Features:
- 20 unfolding title effects
- Supports rendering your video

13 Orange83
These are five modern title packs for Premiere. With it, you don’t need to use After Effects as you can import them to edit. The best part is you can include your logo and other stuff you like.
Features:
- Include 5 title packs
- Modern and clean titles
14 Video Intro Templates - Premiere Pro intro template free download
It is a free download Premiere Pro intro template that you can add to your video. It is highly recommended to use promotion and commercial video.
This intro template can be adjusted after you import it to Premiere Pro. This Premiere Pro intro template is HD, so you don’t need to worry about the whole video quality.
Features:
- 1920X1080 (HD) is supported
- This intro template doesn’t include built-in music

15 Elegant Promo - another Premiere Pro intro template free to use
It is intro template for Premiere Pro is modern and free to use. The whole style is young and energetic, which will give viewers a fresh new feeling. It includes 12 images and 26 text layers, and all of them are free to download.
You can use it for your presentation, promotional video, and product video. Besides, it doesn’t require a plug in to use this intro template in Premiere Pro.
Features:
- It includes animated intro elements.
- Use an HD intro template to make a popular video.

These are free templates, and they are enough to get anyone up and running with a new project. As said before, with the commercial enterprises that offer freebies, it’s always worth checking out their paid for output as well, you may not be in the market for it right now, but something may stick for a later time.
Part 2: Bonus: Best 5 Premiere Pro Intro Templates Free Download
Even though all websites we featured in this article offer some free intro templates for Adobe Premiere Pro. However, it is still a much better solution to buy a subscription plan on a platform if you are working on a large number of projects each month.
Let’s see which websites you can use to download the intro and title templates for Premiere Pro.
16. Motion Array
In addition to an impressive library of intro templates, Motion Array offers presets, sound effects, royalty-free music, and stock footage.
Furthermore, you can choose the software version to make sure that the templates you download can be used with the version of Adobe Premiere Pro you have installed on your computer.
The website provides you with powerful search tools, so you can select the resolution of the template, up to 8K, or choose which types of templates are going to be displayed.
Using the free subscription plan can limit your options since you’ll only be able to download free templates, and your upload storage will be limited to just 1GB.
The Pro subscription plan that can be purchased for $54 per month will grant you access to an almost endless selection of title templates as well as a huge selection of plugins for Adobe Premiere Pro.

17. Cinecom – Simple Intro for Premiere Pro
It is a designer pack that features ten pre-animated lower-thirds intro templates. You can change the duration of the font and color of the text in each template, and you can choose if you want to download a 1080 or the 4K version of the designer pack.
The templates are compatible with CS6, CC2013, CC2014, and CC2016 versions of the Premiere Pro. The Simple Titles pack can be easily installed, as you just have to drag and drop it into the software.
However, before you can download these title templates, you have to subscribe to Cinecom’s mailing list.
Even though this can be a bit inconvenient, it is very well worth the trouble since you’ll be able to transform or build upon the intro templates and use them freely in all videos you edit in Adobe Premiere Pro.

18. EnvatoElements
You can find much more than intro templates on the EnvatoElements platform since you can choose from 740.000 items you can use for anything from creating a WordPress website to preparing your next business presentation.
The Video Templates category alone features over 4000 items, including Logo Stings or Infographics assets.
There are nearly one hundred available intro templates for Adobe Premiere Pro, but downloading any of them requires you to create an account and purchase a subscription plan.
Prices start from $16.50 per month, and packages include virtually unlimited access to stock photos and videos, video templates, and much more. The EnvatoElements platform also offers assets that can be used with Final Cut Pro, Adobe After Effects or Apple Motion.

19. Videohive
Videohive is a part of the Envato Market platform that also features Web Themes and Templates, Code, Audio, or Graphic sections. It is free to use, but only a limited amount of assets can be downloaded for free.
To download an item, you must purchase it, and prices can range from $16 to $50 for a single title template.
Videohive is also a great source of title templates for Adobe After Effects, as it offers more than 5000 titles and intros that are compatible with this software.
Furthermore, you can download presets for both Premiere Pro and After Effects that can be used to create stop-motion animations, perform color correction, or make the footage look like it was captured with a VHS camera.

20. RocketStock
This option is best suited for video editors who want to create their intros because RocketStok’s Cinematic Style Library extends the scope of options provided by Premiere Pro.
Downloading all fonts except Helvetica Neue is free, but you must check which fonts you can use in commercial projects. You will have no trouble installing the fonts since you can just double-click on the font and follow the on-screen instructions.
Once you’ve installed all the fonts from the library, you can use them to replace the software’s default library. You just have to click on the Replace Style Library option that can be accessed from Premiere Pro’s Title Style tab.
If you don’t feel comfortable creating your titles or if you simply don’t have the time to create your own titles, the Free Cinematic Style Library is not the best choice for you.
On the other hand, Premiere Pro’s users who don’t often use title templates can benefit from downloading RocketStock’s intro library.

Part 3: How to Import and Customize Title Templates in Premiere
If you download the template, all the title templates support customization. You can change its size, font, color, and add 3D effects.
It is easy to import and use it to touch up your video. Check out the steps below to know how to import title templates quickly.
- Install the title template. Choose one template you like and download it to your PC. Remember to unzip it before importing it. Now install them.
- Import the title template. You just need to go to click Effects at the top. Then at right, you will find Presets in the effects section.
- Right-click on presets, and choose Import Presets. If the title template format is .mogrt, you need to open it in Essential Graphics Panel. At the bottom right corner, click the plus icon to import the title template and install it.
- Customize the title template. Once the title template is imported, drag it to the timeline. Click the Editing tab. Here you can customize colors, text, opacities, and positions. There are more options for you to explore.
- You can also copy and paste the title template to another place in the timeline. If you change one place of the pasted template, the original one will remain the same.
Note: each version of Premiere’s interface will look different, but the workflow is similar.
Conclusion
Using title templates can help you achieve a certain visual style faster, so you don’t have to spend a lot of time looking for a perfect background or animating the text.
The Internet provides almost unlimited video editing resources, but not all of these resources can be acquired for free.
Which website you will choose as a source of fresh title templates depends on how often you work on new projects in Adobe Premiere Pro.
If you want to make professional video editing and tired of Premiere, try Filmora! It includes various titles templates to use.
You can sync audio automatically, use detailed color correction to make your title and video like a movie. Download it now (FREE)!

Benjamin Arango
Benjamin Arango is a writer and a lover of all things video.
Follow @Benjamin Arango
Benjamin Arango
Mar 29, 2024• Proven solutions
One of the things that can make your output stand out from the crowd is the titles. Many people think creating eye-catching title effects is beyond them, but with Premiere Pro, you really couldn’t be more wrong.
As Premiere Pro doesn’t have built-in templates, the ability to import free Premiere Pro templates is a must. Anyone need to find a custom title style that suits the project and looks professional and carries impact.
The great thing is that there are many of these resources that are offered entirely free! If you don’t know how to add text/title to Adobe Premiere, here are steps to add text resources .
In this article, we will share with you 20 Free to download Title Templates for Premiere Pro.
- Part1: Top 15 Free Adobe Premiere Pro Title Templates
- Part2: Best 5 Premiere Pro Intro Templates Free Download
- Part3: How to Import and Customize Title Templates in Premiere
You may also like: 10 Free Star Wars Fonts to Make Your Video Amazing
Part 1: Top 15 Free Adobe Premiere Title Templates
Adding the finishing touches to a project, like creating the opening titles or end credits, is often not at the top of anyone’s priority list during the video editing process.
Nonetheless, making a unique opening sequence along with impressive animations in Adobe Premiere Pro can be a time-consuming endeavor, so instead of spending countless hours on producing a perfect combination of text and images, you can just download a title template from the Internet.
1 Premier Pro
Jarle Leirpoll runs this site, and it is a treasure trove of information, help, and advice on Premiere from a man who wrote the book (literally, it’s for sale on the site!) on Premiere.
His first title collection is consisting of 8 templates, including Lower Thirds templates, end credit template, and some special characters. However, it well worth a look around the site as there is plenty more free stuff including presets, and a whole range of tips and tricks to help with your editing.
Features:
- Free Premiere Pro templates to download
- Easy to import the title template to Premiere
- 100% ready to use

In case that you’re just a beginner of video editing software, you can start with Wondershare Filmora (Latest Filmora version 11) to add text to videos, which is powerful but easy-to-use for green hands. Download the Wondershare Filmora below.
There are hundreds of Text and Titles presets available in Filmora, which allows you to add titles, subtitles, scrolling end credits, lower 3d, and openers with ease. You can also apply some animation effects to the selected title presets.
Check the video below to find out how to add text to video with Wondershare Filmora.
Besides the built-in title presets, Wondershare Filmora (Latest Filmora version X) also provides more title templates in Filmstock , which offers lots of special effects templates.
Currently, there are Title Expansion Set, business title set, wedding title set, and lower third expansion set to download. Check the video below to watch the Title Expansion set templates.
 Download Mac Version ](https://tools.techidaily.com/wondershare/filmora/download/ )
Learn more details about How to Add Text to Video with Filmora.
2 Richard Harrington
This is another site that offers templates for download but is also a great place to visit for ideas and information. Richard approaches Premiere from a photographer’s viewpoint, and so has a slightly different view on many topics that are well worth reading.
He has links to a sizable number of templates on Richard Harrington covering a range of styles and subjects, including DVD menus, animated text, and high-quality models. Still, his blog is updated regularly and often includes free downloads.
Features:
- Supports Adobe Premiere intro templates to use
- It includes various templates and presets on Windows and Mac
- More than title templates also has DVD menus and animated text

3 ProVideoCoalition
Another all-encompassing site has a huge amount of information and knowledge to be gained. The templates are just part of the story. They are available on Pro Video Coalition and include numerous files and even some free video content showing their implementation.
Also on this page are links to some other sites offering free content or advice on various aspects of Premiere, making it well worth a visit and definitely worth its place in this top 10.
Of particular interest on this site is the regularly updated news which focuses on the latest hardware and software announcements.
Features:
- Supports lower thirds for Adobe Premiere
- You can customize the Premiere Pro intro template free download
- You can create graphic elements
4 Coremelt
This is a commercial site that offers a wide variety of high-quality plugins and templates for several video editing platforms. However, we are on the lookout for that fabulous price of free here, so a little digging finds this page , here you will find ten templates from one of their best selling products offered entirely free.
All templates are quality professionally produced products and worth the visit alone. For anyone who is looking to take their editing output to the professional level, the commercial products on offer here are well worth a look, high quality, and a reasonable cost.
Features:
- It includes 3D text and motion graphics templates
- Free and safe download the Premiere template

5 Bestproaction
Another commercial site. This one has a range of free templates and presets to download for Premiere. Fourteen open items altogether can be downloaded. This site at least deserves a browse through their catalog after a download. The emphasis here is on low cost but high quality, useful templates, and plugins to suit any project.
Even for those of us with a limited budget, there may be something that catches the eye. It is an excellent site for browsing when looking for inspiration.
Features:
- Offers multimedia products like free Premiere Pro text, title templates
- Includes professional Premiere Pro template for videographers
- You can create graphic elements

6 FXFactory
This is another commercial site that has a smattering of very high-quality free downloads on offer, including a beautiful template for the original Star Wars movie style scrolling titles.
Again, it is worth browsing the catalog when you are on the site, but all the free products can be found here .
FX Factory has also created some great video tutorials on a variety of aspects of video production that are well worth a view when you are at the site.
Features:
- Free Premiere Pro effects templates to download
- Includes a step by step Premiere Pro tutorial
7 Creative Impatience
A fantastic site full of information, tips, and opinion on all aspects of video production, it’s a great place to spend some time, with the bonus of a bunch of free downloads for Premiere.
Of particular note are the tutorials, an excellent source of information and tricks that you may not have seen before, with their YouTube channel being a great source of free guidance for editors of any sort of experience.
Features:
- Apart from free Premiere Pro templates, you can also find blogs
- Easy steps to make Premiere Pro templates
- Safe and clean to use. All real

8Filmimpact
A commercial site is offering some great products at competitive prices. At first glance, this may not seem to be a useful place for our search for the free stuff.
However, all the products do have a free trial download, and as a bonus, the trial for pack one includes four free to use templates. They are quality products too, and well worth a look.

9 Style4Type
Style4Type is an exciting site regularly updated with new free templates as well as offering technical advice and having further templates available as commercial products.
And to the side is even a free download for a PDF file that walks you through installing and using the templates within Premiere once you have them.
There are already a lot of free templates on offer covering a wide variety of styles, but they are added to with regularity, so it is a site to bookmark for the future.
Features:
- Free title templates to use including texture templates
- Professional tools to better your video

10 Premiere Beat
Lots of information on this site as its been running for a decade, it is a website that imparts a wealth of knowledge along the way on not just video editing but music.
The pack includes 21 Premiere title templates to use. Another site that you will want to visit again and again.
Features:
- High-quality Premiere Pro templates to download
- A large number of Premiere templates to use
11 Clean Elegant Rotation Title
It is a clean title template without unnecessary parts. If you like simple titles, this one is best for you. You can customize in Premiere easily with a few clicks. For beginners, it also includes free tutorials to use.
Features:
- Simple and clean Premiere title templates
- Customizable in Premiere

12 Unfolding Titles
It is a clean title template with an unfolding effect. Each text has two unfolding effects, which are convenient to use with customization. It supports 4K and HD versions. In this pack, it wons 10 title formats. After importing Premiere, you can also change text size.
Features:
- 20 unfolding title effects
- Supports rendering your video

13 Orange83
These are five modern title packs for Premiere. With it, you don’t need to use After Effects as you can import them to edit. The best part is you can include your logo and other stuff you like.
Features:
- Include 5 title packs
- Modern and clean titles
14 Video Intro Templates - Premiere Pro intro template free download
It is a free download Premiere Pro intro template that you can add to your video. It is highly recommended to use promotion and commercial video.
This intro template can be adjusted after you import it to Premiere Pro. This Premiere Pro intro template is HD, so you don’t need to worry about the whole video quality.
Features:
- 1920X1080 (HD) is supported
- This intro template doesn’t include built-in music

15 Elegant Promo - another Premiere Pro intro template free to use
It is intro template for Premiere Pro is modern and free to use. The whole style is young and energetic, which will give viewers a fresh new feeling. It includes 12 images and 26 text layers, and all of them are free to download.
You can use it for your presentation, promotional video, and product video. Besides, it doesn’t require a plug in to use this intro template in Premiere Pro.
Features:
- It includes animated intro elements.
- Use an HD intro template to make a popular video.

These are free templates, and they are enough to get anyone up and running with a new project. As said before, with the commercial enterprises that offer freebies, it’s always worth checking out their paid for output as well, you may not be in the market for it right now, but something may stick for a later time.
Part 2: Bonus: Best 5 Premiere Pro Intro Templates Free Download
Even though all websites we featured in this article offer some free intro templates for Adobe Premiere Pro. However, it is still a much better solution to buy a subscription plan on a platform if you are working on a large number of projects each month.
Let’s see which websites you can use to download the intro and title templates for Premiere Pro.
16. Motion Array
In addition to an impressive library of intro templates, Motion Array offers presets, sound effects, royalty-free music, and stock footage.
Furthermore, you can choose the software version to make sure that the templates you download can be used with the version of Adobe Premiere Pro you have installed on your computer.
The website provides you with powerful search tools, so you can select the resolution of the template, up to 8K, or choose which types of templates are going to be displayed.
Using the free subscription plan can limit your options since you’ll only be able to download free templates, and your upload storage will be limited to just 1GB.
The Pro subscription plan that can be purchased for $54 per month will grant you access to an almost endless selection of title templates as well as a huge selection of plugins for Adobe Premiere Pro.

17. Cinecom – Simple Intro for Premiere Pro
It is a designer pack that features ten pre-animated lower-thirds intro templates. You can change the duration of the font and color of the text in each template, and you can choose if you want to download a 1080 or the 4K version of the designer pack.
The templates are compatible with CS6, CC2013, CC2014, and CC2016 versions of the Premiere Pro. The Simple Titles pack can be easily installed, as you just have to drag and drop it into the software.
However, before you can download these title templates, you have to subscribe to Cinecom’s mailing list.
Even though this can be a bit inconvenient, it is very well worth the trouble since you’ll be able to transform or build upon the intro templates and use them freely in all videos you edit in Adobe Premiere Pro.

18. EnvatoElements
You can find much more than intro templates on the EnvatoElements platform since you can choose from 740.000 items you can use for anything from creating a WordPress website to preparing your next business presentation.
The Video Templates category alone features over 4000 items, including Logo Stings or Infographics assets.
There are nearly one hundred available intro templates for Adobe Premiere Pro, but downloading any of them requires you to create an account and purchase a subscription plan.
Prices start from $16.50 per month, and packages include virtually unlimited access to stock photos and videos, video templates, and much more. The EnvatoElements platform also offers assets that can be used with Final Cut Pro, Adobe After Effects or Apple Motion.

19. Videohive
Videohive is a part of the Envato Market platform that also features Web Themes and Templates, Code, Audio, or Graphic sections. It is free to use, but only a limited amount of assets can be downloaded for free.
To download an item, you must purchase it, and prices can range from $16 to $50 for a single title template.
Videohive is also a great source of title templates for Adobe After Effects, as it offers more than 5000 titles and intros that are compatible with this software.
Furthermore, you can download presets for both Premiere Pro and After Effects that can be used to create stop-motion animations, perform color correction, or make the footage look like it was captured with a VHS camera.

20. RocketStock
This option is best suited for video editors who want to create their intros because RocketStok’s Cinematic Style Library extends the scope of options provided by Premiere Pro.
Downloading all fonts except Helvetica Neue is free, but you must check which fonts you can use in commercial projects. You will have no trouble installing the fonts since you can just double-click on the font and follow the on-screen instructions.
Once you’ve installed all the fonts from the library, you can use them to replace the software’s default library. You just have to click on the Replace Style Library option that can be accessed from Premiere Pro’s Title Style tab.
If you don’t feel comfortable creating your titles or if you simply don’t have the time to create your own titles, the Free Cinematic Style Library is not the best choice for you.
On the other hand, Premiere Pro’s users who don’t often use title templates can benefit from downloading RocketStock’s intro library.

Part 3: How to Import and Customize Title Templates in Premiere
If you download the template, all the title templates support customization. You can change its size, font, color, and add 3D effects.
It is easy to import and use it to touch up your video. Check out the steps below to know how to import title templates quickly.
- Install the title template. Choose one template you like and download it to your PC. Remember to unzip it before importing it. Now install them.
- Import the title template. You just need to go to click Effects at the top. Then at right, you will find Presets in the effects section.
- Right-click on presets, and choose Import Presets. If the title template format is .mogrt, you need to open it in Essential Graphics Panel. At the bottom right corner, click the plus icon to import the title template and install it.
- Customize the title template. Once the title template is imported, drag it to the timeline. Click the Editing tab. Here you can customize colors, text, opacities, and positions. There are more options for you to explore.
- You can also copy and paste the title template to another place in the timeline. If you change one place of the pasted template, the original one will remain the same.
Note: each version of Premiere’s interface will look different, but the workflow is similar.
Conclusion
Using title templates can help you achieve a certain visual style faster, so you don’t have to spend a lot of time looking for a perfect background or animating the text.
The Internet provides almost unlimited video editing resources, but not all of these resources can be acquired for free.
Which website you will choose as a source of fresh title templates depends on how often you work on new projects in Adobe Premiere Pro.
If you want to make professional video editing and tired of Premiere, try Filmora! It includes various titles templates to use.
You can sync audio automatically, use detailed color correction to make your title and video like a movie. Download it now (FREE)!

Benjamin Arango
Benjamin Arango is a writer and a lover of all things video.
Follow @Benjamin Arango
Benjamin Arango
Mar 29, 2024• Proven solutions
One of the things that can make your output stand out from the crowd is the titles. Many people think creating eye-catching title effects is beyond them, but with Premiere Pro, you really couldn’t be more wrong.
As Premiere Pro doesn’t have built-in templates, the ability to import free Premiere Pro templates is a must. Anyone need to find a custom title style that suits the project and looks professional and carries impact.
The great thing is that there are many of these resources that are offered entirely free! If you don’t know how to add text/title to Adobe Premiere, here are steps to add text resources .
In this article, we will share with you 20 Free to download Title Templates for Premiere Pro.
- Part1: Top 15 Free Adobe Premiere Pro Title Templates
- Part2: Best 5 Premiere Pro Intro Templates Free Download
- Part3: How to Import and Customize Title Templates in Premiere
You may also like: 10 Free Star Wars Fonts to Make Your Video Amazing
Part 1: Top 15 Free Adobe Premiere Title Templates
Adding the finishing touches to a project, like creating the opening titles or end credits, is often not at the top of anyone’s priority list during the video editing process.
Nonetheless, making a unique opening sequence along with impressive animations in Adobe Premiere Pro can be a time-consuming endeavor, so instead of spending countless hours on producing a perfect combination of text and images, you can just download a title template from the Internet.
1 Premier Pro
Jarle Leirpoll runs this site, and it is a treasure trove of information, help, and advice on Premiere from a man who wrote the book (literally, it’s for sale on the site!) on Premiere.
His first title collection is consisting of 8 templates, including Lower Thirds templates, end credit template, and some special characters. However, it well worth a look around the site as there is plenty more free stuff including presets, and a whole range of tips and tricks to help with your editing.
Features:
- Free Premiere Pro templates to download
- Easy to import the title template to Premiere
- 100% ready to use

In case that you’re just a beginner of video editing software, you can start with Wondershare Filmora (Latest Filmora version 11) to add text to videos, which is powerful but easy-to-use for green hands. Download the Wondershare Filmora below.
There are hundreds of Text and Titles presets available in Filmora, which allows you to add titles, subtitles, scrolling end credits, lower 3d, and openers with ease. You can also apply some animation effects to the selected title presets.
Check the video below to find out how to add text to video with Wondershare Filmora.
Besides the built-in title presets, Wondershare Filmora (Latest Filmora version X) also provides more title templates in Filmstock , which offers lots of special effects templates.
Currently, there are Title Expansion Set, business title set, wedding title set, and lower third expansion set to download. Check the video below to watch the Title Expansion set templates.
 Download Mac Version ](https://tools.techidaily.com/wondershare/filmora/download/ )
Learn more details about How to Add Text to Video with Filmora.
2 Richard Harrington
This is another site that offers templates for download but is also a great place to visit for ideas and information. Richard approaches Premiere from a photographer’s viewpoint, and so has a slightly different view on many topics that are well worth reading.
He has links to a sizable number of templates on Richard Harrington covering a range of styles and subjects, including DVD menus, animated text, and high-quality models. Still, his blog is updated regularly and often includes free downloads.
Features:
- Supports Adobe Premiere intro templates to use
- It includes various templates and presets on Windows and Mac
- More than title templates also has DVD menus and animated text

3 ProVideoCoalition
Another all-encompassing site has a huge amount of information and knowledge to be gained. The templates are just part of the story. They are available on Pro Video Coalition and include numerous files and even some free video content showing their implementation.
Also on this page are links to some other sites offering free content or advice on various aspects of Premiere, making it well worth a visit and definitely worth its place in this top 10.
Of particular interest on this site is the regularly updated news which focuses on the latest hardware and software announcements.
Features:
- Supports lower thirds for Adobe Premiere
- You can customize the Premiere Pro intro template free download
- You can create graphic elements
4 Coremelt
This is a commercial site that offers a wide variety of high-quality plugins and templates for several video editing platforms. However, we are on the lookout for that fabulous price of free here, so a little digging finds this page , here you will find ten templates from one of their best selling products offered entirely free.
All templates are quality professionally produced products and worth the visit alone. For anyone who is looking to take their editing output to the professional level, the commercial products on offer here are well worth a look, high quality, and a reasonable cost.
Features:
- It includes 3D text and motion graphics templates
- Free and safe download the Premiere template

5 Bestproaction
Another commercial site. This one has a range of free templates and presets to download for Premiere. Fourteen open items altogether can be downloaded. This site at least deserves a browse through their catalog after a download. The emphasis here is on low cost but high quality, useful templates, and plugins to suit any project.
Even for those of us with a limited budget, there may be something that catches the eye. It is an excellent site for browsing when looking for inspiration.
Features:
- Offers multimedia products like free Premiere Pro text, title templates
- Includes professional Premiere Pro template for videographers
- You can create graphic elements

6 FXFactory
This is another commercial site that has a smattering of very high-quality free downloads on offer, including a beautiful template for the original Star Wars movie style scrolling titles.
Again, it is worth browsing the catalog when you are on the site, but all the free products can be found here .
FX Factory has also created some great video tutorials on a variety of aspects of video production that are well worth a view when you are at the site.
Features:
- Free Premiere Pro effects templates to download
- Includes a step by step Premiere Pro tutorial
7 Creative Impatience
A fantastic site full of information, tips, and opinion on all aspects of video production, it’s a great place to spend some time, with the bonus of a bunch of free downloads for Premiere.
Of particular note are the tutorials, an excellent source of information and tricks that you may not have seen before, with their YouTube channel being a great source of free guidance for editors of any sort of experience.
Features:
- Apart from free Premiere Pro templates, you can also find blogs
- Easy steps to make Premiere Pro templates
- Safe and clean to use. All real

8Filmimpact
A commercial site is offering some great products at competitive prices. At first glance, this may not seem to be a useful place for our search for the free stuff.
However, all the products do have a free trial download, and as a bonus, the trial for pack one includes four free to use templates. They are quality products too, and well worth a look.

9 Style4Type
Style4Type is an exciting site regularly updated with new free templates as well as offering technical advice and having further templates available as commercial products.
And to the side is even a free download for a PDF file that walks you through installing and using the templates within Premiere once you have them.
There are already a lot of free templates on offer covering a wide variety of styles, but they are added to with regularity, so it is a site to bookmark for the future.
Features:
- Free title templates to use including texture templates
- Professional tools to better your video

10 Premiere Beat
Lots of information on this site as its been running for a decade, it is a website that imparts a wealth of knowledge along the way on not just video editing but music.
The pack includes 21 Premiere title templates to use. Another site that you will want to visit again and again.
Features:
- High-quality Premiere Pro templates to download
- A large number of Premiere templates to use
11 Clean Elegant Rotation Title
It is a clean title template without unnecessary parts. If you like simple titles, this one is best for you. You can customize in Premiere easily with a few clicks. For beginners, it also includes free tutorials to use.
Features:
- Simple and clean Premiere title templates
- Customizable in Premiere

12 Unfolding Titles
It is a clean title template with an unfolding effect. Each text has two unfolding effects, which are convenient to use with customization. It supports 4K and HD versions. In this pack, it wons 10 title formats. After importing Premiere, you can also change text size.
Features:
- 20 unfolding title effects
- Supports rendering your video

13 Orange83
These are five modern title packs for Premiere. With it, you don’t need to use After Effects as you can import them to edit. The best part is you can include your logo and other stuff you like.
Features:
- Include 5 title packs
- Modern and clean titles
14 Video Intro Templates - Premiere Pro intro template free download
It is a free download Premiere Pro intro template that you can add to your video. It is highly recommended to use promotion and commercial video.
This intro template can be adjusted after you import it to Premiere Pro. This Premiere Pro intro template is HD, so you don’t need to worry about the whole video quality.
Features:
- 1920X1080 (HD) is supported
- This intro template doesn’t include built-in music

15 Elegant Promo - another Premiere Pro intro template free to use
It is intro template for Premiere Pro is modern and free to use. The whole style is young and energetic, which will give viewers a fresh new feeling. It includes 12 images and 26 text layers, and all of them are free to download.
You can use it for your presentation, promotional video, and product video. Besides, it doesn’t require a plug in to use this intro template in Premiere Pro.
Features:
- It includes animated intro elements.
- Use an HD intro template to make a popular video.

These are free templates, and they are enough to get anyone up and running with a new project. As said before, with the commercial enterprises that offer freebies, it’s always worth checking out their paid for output as well, you may not be in the market for it right now, but something may stick for a later time.
Part 2: Bonus: Best 5 Premiere Pro Intro Templates Free Download
Even though all websites we featured in this article offer some free intro templates for Adobe Premiere Pro. However, it is still a much better solution to buy a subscription plan on a platform if you are working on a large number of projects each month.
Let’s see which websites you can use to download the intro and title templates for Premiere Pro.
16. Motion Array
In addition to an impressive library of intro templates, Motion Array offers presets, sound effects, royalty-free music, and stock footage.
Furthermore, you can choose the software version to make sure that the templates you download can be used with the version of Adobe Premiere Pro you have installed on your computer.
The website provides you with powerful search tools, so you can select the resolution of the template, up to 8K, or choose which types of templates are going to be displayed.
Using the free subscription plan can limit your options since you’ll only be able to download free templates, and your upload storage will be limited to just 1GB.
The Pro subscription plan that can be purchased for $54 per month will grant you access to an almost endless selection of title templates as well as a huge selection of plugins for Adobe Premiere Pro.

17. Cinecom – Simple Intro for Premiere Pro
It is a designer pack that features ten pre-animated lower-thirds intro templates. You can change the duration of the font and color of the text in each template, and you can choose if you want to download a 1080 or the 4K version of the designer pack.
The templates are compatible with CS6, CC2013, CC2014, and CC2016 versions of the Premiere Pro. The Simple Titles pack can be easily installed, as you just have to drag and drop it into the software.
However, before you can download these title templates, you have to subscribe to Cinecom’s mailing list.
Even though this can be a bit inconvenient, it is very well worth the trouble since you’ll be able to transform or build upon the intro templates and use them freely in all videos you edit in Adobe Premiere Pro.

18. EnvatoElements
You can find much more than intro templates on the EnvatoElements platform since you can choose from 740.000 items you can use for anything from creating a WordPress website to preparing your next business presentation.
The Video Templates category alone features over 4000 items, including Logo Stings or Infographics assets.
There are nearly one hundred available intro templates for Adobe Premiere Pro, but downloading any of them requires you to create an account and purchase a subscription plan.
Prices start from $16.50 per month, and packages include virtually unlimited access to stock photos and videos, video templates, and much more. The EnvatoElements platform also offers assets that can be used with Final Cut Pro, Adobe After Effects or Apple Motion.

19. Videohive
Videohive is a part of the Envato Market platform that also features Web Themes and Templates, Code, Audio, or Graphic sections. It is free to use, but only a limited amount of assets can be downloaded for free.
To download an item, you must purchase it, and prices can range from $16 to $50 for a single title template.
Videohive is also a great source of title templates for Adobe After Effects, as it offers more than 5000 titles and intros that are compatible with this software.
Furthermore, you can download presets for both Premiere Pro and After Effects that can be used to create stop-motion animations, perform color correction, or make the footage look like it was captured with a VHS camera.

20. RocketStock
This option is best suited for video editors who want to create their intros because RocketStok’s Cinematic Style Library extends the scope of options provided by Premiere Pro.
Downloading all fonts except Helvetica Neue is free, but you must check which fonts you can use in commercial projects. You will have no trouble installing the fonts since you can just double-click on the font and follow the on-screen instructions.
Once you’ve installed all the fonts from the library, you can use them to replace the software’s default library. You just have to click on the Replace Style Library option that can be accessed from Premiere Pro’s Title Style tab.
If you don’t feel comfortable creating your titles or if you simply don’t have the time to create your own titles, the Free Cinematic Style Library is not the best choice for you.
On the other hand, Premiere Pro’s users who don’t often use title templates can benefit from downloading RocketStock’s intro library.

Part 3: How to Import and Customize Title Templates in Premiere
If you download the template, all the title templates support customization. You can change its size, font, color, and add 3D effects.
It is easy to import and use it to touch up your video. Check out the steps below to know how to import title templates quickly.
- Install the title template. Choose one template you like and download it to your PC. Remember to unzip it before importing it. Now install them.
- Import the title template. You just need to go to click Effects at the top. Then at right, you will find Presets in the effects section.
- Right-click on presets, and choose Import Presets. If the title template format is .mogrt, you need to open it in Essential Graphics Panel. At the bottom right corner, click the plus icon to import the title template and install it.
- Customize the title template. Once the title template is imported, drag it to the timeline. Click the Editing tab. Here you can customize colors, text, opacities, and positions. There are more options for you to explore.
- You can also copy and paste the title template to another place in the timeline. If you change one place of the pasted template, the original one will remain the same.
Note: each version of Premiere’s interface will look different, but the workflow is similar.
Conclusion
Using title templates can help you achieve a certain visual style faster, so you don’t have to spend a lot of time looking for a perfect background or animating the text.
The Internet provides almost unlimited video editing resources, but not all of these resources can be acquired for free.
Which website you will choose as a source of fresh title templates depends on how often you work on new projects in Adobe Premiere Pro.
If you want to make professional video editing and tired of Premiere, try Filmora! It includes various titles templates to use.
You can sync audio automatically, use detailed color correction to make your title and video like a movie. Download it now (FREE)!

Benjamin Arango
Benjamin Arango is a writer and a lover of all things video.
Follow @Benjamin Arango
Also read:
- In 2024, Transform Your Videos with Slow Motion A Kapwing Tutorial for Beginners
- New VLC Slow Motion Tutorial Enhance Your Video Viewing Experience
- New Best of Both Worlds Top Free and Paid Android Video Editing Apps 2023 for 2024
- Updated 2024 Approved Most Used Aspect Ratio Resizer Software
- New Top-Rated Free Online Invitation Video Editors and Makers
- Updated FCP vs LumaFusion Choosing the Ultimate Video Editing Software for 2024
- New In 2024, Color Harmony Made Easy A Step-by-Step FCP Guide
- Updated In 2024, IPhone and iPad Video Compression Made Easy 5 Free Apps to Try
- New 2024 Approved Discover the Best Stop Motion Software A Comparative Guide
- New In 2024, Free Video Flipper Websites No Download Required
- New Audio Mastery The Top 8 Professional Editing Software Solutions for 2024
- New Stop Motion Animation Made Easy A Beginners Guide to Software Options
- 2024 Approved Unleash Your Creativity Making Videos From Photos and Soundtracks
- Premiere Pro Compatibility Ensure Smooth Video Editing on Your Computer for 2024
- Updated The Ultimate Guide to LinkedIn Video Aspect Ratios for Better Visibility for 2024
- Updated Get More From Your Videos Learn to Split and Edit in Windows Live Movie Maker for 2024
- New 2024 Approved The Ultimate List of Free Online Photo Background Blur Tools
- Updated 2024 Approved Unlocking OS X Mavericks Video Editing Potential
- New Motion Blur Magic A Comprehensive Guide to Final Cut Pro Techniques
- Updated In 2024, Wax Video Editing Essentials A Guide to Getting Started with This Free Editor
- Updated In 2024, The Ultimate List of Glitch Video Editors Online and Offline Options
- New In 2024, Breaking Free From Windows Movie Maker Top Alternatives
- New In 2024, Subtitle Your Videos for Free Top 10 Online Makers
- New Trim and Edit Videos on Windows 10 The Best Free Options for 2024
- New In 2024, Bring Your Cartoons to Life Top Mobile Animation Apps
- Updated In 2024, Revolutionize Your Videos Best Apple Video Editing Software Revealed
- New 2024 Approved Top-Rated WebM to MP3 Conversion Software
- New In 2024, Top Picks Easy Video Editors for Photos and Music
- Updated Social Media Design Dimensions What You Need to Know
- In 2024, YouTube Thumbnail Secrets Unlocking the Power of Eye-Catching Images
- Updated The Ultimate List 10 Cartoon Video Creation Apps for Mobile
- Updated Get Creative Top Free Mobile Apps for Adding Video Special Effects for 2024
- Updated 2024 Approved Chroma Keying Mastery Advanced FCP X Tutorials for Professionals
- Updated In 2024, Best of the Best Top 10 Free 4K Video Converter Tools
- Updated Video Editing Mastery Top 4K/8K Software for Beginners and Pros for 2024
- Updated Top Mac Video Editors of Reviews and Comparisons for 2024
- Updated The Stop Motion Bible Everything You Need to Know About Studios and Alternatives
- New 2024 Approved Say Goodbye to Shaky Cam Stabilizing Your Videos in Premiere Pro
- New Eliminate Filmora Watermark Free and Paid Methods for 2024
- New 2024 Approved Essential Video Editing Software for Beginners
- Updated Unlock Chromecast Streaming Any Video Format Made Easy (Updated 2023) for 2024
- New 2024 Approved Cutting-Edge Free 4K Video Editors You Need to Try
- New VN Video Editor Pro Review Can It Replace Your Go-To Video Editor?
- In 2024, Bypassing Google Account With vnROM Bypass For Vivo Y28 5G
- In 2024, Process of Screen Sharing OnePlus Nord N30 5G to PC- Detailed Steps | Dr.fone
- Forgot your Lava Agni 2 5G lock screen pattern, PIN or password? Here’s what to do
- In 2024, Ways to stop parent tracking your Oppo A79 5G | Dr.fone
- In 2024, What Pokémon Evolve with A Dawn Stone For Honor Magic 6 Lite? | Dr.fone
- How to Intercept Text Messages on Motorola Moto G23 | Dr.fone
- How To Simulate GPS Movement With Location Spoofer On OnePlus 12? | Dr.fone
- How to Factory Reset Vivo V27 If I Forgot Security Code or Password? | Dr.fone
- How to Unlock Itel A60s PIN Code/Pattern Lock/Password
- A Step-by-Step Guide on Using ADB and Fastboot to Remove FRP Lock on your Tecno Spark 20
- Hard Reset Oppo Find X6 Pro in 3 Efficient Ways | Dr.fone
- How to Remove Activation Lock From the iPhone 8 Plus Without Previous Owner?
- In 2024, iPogo will be the new iSpoofer On Tecno Phantom V Flip? | Dr.fone
- How to Bypass Android Lock Screen Using Emergency Call On Infinix Hot 40 Pro?
- In 2024, The Ultimate Guide to Realme 11X 5G Pattern Lock Screen Everything You Need to Know
- How to Use Pokémon Emerald Master Ball Cheat On Tecno Pop 7 Pro | Dr.fone
- How to Use Pokémon Emerald Master Ball Cheat On Apple iPhone 14 | Dr.fone
- In 2024, Pokemon Go No GPS Signal? Heres Every Possible Solution On Vivo X90S | Dr.fone
- Best Motorola Edge 40 Neo Pattern Lock Removal Tools Remove Android Pattern Lock Without Losing Data
- Title: New FCPX Power User Mastering Freeze Frames, Slow Motion, and Beyond for 2024
- Author: MdadeLe
- Created at : 2024-06-08 12:39:37
- Updated at : 2024-06-09 12:39:37
- Link: https://smart-video-editing.techidaily.com/new-fcpx-power-user-mastering-freeze-frames-slow-motion-and-beyond-for-2024/
- License: This work is licensed under CC BY-NC-SA 4.0.


