
:max_bytes(150000):strip_icc():format(webp)/001_the-best-kids-movies-on-disney-plus-june-2023-5112564-37245acf2e6840ba8319f0e13985e04a.jpg)
New Best of the Best Video Editing Apps for Windows, Mac, iOS, Android, and Linux for 2024
Best of the Best: Video Editing Apps for Windows, Mac, iOS, Android, and Linux
Best Video Editors for Windows/Mac/iOS/Android/Linux [All in One]

Ollie Mattison
Mar 27, 2024• Proven solutions
Now, videos are getting increasingly important for you to present your thoughts and feeling on Instagram, YouTube, or Facebook.
But how to make your video looks professional, creative, stunning and deserved to share? A free video editing software can do you a favor.
So, Which is the best video editor available in the market?
If you are not quite certain about the video editing software you should use to edit your videos, you’ve come to the right place. Because we are going to take you through the best video editors including free versions.
Newcomers to the world of the video editing as well as seasoned professionals can use this guide to find the video editing software that will help them produce better visual content.
Let’s dive in and explore all aspects worth considering before you decide which software is best for you. And you can click the Filter button at the left side in this article to find the best video editing software for you.
- Part I: Best Video Editor for PC/Mac/Linux
- Part II: Best Video Editing Software Online
- Part III: Best Video Editor APP for iOS/Android
We spent about a month for researching and testing all popular video making software in the market and now collect 35 best video editors for you. This list of film makers can be used on Windows, Mac OS, iOS, Android, and Linux. Besides, some of them are online video editors you can use directly.
Now, let’s filter through the list to find the best video editor for you. Check it out :
| No. | Product Name | Supported OS | Price | Best for | Overview | Download Link |
|---|---|---|---|---|---|---|
| 1 | Wondershare Filmora | Windows 7/8/10, Mac OS, Android, iOS | Free trial; $79.99 perpetual, $49.99/year | Beginners, Semi-Pros | 4.9 | Download |
| 2 | Windows Movie Maker | Windows7/8/10 | Free | Beginners | 4.1 | Download |
| 3 | iMovie | Mac OS, iOS | Free | Beginners | 4.3 | Download |
| 4 | Final Cut Pro | Mac OS | 30 days free trial; $299.99 | Professionals | 4.4 | Download |
| 5 | Wondershare Filmii | Windows 7/8/10 | Free trial; $9.99 | Beginners | 4.3 | Download |
| 6 | Lightworks | Windows 7/8/10, Mac OS, Linux | Free trial; $437.99 | Professionals | 4.2 | Download |
| 7 | ShotCut | Windows 7/8/10, Mac OS, Linux | Free Open Source Video Editor | Semi-Pros | 3.9 | Download |
| 8 | HitFilm Express | Windows, Mac OS | Free | Semi-Pros | 4.1 | Download |
| 9 | Blender | Windows 7/8/10, Mac OS, Linux | Free; Fund $6/mo for support | Professionals | 3.8 | Download |
| 10 | Avidemux | Windows 7/8/10, Mac OS, Linux | Free | Beginners | 3.5 | Download |
| 11 | VideoPad Video Editor | Windows, Mac OSX, iOS, Kindle | Free | Beginners | 3.9 | Download |
| 12 | OpenShot | Windows 7/8/10, Mac OS, Linux | Free Open Source Video Editor | Beginners | 3.8 | Download |
| 13 | Kdenlive | Windows 7/8/10, Mac OS, Linux | Free | Semi-pros | 4.1 | Download |
| 14 | Adobe Premiere Pro | Windows 7/8/10, Mac OS | 7 days free trial; $20.99/mo; $33.99 /mo | Professionals | 4.5 | Download |
| 15 | Magix Vegas Pro | Windows 7/8/10, Mac OS | $399-$799 | Professionals | 4.2 | Download |
| 16 | Adobe Premiere Elements | Windows 7/8/10, Mac OS | $99.99 | Semi-pros | 4.7 | Download |
| 17 | CyberLink PowerDirector | Windows 7/8/10, Mac OS | $69,99 - $129,99 | Semi-pros | 4.5 | Download |
| 18 | Magix Movie Video Easy | Windows only | Free trial; $49,99 | Semi-pros | 3.6 | Download |
| 19 | Magix Video Pro | Windows 10 | Free trial; $79.99 | Beginners | 4.1 | Download |
| 20 | Media | Online | Free | Beginners | 4.75 | Check |
| 21 | YouTube | Online | Free | Beginners | 4.8 | Check |
| 22 | Online Video Cutter | Online | Free | Beginners | 3.6 | Check |
| 23 | Movie Maker Online | Online | Free | Beginners | 3.7 | Check |
| 24 | ClipChamp | Online | 14 day free trial; $7/mo | Beginners | 4.1 | Check |
| 25 | WeVideo | Online | Free trial; $11.99-$79.99 | Beginners | 4.4 | Check |
| 26 | Kizoa | Online | Freemium | Beginners | 3.8 | Check |
| 27 | Wideo | Online | Freemium | Beginners | 4.3 | Check |
| 28 | Filmora | iOS, Android | Freemium | Beginners | 4.1 | Download |
| 29 | Vlogit | iOS, Android | Free | Beginners | 3.6 | Download |
| 30 | VideoShop | iOS, Android | Freemium | Beginners | 4.8 | Download |
| 31 | Filmmaker Pro | iOS | Freemium; $5.99/mo | Semi-pros | 4.6 | Download |
| 32 | KineMaster | iOS, Android | Freemium | Semi-pros | 4.4 | Download |
| 33 | LumaFusion | iOS | $29.99 | Semi-pros | 4.8 | Download |
| 34 | Vizzywig 2019 | iOS | $79.99 | Semi-pros | 4.1 | Download |
| 35 | PowerDirector | iOS, Android | Freemium | Beginners | 4.5 | Download |
Part I: Best Video Editing Software for Windows/Mac/Linux
1. Wondershare Filmora
Platform: Windows, Mac, Android, iOS
Price: Free trial; $79.99 perpetual, $49.99/year
Level: Beginners
Even though it is widely considered as one of the premium entry-level video editing software options, Wondershare Filmora also offers advanced editing tools. The software product comes with detailed learning resources and provides support to its users who have little editing experience. The wide range of file formats and remarkably diverse Export options make Filmora an interesting choice for those who are just entering the world of video editing, but also for more experienced editors.
Features: Filmora’s rich effect library contains over a thousand modern special effects from niches such as gaming, blockbuster or tutorial, and new effects are added every month. The Action Cam tool is designed to make merging footage shot on action cameras easy and quick. Filmora supports a wide range of file formats including AVI, MP4 or MKV, so you don’t have to worry if your footage was shot in 4K or HD because you can easily edit it with this software.
Advantages:
A large number of professional video editing features Filmora offers as well as its modernly designed interface makes it one of the best options for amateur video creators.
Limitations:
You can use all the features in the free trial version, but have to pay to remove the watermark.
Lear more about Wondershare Filmora here: Filmora Official YouTube Channel
2. Windows Movie Maker
Platform: Windows
Price: Free
Level: Beginners

This is probably one of the oldest if not the oldest video editing software for PCs. Microsoft has announced that Windows Movie Maker will no longer be available for download. This software can still be found online, although not on Microsoft’s website, and currently, there are two different versions of Windows Movie Maker available. Even the least experienced video editors can master each of the Movie Maker versions easily.
Features: The classic video editing software is equipped with all the tools you’ll need for basic editing tasks like trimming, changing the video playback speed or rotating videos. It even features a Video Stabilization option that can be useful if you’d like to stabilize a video and remove the distracting camera shakes. Windows Movie Maker lets you add text effects to your video, insert Transitions between two takes, perform basic audio editing or record a screen.
Advantages:
Free, meets your basic editing demands
Limitations:
Service discontinued
No support for modern file formats
Lacks color correction tools, visual effects or any other advanced video editing options.
Check how to use Windows Movie Maker here: Windows Movie Maker User Guide
3. iMovie
Platform: Mac OS, iOS
Price: Free
Level: Beginners

As the Apple’s version of the Windows Movie Maker, iMovie has a similar status of a classic video editor that is at its best when used for simple video editing tasks. The video editor can also be used on an iPhone or an iPad if you want to edit your videos on the go. Learning your way around iMovie won’t take much of your time since all of its features are easy to use.
Features: Editing 4K videos or making credits or titles are just a few among many options provided by iMovie. Adding transitions, applying split-screen effects or creating PIP videos doesn’t require you to be a skilled video editor, because all of these options are easily accessible and they can be used in any project you are working on.
The iMovie’s audio editing options are equally impressive since the software enables you to add music, use built-in sound effects and record voiceovers. The video editor supports most of the popular file formats.
Advantages:
Free, and comes bundled with your Mac
Intuitive interface
Limitations:
This classic video editor for Apple’s devices doesn’t offer advanced video editing options such as motion tracking or keyframe marking.
Check how to use Windows Movie Maker here: iMovie User Guide
4. Final Cut Pro
Platform: macOS
Price: Paid, $299
Level: Professionals

Final Cut Pro is probably one of the highest praised video editing software ever created. It has been used to edit cinematic masterpieces such as ‘What happened Miss Simone’ or ‘The Girl With a Dragon Tattoo’, which speaks volumes about the software’s capability. Final Cut Pro’s Magnetic Timeline 2 is one of the kind, and it makes organizing large amounts of video and audio files look easy. Although the software’s price may seem discouraging, those who invested in it never had to use another video editor.
Features: A brief look at the list of Final Cut Pro’s video editing tools will leave you wondering if there is anything this software can’t do. Besides basic video editing features, the video editor is also equipped with 360 degrees VR video editing option, Multicam editing, and advanced color grading tools. Final Cut Pro allows its users to add as many audio tracks to the timeline as they want, thus enabling them to create impeccable soundtracks for their videos.
Advantages: Working with large numbers of video files is simplified by the software’s timeline, while options such as 3D titles or VR contribute to the strong impression this editor leaves on all of its users.
Limitations: Final Cut Pro has some lingering glitches that still haven’t been fixed, and its audio editing tool set lacks some important pieces.
If you are new to video editing and you will need a video maker that is tailored for beginners. In such case, you can read this article to get: Best Free Video Editing Software for Beginners >> They are really very easy to use. You can make a stunning video less than an hour.
5. Wondershare Filmii
Platform: Windows
Price: Free, Paid versions
Level: Beginners
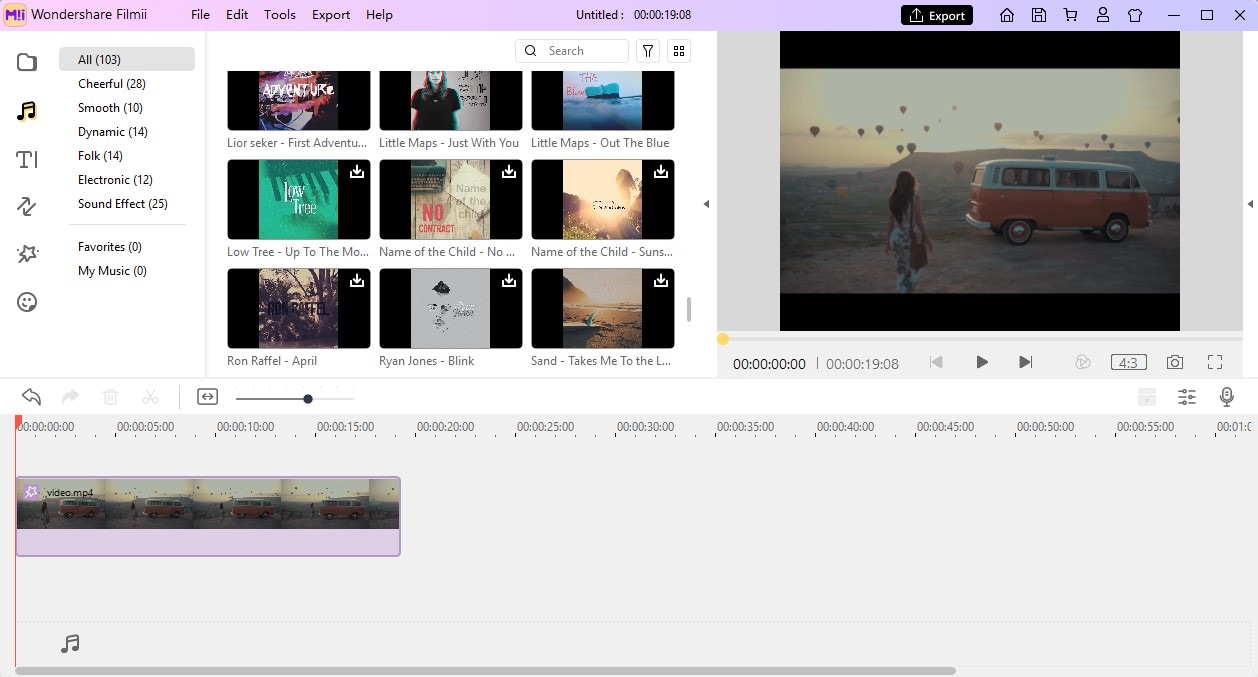
This delicate video editing software is one of the best video editors for newbies. The free version of the software offers a lot of powerful video editing tools, but in order to get rid of the watermnark, you have to pay 9.99$ for its monthly plan. One of the advantages of Filmii is that it has a variety of video templates that can help beginners edit amazing videos with ease due to its auto-create functionality. Besides, its audio editing or creative tools are equally impressive.
6. Lightworks
Platform: Windows, macOS, Linux
Price: Free, Paid versions: $437.99
Level: Professionals

Lightworks is one of the best video editing software on this list with a long history in the movie-making business. The free version of the software is available, but it has limited export options. A $25 monthly subscription is required in order to gain access to all of the software’s features. Although it may be a somewhat pricey option, purchasing Lightworks is a profitable investment that may help you improve the quality of your videos.
Features: Both free and paid versions of this video editing suite offer support for wide range of video file formats. This can be very useful for video editors who often work on projects shot on different cameras. Multi-cam editing feature enables the software’s users to work with footage shot from separate angles, using more than just one camera. The videos edited with the free version of the software can only be exported to an MPEG4 file format with the maximum size of 1280X 790 pixels, and they must be uploaded to YouTube directly from the editor.
Advantages: Royalty-free media and a remarkable VFX panel make Lightworks a tempting option for professional and amateur video editors alike.
Limitations: The export options on the free version of the software are extremely limited and the software doesn’t provide much support for inexperienced users.
7. ShotCut
Platform: Windows, macOS, Linux
Price: Free
Level: Semi-Pros
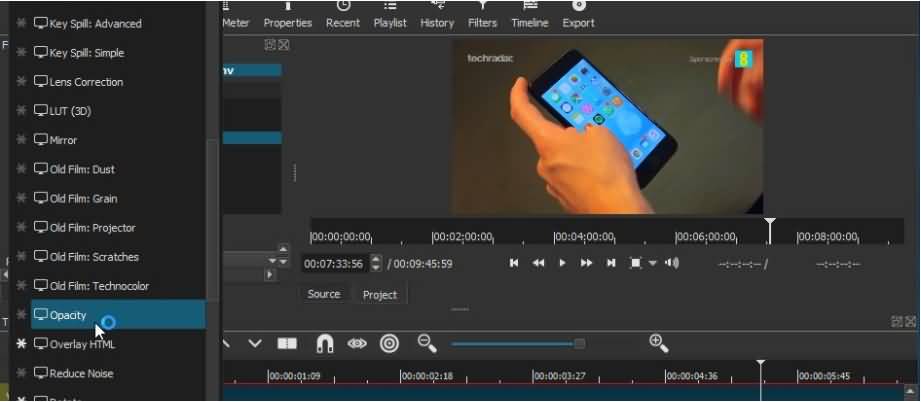
If you need a video editing software just to piece together a few clips you recorded on the family vacation, then ShotCut may be a bit overwhelming choice for such a task. This open-source software is equipped with a rich collection of audio and video editing features, while it also offers support for nearly all video file formats. It is best suited for users in need of powerful video editing software who don’t want to spend a fortune on purchasing a professional editing suite.
Features: Screen capturing, webcam video recording or audio capturing options are all made available by ShotCut. The software’s video and audio editing features surpass all expectations and allow the software’s users to have complete creative control over their projects. Features such as Chroma Key, Crop or Blur are accompanied by a number of amazing video effects that can be used to enhance the colors in a video. Using ShotCut requires you to just download the software and run its executable file, which means that you don’t have to go through the installation process in order to start editing with this software.
Advantages: 4K videos, as well as numerous other video and audio file formats, are supported by this open-source video editing software. To make things even better ShotCut grants you access to fully customizable filters.
Limitations: The software doesn’t feature preset export profiles, and the transitions it offers are a bit scarce.
8. HitFilm Express
Platform: Windows, macOS
Price: Free
Level: Semi-Pros

This cross-platform video editor ranks among best video editing software products currently available on the market. Its secret lies in uniting visual effect compositing and video editing options under the same roof. HitFilm Express is aimed at users with an enviable amount of video editing experience, since inexperienced video editors may find the software’s interface difficult to navigate. This video editing suite offers a lot of video editing tools as well as visual and audio effect, that can be easily used to improve the quality of your videos.
Features: The rare combination of VFX compositing and video editing makes HitFilm Express unique, while its motion design and tracking options offer support for more complex video editing actions. The software supports 2D and 3D effects compositing, as well as 4K and 360-degree videos.
HitFilm Express’ titling options are at the basic level, while its Export options are alarmingly narrow. This free editing software doesn’t provide too many options for color adjustments, but its audio editing features can be used to create a video with a superior soundtrack.
Advantages: The software offers a wide spectrum of transitions and video effects and it supports most popular video file formats. HitFilm Express lets you use semi-professional video editing tools for free.
Limitations: In order to export a video from the software you must share a link on a social media platform and then download the file. People who are not familiar with the video editing process may find using HitFilm Express difficult.
9. Blender
Platform: Windows, macOS, Linux
Price: Free
Level: Professionals

Blender started out as an open-source project and over the years animators, scientists, VFX artists and numerous other people have participated in developing this 3D creation suite. The software can be used for modeling, animation, video editing or compositing, to mention only a few of its many purposes. Editing video footage isn’t Blender’s strong suit, but its video editing features are powerful enough to enable you to perform basic editing tasks. However, this doesn’t mean you can’t use this software to create videos that grab the viewer’s attention.
Features: Cutting or trimming videos, adjusting the video’s playback speed or adding keyframes to a video clip is an easy process in Blender. The software’s true strength lies in its animation, 3D modeling or motion tracking features. The latest version of Blender is equipped with a motion tracking option that allows you to import the footage into the software directly from a camera. You can utilize this feature to mask areas of the shot and see the movement on camera in a 3D environment.
Advantages: Blender’s price and its powerful features make it an interesting choice as your primary video editing software.
Limitations: You must have in-depth knowledge of animation, compositing, and 3D techniques in order to be able to use Blender.
10. Avidemux
Platform: Windows, macOS, Linux
Price: Free
Level: Beginners

This simple video editing software has all the tools you’ll ever need to quickly polish your videos. Its audio and video effects can be utilized to make your videos look and sound professionally, but Avidemux doesn’t offer much more than these basic video editing options.
The software provides support for most of popular video file formats, but its export options are far from perfect. Avidemux doesn’t feature visual effects or transitions, which significantly limits its video editing capabilities.
Features: Newcomers to the video editing world will love the software’s interface, because of its simplicity. The Transform feature allows you to fade in and fade out shots, crop or rotate video clips and even add logos to your videos. Blur or Sharpen effects enable users to enhance their videos, while contrast, brightness, saturation or hue values can be adjusted to make the colors in the video look more vivid. Avidemux also features the Subtitle option, but the software can only add hardcoded subtitles to videos.
Advantages: Solves all your basic video editing problems, and lets you have fun while editing videos. Avidemux also has solid encoding options and its interface is user-friendly.
Limitations: There are no video effects or transitions, which narrows down the software’s video editing options.
11. VideoPad Video Editor
Platform: Windows, macOS
Price: Free
Level: Beginners
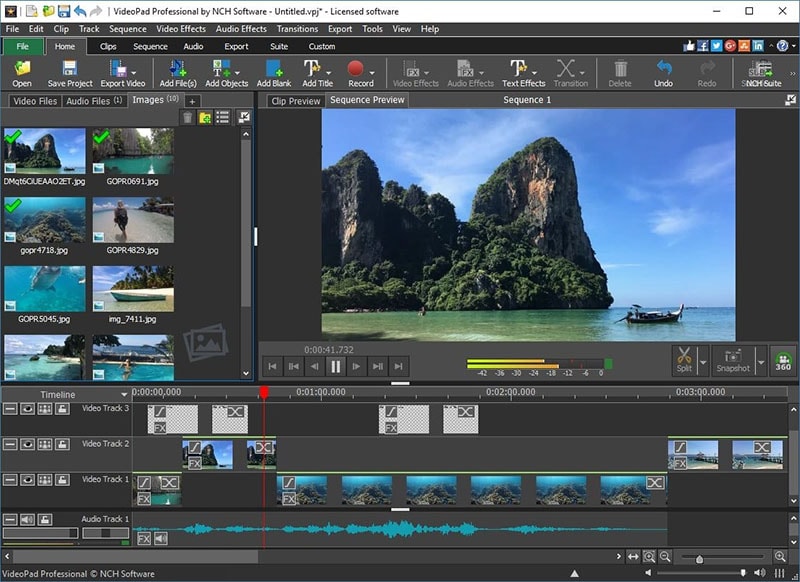
VideoPad is one of the best entry-level cross-platform software products you can use for easy video editing tasks. The free version of the software is available to both Mac and PC users, although the Windows version limits the video exporting options to just two file formats. The VideoPad’s interface doesn’t take much time to get used to, and it perfectly adjusted to the needs of inexperienced video editors. Paid versions of the software are available to advanced editors who want to use VideoPad for more than just basic video editing.
Features: The list of video editing features VideoPad provides includes several pleasant surprises. The 4K video support, as well as 360-video editing features, are aimed at GoPro owners who want a quick and easy way to process their footage. The visual effects this free video editing software provides are impressive, while the Chroma Key option enables its users to create green screen videos. Even though VideoPad allows its users to edit audio files, its audio editing features are fairly modest.
Advantages: Learning how to use VideoPad is simplified by its intuitively designed interface.
Limitations: There are no advanced video editing options like multi-cam editing and motion tracking and certain features become unavailable when using the free version of the software over a longer period of time.
Download link: If you download the trial version instead of the free non-commercial home edition, or do not find a specific link to it on the website, you can trydownloading it from this link , or contact tech support , and they will send you a direct link.
12. OpenShot
Platform: Window, macOS, Linux
Price: Free
Level: Beginners

This award-winning open-source video editor offers a wide range of video editing tools that span from trimming and slicing to Slow Motion and Time effects. OpenShot is an excellent software for training and learning new video editing tricks, but it is best avoided if you are working on a large project. The software’s basic video editing features make it an excellent choice for users who only want to perform simple edits without having to waste too much time.
Features: OpenShot lets you add unlimited video and audio tracks to your projects, but its file management capabilities are far from impressive. The software allows you to trim or arrange the video files in any way you want, and it also provides a lot of different Transitions that can be used to make the videos look smoother. The collection of video and audio effects allows users to try out different solutions for the scenes in their video clips. OpenShot features a Vector Title Editor that can assist you in creating perfect opening titles or end credits.
Advantages: The interface of this open-source video editing software is designed to assist its users through every step of the video editing process. OpenShot is a great choice for all video editors who want to save money and use a powerful video editing software at the same time.
Limitations: More complex video editing options such as Rotoscoping, are not available. You may have to install add-ons if the OS you are using doesn’t meet the software’s system requirements.
13. Kdenlive
Platform: Windows, macOS, Linux
Price: Free
Level: Semi-pros

Almost two decades ago, this open-source project was started by Jason Wood in order to develop a video editing software for Linux OS. Over the years, a small team of developers has created Windows and MacOS versions of the editor that now have a loyal fan base. Even though the software’s features make it a reliable choice for more complex projects, Kdnelive can also be used to perform simple edits. This video editing software combines the simplicity of entry-level video editors with advanced video editing tools frequently used by experienced professionals.
Features: The functionality of this video editor will surprise even the greatest of skeptics. The software’s timeline lets you to add as many videos and audio files to your project as you want, making it a perfect tool for large-scale projects. The visual effects and transitions enable users to manipulate the footage in any way they see fit, while the extremely powerful analysis tools such as histograms, waveforms or vectorscopes enable them to monitor all the adjustments they make on their footage.
Advantages: Kdnlive provides support for nearly all input file formats that can be added easily to the software’s multitrack timeline. The free open-source add-ons can extend the video editor’s capability and thus enable you to perform a wider range of video editing actions.
Limitations: Even though the software provides the screencast recording option, it doesn’t feature the PIP effect. Multi frame-rate editing isn’t possible and software’s updates can last for hours.
14. Adobe Premiere Pro
Platform: Windows, macOS
Price: Paid, $19.99 per month
Level: Professionals

There are very few video editing suites that can offer as much to its users as Adobe Premiere Pro can. It is probably one of the best video editors ever created, as it has been setting the industry standards for a long time. High-end professionals frequently use Adobe Premiere Pro on their projects, while aspiring filmmakers strive to learn every option this unique video editor has to offer. The much-famed software isn’t the best choice for video editors who are just learning the basics of the trade, although it supplies a staggering amount of tutorials and learning materials.
Features: With each new version of Adobe Premiere Pro the list of the software’s features becomes longer. Its timeline is famous for its ease of use because it enables you to add as much new audio or video tracks as your project requires. This is arguably one of the best color correction software packages on the market, while its color grading features are no less impressive. Adobe Premiere Pro provides support for a wide range of video file formats including 4K, HDR, and 360 VR videos.
Advantages: Perfect for collaborative projects that involve large teams of experienced professionals. The software is at its best when used with other Adobe’s products that enable you to develop projects beyond the boundaries set by the Adobe Premiere Pro’s limitations.
Limitations: You cannot purchase the lifetime license to use this video editing software, and paying monthly subscriptions may be hard on the budget of some of its potential users.
15. Magix Vegas Pro
Platform: Windows
**Price:**Paid: $399
Level: Professionals

Successful independent artists, film producers, and all other film and video enthusiasts can only benefit from purchasing this video editing suite. The software belonged to Sony Creative Software for much of its history, but on May 20. 2016 the company sold it to Magix. Previously known as Vegas Pro or just Vegas, this video editing software is widely accepted as one of the best professional video editing tools ever created. There is virtually no video editing task that cannot be completed in Magix Vegas Pro video editing software.
Features: This video editor is designed to provide support to its users from the beginning until the very end of the video editing process. Magix Vegas Pro recognizes almost all video file formats, even those captured with professional RED or ARRI Alexa cameras. You can use this software to edit 3D or 4K videos, while the Multicamera-Editing feature lets you switch between any number of video sources with a single mouse click. Effects such as Automatic Crossfades allow you to create transitions between shots effortlessly.
Advantages: The seemingly unlimited amount of learning resources makes editing with Magix Vegas Pro a lot easier and it enables less experienced video editors to learn new tricks.
Limitations: There aren’t as many visual effects as you would hope for and the software’s interface isn’t aesthetically pleasing, but it is very functional.
16. Adobe Premiere Elements
Platform: Windows, macOS
**Price:**Paid: $99.99
Level: Semi-pros

Although it is often regarded as a simplified version of Premiere Pro, this video editing suite offers enough video editing tools to edit videos at the semi-professional level. Adobe Premiere Elements contains automated versions of Premiere Pro’s features and in this manner it enables its users to utilize professional video editing tools on their prosumer level projects. Even though this Adobe’s software product lacks the power of professional video editing software packages, it still offers enough video editing tools for the production of nicely polished and well-rounded videos.
Features: Adobe Premiere Elements recognizes all popular video file formats, and it offers support for 4K content. In addition to its remarkable file format compatibility, the video editor also features 3D editing and face detection options that can be very useful when working on more complex video projects. The haze-removal effect is extremely efficient at reducing the fog or cigarette smoke in a shot, while the motion titles let you create visually impressive opening titles or end credits. The Adobe Premiere Elements has performed exceptionally well when rendering large video files.
Advantages: The software’s Guided mode provides support to its users and helps them learn how to perform all video editing actions. The asset management tool offers assistance with the organization of large amounts of video and audio files.
Limitations: When compared to other video editors in this guide Adobe Premiere Elements’ device and social media optimization features seem to be in short supply.
17. CyberLink PowerDirector
Platform: Windows, macOS
**Price:**Free trial, Paid version: $69,99 - $129,99
Level: Semi-pros
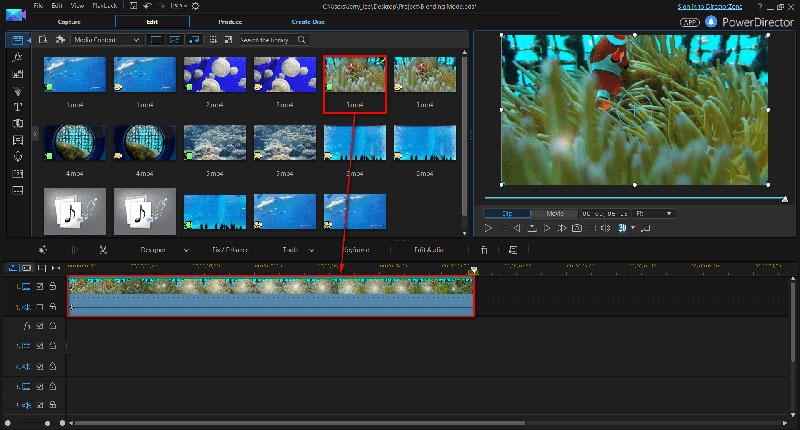
This is probably one of the best and most popular video editing software packages aimed at amateur and semi-professional users. There are several versions of the software available, and each of them contains a different amount of options and video editing tools. Even with somewhat reduced capability, the least expensive version of the editor supports 360-degree as well as VR options for posting on social media such as Vimeo, Facebook or YouTube. CyberLink PowerDirector isn’t a professional video editing software, but it still offers a lot of extraordinary options that can take you a step closer to producing a professional video.
Features: The 360-degree video editing options are probably the first thing that catches the eye when you look at the list of features the software provides, but its true power lies in its color tools. LUTs, HDR effects or Split Toning options are just the tip of the iceberg since PowerDirector offers countless tools for fine-tuning of the colors in your videos. Animated PIP effects and video collages make this video editing software a perfect choice for the production of tutorials and all other types of online videos.
Advantages: The audio editing options provided by CyberLink PowerDirector are nothing short of amazing since they enable the software’s users to manipulate the audio files in any way they see fit.
Limitations: Motion tracking and color lookup features are not always reliable. The software is a bit overpriced when compared with similar video editing suits.
18. Magix Movie Video Easy
Platform: Windows
Price: Free trial, Paid version: $49,99
Level: Semi-pros

This video editor is a great choice for people who have never edited a video before and who want to learn how to perform basic video editing tasks. Video Easy’s intuitive user interface can be mastered by anyone with enough determination to edit videos with this software on a constant basis. Features this editor offers may not be as impressive as to ones provided by professional video editing suites, but they are powerful enough to produce clean edits that give your videos a professional look.
Features: If you choose to make Magix Movie Video Easy your primary video editing software, you will never have to worry about what type of camera you used to record your videos since the software is compatible with all standard camcorders, digital cameras, and Smartphones. The rich collection of transitions and effects, as well as the intro and outro animations, can all be used to create amazing videos. You can export videos to DVDs, Blu-Ray discs or YouTube directly from the software.
Advantages: If you are looking for a video editor that will enable you to add music to your videos, trim or cut videos quickly and choose from hundreds of effects, then you should look no further because Magix Movie Video Easy provides all of these options, and much more.
Limitations: Doesn’t perform well when used for demanding video editing tasks.
19. Magix Video Pro
Platform: Windows, macOS
Price: Free trial, Paid version: $62,99
Level: Beginners

Magix has been the largest European video editing software manufacturer for more than two decades. Its software products may not enjoy the fame of Adobe’s video editing software packages, but this doesn’t mean that a video editor such as Magix Video Pro cannot be used for the production of professional-looking videos. Besides offering basic video editing tools this video editor also features advanced video editing options such as Stop Motion animation or 360-degree video editing. Magix Video Pro is often labeled as ‘one of the best video editing programs out there’.
Features: Audio editing features that come with this video editor include an audio mixer that enables you to reduce noise levels, control the low, mid and high sounds or simply equalize the sound volume across the entire project. The video editing tools supplied by the Magix Video Pro are as impressive as its audio editing options. Lens correction features, Split screen videos or 360-degree video editing options reveal only a fraction of the software’s capabilities. Magix Video Pro delivers professional video editing features to consumer-level users.
Advantages: The software allows you to place any type of media file on its timeline and use it in your project.
Limitations: The effects library installation process can be time-consuming, although it is well worth the wait.
Part II: Best Video Making Editors Online
20. YouTube
Platform: Online
Price: Free
Level: Beginners

The world’s largest video sharing platform also offers basic video editing services. Although Google has discontinued its built-in video editor, it still allows tts users to trim or rotate videos, apply filters or even create time-lapse and slow-motion videos on line. Brightness, contrast or saturation levels can be altered if you want to enhance the colors in your videos. Audio editing features are limited because the platform only allows you to add a single audio file to a project you’re working on. However, some of the most important video editing features like adding the text or creating titles are not available.
Advantages: Allows you to polish your videos before posting them on YouTube for free.
Cons: This online video editor lacks some basic video editing tools such as transitions or audio controls.
21. Online Video Cutter
Platform: Online
Price: Free
Level: Beginners
If you were looking for a web app that contains all the tools required to cut a small video file, then Online Video Cutter is one of your best options. You won’t even have to create an account before you start the video editing process. The videos you upload to this online editor can’t exceed the 500 MB size limit. Besides cutting their videos, users of this editor can also rotate or trim their footage for free. Online Video Cutter provides support for nearly all video file formats, so you don’t have to worry about the file format in which your video was captured.
Advantages: Offers a quick way to trim videos online and it is exceptionally easy to use.
Limitations: Lacks even the most basic video editing features other than cutting, trimming and rotating videos.
22. Movie Maker Online
Platform: Online
Price: Free
Level: Beginners

This free online editing tool lets you process videos without even registering or creating an account. You can add videos, photos, text, and music into a single project and mix them together into an awesome video. The platform grants you access to its rich filter library, and it also allows you to add text overlays, fade audio and video files or create smooth transitions between shots. Movie Maker Online features its own collection of royalty free music and photos you can use to make your videos look and sound better. The webpage’s design is a little odd, and it may take some time to get used to it.
Advantages: The app offers a lot of different video editing tools and it allows you to perform all basic video editing actions online.
Limitations: Movie Maker Online is funded by ads, and requires you to disable your AdBlock app before you can start editing a video.
23. ClipChamp
Platform: Online
Price: Free trial, Paid: $7 per month
Level: Beginners

ClipChamp lets you upload videos you already recorded or capture new footage using your computer’s webcam. The free version of this web app allows you to export in 1080p video files, but you can’t produce more than five videos in a single month. Both versions of the online video editor require you to create an account, and the videos exported from the free version of the app don’t have a watermark. ClipChamp provides numerous video editing tools, including transition, color adjustments or cropping. The exporting process doesn’t last too long and you can choose whether you want to share the video on social media or download it to your computer.
Advantages: Makes creating webcam videos as well as editing preexisting footage look easy while providing excellent export options.
Limitations: The free version of ClipChamp allows you export only five videos in a month.
24. WeVideo
Platform: Online
Price: Freemium
Level: Beginners
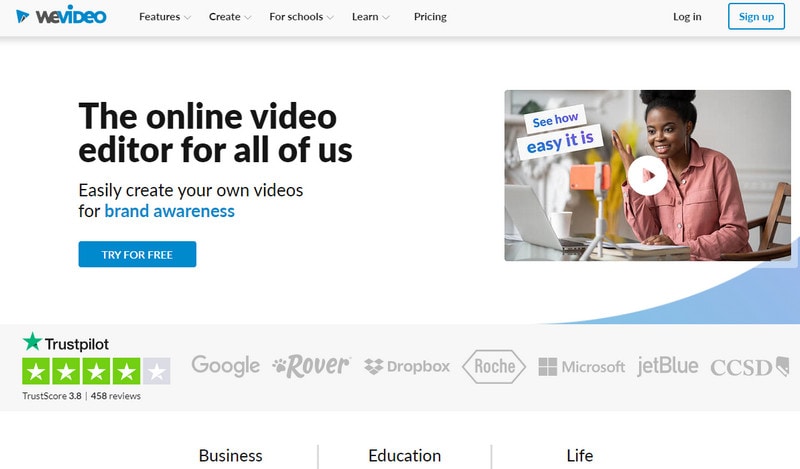
The capabilities of WeVideo online video editor surpass the basic level of video editing. The platform offers support for iOS and Android devices as well as desktop computers. Producing square or horizontal videos, creating motion titles or publishing videos in 720p HD resolution are just a few amazing options this online video editor provides. The paid versions of the web app are best suited for skilled video editing professionals or large teams that are working on demanding projects. WeVideo’s free version doesn’t allow its users to publish more than 30 minutes of video content each month and each exported video contains a watermark.
Advantages: Produces videos with great picture quality and offers tons of advanced video editing options.
Limitations: Creating an account is mandatory even for video editors who want to use the free version of WeVideo.
25. Kizoa
Platform: Online
Price: Freemium
Level: Beginners

Kizoa offers a broad spectrum of transitions, visual effects, animation and text effects to its users for free. The video editing platform is frequently used to create goofy short videos that can be easily shared on Facebook or Twitter. The app allows you to add photos to your video projects and it grants you access to an incredibly rich royalty free music collection. However, you will have to create an account on Kizoa in order to be able to export the videos you created. The editor’s timeline is rudimentary, but still functional enough to enable users to combine audio, video, and photo files.
Advantages: Kizoa is a powerful tool for the creation of entertaining social media videos.
Limitations: You must create an account in order to be able to export your projects, and the online video editor doesn’t feature any advanced video editing options.
26. Wideo
Platform: Online
Price: Freemium
Level: Beginners
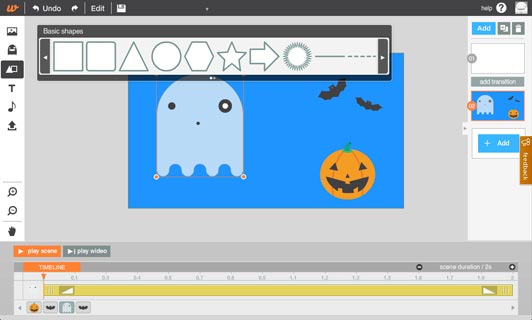
All video enthusiasts can use Wideo platform to edit their videos, regardless of their skill level. In addition to amazing video editing options, this online video editor also features animations that can be used to create professional presentations. All video content uploaded to Wideo is stored on the cloud, and pricing plans for professionals include unlimited storage space. The Basic version of the editor allows for just ten downloads in a month and it doesn’t let its users upload videos to YouTube. Even though this video editor is easy to use, it is better suited for skilled professionals than it is for inexperienced video editors.
Advantages: Even the Basic pricing plan enables users to export HD videos, while Professional and Enterprise pricing plans include the Full HD export option.
Limitations: Limited audio editing options significantly reduce the capabilities of this online video editing platform.
Read More to Get: 10 Best Free Online Video Editors With No Watermark >>
Part III: Best Video APP for iOS/Android
27. Filmora
Platform: iOS, Andoird
Price: Freemium
Level: Beginners
You can edit your videos with Filmora in just three simple steps. All you have to do is choose the videos and photos from your phone’s gallery, Instagram or Facebook account, select a theme, insert transitions or add a song and share the video directly from the app on social media or to your email address. Besides the powerful video editing features, this app for iOS and Android devices also allows you to set your video’s aspect ratio to Square 1:1 if you would like to share the clip on Instagram or Cinema 16:9 if the video is shared to YouTube.
Advantages: Supports HD export options and provides a diverse set of video editing options.
Limitations: The app can’t perform advanced video editing tasks.
28. Vlogit
Platform: iOS, Android
Price: Free
Level: Beginners
The Wondershare’s video editing app for Android and iOS devices is designed to offer assistance to YouTubers and Vloggers who want to edit their videos directly from their Smartphones. Vlogit is equipped with video editing tools that enable you to cut, trim or rotate videos, while its sound editing features include recording voiceovers, adding sound effects or choosing the music you want to use as a soundtrack to your video. The app lets you combine photos and videos within the same project, and it also enables you to create customized openers from animated templates. The videos created and exported with the Vlogit app don’t contain watermarks.
Advantages: Offers powerful video editing features to YouTubers and Vloggers who want to edit their videos from their Smartphones for free.
Limitations: The list of visual effects the app provides could be longer.
29. VideoShop
Platform: iOS, Android
Price: Freemium
Level: Beginners

The extensive list of features VideoShop app offers makes it one of the best options for novice video editors who want to quickly create visually impressive videos. This video editing app allows you to work with multiple video files or merge them into a single video. The animated titles enable users of the VideoShop app to create professional-looking intros for their videos, while the transitions feature allows them to seamlessly piece together all shots featured in a project. Tilt-Shift and Stop Motion options are also available to video editors who want to make their videos look more professional.
Advantages: Fun and easy to use video editing app that lets you manipulate footage in any way you want.
Limitations: VideoShop contains ads, and the app’s version for iOS devices only supports videos recorded with iPhones and iPads.
30. Filmmaker Pro
Platform: iOS
Price: Freemium, $5,99 monthly subscription
Level: Semi-pros

iPhone videographers who need access to semi-professional video editing tools will certainly enjoy using this app. Filmmaker Pro offers support for 4K footage filmed on the latest models of iPhone and it enables its users to add an unlimited number of text overlays, video clips, voiceovers or audio tracks to the app’s timeline. The video editor grants you access to over 30 filters, video grading features, as well as Chroma Key and Ken Burns effects. In addition to impressive video and audio editing features, Filmmaker Pro’s users can also record videos with a camera that lets them adjust settings manually directly from the app, although this option must be paid for.
Advantages: Text overlays, audio editing features and the ability to select the aspect ratio for each video you edit with this app, make it one of the best video editing options for iOS devices.
Limitations: Nearly all of the app’s best features must be purchased.
31. KineMaster
Platform: iOS, Android
Price: Freemium, contains adds
Level: Semi-pros
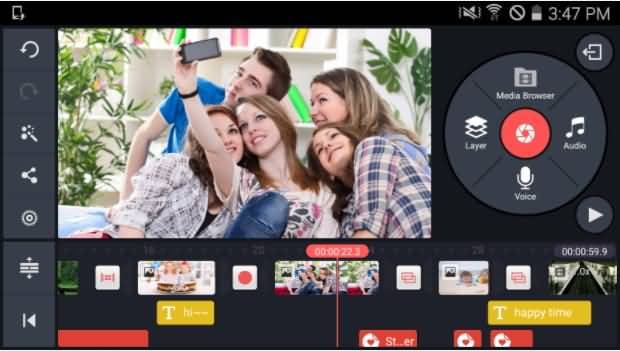
This cross-platform video editor is one of the premier options for mobile video editing on both iOS and Android devices. KineMaster is currently the only app that enables Android Smartphone owners to add as many layers of videos, photos, and text to their projects as they want. However, it only supports a limited number of video file formats, which means that the app shouldn’t be used to edit videos that weren’t recorded on an iPhone or Android phone. KineMaster provides a wide range of video exporting options and allows you to share videos on popular social media networks.
Pros: Above average video and audio editing features.
Limitations: Offers a lot of options mobile video editors seldom use.
32. LumaFusion
Platform: iOS
Price: Paid, $29.99
Level: Semi-pros
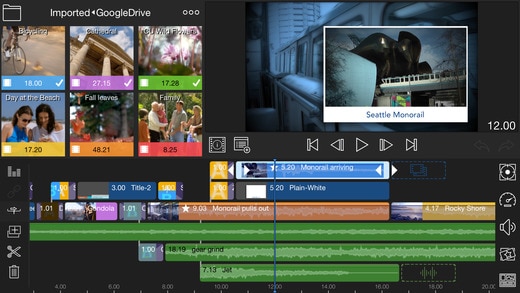
Creating neatly organized projects with LumaFusion is a simple task because the app features a powerful Project Manager that lets you sort files or select aspect ratios for your videos. In addition, the Media Library lets you import all types of files from a cloud storage or drag and drop media from other apps. Producing slow-motion videos that have 120 or 240fps or creating green screen videos using the Chroma Key effect is easy with LumaFusion. The app’s audio editing features are as impressive as its video editing tools since they provide the complete control over the audio files to the video editor’s users.
Advantages: Color correction options, LUTs or numerous visual effects are all part of the reason why LumaFusion is one of the best apps for mobile video editing.
Limitations: Only available for iOS devices.
33. Vizzywig 2019 4K Video Editor
Platform: iOS
Price: Paid, $79.99
Level: Semi-pros

This award-winning app for iOS devices provides all the tools a skilled video editor could desire. Its features include support for 4K videos, wide selection of aspect ratios as well as stylish intros, end credits, and titles. Besides offering professional video editing tools, Vizzywig also features Multi-Camera recording options that can capture videos in 8K resolution. In addition, the app is capable of producing videos that have eight times more pixels than the Apple’s Facetime HD Camera. The non-linear timeline lets you arrange video clips in any way you see fit, and allows you to add multiple media files to each project you are working on.
Advantages: Lets you control the focus and exposure manually and produce videos with stunning picture quality.
Limitations: Single platform compatibility and a high price narrow down the number of the app’s potential users.
34. PowerDirector
Platform: Android
Price: Freemium, contains ads and in-app purchases
Level: Beginners
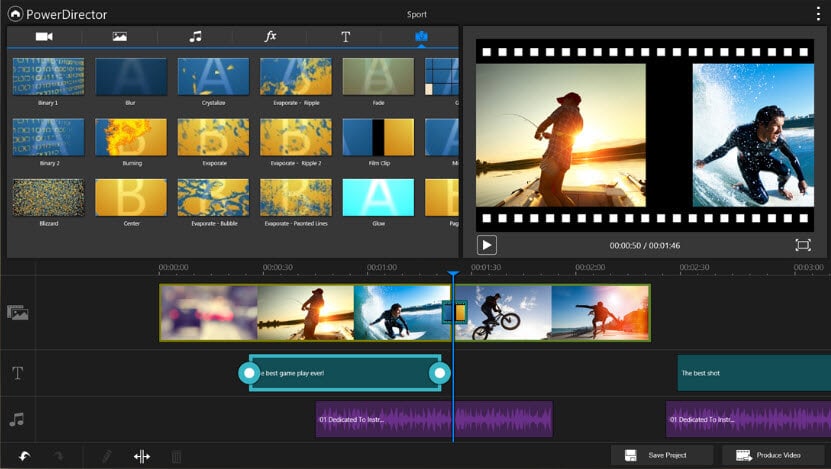
Unlike the Adobe’s app for mobile video editing, PowerDirector lives up to all expectations. This user-friendly app lets you create reverse, 4K, or green screen videos. To make things even better, you can easily apply visual and audio effects or add voiceovers to your projects. In addition to the video editor, the PowerDirector app is also equipped with a powerful photo editor that lets you manipulate images in a professional manner. You can use almost any type of video or audio file in this app because it provides support for all commonly used file formats.
Advantages: PowerDirector is designed to help its users polish their video quickly and effortlessly.
Limitations: Videos in 1080p and 4K resolutions can only be exported after you’ve made an in-app purchase.
Ooops…It looks like there isn’t any tool that matches your demand. Please give it another try.
Which Video Editor Do You Think Is Best for You?
Thank you to read this so far. It’s a long but the most comprehensive reviews ever for all hot video editing software compatible with Windows, Mac, iOS, Android and Linux, as well as online video editors. I hope you find the tools that you like.
If you want to get quick selections without too much reading, here is my recommendation:
- Best video editor for Windows and Mac to download: Filmora
- Best video editing software for Linux to download: Lightworks
- Best video editor for Android, iOS to download: Filmora , VideoShop
- Best online video editor to use: WeVideo
If you still can’t find a one Or we missed one of the tools you think which deserves to be listed above?
Either way, let us know by leaving a comment below.
Ollie Mattison
Ollie Mattison is a writer and a lover of all things video.
Follow @Ollie Mattison
Ollie Mattison
Mar 27, 2024• Proven solutions
Now, videos are getting increasingly important for you to present your thoughts and feeling on Instagram, YouTube, or Facebook.
But how to make your video looks professional, creative, stunning and deserved to share? A free video editing software can do you a favor.
So, Which is the best video editor available in the market?
If you are not quite certain about the video editing software you should use to edit your videos, you’ve come to the right place. Because we are going to take you through the best video editors including free versions.
Newcomers to the world of the video editing as well as seasoned professionals can use this guide to find the video editing software that will help them produce better visual content.
Let’s dive in and explore all aspects worth considering before you decide which software is best for you. And you can click the Filter button at the left side in this article to find the best video editing software for you.
- Part I: Best Video Editor for PC/Mac/Linux
- Part II: Best Video Editing Software Online
- Part III: Best Video Editor APP for iOS/Android
We spent about a month for researching and testing all popular video making software in the market and now collect 35 best video editors for you. This list of film makers can be used on Windows, Mac OS, iOS, Android, and Linux. Besides, some of them are online video editors you can use directly.
Now, let’s filter through the list to find the best video editor for you. Check it out :
| No. | Product Name | Supported OS | Price | Best for | Overview | Download Link |
|---|---|---|---|---|---|---|
| 1 | Wondershare Filmora | Windows 7/8/10, Mac OS, Android, iOS | Free trial; $79.99 perpetual, $49.99/year | Beginners, Semi-Pros | 4.9 | Download |
| 2 | Windows Movie Maker | Windows7/8/10 | Free | Beginners | 4.1 | Download |
| 3 | iMovie | Mac OS, iOS | Free | Beginners | 4.3 | Download |
| 4 | Final Cut Pro | Mac OS | 30 days free trial; $299.99 | Professionals | 4.4 | Download |
| 5 | Wondershare Filmii | Windows 7/8/10 | Free trial; $9.99 | Beginners | 4.3 | Download |
| 6 | Lightworks | Windows 7/8/10, Mac OS, Linux | Free trial; $437.99 | Professionals | 4.2 | Download |
| 7 | ShotCut | Windows 7/8/10, Mac OS, Linux | Free Open Source Video Editor | Semi-Pros | 3.9 | Download |
| 8 | HitFilm Express | Windows, Mac OS | Free | Semi-Pros | 4.1 | Download |
| 9 | Blender | Windows 7/8/10, Mac OS, Linux | Free; Fund $6/mo for support | Professionals | 3.8 | Download |
| 10 | Avidemux | Windows 7/8/10, Mac OS, Linux | Free | Beginners | 3.5 | Download |
| 11 | VideoPad Video Editor | Windows, Mac OSX, iOS, Kindle | Free | Beginners | 3.9 | Download |
| 12 | OpenShot | Windows 7/8/10, Mac OS, Linux | Free Open Source Video Editor | Beginners | 3.8 | Download |
| 13 | Kdenlive | Windows 7/8/10, Mac OS, Linux | Free | Semi-pros | 4.1 | Download |
| 14 | Adobe Premiere Pro | Windows 7/8/10, Mac OS | 7 days free trial; $20.99/mo; $33.99 /mo | Professionals | 4.5 | Download |
| 15 | Magix Vegas Pro | Windows 7/8/10, Mac OS | $399-$799 | Professionals | 4.2 | Download |
| 16 | Adobe Premiere Elements | Windows 7/8/10, Mac OS | $99.99 | Semi-pros | 4.7 | Download |
| 17 | CyberLink PowerDirector | Windows 7/8/10, Mac OS | $69,99 - $129,99 | Semi-pros | 4.5 | Download |
| 18 | Magix Movie Video Easy | Windows only | Free trial; $49,99 | Semi-pros | 3.6 | Download |
| 19 | Magix Video Pro | Windows 10 | Free trial; $79.99 | Beginners | 4.1 | Download |
| 20 | Media | Online | Free | Beginners | 4.75 | Check |
| 21 | YouTube | Online | Free | Beginners | 4.8 | Check |
| 22 | Online Video Cutter | Online | Free | Beginners | 3.6 | Check |
| 23 | Movie Maker Online | Online | Free | Beginners | 3.7 | Check |
| 24 | ClipChamp | Online | 14 day free trial; $7/mo | Beginners | 4.1 | Check |
| 25 | WeVideo | Online | Free trial; $11.99-$79.99 | Beginners | 4.4 | Check |
| 26 | Kizoa | Online | Freemium | Beginners | 3.8 | Check |
| 27 | Wideo | Online | Freemium | Beginners | 4.3 | Check |
| 28 | Filmora | iOS, Android | Freemium | Beginners | 4.1 | Download |
| 29 | Vlogit | iOS, Android | Free | Beginners | 3.6 | Download |
| 30 | VideoShop | iOS, Android | Freemium | Beginners | 4.8 | Download |
| 31 | Filmmaker Pro | iOS | Freemium; $5.99/mo | Semi-pros | 4.6 | Download |
| 32 | KineMaster | iOS, Android | Freemium | Semi-pros | 4.4 | Download |
| 33 | LumaFusion | iOS | $29.99 | Semi-pros | 4.8 | Download |
| 34 | Vizzywig 2019 | iOS | $79.99 | Semi-pros | 4.1 | Download |
| 35 | PowerDirector | iOS, Android | Freemium | Beginners | 4.5 | Download |
Part I: Best Video Editing Software for Windows/Mac/Linux
1. Wondershare Filmora
Platform: Windows, Mac, Android, iOS
Price: Free trial; $79.99 perpetual, $49.99/year
Level: Beginners
Even though it is widely considered as one of the premium entry-level video editing software options, Wondershare Filmora also offers advanced editing tools. The software product comes with detailed learning resources and provides support to its users who have little editing experience. The wide range of file formats and remarkably diverse Export options make Filmora an interesting choice for those who are just entering the world of video editing, but also for more experienced editors.
Features: Filmora’s rich effect library contains over a thousand modern special effects from niches such as gaming, blockbuster or tutorial, and new effects are added every month. The Action Cam tool is designed to make merging footage shot on action cameras easy and quick. Filmora supports a wide range of file formats including AVI, MP4 or MKV, so you don’t have to worry if your footage was shot in 4K or HD because you can easily edit it with this software.
Advantages:
A large number of professional video editing features Filmora offers as well as its modernly designed interface makes it one of the best options for amateur video creators.
Limitations:
You can use all the features in the free trial version, but have to pay to remove the watermark.
Lear more about Wondershare Filmora here: Filmora Official YouTube Channel
2. Windows Movie Maker
Platform: Windows
Price: Free
Level: Beginners
This is probably one of the oldest if not the oldest video editing software for PCs. Microsoft has announced that Windows Movie Maker will no longer be available for download. This software can still be found online, although not on Microsoft’s website, and currently, there are two different versions of Windows Movie Maker available. Even the least experienced video editors can master each of the Movie Maker versions easily.
Features: The classic video editing software is equipped with all the tools you’ll need for basic editing tasks like trimming, changing the video playback speed or rotating videos. It even features a Video Stabilization option that can be useful if you’d like to stabilize a video and remove the distracting camera shakes. Windows Movie Maker lets you add text effects to your video, insert Transitions between two takes, perform basic audio editing or record a screen.
Advantages:
Free, meets your basic editing demands
Limitations:
Service discontinued
No support for modern file formats
Lacks color correction tools, visual effects or any other advanced video editing options.
Check how to use Windows Movie Maker here: Windows Movie Maker User Guide
3. iMovie
Platform: Mac OS, iOS
Price: Free
Level: Beginners
As the Apple’s version of the Windows Movie Maker, iMovie has a similar status of a classic video editor that is at its best when used for simple video editing tasks. The video editor can also be used on an iPhone or an iPad if you want to edit your videos on the go. Learning your way around iMovie won’t take much of your time since all of its features are easy to use.
Features: Editing 4K videos or making credits or titles are just a few among many options provided by iMovie. Adding transitions, applying split-screen effects or creating PIP videos doesn’t require you to be a skilled video editor, because all of these options are easily accessible and they can be used in any project you are working on.
The iMovie’s audio editing options are equally impressive since the software enables you to add music, use built-in sound effects and record voiceovers. The video editor supports most of the popular file formats.
Advantages:
Free, and comes bundled with your Mac
Intuitive interface
Limitations:
This classic video editor for Apple’s devices doesn’t offer advanced video editing options such as motion tracking or keyframe marking.
Check how to use Windows Movie Maker here: iMovie User Guide
4. Final Cut Pro
Platform: macOS
Price: Paid, $299
Level: Professionals
Final Cut Pro is probably one of the highest praised video editing software ever created. It has been used to edit cinematic masterpieces such as ‘What happened Miss Simone’ or ‘The Girl With a Dragon Tattoo’, which speaks volumes about the software’s capability. Final Cut Pro’s Magnetic Timeline 2 is one of the kind, and it makes organizing large amounts of video and audio files look easy. Although the software’s price may seem discouraging, those who invested in it never had to use another video editor.
Features: A brief look at the list of Final Cut Pro’s video editing tools will leave you wondering if there is anything this software can’t do. Besides basic video editing features, the video editor is also equipped with 360 degrees VR video editing option, Multicam editing, and advanced color grading tools. Final Cut Pro allows its users to add as many audio tracks to the timeline as they want, thus enabling them to create impeccable soundtracks for their videos.
Advantages: Working with large numbers of video files is simplified by the software’s timeline, while options such as 3D titles or VR contribute to the strong impression this editor leaves on all of its users.
Limitations: Final Cut Pro has some lingering glitches that still haven’t been fixed, and its audio editing tool set lacks some important pieces.
If you are new to video editing and you will need a video maker that is tailored for beginners. In such case, you can read this article to get: Best Free Video Editing Software for Beginners >> They are really very easy to use. You can make a stunning video less than an hour.
5. Wondershare Filmii
Platform: Windows
Price: Free, Paid versions
Level: Beginners
This delicate video editing software is one of the best video editors for newbies. The free version of the software offers a lot of powerful video editing tools, but in order to get rid of the watermnark, you have to pay 9.99$ for its monthly plan. One of the advantages of Filmii is that it has a variety of video templates that can help beginners edit amazing videos with ease due to its auto-create functionality. Besides, its audio editing or creative tools are equally impressive.
6. Lightworks
Platform: Windows, macOS, Linux
Price: Free, Paid versions: $437.99
Level: Professionals
Lightworks is one of the best video editing software on this list with a long history in the movie-making business. The free version of the software is available, but it has limited export options. A $25 monthly subscription is required in order to gain access to all of the software’s features. Although it may be a somewhat pricey option, purchasing Lightworks is a profitable investment that may help you improve the quality of your videos.
Features: Both free and paid versions of this video editing suite offer support for wide range of video file formats. This can be very useful for video editors who often work on projects shot on different cameras. Multi-cam editing feature enables the software’s users to work with footage shot from separate angles, using more than just one camera. The videos edited with the free version of the software can only be exported to an MPEG4 file format with the maximum size of 1280X 790 pixels, and they must be uploaded to YouTube directly from the editor.
Advantages: Royalty-free media and a remarkable VFX panel make Lightworks a tempting option for professional and amateur video editors alike.
Limitations: The export options on the free version of the software are extremely limited and the software doesn’t provide much support for inexperienced users.
7. ShotCut
Platform: Windows, macOS, Linux
Price: Free
Level: Semi-Pros
If you need a video editing software just to piece together a few clips you recorded on the family vacation, then ShotCut may be a bit overwhelming choice for such a task. This open-source software is equipped with a rich collection of audio and video editing features, while it also offers support for nearly all video file formats. It is best suited for users in need of powerful video editing software who don’t want to spend a fortune on purchasing a professional editing suite.
Features: Screen capturing, webcam video recording or audio capturing options are all made available by ShotCut. The software’s video and audio editing features surpass all expectations and allow the software’s users to have complete creative control over their projects. Features such as Chroma Key, Crop or Blur are accompanied by a number of amazing video effects that can be used to enhance the colors in a video. Using ShotCut requires you to just download the software and run its executable file, which means that you don’t have to go through the installation process in order to start editing with this software.
Advantages: 4K videos, as well as numerous other video and audio file formats, are supported by this open-source video editing software. To make things even better ShotCut grants you access to fully customizable filters.
Limitations: The software doesn’t feature preset export profiles, and the transitions it offers are a bit scarce.
8. HitFilm Express
Platform: Windows, macOS
Price: Free
Level: Semi-Pros
This cross-platform video editor ranks among best video editing software products currently available on the market. Its secret lies in uniting visual effect compositing and video editing options under the same roof. HitFilm Express is aimed at users with an enviable amount of video editing experience, since inexperienced video editors may find the software’s interface difficult to navigate. This video editing suite offers a lot of video editing tools as well as visual and audio effect, that can be easily used to improve the quality of your videos.
Features: The rare combination of VFX compositing and video editing makes HitFilm Express unique, while its motion design and tracking options offer support for more complex video editing actions. The software supports 2D and 3D effects compositing, as well as 4K and 360-degree videos.
HitFilm Express’ titling options are at the basic level, while its Export options are alarmingly narrow. This free editing software doesn’t provide too many options for color adjustments, but its audio editing features can be used to create a video with a superior soundtrack.
Advantages: The software offers a wide spectrum of transitions and video effects and it supports most popular video file formats. HitFilm Express lets you use semi-professional video editing tools for free.
Limitations: In order to export a video from the software you must share a link on a social media platform and then download the file. People who are not familiar with the video editing process may find using HitFilm Express difficult.
9. Blender
Platform: Windows, macOS, Linux
Price: Free
Level: Professionals
Blender started out as an open-source project and over the years animators, scientists, VFX artists and numerous other people have participated in developing this 3D creation suite. The software can be used for modeling, animation, video editing or compositing, to mention only a few of its many purposes. Editing video footage isn’t Blender’s strong suit, but its video editing features are powerful enough to enable you to perform basic editing tasks. However, this doesn’t mean you can’t use this software to create videos that grab the viewer’s attention.
Features: Cutting or trimming videos, adjusting the video’s playback speed or adding keyframes to a video clip is an easy process in Blender. The software’s true strength lies in its animation, 3D modeling or motion tracking features. The latest version of Blender is equipped with a motion tracking option that allows you to import the footage into the software directly from a camera. You can utilize this feature to mask areas of the shot and see the movement on camera in a 3D environment.
Advantages: Blender’s price and its powerful features make it an interesting choice as your primary video editing software.
Limitations: You must have in-depth knowledge of animation, compositing, and 3D techniques in order to be able to use Blender.
10. Avidemux
Platform: Windows, macOS, Linux
Price: Free
Level: Beginners
This simple video editing software has all the tools you’ll ever need to quickly polish your videos. Its audio and video effects can be utilized to make your videos look and sound professionally, but Avidemux doesn’t offer much more than these basic video editing options.
The software provides support for most of popular video file formats, but its export options are far from perfect. Avidemux doesn’t feature visual effects or transitions, which significantly limits its video editing capabilities.
Features: Newcomers to the video editing world will love the software’s interface, because of its simplicity. The Transform feature allows you to fade in and fade out shots, crop or rotate video clips and even add logos to your videos. Blur or Sharpen effects enable users to enhance their videos, while contrast, brightness, saturation or hue values can be adjusted to make the colors in the video look more vivid. Avidemux also features the Subtitle option, but the software can only add hardcoded subtitles to videos.
Advantages: Solves all your basic video editing problems, and lets you have fun while editing videos. Avidemux also has solid encoding options and its interface is user-friendly.
Limitations: There are no video effects or transitions, which narrows down the software’s video editing options.
11. VideoPad Video Editor
Platform: Windows, macOS
Price: Free
Level: Beginners
VideoPad is one of the best entry-level cross-platform software products you can use for easy video editing tasks. The free version of the software is available to both Mac and PC users, although the Windows version limits the video exporting options to just two file formats. The VideoPad’s interface doesn’t take much time to get used to, and it perfectly adjusted to the needs of inexperienced video editors. Paid versions of the software are available to advanced editors who want to use VideoPad for more than just basic video editing.
Features: The list of video editing features VideoPad provides includes several pleasant surprises. The 4K video support, as well as 360-video editing features, are aimed at GoPro owners who want a quick and easy way to process their footage. The visual effects this free video editing software provides are impressive, while the Chroma Key option enables its users to create green screen videos. Even though VideoPad allows its users to edit audio files, its audio editing features are fairly modest.
Advantages: Learning how to use VideoPad is simplified by its intuitively designed interface.
Limitations: There are no advanced video editing options like multi-cam editing and motion tracking and certain features become unavailable when using the free version of the software over a longer period of time.
Download link: If you download the trial version instead of the free non-commercial home edition, or do not find a specific link to it on the website, you can trydownloading it from this link , or contact tech support , and they will send you a direct link.
12. OpenShot
Platform: Window, macOS, Linux
Price: Free
Level: Beginners
This award-winning open-source video editor offers a wide range of video editing tools that span from trimming and slicing to Slow Motion and Time effects. OpenShot is an excellent software for training and learning new video editing tricks, but it is best avoided if you are working on a large project. The software’s basic video editing features make it an excellent choice for users who only want to perform simple edits without having to waste too much time.
Features: OpenShot lets you add unlimited video and audio tracks to your projects, but its file management capabilities are far from impressive. The software allows you to trim or arrange the video files in any way you want, and it also provides a lot of different Transitions that can be used to make the videos look smoother. The collection of video and audio effects allows users to try out different solutions for the scenes in their video clips. OpenShot features a Vector Title Editor that can assist you in creating perfect opening titles or end credits.
Advantages: The interface of this open-source video editing software is designed to assist its users through every step of the video editing process. OpenShot is a great choice for all video editors who want to save money and use a powerful video editing software at the same time.
Limitations: More complex video editing options such as Rotoscoping, are not available. You may have to install add-ons if the OS you are using doesn’t meet the software’s system requirements.
13. Kdenlive
Platform: Windows, macOS, Linux
Price: Free
Level: Semi-pros
Almost two decades ago, this open-source project was started by Jason Wood in order to develop a video editing software for Linux OS. Over the years, a small team of developers has created Windows and MacOS versions of the editor that now have a loyal fan base. Even though the software’s features make it a reliable choice for more complex projects, Kdnelive can also be used to perform simple edits. This video editing software combines the simplicity of entry-level video editors with advanced video editing tools frequently used by experienced professionals.
Features: The functionality of this video editor will surprise even the greatest of skeptics. The software’s timeline lets you to add as many videos and audio files to your project as you want, making it a perfect tool for large-scale projects. The visual effects and transitions enable users to manipulate the footage in any way they see fit, while the extremely powerful analysis tools such as histograms, waveforms or vectorscopes enable them to monitor all the adjustments they make on their footage.
Advantages: Kdnlive provides support for nearly all input file formats that can be added easily to the software’s multitrack timeline. The free open-source add-ons can extend the video editor’s capability and thus enable you to perform a wider range of video editing actions.
Limitations: Even though the software provides the screencast recording option, it doesn’t feature the PIP effect. Multi frame-rate editing isn’t possible and software’s updates can last for hours.
14. Adobe Premiere Pro
Platform: Windows, macOS
Price: Paid, $19.99 per month
Level: Professionals
There are very few video editing suites that can offer as much to its users as Adobe Premiere Pro can. It is probably one of the best video editors ever created, as it has been setting the industry standards for a long time. High-end professionals frequently use Adobe Premiere Pro on their projects, while aspiring filmmakers strive to learn every option this unique video editor has to offer. The much-famed software isn’t the best choice for video editors who are just learning the basics of the trade, although it supplies a staggering amount of tutorials and learning materials.
Features: With each new version of Adobe Premiere Pro the list of the software’s features becomes longer. Its timeline is famous for its ease of use because it enables you to add as much new audio or video tracks as your project requires. This is arguably one of the best color correction software packages on the market, while its color grading features are no less impressive. Adobe Premiere Pro provides support for a wide range of video file formats including 4K, HDR, and 360 VR videos.
Advantages: Perfect for collaborative projects that involve large teams of experienced professionals. The software is at its best when used with other Adobe’s products that enable you to develop projects beyond the boundaries set by the Adobe Premiere Pro’s limitations.
Limitations: You cannot purchase the lifetime license to use this video editing software, and paying monthly subscriptions may be hard on the budget of some of its potential users.
15. Magix Vegas Pro
Platform: Windows
**Price:**Paid: $399
Level: Professionals
Successful independent artists, film producers, and all other film and video enthusiasts can only benefit from purchasing this video editing suite. The software belonged to Sony Creative Software for much of its history, but on May 20. 2016 the company sold it to Magix. Previously known as Vegas Pro or just Vegas, this video editing software is widely accepted as one of the best professional video editing tools ever created. There is virtually no video editing task that cannot be completed in Magix Vegas Pro video editing software.
Features: This video editor is designed to provide support to its users from the beginning until the very end of the video editing process. Magix Vegas Pro recognizes almost all video file formats, even those captured with professional RED or ARRI Alexa cameras. You can use this software to edit 3D or 4K videos, while the Multicamera-Editing feature lets you switch between any number of video sources with a single mouse click. Effects such as Automatic Crossfades allow you to create transitions between shots effortlessly.
Advantages: The seemingly unlimited amount of learning resources makes editing with Magix Vegas Pro a lot easier and it enables less experienced video editors to learn new tricks.
Limitations: There aren’t as many visual effects as you would hope for and the software’s interface isn’t aesthetically pleasing, but it is very functional.
16. Adobe Premiere Elements
Platform: Windows, macOS
**Price:**Paid: $99.99
Level: Semi-pros
Although it is often regarded as a simplified version of Premiere Pro, this video editing suite offers enough video editing tools to edit videos at the semi-professional level. Adobe Premiere Elements contains automated versions of Premiere Pro’s features and in this manner it enables its users to utilize professional video editing tools on their prosumer level projects. Even though this Adobe’s software product lacks the power of professional video editing software packages, it still offers enough video editing tools for the production of nicely polished and well-rounded videos.
Features: Adobe Premiere Elements recognizes all popular video file formats, and it offers support for 4K content. In addition to its remarkable file format compatibility, the video editor also features 3D editing and face detection options that can be very useful when working on more complex video projects. The haze-removal effect is extremely efficient at reducing the fog or cigarette smoke in a shot, while the motion titles let you create visually impressive opening titles or end credits. The Adobe Premiere Elements has performed exceptionally well when rendering large video files.
Advantages: The software’s Guided mode provides support to its users and helps them learn how to perform all video editing actions. The asset management tool offers assistance with the organization of large amounts of video and audio files.
Limitations: When compared to other video editors in this guide Adobe Premiere Elements’ device and social media optimization features seem to be in short supply.
17. CyberLink PowerDirector
Platform: Windows, macOS
**Price:**Free trial, Paid version: $69,99 - $129,99
Level: Semi-pros
This is probably one of the best and most popular video editing software packages aimed at amateur and semi-professional users. There are several versions of the software available, and each of them contains a different amount of options and video editing tools. Even with somewhat reduced capability, the least expensive version of the editor supports 360-degree as well as VR options for posting on social media such as Vimeo, Facebook or YouTube. CyberLink PowerDirector isn’t a professional video editing software, but it still offers a lot of extraordinary options that can take you a step closer to producing a professional video.
Features: The 360-degree video editing options are probably the first thing that catches the eye when you look at the list of features the software provides, but its true power lies in its color tools. LUTs, HDR effects or Split Toning options are just the tip of the iceberg since PowerDirector offers countless tools for fine-tuning of the colors in your videos. Animated PIP effects and video collages make this video editing software a perfect choice for the production of tutorials and all other types of online videos.
Advantages: The audio editing options provided by CyberLink PowerDirector are nothing short of amazing since they enable the software’s users to manipulate the audio files in any way they see fit.
Limitations: Motion tracking and color lookup features are not always reliable. The software is a bit overpriced when compared with similar video editing suits.
18. Magix Movie Video Easy
Platform: Windows
Price: Free trial, Paid version: $49,99
Level: Semi-pros
This video editor is a great choice for people who have never edited a video before and who want to learn how to perform basic video editing tasks. Video Easy’s intuitive user interface can be mastered by anyone with enough determination to edit videos with this software on a constant basis. Features this editor offers may not be as impressive as to ones provided by professional video editing suites, but they are powerful enough to produce clean edits that give your videos a professional look.
Features: If you choose to make Magix Movie Video Easy your primary video editing software, you will never have to worry about what type of camera you used to record your videos since the software is compatible with all standard camcorders, digital cameras, and Smartphones. The rich collection of transitions and effects, as well as the intro and outro animations, can all be used to create amazing videos. You can export videos to DVDs, Blu-Ray discs or YouTube directly from the software.
Advantages: If you are looking for a video editor that will enable you to add music to your videos, trim or cut videos quickly and choose from hundreds of effects, then you should look no further because Magix Movie Video Easy provides all of these options, and much more.
Limitations: Doesn’t perform well when used for demanding video editing tasks.
19. Magix Video Pro
Platform: Windows, macOS
Price: Free trial, Paid version: $62,99
Level: Beginners
Magix has been the largest European video editing software manufacturer for more than two decades. Its software products may not enjoy the fame of Adobe’s video editing software packages, but this doesn’t mean that a video editor such as Magix Video Pro cannot be used for the production of professional-looking videos. Besides offering basic video editing tools this video editor also features advanced video editing options such as Stop Motion animation or 360-degree video editing. Magix Video Pro is often labeled as ‘one of the best video editing programs out there’.
Features: Audio editing features that come with this video editor include an audio mixer that enables you to reduce noise levels, control the low, mid and high sounds or simply equalize the sound volume across the entire project. The video editing tools supplied by the Magix Video Pro are as impressive as its audio editing options. Lens correction features, Split screen videos or 360-degree video editing options reveal only a fraction of the software’s capabilities. Magix Video Pro delivers professional video editing features to consumer-level users.
Advantages: The software allows you to place any type of media file on its timeline and use it in your project.
Limitations: The effects library installation process can be time-consuming, although it is well worth the wait.
Part II: Best Video Making Editors Online
20. YouTube
Platform: Online
Price: Free
Level: Beginners
The world’s largest video sharing platform also offers basic video editing services. Although Google has discontinued its built-in video editor, it still allows tts users to trim or rotate videos, apply filters or even create time-lapse and slow-motion videos on line. Brightness, contrast or saturation levels can be altered if you want to enhance the colors in your videos. Audio editing features are limited because the platform only allows you to add a single audio file to a project you’re working on. However, some of the most important video editing features like adding the text or creating titles are not available.
Advantages: Allows you to polish your videos before posting them on YouTube for free.
Cons: This online video editor lacks some basic video editing tools such as transitions or audio controls.
21. Online Video Cutter
Platform: Online
Price: Free
Level: Beginners
If you were looking for a web app that contains all the tools required to cut a small video file, then Online Video Cutter is one of your best options. You won’t even have to create an account before you start the video editing process. The videos you upload to this online editor can’t exceed the 500 MB size limit. Besides cutting their videos, users of this editor can also rotate or trim their footage for free. Online Video Cutter provides support for nearly all video file formats, so you don’t have to worry about the file format in which your video was captured.
Advantages: Offers a quick way to trim videos online and it is exceptionally easy to use.
Limitations: Lacks even the most basic video editing features other than cutting, trimming and rotating videos.
22. Movie Maker Online
Platform: Online
Price: Free
Level: Beginners
This free online editing tool lets you process videos without even registering or creating an account. You can add videos, photos, text, and music into a single project and mix them together into an awesome video. The platform grants you access to its rich filter library, and it also allows you to add text overlays, fade audio and video files or create smooth transitions between shots. Movie Maker Online features its own collection of royalty free music and photos you can use to make your videos look and sound better. The webpage’s design is a little odd, and it may take some time to get used to it.
Advantages: The app offers a lot of different video editing tools and it allows you to perform all basic video editing actions online.
Limitations: Movie Maker Online is funded by ads, and requires you to disable your AdBlock app before you can start editing a video.
23. ClipChamp
Platform: Online
Price: Free trial, Paid: $7 per month
Level: Beginners
ClipChamp lets you upload videos you already recorded or capture new footage using your computer’s webcam. The free version of this web app allows you to export in 1080p video files, but you can’t produce more than five videos in a single month. Both versions of the online video editor require you to create an account, and the videos exported from the free version of the app don’t have a watermark. ClipChamp provides numerous video editing tools, including transition, color adjustments or cropping. The exporting process doesn’t last too long and you can choose whether you want to share the video on social media or download it to your computer.
Advantages: Makes creating webcam videos as well as editing preexisting footage look easy while providing excellent export options.
Limitations: The free version of ClipChamp allows you export only five videos in a month.
24. WeVideo
Platform: Online
Price: Freemium
Level: Beginners
The capabilities of WeVideo online video editor surpass the basic level of video editing. The platform offers support for iOS and Android devices as well as desktop computers. Producing square or horizontal videos, creating motion titles or publishing videos in 720p HD resolution are just a few amazing options this online video editor provides. The paid versions of the web app are best suited for skilled video editing professionals or large teams that are working on demanding projects. WeVideo’s free version doesn’t allow its users to publish more than 30 minutes of video content each month and each exported video contains a watermark.
Advantages: Produces videos with great picture quality and offers tons of advanced video editing options.
Limitations: Creating an account is mandatory even for video editors who want to use the free version of WeVideo.
25. Kizoa
Platform: Online
Price: Freemium
Level: Beginners
Kizoa offers a broad spectrum of transitions, visual effects, animation and text effects to its users for free. The video editing platform is frequently used to create goofy short videos that can be easily shared on Facebook or Twitter. The app allows you to add photos to your video projects and it grants you access to an incredibly rich royalty free music collection. However, you will have to create an account on Kizoa in order to be able to export the videos you created. The editor’s timeline is rudimentary, but still functional enough to enable users to combine audio, video, and photo files.
Advantages: Kizoa is a powerful tool for the creation of entertaining social media videos.
Limitations: You must create an account in order to be able to export your projects, and the online video editor doesn’t feature any advanced video editing options.
26. Wideo
Platform: Online
Price: Freemium
Level: Beginners
All video enthusiasts can use Wideo platform to edit their videos, regardless of their skill level. In addition to amazing video editing options, this online video editor also features animations that can be used to create professional presentations. All video content uploaded to Wideo is stored on the cloud, and pricing plans for professionals include unlimited storage space. The Basic version of the editor allows for just ten downloads in a month and it doesn’t let its users upload videos to YouTube. Even though this video editor is easy to use, it is better suited for skilled professionals than it is for inexperienced video editors.
Advantages: Even the Basic pricing plan enables users to export HD videos, while Professional and Enterprise pricing plans include the Full HD export option.
Limitations: Limited audio editing options significantly reduce the capabilities of this online video editing platform.
Read More to Get: 10 Best Free Online Video Editors With No Watermark >>
Part III: Best Video APP for iOS/Android
27. Filmora
Platform: iOS, Andoird
Price: Freemium
Level: Beginners
You can edit your videos with Filmora in just three simple steps. All you have to do is choose the videos and photos from your phone’s gallery, Instagram or Facebook account, select a theme, insert transitions or add a song and share the video directly from the app on social media or to your email address. Besides the powerful video editing features, this app for iOS and Android devices also allows you to set your video’s aspect ratio to Square 1:1 if you would like to share the clip on Instagram or Cinema 16:9 if the video is shared to YouTube.
Advantages: Supports HD export options and provides a diverse set of video editing options.
Limitations: The app can’t perform advanced video editing tasks.
28. Vlogit
Platform: iOS, Android
Price: Free
Level: Beginners
The Wondershare’s video editing app for Android and iOS devices is designed to offer assistance to YouTubers and Vloggers who want to edit their videos directly from their Smartphones. Vlogit is equipped with video editing tools that enable you to cut, trim or rotate videos, while its sound editing features include recording voiceovers, adding sound effects or choosing the music you want to use as a soundtrack to your video. The app lets you combine photos and videos within the same project, and it also enables you to create customized openers from animated templates. The videos created and exported with the Vlogit app don’t contain watermarks.
Advantages: Offers powerful video editing features to YouTubers and Vloggers who want to edit their videos from their Smartphones for free.
Limitations: The list of visual effects the app provides could be longer.
29. VideoShop
Platform: iOS, Android
Price: Freemium
Level: Beginners
The extensive list of features VideoShop app offers makes it one of the best options for novice video editors who want to quickly create visually impressive videos. This video editing app allows you to work with multiple video files or merge them into a single video. The animated titles enable users of the VideoShop app to create professional-looking intros for their videos, while the transitions feature allows them to seamlessly piece together all shots featured in a project. Tilt-Shift and Stop Motion options are also available to video editors who want to make their videos look more professional.
Advantages: Fun and easy to use video editing app that lets you manipulate footage in any way you want.
Limitations: VideoShop contains ads, and the app’s version for iOS devices only supports videos recorded with iPhones and iPads.
30. Filmmaker Pro
Platform: iOS
Price: Freemium, $5,99 monthly subscription
Level: Semi-pros
iPhone videographers who need access to semi-professional video editing tools will certainly enjoy using this app. Filmmaker Pro offers support for 4K footage filmed on the latest models of iPhone and it enables its users to add an unlimited number of text overlays, video clips, voiceovers or audio tracks to the app’s timeline. The video editor grants you access to over 30 filters, video grading features, as well as Chroma Key and Ken Burns effects. In addition to impressive video and audio editing features, Filmmaker Pro’s users can also record videos with a camera that lets them adjust settings manually directly from the app, although this option must be paid for.
Advantages: Text overlays, audio editing features and the ability to select the aspect ratio for each video you edit with this app, make it one of the best video editing options for iOS devices.
Limitations: Nearly all of the app’s best features must be purchased.
31. KineMaster
Platform: iOS, Android
Price: Freemium, contains adds
Level: Semi-pros
This cross-platform video editor is one of the premier options for mobile video editing on both iOS and Android devices. KineMaster is currently the only app that enables Android Smartphone owners to add as many layers of videos, photos, and text to their projects as they want. However, it only supports a limited number of video file formats, which means that the app shouldn’t be used to edit videos that weren’t recorded on an iPhone or Android phone. KineMaster provides a wide range of video exporting options and allows you to share videos on popular social media networks.
Pros: Above average video and audio editing features.
Limitations: Offers a lot of options mobile video editors seldom use.
32. LumaFusion
Platform: iOS
Price: Paid, $29.99
Level: Semi-pros
Creating neatly organized projects with LumaFusion is a simple task because the app features a powerful Project Manager that lets you sort files or select aspect ratios for your videos. In addition, the Media Library lets you import all types of files from a cloud storage or drag and drop media from other apps. Producing slow-motion videos that have 120 or 240fps or creating green screen videos using the Chroma Key effect is easy with LumaFusion. The app’s audio editing features are as impressive as its video editing tools since they provide the complete control over the audio files to the video editor’s users.
Advantages: Color correction options, LUTs or numerous visual effects are all part of the reason why LumaFusion is one of the best apps for mobile video editing.
Limitations: Only available for iOS devices.
33. Vizzywig 2019 4K Video Editor
Platform: iOS
Price: Paid, $79.99
Level: Semi-pros
This award-winning app for iOS devices provides all the tools a skilled video editor could desire. Its features include support for 4K videos, wide selection of aspect ratios as well as stylish intros, end credits, and titles. Besides offering professional video editing tools, Vizzywig also features Multi-Camera recording options that can capture videos in 8K resolution. In addition, the app is capable of producing videos that have eight times more pixels than the Apple’s Facetime HD Camera. The non-linear timeline lets you arrange video clips in any way you see fit, and allows you to add multiple media files to each project you are working on.
Advantages: Lets you control the focus and exposure manually and produce videos with stunning picture quality.
Limitations: Single platform compatibility and a high price narrow down the number of the app’s potential users.
34. PowerDirector
Platform: Android
Price: Freemium, contains ads and in-app purchases
Level: Beginners
Unlike the Adobe’s app for mobile video editing, PowerDirector lives up to all expectations. This user-friendly app lets you create reverse, 4K, or green screen videos. To make things even better, you can easily apply visual and audio effects or add voiceovers to your projects. In addition to the video editor, the PowerDirector app is also equipped with a powerful photo editor that lets you manipulate images in a professional manner. You can use almost any type of video or audio file in this app because it provides support for all commonly used file formats.
Advantages: PowerDirector is designed to help its users polish their video quickly and effortlessly.
Limitations: Videos in 1080p and 4K resolutions can only be exported after you’ve made an in-app purchase.
Ooops…It looks like there isn’t any tool that matches your demand. Please give it another try.
Which Video Editor Do You Think Is Best for You?
Thank you to read this so far. It’s a long but the most comprehensive reviews ever for all hot video editing software compatible with Windows, Mac, iOS, Android and Linux, as well as online video editors. I hope you find the tools that you like.
If you want to get quick selections without too much reading, here is my recommendation:
- Best video editor for Windows and Mac to download: Filmora
- Best video editing software for Linux to download: Lightworks
- Best video editor for Android, iOS to download: Filmora , VideoShop
- Best online video editor to use: WeVideo
If you still can’t find a one Or we missed one of the tools you think which deserves to be listed above?
Either way, let us know by leaving a comment below.
Ollie Mattison
Ollie Mattison is a writer and a lover of all things video.
Follow @Ollie Mattison
Android Video Editing 101: Choosing the Right Movie Maker App
Are you looking for a movie maker android app for video editing? If yes, then you must read this article as you will find the 10 best movie maker apps for Android and give a delightful touch to your videos. When it comes to movie editor android applications, there are wide-ranging tools on Play Store. But only a few among a myriad of options offer the best interface and advanced features.
10 Best Movie Maker Apps for Android in 2021
These video editing tools are convenient and incredible for beginners as well as professional video editors. So, without further ado, let’s take a look at the 10 best movie maker Android apps:
1. Filmora
Filmora is an Android movie maker that enables video editors to merge and trim videos. With more than 5000 templates and stickers, you can make your video engaging and interesting. Filmora offers a wide array of text animation and font options. You can adjust the video saturation, brightness, temp, and clarity. If you are a YouTuber, you can include a custom watermark such as your logo or name. This movie maker android app is suitable for both, beginners and professionals. Here are some best features of Filmora:
- Easy to use interface
- Wide range of music library
- Advanced editing features
- Speed control
- Text animation
- PIP options

2. Stop Motion Studio Pro
Stop Motion Studio Pro is different than traditional video editing tools in every way. Developers designed this tool specifically for cut stop-motion animation. This versatile Samsung movie maker enables you to shoot videos with a built-in camera and convert still objects into motion. You can tweak each frame and add multiple audios to bring desk-bound objects to life. Stop Motion Studio Pro is a powerful application with the following tools:
- Easy-to-use interface
- Overlay mode
- Interactive timeline
- Animation guides
- Insert, copy, paste, and cut frames

3. GoPro Quik
Sometimes, you don’t want to go deep with video editing. You need a movie maker app that performs all the hard work for you and gives you automated results. That’s how GoPro Quik helps video editors. Perfect for newbies, this android movie editor highlights music, points, and formatting.
You can choose video, images, and audio from your mobile storage and instantly create reels and stories. Furthermore, you can trim videos and choose a theme for instant edits. The latest version of GoPro Quik gives you cloud backup, powerful slow-down, and a wide range of filters. Here are some features you get with GoPro Quik:
- Control frame speed
- Easily combine clips
- Unlimited cloud backup
- Slideshow and movie maker

4. PowerDirector
PowerDirector is a bit expensive than other movie maker android apps. But, this tool is worth purchasing as it offers a friendly and easy-to-understand interface. With this movie maker, you can import clips and align them on a timeline. This is a responsive app with a lack of clutter and a simple interface. PowerDirector offers wide-ranging tools to create engaging videos for YouTube shorts, stories, and highlights. If you are new to video editing, using this tool would be a good start. PowerDirector offers:
- Supports 4K videos
- Speed adjustments
- Video stabilizer
- Voice changer
- Slow-motion and fast forward options

5. KineMaster
KineMaster is a powerful movie maker app that offers to splice, cutting, and cropping features. Furthermore, it enables you to add voiceovers, sound effects, and music to your video. Animation tools help you add motion to different layers and allow you to control the speed and movement of objects. You can make your video engaging by including stickers, images, and special effects. As first-time users, you may find this app to be too cluttered, but when you will start using it, the interface becomes simpler. Although this application is paid, you can enjoy the bulk of the toolset with the free version as well. Here are some KineMaster features:
- Crop videos
- Slice and cut clips
- Add music, images, and stickers
- Animation tools

6. Adobe Premiere Clip
Adobe Premiere Clip is one of the finest movie editor android apps on the Play Store. The tool enables you to edit videos from mobile storage and use multiple editing functions such as adding transitions, trimming, cutting. Furthermore, you can also include effects, filters, and music to make your video more attractive. This tool doesn’t irritate the users with advertisements. If you want an app to simplify the editing process, Adobe Premiere Clip can be the best option. Some features are:
- Multi-camera sequence
- Free and multi-platform
- Edit in Premiere Pro
- Creative Cloud account syncs
- Easy to use

7. Magisto
Magisto movie editor android app is perfect for beginners who want simple editing features. The tool offers simple and basic features to combine video effects, text, audio, and clips, Furthermore, you can create outstanding videos without much effort. Once you import video clips, audio, and pictures on this platform, it automatically aligns the content in a few minutes. Whenever you edit a video, the edited file will get saved. This means that you can continue editing where you left off. Magisto offers:
- Multiple themes
- Unique business styles
- Commercially licensed music
- Premium editing styles
- Insights
- Unlimited HD movie downloads

9. Splice
Splice is a split video editor that helps create a moving collage. You can have a lot of fun with this movie editor android app as it enables you to customize transitions lengths and cut and edit video clips. Splice has a library for music tracks so you can add songs in the background. This is a user-friendly tool with filters, switches, and text. You can include a wide array of effects on your video and enhance video quality. For instance, if you want to create a documentary on your smartphone, you can add documentary-style effects to the clips. Here are some features of Splice:
- Speed control
- Audio and video sync
- Music library
- Cut and crop video features

10. Action Director
Action Director include basic and advanced video editing tool to create interesting videos. This tool enables you to import and edit video clips. Furthermore, you can include music, use slow motion, add text, and trim videos. The application supports 4K videos, giving you high-definition results. Many lecturers use this movie maker app to create Webinar tutorials. If you want to create high-impact and crystal clear videos, you should choose Action Director. Some popular features of this software are:
- Stop motion
- Preset themes
- Video stabilizer
- Lens and color corrections

Closing Word
Now that you are aware of these top movie maker apps for Android, you can evaluate the options and choose a mobile app that offers top features. Among all these options, Filmora video editing tool is the best software with impressive features. This app is perfect for creating video content for YouTube, Facebook, and other social media platforms.
2. Stop Motion Studio Pro
Stop Motion Studio Pro is different than traditional video editing tools in every way. Developers designed this tool specifically for cut stop-motion animation. This versatile Samsung movie maker enables you to shoot videos with a built-in camera and convert still objects into motion. You can tweak each frame and add multiple audios to bring desk-bound objects to life. Stop Motion Studio Pro is a powerful application with the following tools:
- Easy-to-use interface
- Overlay mode
- Interactive timeline
- Animation guides
- Insert, copy, paste, and cut frames
3. GoPro Quik
Sometimes, you don’t want to go deep with video editing. You need a movie maker app that performs all the hard work for you and gives you automated results. That’s how GoPro Quik helps video editors. Perfect for newbies, this android movie editor highlights music, points, and formatting.
You can choose video, images, and audio from your mobile storage and instantly create reels and stories. Furthermore, you can trim videos and choose a theme for instant edits. The latest version of GoPro Quik gives you cloud backup, powerful slow-down, and a wide range of filters. Here are some features you get with GoPro Quik:
- Control frame speed
- Easily combine clips
- Unlimited cloud backup
- Slideshow and movie maker
4. PowerDirector
PowerDirector is a bit expensive than other movie maker android apps. But, this tool is worth purchasing as it offers a friendly and easy-to-understand interface. With this movie maker, you can import clips and align them on a timeline. This is a responsive app with a lack of clutter and a simple interface. PowerDirector offers wide-ranging tools to create engaging videos for YouTube shorts, stories, and highlights. If you are new to video editing, using this tool would be a good start. PowerDirector offers:
- Supports 4K videos
- Speed adjustments
- Video stabilizer
- Voice changer
- Slow-motion and fast forward options
5. KineMaster
KineMaster is a powerful movie maker app that offers to splice, cutting, and cropping features. Furthermore, it enables you to add voiceovers, sound effects, and music to your video. Animation tools help you add motion to different layers and allow you to control the speed and movement of objects. You can make your video engaging by including stickers, images, and special effects. As first-time users, you may find this app to be too cluttered, but when you will start using it, the interface becomes simpler. Although this application is paid, you can enjoy the bulk of the toolset with the free version as well. Here are some KineMaster features:
- Crop videos
- Slice and cut clips
- Add music, images, and stickers
- Animation tools
6. Adobe Premiere Clip
Adobe Premiere Clip is one of the finest movie editor android apps on the Play Store. The tool enables you to edit videos from mobile storage and use multiple editing functions such as adding transitions, trimming, cutting. Furthermore, you can also include effects, filters, and music to make your video more attractive. This tool doesn’t irritate the users with advertisements. If you want an app to simplify the editing process, Adobe Premiere Clip can be the best option. Some features are:
- Multi-camera sequence
- Free and multi-platform
- Edit in Premiere Pro
- Creative Cloud account syncs
- Easy to use
7. Magisto
Magisto movie editor android app is perfect for beginners who want simple editing features. The tool offers simple and basic features to combine video effects, text, audio, and clips, Furthermore, you can create outstanding videos without much effort. Once you import video clips, audio, and pictures on this platform, it automatically aligns the content in a few minutes. Whenever you edit a video, the edited file will get saved. This means that you can continue editing where you left off. Magisto offers:
- Multiple themes
- Unique business styles
- Commercially licensed music
- Premium editing styles
- Insights
- Unlimited HD movie downloads
9. Splice
Splice is a split video editor that helps create a moving collage. You can have a lot of fun with this movie editor android app as it enables you to customize transitions lengths and cut and edit video clips. Splice has a library for music tracks so you can add songs in the background. This is a user-friendly tool with filters, switches, and text. You can include a wide array of effects on your video and enhance video quality. For instance, if you want to create a documentary on your smartphone, you can add documentary-style effects to the clips. Here are some features of Splice:
- Speed control
- Audio and video sync
- Music library
- Cut and crop video features
10. Action Director
Action Director include basic and advanced video editing tool to create interesting videos. This tool enables you to import and edit video clips. Furthermore, you can include music, use slow motion, add text, and trim videos. The application supports 4K videos, giving you high-definition results. Many lecturers use this movie maker app to create Webinar tutorials. If you want to create high-impact and crystal clear videos, you should choose Action Director. Some popular features of this software are:
- Stop motion
- Preset themes
- Video stabilizer
- Lens and color corrections
Closing Word
Now that you are aware of these top movie maker apps for Android, you can evaluate the options and choose a mobile app that offers top features. Among all these options, Filmora video editing tool is the best software with impressive features. This app is perfect for creating video content for YouTube, Facebook, and other social media platforms.
Free Split-Screen Video Maker: Online and Offline Options
Best Split Screen Video Editor [Online & Offline]
Ollie Mattison
Mar 27, 2024• Proven solutions
The effect that comes up after adding two or more screens in a single frame is called split screen, and the tool that enables the users to do this is a split screen video editor. These split screens have significant importance in post-production tasks. That said, the following sections discuss about the tools that enable you to create split screen videos, and explain the process of doing so.
As mentioned above, the split screen effect lets you add two or more screens in a single frame. When multiple activities occur at the same time but at different locations, they all can be shown on one screen by placing their corresponding footages side-by-side or in any other arrangement that the split screen video maker allows.
Best Split Screen Video Editing Software for Windows and Mac [Free & Paid]
After understanding what split screen is, it becomes both obvious and mandatory to know about some of the most used split screen video editor applications, and how they help you in adding the effect to your movies. Following is a list of a couple of such programs:
1. iMovie
A proprietary of Apple, iMovie is available for both iOS and macOS, and is absolutely free of cost. Even though the tool lacks some advanced options for fine editing, it still offers a good platform to those planning their career in post-production industry. With simple UI, it is easy to learn iMovie.
The step-by-step instructions given below explain how to use iMovie to add split screen effect to your videos:
Step 1: Add Footages to iMovie
After importing the footages to the Media Bin in iMovie, drag the first one to the Timeline, and then drag the second one above the first layer.
Step 2: Select the Split Screen Effect
Select the top video layer in the Timeline, and choose Split Screen from the screen type drop-down list at the top.
Step 3: Select Split Screen Preset
Choose a position for the selected layer from the Position drop-down list at the top, and use the Slide slider to adjust the speed of the appearance of the footage.
Pros
- iMovie is free to download and use
- The program is available for both macOS and iOS
Cons
- Allows only up to two videos to be used in split screen
You can get iMovie from here: https://www.apple.com/in/imovie/
2. Wondershare Filmora Editor


One of the most robust apps that is compared with post-production applications like Adobe Premiere Pro and Final Cut Pro X, Wondershare Filmora is also a video editor that helps split screen easily. The software is available for Windows and Mac computers, and provides prompt technical support to its consumers. Although Filmora that packed with more advanced tools is also available, most of the times Filmora serves the purpose pretty well.
You can learn how to add split screen effect in Wondershare Filmora by following the steps given below:
Step 1: Import Footages to Filmora
Launch Wondershare Filmora, click anywhere inside the Media window in the upper-left section, and import all the videos you want to use to create the split screen effect.
Step 2: Choose a Split Screen Preset
Click Split Screen from the standard toolbar at the top, click and drag your preferred preset to the Timeline, and then extend the duration of the effect in the Timeline by dragging its handle.
Step 3: Add Videos to Split Screen

Click ADVANCED from the bottom-right area of the Media pane, on the Advanced Split Screen Edit box, drag the first video from the left pane, and drop it on your preferred section in the right. Repeat the process to add all the other videos to their corresponding sections. Adjust their time of appearance by dragging their thumbnail in the Timeline of the box, and click OK.
Pros
- Wondershare Filmora is lightweight and is less resource intensive
- Allows as many as 6 videos to be added to create split screen effect
- Has 30+ split screen presets
Cons
- A couple of windows are required to be opened while working with split screen
3 . VSDC
VSDC is a free and efficient split screen video maker. In fact, the program is a full-fledged post-production application that can be used to edit the videos to prepare industry-standard clips for presentations, broadcasting, and commercial and private distribution. The best thing about VSDC is, it is absolutely free of cost, and doesn’t add any watermarks to the output files.
The instructions given below explain how to use the split screen feature in VSDC:
Step 1: Add Video Footages
Click Add object from the standard toolbar at the top, click Video, and select and add the first footage to the preview window. Repeat the process to add more video(s) as needed.
Step 2: Add Split Screen Effect
Grab any of the side handles of the video you added last, and drag it inward to reduce its size proportionally. Repeat the process to reduce the size of the other video(s) that is/are now revealed from beneath the one you just adjusted in order to create the split screen effect.
Pros
- Absolutely free to use
- Allows practically unlimited number of footages to be added to create the split screen videos
Cons
- No presets for automatic video positioning are available for split screen effect
You can get VSDC free video editor from here: http://www.videosoftdev.com/
4. Shotcut
A free and opensource editing tool, Shotcut can also be used as a split screen video maker to produce industry-standard movies and documentaries. Shotcut is available for FreeBSD, Windows, Linux, and macOS, and comes in both x64 and x86 variants. Being a free program, Shotcut doesn’t require any activation or registration.
The procedure that follows explains how to use Shortcut as a free split screen video editor:
Step 1: Add Clips to the Timeline
Import the footages to the Shotcut’s media bin, drag one of the clips from the bin to the Timeline at the bottom, and then press Ctrl + I on your keyboard to add more video tracks. You can press this shortcut key for another couple of times depending on the number films you want to use for the split screen effect. Next, drag each film from the bin to their corresponding tracks. Note: Make sure NOT to place all the clips on the same track, and that each of them is on a different, its own, video layer.
Step 2: Adjust the First Video
Select the last video you added to the Timeline (it should be the topmost track), click Filters from above the Timeline, click the + button from the upper-left corner, click Size and Position from the list that appears next, and select the clip’s position from the Preset drop-down list.
Step 3: Adjust Other Videos
Select the second video in the Timeline and repeat the process to set its position, and do the same for all other footages that you added in order to create the split screen effect.
Pros
- Available for FreeBSD, Windows, Linux, and macOS platforms
- If using presets, as many as 4 videos can be added for split screen effect
Cons
- Working with split screen manually may require practice and some calculations to position the clips on the screen correctly
You can get Shotcut from here: https://shotcut.org/
5. Lightworks
Used by the professionals to edit and prepare movies like Pulp Fiction, The Cure, L.A. Confidential, Bruce Almighty, The Wolf of Wall Street, etc., Lightworks is, in true means, a complete and full-fledged post-production application to create industry-standard outputs. The main reason for the app’s wide userbase is that it is a cross-platform software that is available for Linux, Mac, and Windows computers.
To use Lightworks as split screen video maker, you can follow the instructions given below:
Step 1: Add Tracks in Timeline
After importing the clips to Lightworks, leave them in the Media Bin for now, right-click anywhere in the Timeline at the bottom, go to Tracks, click Add multiple, and from the Number to add drop-down list, choose the number of tracks you want to add to the Timeline. Click Add to confirm the changes.
Step 2: Disable Auto Sync
Right-click anywhere in the Timeline, and click to deselect Auto track sync.
Step 3: Add Clips to Timeline
Drag the clips from the Media Bin to the Timeline. Make sure to place each footage on a different track, and that all the tracks are on top of each other. Optionally, right-click the audio that was added along with the clips, and click Remove from the context menu. Use this method to remove all the audios or leave the one you want to have. Note: Removing the audio tracks ensures that they do not overlap during the playback.
Step 4: Enable Split Screen
Click VFX from above the preview window, click the + (Add new effects) icon from the top of the left pane, select the DVE category from the upper-right corner of the left pane, scroll down the left pane to the Split-screen Presets section, and double-click your preferred split screen preset to add the effect to the participating clips.
Pros
- Even the free variant has split screen feature
- A complete post-production tool that doesn’t require any other program for finalizing the things
Cons
- Not many split screen presets are available
Download Lightworks free version from here: https://www.lwks.com/
6. Adobe Premiere Pro
One of the most appreciated and widely used post-production applications for Windows and Mac computers, Adobe Premiere Pro has been professionals’ first choice when it comes to video editing, irrespective of the fact that it has a steep learning curve, and is also a resource intensive software to work with.
The steps below explain how to use Adobe Premiere Pro as a split screen video maker:
Step 1: Add Videos to Timeline
After importing the clips to the Project window, drag each of them to the Timeline, and place them in their separate tracks one above the other.
Step 2: Position and Crop
Select the topmost video track in the Timeline, go to Effect Controls panel from the top of the upper-left pane, and use the Position slider to position the video to your preferred area of the screen. Repeat this process for all the clips in the Timeline you want to add to split screen.
Step 3: Crop the Clips
Search for the Crop effect in the Effects pane present at the lower-left corner, drag and drop the effect on each of the clips in the timeline, and use the Crop slider in the Effect Controls pane to crop the videos as needed. Optionally use the keyframes to add sliding animations to give more professional look to the split screen effect.
Pros
- Most robust and efficient video editing tool
- Allows practically unlimited number of videos to be used for split screen
Cons
- Requires subscription that needs to be renewed regularly
For more details about making split screen with Pr, check How to create a split screen in Premiere Pro
7. Final Cut Pro X
Available only for Mac computers at the time of this writing, Final Cut Pro X or FCPX gives tough competition to Adobe Premiere Pro. Since Apple devices are famous for their speedy processing, professionals any day prefer FCPX over Adobe Premiere Pro if they own a Mac PC running macOS.
You can use FCPX as split screen video maker by following the steps given below:
Step 1: Place Footages in the Timeline
As mentioned earlier, add the clips on top of each other on separate tracks in the Timeline of FCPX.
Step 2: Position and Crop
Select the first clip in the Timeline, from the Transform section of the Video Inspector pane in the right, use the Position slider to move the clip to your preferred side of the screen, and use the sliders from the Crop section to crop the footage to adjust the portion of interest. Repeat the process for the other video tracks as well to get your desired split screen effect in Final Cut Pro X.
Pros
- Offers quick and easy way to add split screen effect
- Allows practically unlimited number of videos to be used for split screen
Cons
- Doesn’t have any particular preset for split screen effect
You may also like: How to create a PIP video with Final Cut Pro X
Best Free Online Split Screen Video Editors
Apart from the desktop programs discussed above, there are a couple of web tools that can be used as split screen video maker online free. Two of the most used ones are introduced below:
1. Kapwing Collage Maker
Although Kapwing offers several other online tools like video resizer, meme generator, slideshow maker, etc., the solution that can be considered split screen video editor is Kapwing Collage Maker. This web app allows you to select a template to get started, and the rest of the process is simple.
The following steps explain how to create a split screen video with Kapwing:
Step 1: Add Clips to Preset
Go to the https://www.kapwing.com/collage link, click to select your preferred split screen preset, click REPLACE on one of the segments of the split screen on the next page, and select and upload the first video. Next, click REPLACE on the other segment(s), and select and upload the other videos as well.
Step 2: Reposition and Publish
Click and drag each of the added clips to reposition them on the screen, use the other tools to crop and adjust the videos as needed, and click Publish from the top-right corner. Note: Optionally you can click Timeline from the top of the preview window, adjust the timings and other settings as needed on the next page, and click Done. After this, you can go ahead and hit Publish to create the split screen effect out of the uploaded videos.
Pros
- Free to use
- Allows as many as 4 videos to create split screen effect
Cons
- Requires you to register and sign in to remove the watermark from the output file
2. WeVideo
Yet another split screen video maker online free solution, WeVideo offers almost desktop program-like experience while creating split screen effects. Even though all the subscription plans that the vendor offers are chargeable, the Education plan can be tried for 30 days for free, post which the teachers are required to pay to continue using the web tool.
The following steps explain how to get split screen effect with WeVideo:
Step 1: Import Videos
Visit https://www.wevideo.com and on the main window, click Video from under the Create a new section at the top, select a layout on the Let’s get started box, and click START EDITING from the bottom right corner. Next, click ADD in the My media window in the upper-left section, click BROWSE TO SELECT on the Import media box, and add the videos you want to use in the split screen effect.
Step 2: Add Clips to Timeline
As explained earlier, drag the videos from the My media pane and drop them in the Timeline. Make sure to place every video in its separate layer, and that all the layers are on top of each other.
Step 3: Create Split Screen Effect
Select any clip in the Timeline, and click the Open clip editor icon from the upper-left area of the track. On the next page, use the Scale slider to reduce the size of the selected clip, and from the preview window in the right, drag to reposition the video to your preferred location on the screen. Click SAVE CHANGES from the bottom of the left pane to confirm the settings. Repeat the process for the second clip in the Timeline to resize and reposition it on the screen. Click FINISH from the upper-right corner, on the next box, enter a name for the video in the available field, click SET, choose your preferred settings on the next page, and click EXPORT from the bottom-right corner to produce the split screen video.
Pros
- Free to use
- Allows multiple videos to be used for split screen
Cons
- Paid subscription is needed to remove watermark from the outputs
FAQs About Split Screen Video Editors
Why you should use split screen effect in video?
There are a couple of reasons you may want to use split screen effect in your video. Some of the most common uses include:
- Showing multiple actions by the same or different characters at the same time, without changing the screen
- Comparing multiple objects or picture quality. This can be done only when the entities in question are placed side-by-side
- Making your video look more professional
- Showing different effects on the same screen
Can I create a split screen video with Windows Movie Maker or Windows 10 Photos app?
No, you cannot. Although these tools enable you to resize the videos, since they don’t allow multi-tracked Timelines, no video clips can be placed one above the other which is an essential part for any split screen video maker to create the effect. However, as discussed above, there are several post-production tools, offline and online, that allow you to make split screen videos easily and without any cost.
Conclusion
Split screen video editor tools are both paid and free. Regardless of the program you use to create the effect, the output files always look more professional and informative. Furthermore, things become way simpler if the split screen video maker has simple UI, is less resource intensive, and is easy to use as it is the case with Wondershare Filmora.
Ollie Mattison
Ollie Mattison is a writer and a lover of all things video.
Follow @Ollie Mattison
Ollie Mattison
Mar 27, 2024• Proven solutions
The effect that comes up after adding two or more screens in a single frame is called split screen, and the tool that enables the users to do this is a split screen video editor. These split screens have significant importance in post-production tasks. That said, the following sections discuss about the tools that enable you to create split screen videos, and explain the process of doing so.
As mentioned above, the split screen effect lets you add two or more screens in a single frame. When multiple activities occur at the same time but at different locations, they all can be shown on one screen by placing their corresponding footages side-by-side or in any other arrangement that the split screen video maker allows.
Best Split Screen Video Editing Software for Windows and Mac [Free & Paid]
After understanding what split screen is, it becomes both obvious and mandatory to know about some of the most used split screen video editor applications, and how they help you in adding the effect to your movies. Following is a list of a couple of such programs:
1. iMovie
A proprietary of Apple, iMovie is available for both iOS and macOS, and is absolutely free of cost. Even though the tool lacks some advanced options for fine editing, it still offers a good platform to those planning their career in post-production industry. With simple UI, it is easy to learn iMovie.
The step-by-step instructions given below explain how to use iMovie to add split screen effect to your videos:
Step 1: Add Footages to iMovie
After importing the footages to the Media Bin in iMovie, drag the first one to the Timeline, and then drag the second one above the first layer.
Step 2: Select the Split Screen Effect
Select the top video layer in the Timeline, and choose Split Screen from the screen type drop-down list at the top.
Step 3: Select Split Screen Preset
Choose a position for the selected layer from the Position drop-down list at the top, and use the Slide slider to adjust the speed of the appearance of the footage.
Pros
- iMovie is free to download and use
- The program is available for both macOS and iOS
Cons
- Allows only up to two videos to be used in split screen
You can get iMovie from here: https://www.apple.com/in/imovie/
2. Wondershare Filmora Editor
One of the most robust apps that is compared with post-production applications like Adobe Premiere Pro and Final Cut Pro X, Wondershare Filmora is also a video editor that helps split screen easily. The software is available for Windows and Mac computers, and provides prompt technical support to its consumers. Although Filmora that packed with more advanced tools is also available, most of the times Filmora serves the purpose pretty well.
You can learn how to add split screen effect in Wondershare Filmora by following the steps given below:
Step 1: Import Footages to Filmora
Launch Wondershare Filmora, click anywhere inside the Media window in the upper-left section, and import all the videos you want to use to create the split screen effect.
Step 2: Choose a Split Screen Preset
Click Split Screen from the standard toolbar at the top, click and drag your preferred preset to the Timeline, and then extend the duration of the effect in the Timeline by dragging its handle.
Step 3: Add Videos to Split Screen
Click ADVANCED from the bottom-right area of the Media pane, on the Advanced Split Screen Edit box, drag the first video from the left pane, and drop it on your preferred section in the right. Repeat the process to add all the other videos to their corresponding sections. Adjust their time of appearance by dragging their thumbnail in the Timeline of the box, and click OK.
Pros
- Wondershare Filmora is lightweight and is less resource intensive
- Allows as many as 6 videos to be added to create split screen effect
- Has 30+ split screen presets
Cons
- A couple of windows are required to be opened while working with split screen
3 . VSDC
VSDC is a free and efficient split screen video maker. In fact, the program is a full-fledged post-production application that can be used to edit the videos to prepare industry-standard clips for presentations, broadcasting, and commercial and private distribution. The best thing about VSDC is, it is absolutely free of cost, and doesn’t add any watermarks to the output files.
The instructions given below explain how to use the split screen feature in VSDC:
Step 1: Add Video Footages
Click Add object from the standard toolbar at the top, click Video, and select and add the first footage to the preview window. Repeat the process to add more video(s) as needed.
Step 2: Add Split Screen Effect
Grab any of the side handles of the video you added last, and drag it inward to reduce its size proportionally. Repeat the process to reduce the size of the other video(s) that is/are now revealed from beneath the one you just adjusted in order to create the split screen effect.
Pros
- Absolutely free to use
- Allows practically unlimited number of footages to be added to create the split screen videos
Cons
- No presets for automatic video positioning are available for split screen effect
You can get VSDC free video editor from here: http://www.videosoftdev.com/
4. Shotcut
A free and opensource editing tool, Shotcut can also be used as a split screen video maker to produce industry-standard movies and documentaries. Shotcut is available for FreeBSD, Windows, Linux, and macOS, and comes in both x64 and x86 variants. Being a free program, Shotcut doesn’t require any activation or registration.
The procedure that follows explains how to use Shortcut as a free split screen video editor:
Step 1: Add Clips to the Timeline
Import the footages to the Shotcut’s media bin, drag one of the clips from the bin to the Timeline at the bottom, and then press Ctrl + I on your keyboard to add more video tracks. You can press this shortcut key for another couple of times depending on the number films you want to use for the split screen effect. Next, drag each film from the bin to their corresponding tracks. Note: Make sure NOT to place all the clips on the same track, and that each of them is on a different, its own, video layer.
Step 2: Adjust the First Video
Select the last video you added to the Timeline (it should be the topmost track), click Filters from above the Timeline, click the + button from the upper-left corner, click Size and Position from the list that appears next, and select the clip’s position from the Preset drop-down list.
Step 3: Adjust Other Videos
Select the second video in the Timeline and repeat the process to set its position, and do the same for all other footages that you added in order to create the split screen effect.
Pros
- Available for FreeBSD, Windows, Linux, and macOS platforms
- If using presets, as many as 4 videos can be added for split screen effect
Cons
- Working with split screen manually may require practice and some calculations to position the clips on the screen correctly
You can get Shotcut from here: https://shotcut.org/
5. Lightworks
Used by the professionals to edit and prepare movies like Pulp Fiction, The Cure, L.A. Confidential, Bruce Almighty, The Wolf of Wall Street, etc., Lightworks is, in true means, a complete and full-fledged post-production application to create industry-standard outputs. The main reason for the app’s wide userbase is that it is a cross-platform software that is available for Linux, Mac, and Windows computers.
To use Lightworks as split screen video maker, you can follow the instructions given below:
Step 1: Add Tracks in Timeline
After importing the clips to Lightworks, leave them in the Media Bin for now, right-click anywhere in the Timeline at the bottom, go to Tracks, click Add multiple, and from the Number to add drop-down list, choose the number of tracks you want to add to the Timeline. Click Add to confirm the changes.
Step 2: Disable Auto Sync
Right-click anywhere in the Timeline, and click to deselect Auto track sync.
Step 3: Add Clips to Timeline
Drag the clips from the Media Bin to the Timeline. Make sure to place each footage on a different track, and that all the tracks are on top of each other. Optionally, right-click the audio that was added along with the clips, and click Remove from the context menu. Use this method to remove all the audios or leave the one you want to have. Note: Removing the audio tracks ensures that they do not overlap during the playback.
Step 4: Enable Split Screen
Click VFX from above the preview window, click the + (Add new effects) icon from the top of the left pane, select the DVE category from the upper-right corner of the left pane, scroll down the left pane to the Split-screen Presets section, and double-click your preferred split screen preset to add the effect to the participating clips.
Pros
- Even the free variant has split screen feature
- A complete post-production tool that doesn’t require any other program for finalizing the things
Cons
- Not many split screen presets are available
Download Lightworks free version from here: https://www.lwks.com/
6. Adobe Premiere Pro
One of the most appreciated and widely used post-production applications for Windows and Mac computers, Adobe Premiere Pro has been professionals’ first choice when it comes to video editing, irrespective of the fact that it has a steep learning curve, and is also a resource intensive software to work with.
The steps below explain how to use Adobe Premiere Pro as a split screen video maker:
Step 1: Add Videos to Timeline
After importing the clips to the Project window, drag each of them to the Timeline, and place them in their separate tracks one above the other.
Step 2: Position and Crop
Select the topmost video track in the Timeline, go to Effect Controls panel from the top of the upper-left pane, and use the Position slider to position the video to your preferred area of the screen. Repeat this process for all the clips in the Timeline you want to add to split screen.
Step 3: Crop the Clips
Search for the Crop effect in the Effects pane present at the lower-left corner, drag and drop the effect on each of the clips in the timeline, and use the Crop slider in the Effect Controls pane to crop the videos as needed. Optionally use the keyframes to add sliding animations to give more professional look to the split screen effect.
Pros
- Most robust and efficient video editing tool
- Allows practically unlimited number of videos to be used for split screen
Cons
- Requires subscription that needs to be renewed regularly
For more details about making split screen with Pr, check How to create a split screen in Premiere Pro
7. Final Cut Pro X
Available only for Mac computers at the time of this writing, Final Cut Pro X or FCPX gives tough competition to Adobe Premiere Pro. Since Apple devices are famous for their speedy processing, professionals any day prefer FCPX over Adobe Premiere Pro if they own a Mac PC running macOS.
You can use FCPX as split screen video maker by following the steps given below:
Step 1: Place Footages in the Timeline
As mentioned earlier, add the clips on top of each other on separate tracks in the Timeline of FCPX.
Step 2: Position and Crop
Select the first clip in the Timeline, from the Transform section of the Video Inspector pane in the right, use the Position slider to move the clip to your preferred side of the screen, and use the sliders from the Crop section to crop the footage to adjust the portion of interest. Repeat the process for the other video tracks as well to get your desired split screen effect in Final Cut Pro X.
Pros
- Offers quick and easy way to add split screen effect
- Allows practically unlimited number of videos to be used for split screen
Cons
- Doesn’t have any particular preset for split screen effect
You may also like: How to create a PIP video with Final Cut Pro X
Best Free Online Split Screen Video Editors
Apart from the desktop programs discussed above, there are a couple of web tools that can be used as split screen video maker online free. Two of the most used ones are introduced below:
1. Kapwing Collage Maker
Although Kapwing offers several other online tools like video resizer, meme generator, slideshow maker, etc., the solution that can be considered split screen video editor is Kapwing Collage Maker. This web app allows you to select a template to get started, and the rest of the process is simple.
The following steps explain how to create a split screen video with Kapwing:
Step 1: Add Clips to Preset
Go to the https://www.kapwing.com/collage link, click to select your preferred split screen preset, click REPLACE on one of the segments of the split screen on the next page, and select and upload the first video. Next, click REPLACE on the other segment(s), and select and upload the other videos as well.
Step 2: Reposition and Publish
Click and drag each of the added clips to reposition them on the screen, use the other tools to crop and adjust the videos as needed, and click Publish from the top-right corner. Note: Optionally you can click Timeline from the top of the preview window, adjust the timings and other settings as needed on the next page, and click Done. After this, you can go ahead and hit Publish to create the split screen effect out of the uploaded videos.
Pros
- Free to use
- Allows as many as 4 videos to create split screen effect
Cons
- Requires you to register and sign in to remove the watermark from the output file
2. WeVideo
Yet another split screen video maker online free solution, WeVideo offers almost desktop program-like experience while creating split screen effects. Even though all the subscription plans that the vendor offers are chargeable, the Education plan can be tried for 30 days for free, post which the teachers are required to pay to continue using the web tool.
The following steps explain how to get split screen effect with WeVideo:
Step 1: Import Videos
Visit https://www.wevideo.com and on the main window, click Video from under the Create a new section at the top, select a layout on the Let’s get started box, and click START EDITING from the bottom right corner. Next, click ADD in the My media window in the upper-left section, click BROWSE TO SELECT on the Import media box, and add the videos you want to use in the split screen effect.
Step 2: Add Clips to Timeline
As explained earlier, drag the videos from the My media pane and drop them in the Timeline. Make sure to place every video in its separate layer, and that all the layers are on top of each other.
Step 3: Create Split Screen Effect
Select any clip in the Timeline, and click the Open clip editor icon from the upper-left area of the track. On the next page, use the Scale slider to reduce the size of the selected clip, and from the preview window in the right, drag to reposition the video to your preferred location on the screen. Click SAVE CHANGES from the bottom of the left pane to confirm the settings. Repeat the process for the second clip in the Timeline to resize and reposition it on the screen. Click FINISH from the upper-right corner, on the next box, enter a name for the video in the available field, click SET, choose your preferred settings on the next page, and click EXPORT from the bottom-right corner to produce the split screen video.
Pros
- Free to use
- Allows multiple videos to be used for split screen
Cons
- Paid subscription is needed to remove watermark from the outputs
FAQs About Split Screen Video Editors
Why you should use split screen effect in video?
There are a couple of reasons you may want to use split screen effect in your video. Some of the most common uses include:
- Showing multiple actions by the same or different characters at the same time, without changing the screen
- Comparing multiple objects or picture quality. This can be done only when the entities in question are placed side-by-side
- Making your video look more professional
- Showing different effects on the same screen
Can I create a split screen video with Windows Movie Maker or Windows 10 Photos app?
No, you cannot. Although these tools enable you to resize the videos, since they don’t allow multi-tracked Timelines, no video clips can be placed one above the other which is an essential part for any split screen video maker to create the effect. However, as discussed above, there are several post-production tools, offline and online, that allow you to make split screen videos easily and without any cost.
Conclusion
Split screen video editor tools are both paid and free. Regardless of the program you use to create the effect, the output files always look more professional and informative. Furthermore, things become way simpler if the split screen video maker has simple UI, is less resource intensive, and is easy to use as it is the case with Wondershare Filmora.
Ollie Mattison
Ollie Mattison is a writer and a lover of all things video.
Follow @Ollie Mattison
Lego Animation Masters: The Best
Best Lego Stop Motion Maker
Ollie Mattison
Mar 27, 2024• Proven solutions
Brickfilms, the cool name for Lego stop-motion animations, is a raging success on YouTube and other video streaming sites. No longer are you limited to build and play with your Lego sets. You can now use apps to bring a story alive. Drag those bricks down from the attic or pull them out of the kids’ box, as you could have a potential goldmine in your home.
Preparation Tips for Shooting Lego Stop Motion Movies
Before you select your stop-motion movie maker , you need to secure some of the essential props to make your film-making a success. You only need a basic set of Lego bricks and your smartphone or iPad if you want to keep it simple. You could use a desk lamp for lighting or a professional camera to add some professionalism should you wish.
Start by setting up your scene. You need a flat and stable surface. It needs to be at a height where you will be comfortable working for an extended period. If you set it up on your floor, you could regret this when the aches in your knees and back kick in. Keep your set in place by using masking tape, so it doesn’t move if you accidentally bump into it.

Now you are ready to start. Lego movies are painstaking. It will take a while to get into a rhythm and to get something of value to be watched by others. Don’t be discouraged. You will get quicker and better with practice. You just need to get started.
With everything in place, as well as a realistic mindset, it is time to choose the stop motion app that will help you produce the best Lego movies.
You might also like:
Best Stop Motion App for Lego Movie
1. I Can Animate
- Cost of app: $2.99 on Apple Store or $4.99 per item on Google Play
- For children 4+
- Unique feature – the timeline allows for simple reordering and editing

I Can Animate is a way to produce movies quickly and with little need for that much tech knowledge. You can use your iOS device, whether tablet or phone, to create and then share your videos. This app is produced by Kudlian Software Ltd and retails on different prices on Apple Store and Google Play.
I Can Animate is unique in its simplicity. You use the camera on your iOS device, and the app will show you the differences between frames, so you can check your progress. This is called onion skinning and is essential to the success of your animation.
There are some basic editing features. These features include an ability to view the images on a timeline and duplicate or reorder these. You can also change the exposure, balance and focus settings to ensure there is a replication of conditions between photographs.

A useful option is the ability to connect a Bluetooth keyboard and capture your images without returning to your device. This means you can secure your phone or tablet and avoid knocking or changing the angle by tapping on the screen. Also helpful for streamlining the filming process is the inbuilt time-lapse feature. You can automatically capture images one after another without having to return to the camera.
You can then share these movies by exporting them to Facebook, YouTube or Dropbox.
2. Stop Motion Studio
- Free basic package with in-app purchases
- Pro version costing $9.99 on Apple Store and $4.99 on Google Play
- For children 4+
- Unique feature – the ability to add and edit audio

Stop Motion Studio, produced by Cateater, is an app offered for people age 4 and over and is available on iOS and Android – for your phone or your tablet. There is also a full-featured movie editing software that you can buy for your PC and Mac.
The app is free to download, with some free features. However, there are in-App purchases for some of the better features. You can purchase the Stop Motion Studio Pro app at the cost of $4.99 for Android devices, which then opens all the advanced features in the app.
The advanced features include a function to add and adjust audio, importing and cropping images as well as 4K Ultra HD and much more. The Green Screen function is particularly smart, as this allows you to include a background, which is preloaded onto the phone.
Reviews are positive. Most note that the product appears simple to use – and you can get high-quality Lego movies without feeling daunted. However, the intuitive nature of the app design belies the smart tools available for your movie production. You can add in text, speech bubbles and titles. You can add facial expressions to your Lego figures. The eraser tool is wonderful, as you can delete unwanted objects from your images.
3. The Lego Movie 2™ Movie Maker
- Free
- For children 8+
- Unique feature – a chance to be part of a Lego moviemaking community

This branded movie maker is free on iOS and Android . It is suitable for children aged 8 and above, so a little more advanced than the more basic I Can Animate – but it is designed only to be used on your phone, using the in-built camera. There is the option to add sounds and visual effects to the live footage, as well as edit material within the app. There is no save facility, which means your project needs to be sensible for the time you have before sharing to the site.
You will need to set up an account to be able to share your movies. However, for parents, this adds a reassuring level of moderation and support. Every video is moderated before it is shared. The set-up of the account is not too arduous. You are asked for your home country, your email address and your date of birth. All your videos will be anonymised as part of a stringent adherence to GDPR and safeguarding policies. The strength of this app is the infrastructure of a large brand that understands how to protect children. Be aware, your movie will become the property of the Lego group when uploaded.
Probably the most attractive selling point of this app is that there is no third-party advertising. Consequently, there are hours of uninterrupted fun offered.
4. LifeLapse Stop Motion Maker
- Free for the basic package
- PRO subscription plan, after a 7-day trial
- Pro Monthly $7.99/ Pro Yearly $39.99 on App Store
- For users 12+ with a focus on B2B adult target market
- Unique feature – professional-level design features – with Instagram cropping guidelines
Created by Bolandia Creative Inc., Life Lapse Stop Motion Maker is designed for a more sophisticated audience. It is available on iOS and Android . It is aimed at users 12 and above, and there is a definite feel of a professional design package. The interface is a clean white with simple black icons for the function buttons. Essentially, the company is aiming the app at other businesses looking to produce marketing material.
This is not to say that the app cannot be used by Lego movie makers. The app has an intuitive interface, with simple icons that make it clear how the features can be used. There is the option to adjust the brightness, contrast, saturation and warmth of each image. You can also change the speed and size of images.

The apparent marketing leaning of this app is evident in the offer of Instagram crop guidelines, which will allow businesses to upload the stop-motion animations to the site. However, the in-app tutorials are excellent for helping younger people compose the Lego movies with a degree of sophistication that the other apps don’t provide. There is the option of an exposure lock, so the conditions stay the same for each photograph. You can use the ghosted image overlay, which allows you to check the difference from one frame to another.
Particularly useful, the grids allow you to clearly map the changes from one image to the next. This stop motion maker app helps you to track your stop-motion animation with some accuracy and it’s quite popular for making Instagram Stop Motion Videos .
5. Onion Cam2
- Free
- For children aged 4+
- Unique feature – simplicity and the onion skin feature allowing you to easily track the stop motion effect

From the developers Yosuke Seki, this StopMotion camera is a simple tool for taking a series of images to produce your Lego movie and then play it back. You can now store the images within the app, which is new from Onion Cam1, which means you can come back to your movies and continue your work. You can also export your video with OnionCam 2.
The “onion” in the title comes from the onion-skin function which allows you to check the lapse between photographs. There is a translucent display of the picture you took last time – allowing you to gradually build up your time-lapse movie.
The guidelines are also a useful way to measure the changes you are making.
If you want an app that allows you to create a simple movie without too many bells and whistles, then this is the app for you. There are not too many advanced features, only the changing order function stands out. However, your young child should be able to use this app without much intervention from you.
Basic Tips for Improving Lego stop motion videos
The essential ingredients for the best Lego movies include creativity and patience. If you have both vital qualities, read on to understand how to maximise the effects in your film.
1. Get your timing right
If you want your characters to move quickly, then you need fewer images and movements per second. If you’re going to slow the characters down, you need to take more pictures with more actions. Getting this right is a matter of trial and error, to begin with.
However, you can make this easier for yourself by planning a little. If you have a shooting rate of 15-frames per second, then you will need to plan out 15 images to fill a second of film. Each action in your movie that would last a second will need 15 pictures with gradual changes per image.
2. Making your characters’ movements natural
If you are not careful, your characters will move around in a jerky fashion. In real life, we ease in and ease out of actions. We start and finish an action slowly. Therefore, when taking images, use more pictures at the start and end of a movement, giving the impression of easing in and out of actions.
3. Master the walk cycle
A great place to start your Lego movie-making is in the perfection of the walk. Your characters will go through 4 movements in a walk.
- One leg will step forward, heel down, and toe up.
- The toe on this foot then descends
- The other leg passes the standing leg
- The passing leg heel hits the floor
This movement will likely take about 20 frames. When moving the arms, make sure the opposite arms move with the leg – so the left arm swings as the right leg is moving forward.
4. Practice and perfect
Finally, watch how people move in real life. Notice how the heads, arms, and legs move together. Then, try to recreate this with your Lego characters. Watch your material, reflect on what could be improved, and try again. The only way to become a great Lego movie maker is to practice, practice, and practice some more!
Conclusion
Finding ways to produce content that stands out on social media is becoming increasingly difficult as video content is growing more popular. Online stop motion makers provide a simple way to use photos and videos to create attention-grabbing videos.
Ollie Mattison
Ollie Mattison is a writer and a lover of all things video.
Follow @Ollie Mattison
Ollie Mattison
Mar 27, 2024• Proven solutions
Brickfilms, the cool name for Lego stop-motion animations, is a raging success on YouTube and other video streaming sites. No longer are you limited to build and play with your Lego sets. You can now use apps to bring a story alive. Drag those bricks down from the attic or pull them out of the kids’ box, as you could have a potential goldmine in your home.
Preparation Tips for Shooting Lego Stop Motion Movies
Before you select your stop-motion movie maker , you need to secure some of the essential props to make your film-making a success. You only need a basic set of Lego bricks and your smartphone or iPad if you want to keep it simple. You could use a desk lamp for lighting or a professional camera to add some professionalism should you wish.
Start by setting up your scene. You need a flat and stable surface. It needs to be at a height where you will be comfortable working for an extended period. If you set it up on your floor, you could regret this when the aches in your knees and back kick in. Keep your set in place by using masking tape, so it doesn’t move if you accidentally bump into it.
Now you are ready to start. Lego movies are painstaking. It will take a while to get into a rhythm and to get something of value to be watched by others. Don’t be discouraged. You will get quicker and better with practice. You just need to get started.
With everything in place, as well as a realistic mindset, it is time to choose the stop motion app that will help you produce the best Lego movies.
You might also like:
Best Stop Motion App for Lego Movie
1. I Can Animate
- Cost of app: $2.99 on Apple Store or $4.99 per item on Google Play
- For children 4+
- Unique feature – the timeline allows for simple reordering and editing
I Can Animate is a way to produce movies quickly and with little need for that much tech knowledge. You can use your iOS device, whether tablet or phone, to create and then share your videos. This app is produced by Kudlian Software Ltd and retails on different prices on Apple Store and Google Play.
I Can Animate is unique in its simplicity. You use the camera on your iOS device, and the app will show you the differences between frames, so you can check your progress. This is called onion skinning and is essential to the success of your animation.
There are some basic editing features. These features include an ability to view the images on a timeline and duplicate or reorder these. You can also change the exposure, balance and focus settings to ensure there is a replication of conditions between photographs.
A useful option is the ability to connect a Bluetooth keyboard and capture your images without returning to your device. This means you can secure your phone or tablet and avoid knocking or changing the angle by tapping on the screen. Also helpful for streamlining the filming process is the inbuilt time-lapse feature. You can automatically capture images one after another without having to return to the camera.
You can then share these movies by exporting them to Facebook, YouTube or Dropbox.
2. Stop Motion Studio
- Free basic package with in-app purchases
- Pro version costing $9.99 on Apple Store and $4.99 on Google Play
- For children 4+
- Unique feature – the ability to add and edit audio
Stop Motion Studio, produced by Cateater, is an app offered for people age 4 and over and is available on iOS and Android – for your phone or your tablet. There is also a full-featured movie editing software that you can buy for your PC and Mac.
The app is free to download, with some free features. However, there are in-App purchases for some of the better features. You can purchase the Stop Motion Studio Pro app at the cost of $4.99 for Android devices, which then opens all the advanced features in the app.
The advanced features include a function to add and adjust audio, importing and cropping images as well as 4K Ultra HD and much more. The Green Screen function is particularly smart, as this allows you to include a background, which is preloaded onto the phone.
Reviews are positive. Most note that the product appears simple to use – and you can get high-quality Lego movies without feeling daunted. However, the intuitive nature of the app design belies the smart tools available for your movie production. You can add in text, speech bubbles and titles. You can add facial expressions to your Lego figures. The eraser tool is wonderful, as you can delete unwanted objects from your images.
3. The Lego Movie 2™ Movie Maker
- Free
- For children 8+
- Unique feature – a chance to be part of a Lego moviemaking community
This branded movie maker is free on iOS and Android . It is suitable for children aged 8 and above, so a little more advanced than the more basic I Can Animate – but it is designed only to be used on your phone, using the in-built camera. There is the option to add sounds and visual effects to the live footage, as well as edit material within the app. There is no save facility, which means your project needs to be sensible for the time you have before sharing to the site.
You will need to set up an account to be able to share your movies. However, for parents, this adds a reassuring level of moderation and support. Every video is moderated before it is shared. The set-up of the account is not too arduous. You are asked for your home country, your email address and your date of birth. All your videos will be anonymised as part of a stringent adherence to GDPR and safeguarding policies. The strength of this app is the infrastructure of a large brand that understands how to protect children. Be aware, your movie will become the property of the Lego group when uploaded.
Probably the most attractive selling point of this app is that there is no third-party advertising. Consequently, there are hours of uninterrupted fun offered.
4. LifeLapse Stop Motion Maker
- Free for the basic package
- PRO subscription plan, after a 7-day trial
- Pro Monthly $7.99/ Pro Yearly $39.99 on App Store
- For users 12+ with a focus on B2B adult target market
- Unique feature – professional-level design features – with Instagram cropping guidelines
Created by Bolandia Creative Inc., Life Lapse Stop Motion Maker is designed for a more sophisticated audience. It is available on iOS and Android . It is aimed at users 12 and above, and there is a definite feel of a professional design package. The interface is a clean white with simple black icons for the function buttons. Essentially, the company is aiming the app at other businesses looking to produce marketing material.
This is not to say that the app cannot be used by Lego movie makers. The app has an intuitive interface, with simple icons that make it clear how the features can be used. There is the option to adjust the brightness, contrast, saturation and warmth of each image. You can also change the speed and size of images.
The apparent marketing leaning of this app is evident in the offer of Instagram crop guidelines, which will allow businesses to upload the stop-motion animations to the site. However, the in-app tutorials are excellent for helping younger people compose the Lego movies with a degree of sophistication that the other apps don’t provide. There is the option of an exposure lock, so the conditions stay the same for each photograph. You can use the ghosted image overlay, which allows you to check the difference from one frame to another.
Particularly useful, the grids allow you to clearly map the changes from one image to the next. This stop motion maker app helps you to track your stop-motion animation with some accuracy and it’s quite popular for making Instagram Stop Motion Videos .
5. Onion Cam2
- Free
- For children aged 4+
- Unique feature – simplicity and the onion skin feature allowing you to easily track the stop motion effect
From the developers Yosuke Seki, this StopMotion camera is a simple tool for taking a series of images to produce your Lego movie and then play it back. You can now store the images within the app, which is new from Onion Cam1, which means you can come back to your movies and continue your work. You can also export your video with OnionCam 2.
The “onion” in the title comes from the onion-skin function which allows you to check the lapse between photographs. There is a translucent display of the picture you took last time – allowing you to gradually build up your time-lapse movie.
The guidelines are also a useful way to measure the changes you are making.
If you want an app that allows you to create a simple movie without too many bells and whistles, then this is the app for you. There are not too many advanced features, only the changing order function stands out. However, your young child should be able to use this app without much intervention from you.
Basic Tips for Improving Lego stop motion videos
The essential ingredients for the best Lego movies include creativity and patience. If you have both vital qualities, read on to understand how to maximise the effects in your film.
1. Get your timing right
If you want your characters to move quickly, then you need fewer images and movements per second. If you’re going to slow the characters down, you need to take more pictures with more actions. Getting this right is a matter of trial and error, to begin with.
However, you can make this easier for yourself by planning a little. If you have a shooting rate of 15-frames per second, then you will need to plan out 15 images to fill a second of film. Each action in your movie that would last a second will need 15 pictures with gradual changes per image.
2. Making your characters’ movements natural
If you are not careful, your characters will move around in a jerky fashion. In real life, we ease in and ease out of actions. We start and finish an action slowly. Therefore, when taking images, use more pictures at the start and end of a movement, giving the impression of easing in and out of actions.
3. Master the walk cycle
A great place to start your Lego movie-making is in the perfection of the walk. Your characters will go through 4 movements in a walk.
- One leg will step forward, heel down, and toe up.
- The toe on this foot then descends
- The other leg passes the standing leg
- The passing leg heel hits the floor
This movement will likely take about 20 frames. When moving the arms, make sure the opposite arms move with the leg – so the left arm swings as the right leg is moving forward.
4. Practice and perfect
Finally, watch how people move in real life. Notice how the heads, arms, and legs move together. Then, try to recreate this with your Lego characters. Watch your material, reflect on what could be improved, and try again. The only way to become a great Lego movie maker is to practice, practice, and practice some more!
Conclusion
Finding ways to produce content that stands out on social media is becoming increasingly difficult as video content is growing more popular. Online stop motion makers provide a simple way to use photos and videos to create attention-grabbing videos.
Ollie Mattison
Ollie Mattison is a writer and a lover of all things video.
Follow @Ollie Mattison
Also read:
- New In 2024, From Ingest to Delivery Mastering Video Import and Export in Adobe Premiere
- New 2024 Approved YouTube to MP3 Conversion Made Easy How to Find the Right Tool
- New In 2024, Free Glitch Effect Tools The Ultimate Online Collection
- Rip Audio From Instagram Fast and Easy Methods for 2024
- New Best FLV Video Editor for Windows 8 Simplify Your Editing Process for 2024
- Updated A Beginners Guide to Audio Editing in Final Cut Pro for 2024
- Updated Convert with Ease The 6 Most Reliable Audio Converter Tools for 2024
- 2024 Approved Transform Your Content with the Best 3D Video Generators
- New Video Editing Face-Off Final Cut Pro vs LumaFusion - Which Is Right for You, In 2024
- 2024 Approved Save Instagram Videos as MP3 Files Easy Methods
- Updated Looking Beyond Final Cut Pro X 10 Top Video Editing Software Options for 2024
- New Smooth Out the Shakes 8 Free Online Video Stabilizers to Try for 2024
- New Bringing Your Photos to Life A Final Cut Pro Slideshow Tutorial for 2024
- Updated Unleash Your Creativity Best Time-Lapse Video Apps for iPhone and Android for 2024
- New In 2024, 10 Best 2D Animation Software Free/Paid
- New 2024 Approved The Ultimate Guide to Free WMV Video Splitters
- New Online Video Creation Made Simple WeVideos Easy Editor for 2024
- Updated In 2024, Wax Video Editing Essentials A Guide to Getting Started with This Free Editor
- New Windows 8 FLV Editor The Ultimate Solution for Video Editing Needs for 2024
- Videopad Video Editor Review and Comparison Best Video Editing Software for 2024
- New The Easiest Way to Edit GoPro Videos A Beginners Guide
- Updated Effortless Video Reframing The Best Editor Options for 2024
- New In 2024, Pro-Quality Videos Made Easy Top Video Stabilizer Apps
- 2024 Approved Transform Your Footage Essential Video Editing Skills in Windows Movie Maker
- New 2024 Approved Video Editing Essentials Import, Edit, and Export in Adobe Premiere
- Revolutionize Your Sound 10 Best Online Waveform Generators for 2024
- New 2024 Approved Video Trimming Made Easy Top 10 PC and Online Tools
- New Facebook Video Pro A Complete Guide to Aspect Ratios and Sizes for 2024
- New In 2024, Free and Easy AVI Video Editing Software Options
- New 2024 Approved Best Top-Rated Video Animation Software for Smartphones and Tablets
- New 2024 Approved Get Noticed on YouTube Thumbnail Size Templates and Expert Strategies
- New In 2024, Ranking the Best Top 5 Video Editing Apps for iPhone Users
- New Unleash Your Creativity The Best Free Online Video Invite Generators for 2024
- Updated 2024 Approved Streamline Your Workflow Best Video Editors with Auto-Reframe
- Updated The Ultimate Guide to Photo and Video Collage Software
- Updated 2024 Approved Make It Pop How to Add Eye-Catching Effects to Your Videos
- Updated In 2024, Video Editing Essentials How to Speed Up Clips in QuickTime Player Windows/Mac
- New Free Video Looper Apps for Windows and Mac Top Picks for 2024
- Updated 2024 Approved Mac Video Cutting Made Simple Quick Tips for Large Files
- Updated From Zero to Hero 9 Best Intro Video Creators for Movies for 2024
- 8 Solutions to Fix Find My Friends Location Not Available On Tecno Pova 5 | Dr.fone
- How to Factory Reset Poco C65 in 5 Easy Ways | Dr.fone
- New In 2024, Top 5 Best Websites to Add Emojis to Photo Online
- What is the best Pokemon for pokemon pvp ranking On Oppo Reno 10 Pro+ 5G? | Dr.fone
- How to Draw Cartoons Step by Step with This Guide for 2024
- In 2024, iPogo will be the new iSpoofer On Realme 12 5G? | Dr.fone
- Top 10 Online Resources for Creating Eye-Catching Gaming Intros
- Top 4 Ways to Trace Vivo V29e Location | Dr.fone
- How Can Realme 12 5GMirror Share to PC? | Dr.fone
- New The Ultimate List 28 Top-Rated Video to GIF Converters
- How to Successfully Bypass iCloud Activation Lock on Apple iPhone 8 Plus
- In 2024, How to Fake Snapchat Location on Apple iPhone 8 | Dr.fone
- How to Reset Tecno Pova 6 Pro 5G Without the Home Button | Dr.fone
- Fix the Error of Unfortunately the Process.com.android.phone Has Stopped on Xiaomi 13T | Dr.fone
- How to unlock Samsung Galaxy Z Flip 5
- In 2024, Full Guide to Bypass Vivo Y56 5G FRP
- In 2024, 5 Quick Methods to Bypass Nokia FRP
- Full Guide on Mirroring Your ZTE Nubia Flip 5G to Your PC/Mac | Dr.fone
- What are Location Permissions Life360 On Oppo Reno 8T 5G? | Dr.fone
- In 2024, Forgotten The Voicemail Password Of Motorola Moto G04? Try These Fixes
- Unlock iPhone 6 Plus lock with iCloud
- 10 Free Location Spoofers to Fake GPS Location on your Vivo Y100 | Dr.fone
- How To Get Out of Recovery on iPhone 14 Pro Max? | Dr.fone
- How Can I Catch the Regional Pokémon without Traveling On Apple iPhone 11 | Dr.fone
- In 2024, How to Bypass FRP from Vivo V29e?
- In 2024, How to Bypass Apple iPhone 11 Pro Max Passcode Easily Video Inside
- 3 Ways to Fake GPS Without Root On Realme C51 | Dr.fone
- In 2024, How to Cast Vivo Y200e 5G Screen to PC Using WiFi | Dr.fone
- Everything You Need to Know about Lock Screen Settings on your Xiaomi
- In 2024, Here are Some of the Best Pokemon Discord Servers to Join On Tecno Spark 10C | Dr.fone
- In 2024, Easy Guide How To Bypass Motorola Razr 40 Ultra FRP Android 10/11/12/13
- How to Use Google Assistant on Your Lock Screen Of Vivo X100 Phone
- In 2024, Top 10 Telegram Spy Tools On Apple iPhone 11 for Parents | Dr.fone
- In 2024, How to Unlock Apple iPhone SE Online? Here are 6 Easy Ways
- How to Change your Apple iPhone 12 Location on Twitter | Dr.fone
- In 2024, Change Location on Yik Yak For your Vivo Y78 5G to Enjoy More Fun | Dr.fone
- In 2024, How to Screen Mirroring Realme Narzo 60 Pro 5G to PC? | Dr.fone
- Title: New Best of the Best Video Editing Apps for Windows, Mac, iOS, Android, and Linux for 2024
- Author: MdadeLe
- Created at : 2024-05-19 08:28:10
- Updated at : 2024-05-20 08:28:10
- Link: https://smart-video-editing.techidaily.com/new-best-of-the-best-video-editing-apps-for-windows-mac-ios-android-and-linux-for-2024/
- License: This work is licensed under CC BY-NC-SA 4.0.
