
:max_bytes(150000):strip_icc():format(webp)/GettyImages-174294003-57c6ee043df78cc16eeab260.jpg)
New 2024 Approved Take Your Videos to the Next Level Top 20 Adobe Premiere Title Templates Free
Take Your Videos to the Next Level: Top 20 Adobe Premiere Title Templates [Free]
Top 20 Adobe Premiere Title/Intro Templates [Free Download]

Benjamin Arango
Mar 29, 2024• Proven solutions
One of the things that can make your output stand out from the crowd is the titles. Many people think creating eye-catching title effects is beyond them, but with Premiere Pro, you really couldn’t be more wrong.
As Premiere Pro doesn’t have built-in templates, the ability to import free Premiere Pro templates is a must. Anyone need to find a custom title style that suits the project and looks professional and carries impact.
The great thing is that there are many of these resources that are offered entirely free! If you don’t know how to add text/title to Adobe Premiere, here are steps to add text resources .
In this article, we will share with you 20 Free to download Title Templates for Premiere Pro.
- Part1: Top 15 Free Adobe Premiere Pro Title Templates
- Part2: Best 5 Premiere Pro Intro Templates Free Download
- Part3: How to Import and Customize Title Templates in Premiere
You may also like: 10 Free Star Wars Fonts to Make Your Video Amazing
Part 1: Top 15 Free Adobe Premiere Title Templates
Adding the finishing touches to a project, like creating the opening titles or end credits, is often not at the top of anyone’s priority list during the video editing process.
Nonetheless, making a unique opening sequence along with impressive animations in Adobe Premiere Pro can be a time-consuming endeavor, so instead of spending countless hours on producing a perfect combination of text and images, you can just download a title template from the Internet.
1 Premier Pro
Jarle Leirpoll runs this site, and it is a treasure trove of information, help, and advice on Premiere from a man who wrote the book (literally, it’s for sale on the site!) on Premiere.
His first title collection is consisting of 8 templates, including Lower Thirds templates, end credit template, and some special characters. However, it well worth a look around the site as there is plenty more free stuff including presets, and a whole range of tips and tricks to help with your editing.
Features:
- Free Premiere Pro templates to download
- Easy to import the title template to Premiere
- 100% ready to use
In case that you’re just a beginner of video editing software, you can start with Wondershare Filmora (Latest Filmora version 11) to add text to videos, which is powerful but easy-to-use for green hands. Download the Wondershare Filmora below.
There are hundreds of Text and Titles presets available in Filmora, which allows you to add titles, subtitles, scrolling end credits, lower 3d, and openers with ease. You can also apply some animation effects to the selected title presets.
Check the video below to find out how to add text to video with Wondershare Filmora.
Besides the built-in title presets, Wondershare Filmora (Latest Filmora version X) also provides more title templates in Filmstock , which offers lots of special effects templates.
Currently, there are Title Expansion Set, business title set, wedding title set, and lower third expansion set to download. Check the video below to watch the Title Expansion set templates.
 Download Mac Version ](https://tools.techidaily.com/wondershare/filmora/download/ )
Learn more details about How to Add Text to Video with Filmora.
2 Richard Harrington
This is another site that offers templates for download but is also a great place to visit for ideas and information. Richard approaches Premiere from a photographer’s viewpoint, and so has a slightly different view on many topics that are well worth reading.
He has links to a sizable number of templates on Richard Harrington covering a range of styles and subjects, including DVD menus, animated text, and high-quality models. Still, his blog is updated regularly and often includes free downloads.
Features:
- Supports Adobe Premiere intro templates to use
- It includes various templates and presets on Windows and Mac
- More than title templates also has DVD menus and animated text
3 ProVideoCoalition
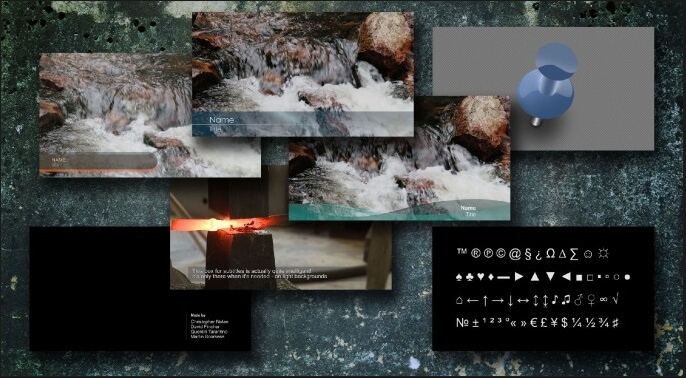
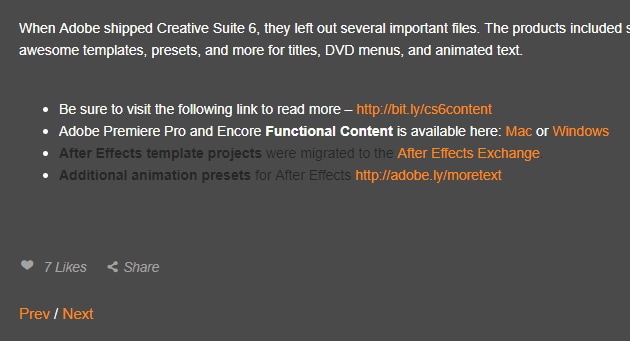
Another all-encompassing site has a huge amount of information and knowledge to be gained. The templates are just part of the story. They are available on Pro Video Coalition and include numerous files and even some free video content showing their implementation.
Also on this page are links to some other sites offering free content or advice on various aspects of Premiere, making it well worth a visit and definitely worth its place in this top 10.
Of particular interest on this site is the regularly updated news which focuses on the latest hardware and software announcements.
Features:
- Supports lower thirds for Adobe Premiere
- You can customize the Premiere Pro intro template free download
- You can create graphic elements
4 Coremelt
This is a commercial site that offers a wide variety of high-quality plugins and templates for several video editing platforms. However, we are on the lookout for that fabulous price of free here, so a little digging finds this page , here you will find ten templates from one of their best selling products offered entirely free.
All templates are quality professionally produced products and worth the visit alone. For anyone who is looking to take their editing output to the professional level, the commercial products on offer here are well worth a look, high quality, and a reasonable cost.
Features:
- It includes 3D text and motion graphics templates
- Free and safe download the Premiere template

5 Bestproaction
Another commercial site. This one has a range of free templates and presets to download for Premiere. Fourteen open items altogether can be downloaded. This site at least deserves a browse through their catalog after a download. The emphasis here is on low cost but high quality, useful templates, and plugins to suit any project.
Even for those of us with a limited budget, there may be something that catches the eye. It is an excellent site for browsing when looking for inspiration.
Features:
- Offers multimedia products like free Premiere Pro text, title templates
- Includes professional Premiere Pro template for videographers
- You can create graphic elements

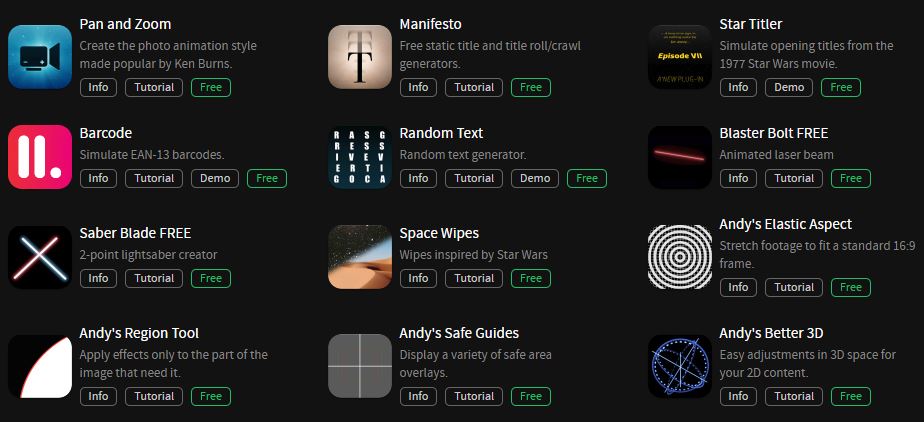
6 FXFactory
This is another commercial site that has a smattering of very high-quality free downloads on offer, including a beautiful template for the original Star Wars movie style scrolling titles.
Again, it is worth browsing the catalog when you are on the site, but all the free products can be found here .
FX Factory has also created some great video tutorials on a variety of aspects of video production that are well worth a view when you are at the site.
Features:
- Free Premiere Pro effects templates to download
- Includes a step by step Premiere Pro tutorial
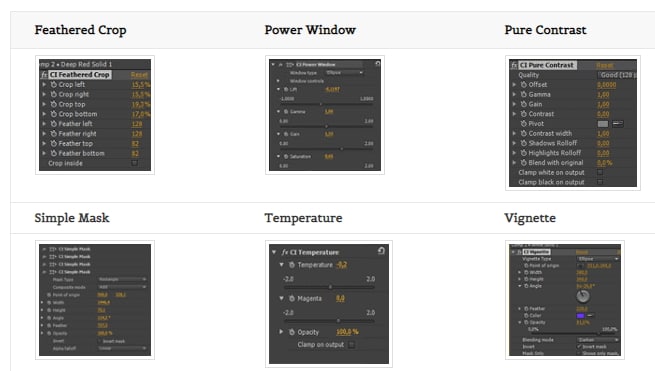
7 Creative Impatience
A fantastic site full of information, tips, and opinion on all aspects of video production, it’s a great place to spend some time, with the bonus of a bunch of free downloads for Premiere.
Of particular note are the tutorials, an excellent source of information and tricks that you may not have seen before, with their YouTube channel being a great source of free guidance for editors of any sort of experience.
Features:
- Apart from free Premiere Pro templates, you can also find blogs
- Easy steps to make Premiere Pro templates
- Safe and clean to use. All real
8Filmimpact
A commercial site is offering some great products at competitive prices. At first glance, this may not seem to be a useful place for our search for the free stuff.
However, all the products do have a free trial download, and as a bonus, the trial for pack one includes four free to use templates. They are quality products too, and well worth a look.

9 Style4Type
Style4Type is an exciting site regularly updated with new free templates as well as offering technical advice and having further templates available as commercial products.
And to the side is even a free download for a PDF file that walks you through installing and using the templates within Premiere once you have them.
There are already a lot of free templates on offer covering a wide variety of styles, but they are added to with regularity, so it is a site to bookmark for the future.
Features:
- Free title templates to use including texture templates
- Professional tools to better your video

10 Premiere Beat
Lots of information on this site as its been running for a decade, it is a website that imparts a wealth of knowledge along the way on not just video editing but music.
The pack includes 21 Premiere title templates to use. Another site that you will want to visit again and again.
Features:
- High-quality Premiere Pro templates to download
- A large number of Premiere templates to use
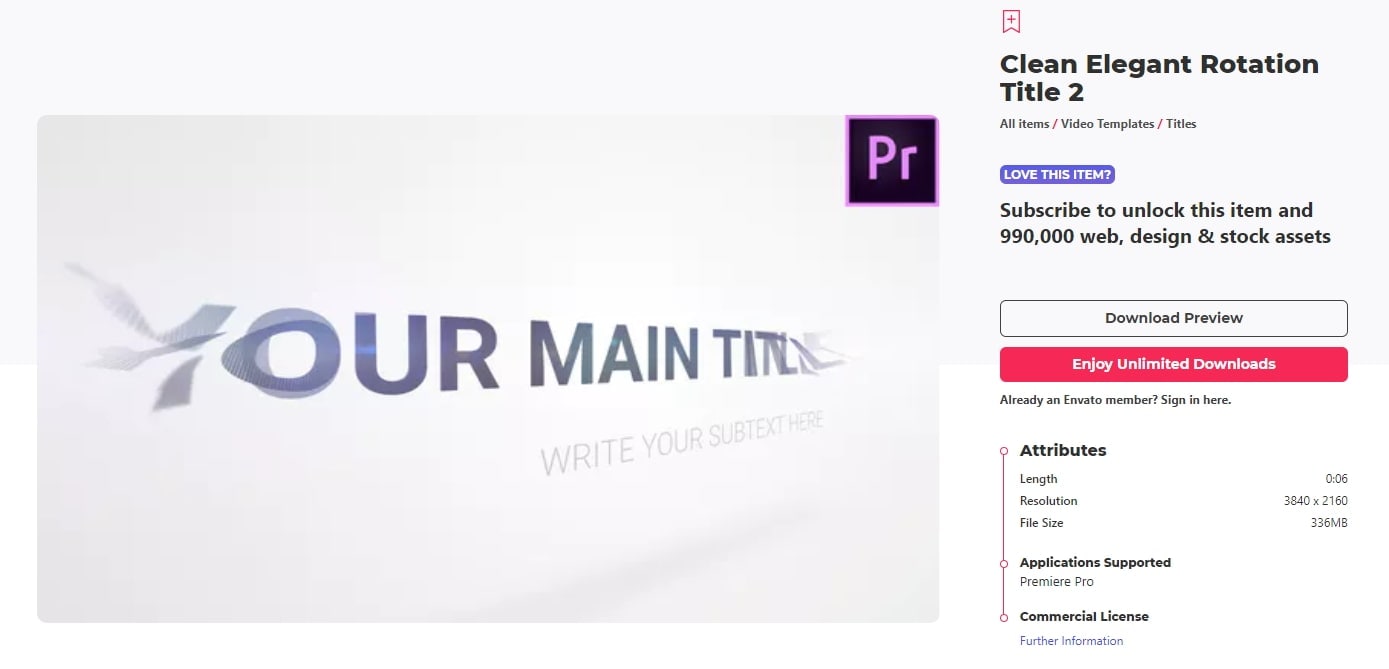
11 Clean Elegant Rotation Title
It is a clean title template without unnecessary parts. If you like simple titles, this one is best for you. You can customize in Premiere easily with a few clicks. For beginners, it also includes free tutorials to use.
Features:
- Simple and clean Premiere title templates
- Customizable in Premiere
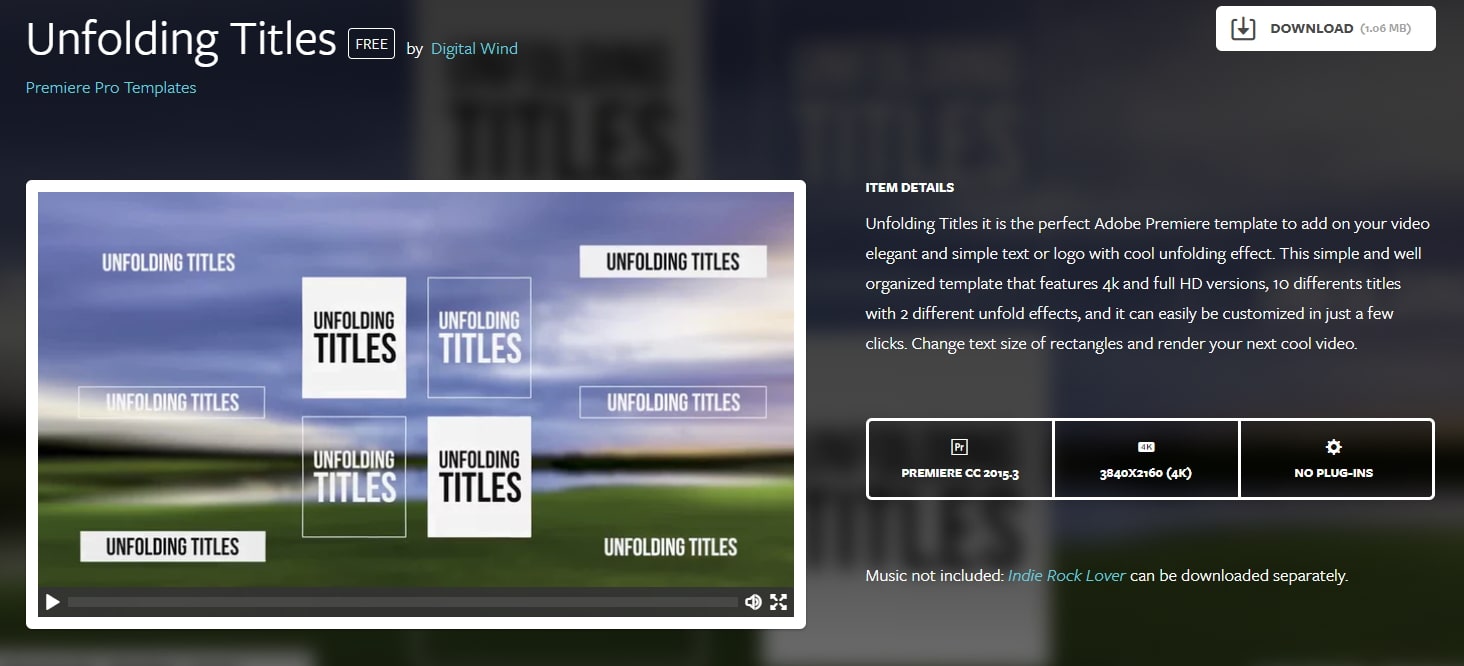
12 Unfolding Titles
It is a clean title template with an unfolding effect. Each text has two unfolding effects, which are convenient to use with customization. It supports 4K and HD versions. In this pack, it wons 10 title formats. After importing Premiere, you can also change text size.
Features:
- 20 unfolding title effects
- Supports rendering your video
13 Orange83
These are five modern title packs for Premiere. With it, you don’t need to use After Effects as you can import them to edit. The best part is you can include your logo and other stuff you like.
Features:
- Include 5 title packs
- Modern and clean titles
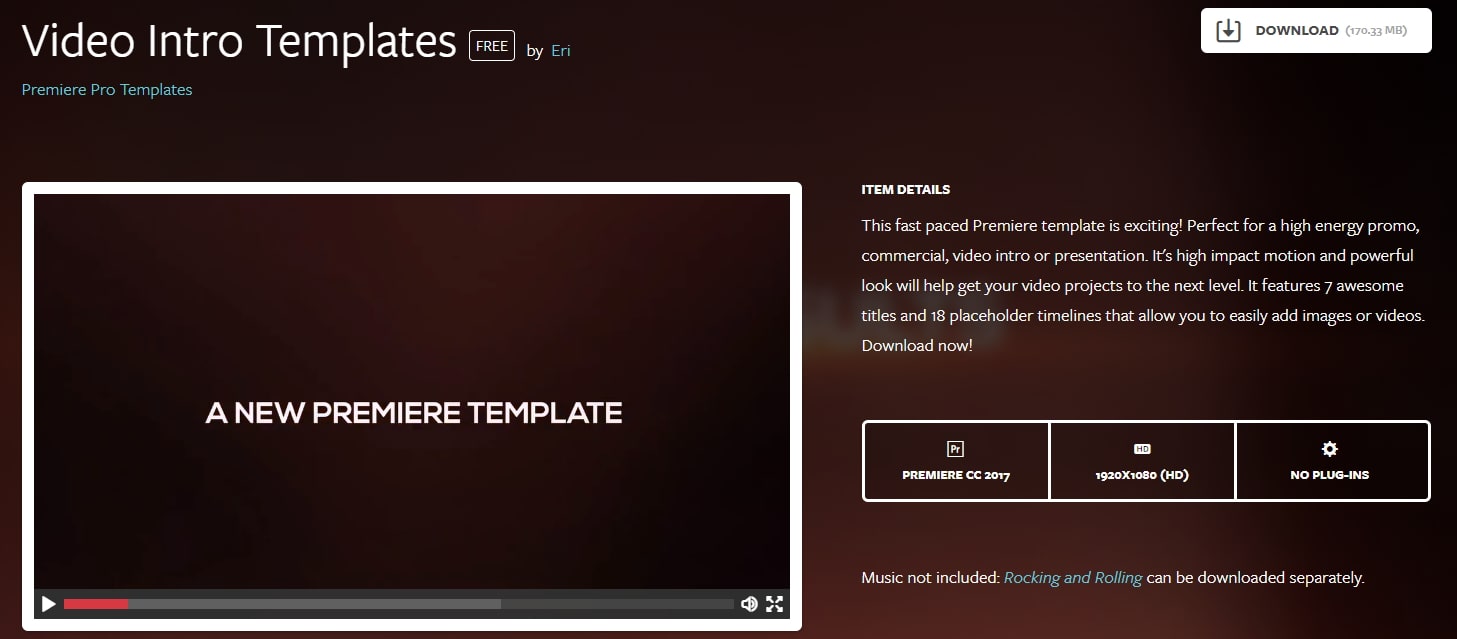
14 Video Intro Templates - Premiere Pro intro template free download
It is a free download Premiere Pro intro template that you can add to your video. It is highly recommended to use promotion and commercial video.
This intro template can be adjusted after you import it to Premiere Pro. This Premiere Pro intro template is HD, so you don’t need to worry about the whole video quality.
Features:
- 1920X1080 (HD) is supported
- This intro template doesn’t include built-in music
15 Elegant Promo - another Premiere Pro intro template free to use
It is intro template for Premiere Pro is modern and free to use. The whole style is young and energetic, which will give viewers a fresh new feeling. It includes 12 images and 26 text layers, and all of them are free to download.
You can use it for your presentation, promotional video, and product video. Besides, it doesn’t require a plug in to use this intro template in Premiere Pro.
Features:
- It includes animated intro elements.
- Use an HD intro template to make a popular video.

These are free templates, and they are enough to get anyone up and running with a new project. As said before, with the commercial enterprises that offer freebies, it’s always worth checking out their paid for output as well, you may not be in the market for it right now, but something may stick for a later time.
Part 2: Bonus: Best 5 Premiere Pro Intro Templates Free Download
Even though all websites we featured in this article offer some free intro templates for Adobe Premiere Pro. However, it is still a much better solution to buy a subscription plan on a platform if you are working on a large number of projects each month.
Let’s see which websites you can use to download the intro and title templates for Premiere Pro.
16. Motion Array
In addition to an impressive library of intro templates, Motion Array offers presets, sound effects, royalty-free music, and stock footage.
Furthermore, you can choose the software version to make sure that the templates you download can be used with the version of Adobe Premiere Pro you have installed on your computer.
The website provides you with powerful search tools, so you can select the resolution of the template, up to 8K, or choose which types of templates are going to be displayed.
Using the free subscription plan can limit your options since you’ll only be able to download free templates, and your upload storage will be limited to just 1GB.
The Pro subscription plan that can be purchased for $54 per month will grant you access to an almost endless selection of title templates as well as a huge selection of plugins for Adobe Premiere Pro.

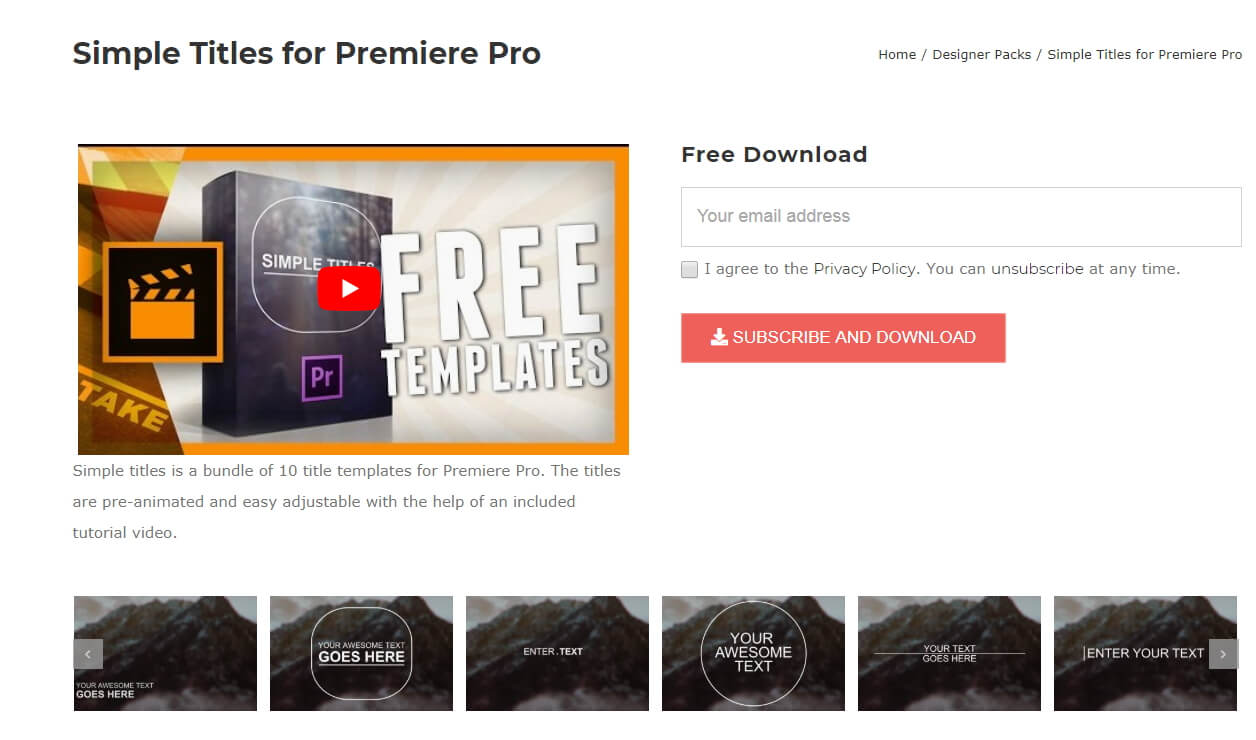
17. Cinecom – Simple Intro for Premiere Pro
It is a designer pack that features ten pre-animated lower-thirds intro templates. You can change the duration of the font and color of the text in each template, and you can choose if you want to download a 1080 or the 4K version of the designer pack.
The templates are compatible with CS6, CC2013, CC2014, and CC2016 versions of the Premiere Pro. The Simple Titles pack can be easily installed, as you just have to drag and drop it into the software.
However, before you can download these title templates, you have to subscribe to Cinecom’s mailing list.
Even though this can be a bit inconvenient, it is very well worth the trouble since you’ll be able to transform or build upon the intro templates and use them freely in all videos you edit in Adobe Premiere Pro.
18. EnvatoElements
You can find much more than intro templates on the EnvatoElements platform since you can choose from 740.000 items you can use for anything from creating a WordPress website to preparing your next business presentation.
The Video Templates category alone features over 4000 items, including Logo Stings or Infographics assets.
There are nearly one hundred available intro templates for Adobe Premiere Pro, but downloading any of them requires you to create an account and purchase a subscription plan.
Prices start from $16.50 per month, and packages include virtually unlimited access to stock photos and videos, video templates, and much more. The EnvatoElements platform also offers assets that can be used with Final Cut Pro, Adobe After Effects or Apple Motion.

19. Videohive
Videohive is a part of the Envato Market platform that also features Web Themes and Templates, Code, Audio, or Graphic sections. It is free to use, but only a limited amount of assets can be downloaded for free.
To download an item, you must purchase it, and prices can range from $16 to $50 for a single title template.
Videohive is also a great source of title templates for Adobe After Effects, as it offers more than 5000 titles and intros that are compatible with this software.
Furthermore, you can download presets for both Premiere Pro and After Effects that can be used to create stop-motion animations, perform color correction, or make the footage look like it was captured with a VHS camera.

20. RocketStock
This option is best suited for video editors who want to create their intros because RocketStok’s Cinematic Style Library extends the scope of options provided by Premiere Pro.
Downloading all fonts except Helvetica Neue is free, but you must check which fonts you can use in commercial projects. You will have no trouble installing the fonts since you can just double-click on the font and follow the on-screen instructions.
Once you’ve installed all the fonts from the library, you can use them to replace the software’s default library. You just have to click on the Replace Style Library option that can be accessed from Premiere Pro’s Title Style tab.
If you don’t feel comfortable creating your titles or if you simply don’t have the time to create your own titles, the Free Cinematic Style Library is not the best choice for you.
On the other hand, Premiere Pro’s users who don’t often use title templates can benefit from downloading RocketStock’s intro library.

Part 3: How to Import and Customize Title Templates in Premiere
If you download the template, all the title templates support customization. You can change its size, font, color, and add 3D effects.
It is easy to import and use it to touch up your video. Check out the steps below to know how to import title templates quickly.
- Install the title template. Choose one template you like and download it to your PC. Remember to unzip it before importing it. Now install them.
- Import the title template. You just need to go to click Effects at the top. Then at right, you will find Presets in the effects section.
- Right-click on presets, and choose Import Presets. If the title template format is .mogrt, you need to open it in Essential Graphics Panel. At the bottom right corner, click the plus icon to import the title template and install it.
- Customize the title template. Once the title template is imported, drag it to the timeline. Click the Editing tab. Here you can customize colors, text, opacities, and positions. There are more options for you to explore.
- You can also copy and paste the title template to another place in the timeline. If you change one place of the pasted template, the original one will remain the same.
Note: each version of Premiere’s interface will look different, but the workflow is similar.
Conclusion
Using title templates can help you achieve a certain visual style faster, so you don’t have to spend a lot of time looking for a perfect background or animating the text.
The Internet provides almost unlimited video editing resources, but not all of these resources can be acquired for free.
Which website you will choose as a source of fresh title templates depends on how often you work on new projects in Adobe Premiere Pro.
If you want to make professional video editing and tired of Premiere, try Filmora! It includes various titles templates to use.
You can sync audio automatically, use detailed color correction to make your title and video like a movie. Download it now (FREE)!
Benjamin Arango
Benjamin Arango is a writer and a lover of all things video.
Follow @Benjamin Arango
Benjamin Arango
Mar 29, 2024• Proven solutions
One of the things that can make your output stand out from the crowd is the titles. Many people think creating eye-catching title effects is beyond them, but with Premiere Pro, you really couldn’t be more wrong.
As Premiere Pro doesn’t have built-in templates, the ability to import free Premiere Pro templates is a must. Anyone need to find a custom title style that suits the project and looks professional and carries impact.
The great thing is that there are many of these resources that are offered entirely free! If you don’t know how to add text/title to Adobe Premiere, here are steps to add text resources .
In this article, we will share with you 20 Free to download Title Templates for Premiere Pro.
- Part1: Top 15 Free Adobe Premiere Pro Title Templates
- Part2: Best 5 Premiere Pro Intro Templates Free Download
- Part3: How to Import and Customize Title Templates in Premiere
You may also like: 10 Free Star Wars Fonts to Make Your Video Amazing
Part 1: Top 15 Free Adobe Premiere Title Templates
Adding the finishing touches to a project, like creating the opening titles or end credits, is often not at the top of anyone’s priority list during the video editing process.
Nonetheless, making a unique opening sequence along with impressive animations in Adobe Premiere Pro can be a time-consuming endeavor, so instead of spending countless hours on producing a perfect combination of text and images, you can just download a title template from the Internet.
1 Premier Pro
Jarle Leirpoll runs this site, and it is a treasure trove of information, help, and advice on Premiere from a man who wrote the book (literally, it’s for sale on the site!) on Premiere.
His first title collection is consisting of 8 templates, including Lower Thirds templates, end credit template, and some special characters. However, it well worth a look around the site as there is plenty more free stuff including presets, and a whole range of tips and tricks to help with your editing.
Features:
- Free Premiere Pro templates to download
- Easy to import the title template to Premiere
- 100% ready to use
In case that you’re just a beginner of video editing software, you can start with Wondershare Filmora (Latest Filmora version 11) to add text to videos, which is powerful but easy-to-use for green hands. Download the Wondershare Filmora below.
There are hundreds of Text and Titles presets available in Filmora, which allows you to add titles, subtitles, scrolling end credits, lower 3d, and openers with ease. You can also apply some animation effects to the selected title presets.
Check the video below to find out how to add text to video with Wondershare Filmora.
Besides the built-in title presets, Wondershare Filmora (Latest Filmora version X) also provides more title templates in Filmstock , which offers lots of special effects templates.
Currently, there are Title Expansion Set, business title set, wedding title set, and lower third expansion set to download. Check the video below to watch the Title Expansion set templates.
Download Mac Version ](https://tools.techidaily.com/wondershare/filmora/download/ )
Learn more details about How to Add Text to Video with Filmora.
2 Richard Harrington
This is another site that offers templates for download but is also a great place to visit for ideas and information. Richard approaches Premiere from a photographer’s viewpoint, and so has a slightly different view on many topics that are well worth reading.
He has links to a sizable number of templates on Richard Harrington covering a range of styles and subjects, including DVD menus, animated text, and high-quality models. Still, his blog is updated regularly and often includes free downloads.
Features:
- Supports Adobe Premiere intro templates to use
- It includes various templates and presets on Windows and Mac
- More than title templates also has DVD menus and animated text
3 ProVideoCoalition
Another all-encompassing site has a huge amount of information and knowledge to be gained. The templates are just part of the story. They are available on Pro Video Coalition and include numerous files and even some free video content showing their implementation.
Also on this page are links to some other sites offering free content or advice on various aspects of Premiere, making it well worth a visit and definitely worth its place in this top 10.
Of particular interest on this site is the regularly updated news which focuses on the latest hardware and software announcements.
Features:
- Supports lower thirds for Adobe Premiere
- You can customize the Premiere Pro intro template free download
- You can create graphic elements
4 Coremelt
This is a commercial site that offers a wide variety of high-quality plugins and templates for several video editing platforms. However, we are on the lookout for that fabulous price of free here, so a little digging finds this page , here you will find ten templates from one of their best selling products offered entirely free.
All templates are quality professionally produced products and worth the visit alone. For anyone who is looking to take their editing output to the professional level, the commercial products on offer here are well worth a look, high quality, and a reasonable cost.
Features:
- It includes 3D text and motion graphics templates
- Free and safe download the Premiere template
5 Bestproaction
Another commercial site. This one has a range of free templates and presets to download for Premiere. Fourteen open items altogether can be downloaded. This site at least deserves a browse through their catalog after a download. The emphasis here is on low cost but high quality, useful templates, and plugins to suit any project.
Even for those of us with a limited budget, there may be something that catches the eye. It is an excellent site for browsing when looking for inspiration.
Features:
- Offers multimedia products like free Premiere Pro text, title templates
- Includes professional Premiere Pro template for videographers
- You can create graphic elements
6 FXFactory
This is another commercial site that has a smattering of very high-quality free downloads on offer, including a beautiful template for the original Star Wars movie style scrolling titles.
Again, it is worth browsing the catalog when you are on the site, but all the free products can be found here .
FX Factory has also created some great video tutorials on a variety of aspects of video production that are well worth a view when you are at the site.
Features:
- Free Premiere Pro effects templates to download
- Includes a step by step Premiere Pro tutorial
7 Creative Impatience
A fantastic site full of information, tips, and opinion on all aspects of video production, it’s a great place to spend some time, with the bonus of a bunch of free downloads for Premiere.
Of particular note are the tutorials, an excellent source of information and tricks that you may not have seen before, with their YouTube channel being a great source of free guidance for editors of any sort of experience.
Features:
- Apart from free Premiere Pro templates, you can also find blogs
- Easy steps to make Premiere Pro templates
- Safe and clean to use. All real
8Filmimpact
A commercial site is offering some great products at competitive prices. At first glance, this may not seem to be a useful place for our search for the free stuff.
However, all the products do have a free trial download, and as a bonus, the trial for pack one includes four free to use templates. They are quality products too, and well worth a look.
9 Style4Type
Style4Type is an exciting site regularly updated with new free templates as well as offering technical advice and having further templates available as commercial products.
And to the side is even a free download for a PDF file that walks you through installing and using the templates within Premiere once you have them.
There are already a lot of free templates on offer covering a wide variety of styles, but they are added to with regularity, so it is a site to bookmark for the future.
Features:
- Free title templates to use including texture templates
- Professional tools to better your video
10 Premiere Beat
Lots of information on this site as its been running for a decade, it is a website that imparts a wealth of knowledge along the way on not just video editing but music.
The pack includes 21 Premiere title templates to use. Another site that you will want to visit again and again.
Features:
- High-quality Premiere Pro templates to download
- A large number of Premiere templates to use
11 Clean Elegant Rotation Title
It is a clean title template without unnecessary parts. If you like simple titles, this one is best for you. You can customize in Premiere easily with a few clicks. For beginners, it also includes free tutorials to use.
Features:
- Simple and clean Premiere title templates
- Customizable in Premiere
12 Unfolding Titles
It is a clean title template with an unfolding effect. Each text has two unfolding effects, which are convenient to use with customization. It supports 4K and HD versions. In this pack, it wons 10 title formats. After importing Premiere, you can also change text size.
Features:
- 20 unfolding title effects
- Supports rendering your video
13 Orange83
These are five modern title packs for Premiere. With it, you don’t need to use After Effects as you can import them to edit. The best part is you can include your logo and other stuff you like.
Features:
- Include 5 title packs
- Modern and clean titles
14 Video Intro Templates - Premiere Pro intro template free download
It is a free download Premiere Pro intro template that you can add to your video. It is highly recommended to use promotion and commercial video.
This intro template can be adjusted after you import it to Premiere Pro. This Premiere Pro intro template is HD, so you don’t need to worry about the whole video quality.
Features:
- 1920X1080 (HD) is supported
- This intro template doesn’t include built-in music
15 Elegant Promo - another Premiere Pro intro template free to use
It is intro template for Premiere Pro is modern and free to use. The whole style is young and energetic, which will give viewers a fresh new feeling. It includes 12 images and 26 text layers, and all of them are free to download.
You can use it for your presentation, promotional video, and product video. Besides, it doesn’t require a plug in to use this intro template in Premiere Pro.
Features:
- It includes animated intro elements.
- Use an HD intro template to make a popular video.
These are free templates, and they are enough to get anyone up and running with a new project. As said before, with the commercial enterprises that offer freebies, it’s always worth checking out their paid for output as well, you may not be in the market for it right now, but something may stick for a later time.
Part 2: Bonus: Best 5 Premiere Pro Intro Templates Free Download
Even though all websites we featured in this article offer some free intro templates for Adobe Premiere Pro. However, it is still a much better solution to buy a subscription plan on a platform if you are working on a large number of projects each month.
Let’s see which websites you can use to download the intro and title templates for Premiere Pro.
16. Motion Array
In addition to an impressive library of intro templates, Motion Array offers presets, sound effects, royalty-free music, and stock footage.
Furthermore, you can choose the software version to make sure that the templates you download can be used with the version of Adobe Premiere Pro you have installed on your computer.
The website provides you with powerful search tools, so you can select the resolution of the template, up to 8K, or choose which types of templates are going to be displayed.
Using the free subscription plan can limit your options since you’ll only be able to download free templates, and your upload storage will be limited to just 1GB.
The Pro subscription plan that can be purchased for $54 per month will grant you access to an almost endless selection of title templates as well as a huge selection of plugins for Adobe Premiere Pro.
17. Cinecom – Simple Intro for Premiere Pro
It is a designer pack that features ten pre-animated lower-thirds intro templates. You can change the duration of the font and color of the text in each template, and you can choose if you want to download a 1080 or the 4K version of the designer pack.
The templates are compatible with CS6, CC2013, CC2014, and CC2016 versions of the Premiere Pro. The Simple Titles pack can be easily installed, as you just have to drag and drop it into the software.
However, before you can download these title templates, you have to subscribe to Cinecom’s mailing list.
Even though this can be a bit inconvenient, it is very well worth the trouble since you’ll be able to transform or build upon the intro templates and use them freely in all videos you edit in Adobe Premiere Pro.
18. EnvatoElements
You can find much more than intro templates on the EnvatoElements platform since you can choose from 740.000 items you can use for anything from creating a WordPress website to preparing your next business presentation.
The Video Templates category alone features over 4000 items, including Logo Stings or Infographics assets.
There are nearly one hundred available intro templates for Adobe Premiere Pro, but downloading any of them requires you to create an account and purchase a subscription plan.
Prices start from $16.50 per month, and packages include virtually unlimited access to stock photos and videos, video templates, and much more. The EnvatoElements platform also offers assets that can be used with Final Cut Pro, Adobe After Effects or Apple Motion.
19. Videohive
Videohive is a part of the Envato Market platform that also features Web Themes and Templates, Code, Audio, or Graphic sections. It is free to use, but only a limited amount of assets can be downloaded for free.
To download an item, you must purchase it, and prices can range from $16 to $50 for a single title template.
Videohive is also a great source of title templates for Adobe After Effects, as it offers more than 5000 titles and intros that are compatible with this software.
Furthermore, you can download presets for both Premiere Pro and After Effects that can be used to create stop-motion animations, perform color correction, or make the footage look like it was captured with a VHS camera.
20. RocketStock
This option is best suited for video editors who want to create their intros because RocketStok’s Cinematic Style Library extends the scope of options provided by Premiere Pro.
Downloading all fonts except Helvetica Neue is free, but you must check which fonts you can use in commercial projects. You will have no trouble installing the fonts since you can just double-click on the font and follow the on-screen instructions.
Once you’ve installed all the fonts from the library, you can use them to replace the software’s default library. You just have to click on the Replace Style Library option that can be accessed from Premiere Pro’s Title Style tab.
If you don’t feel comfortable creating your titles or if you simply don’t have the time to create your own titles, the Free Cinematic Style Library is not the best choice for you.
On the other hand, Premiere Pro’s users who don’t often use title templates can benefit from downloading RocketStock’s intro library.
Part 3: How to Import and Customize Title Templates in Premiere
If you download the template, all the title templates support customization. You can change its size, font, color, and add 3D effects.
It is easy to import and use it to touch up your video. Check out the steps below to know how to import title templates quickly.
- Install the title template. Choose one template you like and download it to your PC. Remember to unzip it before importing it. Now install them.
- Import the title template. You just need to go to click Effects at the top. Then at right, you will find Presets in the effects section.
- Right-click on presets, and choose Import Presets. If the title template format is .mogrt, you need to open it in Essential Graphics Panel. At the bottom right corner, click the plus icon to import the title template and install it.
- Customize the title template. Once the title template is imported, drag it to the timeline. Click the Editing tab. Here you can customize colors, text, opacities, and positions. There are more options for you to explore.
- You can also copy and paste the title template to another place in the timeline. If you change one place of the pasted template, the original one will remain the same.
Note: each version of Premiere’s interface will look different, but the workflow is similar.
Conclusion
Using title templates can help you achieve a certain visual style faster, so you don’t have to spend a lot of time looking for a perfect background or animating the text.
The Internet provides almost unlimited video editing resources, but not all of these resources can be acquired for free.
Which website you will choose as a source of fresh title templates depends on how often you work on new projects in Adobe Premiere Pro.
If you want to make professional video editing and tired of Premiere, try Filmora! It includes various titles templates to use.
You can sync audio automatically, use detailed color correction to make your title and video like a movie. Download it now (FREE)!
Benjamin Arango
Benjamin Arango is a writer and a lover of all things video.
Follow @Benjamin Arango
Top Free Dual-Screen Video Editing Software [Web & Desktop]
Best Split Screen Video Editor [Online & Offline]

Ollie Mattison
Mar 27, 2024• Proven solutions
The effect that comes up after adding two or more screens in a single frame is called split screen, and the tool that enables the users to do this is a split screen video editor. These split screens have significant importance in post-production tasks. That said, the following sections discuss about the tools that enable you to create split screen videos, and explain the process of doing so.
As mentioned above, the split screen effect lets you add two or more screens in a single frame. When multiple activities occur at the same time but at different locations, they all can be shown on one screen by placing their corresponding footages side-by-side or in any other arrangement that the split screen video maker allows.
Best Split Screen Video Editing Software for Windows and Mac [Free & Paid]
After understanding what split screen is, it becomes both obvious and mandatory to know about some of the most used split screen video editor applications, and how they help you in adding the effect to your movies. Following is a list of a couple of such programs:
1. iMovie
A proprietary of Apple, iMovie is available for both iOS and macOS, and is absolutely free of cost. Even though the tool lacks some advanced options for fine editing, it still offers a good platform to those planning their career in post-production industry. With simple UI, it is easy to learn iMovie.
The step-by-step instructions given below explain how to use iMovie to add split screen effect to your videos:
Step 1: Add Footages to iMovie
After importing the footages to the Media Bin in iMovie, drag the first one to the Timeline, and then drag the second one above the first layer.
Step 2: Select the Split Screen Effect
Select the top video layer in the Timeline, and choose Split Screen from the screen type drop-down list at the top.
Step 3: Select Split Screen Preset
Choose a position for the selected layer from the Position drop-down list at the top, and use the Slide slider to adjust the speed of the appearance of the footage.
Pros
- iMovie is free to download and use
- The program is available for both macOS and iOS
Cons
- Allows only up to two videos to be used in split screen
You can get iMovie from here: https://www.apple.com/in/imovie/
2. Wondershare Filmora Editor

One of the most robust apps that is compared with post-production applications like Adobe Premiere Pro and Final Cut Pro X, Wondershare Filmora is also a video editor that helps split screen easily. The software is available for Windows and Mac computers, and provides prompt technical support to its consumers. Although Filmora that packed with more advanced tools is also available, most of the times Filmora serves the purpose pretty well.
You can learn how to add split screen effect in Wondershare Filmora by following the steps given below:
Step 1: Import Footages to Filmora
Launch Wondershare Filmora, click anywhere inside the Media window in the upper-left section, and import all the videos you want to use to create the split screen effect.
Step 2: Choose a Split Screen Preset
Click Split Screen from the standard toolbar at the top, click and drag your preferred preset to the Timeline, and then extend the duration of the effect in the Timeline by dragging its handle.
Step 3: Add Videos to Split Screen

Click ADVANCED from the bottom-right area of the Media pane, on the Advanced Split Screen Edit box, drag the first video from the left pane, and drop it on your preferred section in the right. Repeat the process to add all the other videos to their corresponding sections. Adjust their time of appearance by dragging their thumbnail in the Timeline of the box, and click OK.
Pros
- Wondershare Filmora is lightweight and is less resource intensive
- Allows as many as 6 videos to be added to create split screen effect
- Has 30+ split screen presets
Cons
- A couple of windows are required to be opened while working with split screen
3 . VSDC
VSDC is a free and efficient split screen video maker. In fact, the program is a full-fledged post-production application that can be used to edit the videos to prepare industry-standard clips for presentations, broadcasting, and commercial and private distribution. The best thing about VSDC is, it is absolutely free of cost, and doesn’t add any watermarks to the output files.
The instructions given below explain how to use the split screen feature in VSDC:
Step 1: Add Video Footages
Click Add object from the standard toolbar at the top, click Video, and select and add the first footage to the preview window. Repeat the process to add more video(s) as needed.
Step 2: Add Split Screen Effect
Grab any of the side handles of the video you added last, and drag it inward to reduce its size proportionally. Repeat the process to reduce the size of the other video(s) that is/are now revealed from beneath the one you just adjusted in order to create the split screen effect.
Pros
- Absolutely free to use
- Allows practically unlimited number of footages to be added to create the split screen videos
Cons
- No presets for automatic video positioning are available for split screen effect
You can get VSDC free video editor from here: http://www.videosoftdev.com/
4. Shotcut
A free and opensource editing tool, Shotcut can also be used as a split screen video maker to produce industry-standard movies and documentaries. Shotcut is available for FreeBSD, Windows, Linux, and macOS, and comes in both x64 and x86 variants. Being a free program, Shotcut doesn’t require any activation or registration.
The procedure that follows explains how to use Shortcut as a free split screen video editor:
Step 1: Add Clips to the Timeline
Import the footages to the Shotcut’s media bin, drag one of the clips from the bin to the Timeline at the bottom, and then press Ctrl + I on your keyboard to add more video tracks. You can press this shortcut key for another couple of times depending on the number films you want to use for the split screen effect. Next, drag each film from the bin to their corresponding tracks. Note: Make sure NOT to place all the clips on the same track, and that each of them is on a different, its own, video layer.
Step 2: Adjust the First Video
Select the last video you added to the Timeline (it should be the topmost track), click Filters from above the Timeline, click the + button from the upper-left corner, click Size and Position from the list that appears next, and select the clip’s position from the Preset drop-down list.
Step 3: Adjust Other Videos
Select the second video in the Timeline and repeat the process to set its position, and do the same for all other footages that you added in order to create the split screen effect.
Pros
- Available for FreeBSD, Windows, Linux, and macOS platforms
- If using presets, as many as 4 videos can be added for split screen effect
Cons
- Working with split screen manually may require practice and some calculations to position the clips on the screen correctly
You can get Shotcut from here: https://shotcut.org/
5. Lightworks
Used by the professionals to edit and prepare movies like Pulp Fiction, The Cure, L.A. Confidential, Bruce Almighty, The Wolf of Wall Street, etc., Lightworks is, in true means, a complete and full-fledged post-production application to create industry-standard outputs. The main reason for the app’s wide userbase is that it is a cross-platform software that is available for Linux, Mac, and Windows computers.
To use Lightworks as split screen video maker, you can follow the instructions given below:
Step 1: Add Tracks in Timeline
After importing the clips to Lightworks, leave them in the Media Bin for now, right-click anywhere in the Timeline at the bottom, go to Tracks, click Add multiple, and from the Number to add drop-down list, choose the number of tracks you want to add to the Timeline. Click Add to confirm the changes.
Step 2: Disable Auto Sync
Right-click anywhere in the Timeline, and click to deselect Auto track sync.
Step 3: Add Clips to Timeline
Drag the clips from the Media Bin to the Timeline. Make sure to place each footage on a different track, and that all the tracks are on top of each other. Optionally, right-click the audio that was added along with the clips, and click Remove from the context menu. Use this method to remove all the audios or leave the one you want to have. Note: Removing the audio tracks ensures that they do not overlap during the playback.
Step 4: Enable Split Screen
Click VFX from above the preview window, click the + (Add new effects) icon from the top of the left pane, select the DVE category from the upper-right corner of the left pane, scroll down the left pane to the Split-screen Presets section, and double-click your preferred split screen preset to add the effect to the participating clips.
Pros
- Even the free variant has split screen feature
- A complete post-production tool that doesn’t require any other program for finalizing the things
Cons
- Not many split screen presets are available
Download Lightworks free version from here: https://www.lwks.com/
6. Adobe Premiere Pro
One of the most appreciated and widely used post-production applications for Windows and Mac computers, Adobe Premiere Pro has been professionals’ first choice when it comes to video editing, irrespective of the fact that it has a steep learning curve, and is also a resource intensive software to work with.
The steps below explain how to use Adobe Premiere Pro as a split screen video maker:
Step 1: Add Videos to Timeline
After importing the clips to the Project window, drag each of them to the Timeline, and place them in their separate tracks one above the other.
Step 2: Position and Crop
Select the topmost video track in the Timeline, go to Effect Controls panel from the top of the upper-left pane, and use the Position slider to position the video to your preferred area of the screen. Repeat this process for all the clips in the Timeline you want to add to split screen.
Step 3: Crop the Clips
Search for the Crop effect in the Effects pane present at the lower-left corner, drag and drop the effect on each of the clips in the timeline, and use the Crop slider in the Effect Controls pane to crop the videos as needed. Optionally use the keyframes to add sliding animations to give more professional look to the split screen effect.
Pros
- Most robust and efficient video editing tool
- Allows practically unlimited number of videos to be used for split screen
Cons
- Requires subscription that needs to be renewed regularly
For more details about making split screen with Pr, check How to create a split screen in Premiere Pro
7. Final Cut Pro X
Available only for Mac computers at the time of this writing, Final Cut Pro X or FCPX gives tough competition to Adobe Premiere Pro. Since Apple devices are famous for their speedy processing, professionals any day prefer FCPX over Adobe Premiere Pro if they own a Mac PC running macOS.
You can use FCPX as split screen video maker by following the steps given below:
Step 1: Place Footages in the Timeline
As mentioned earlier, add the clips on top of each other on separate tracks in the Timeline of FCPX.
Step 2: Position and Crop
Select the first clip in the Timeline, from the Transform section of the Video Inspector pane in the right, use the Position slider to move the clip to your preferred side of the screen, and use the sliders from the Crop section to crop the footage to adjust the portion of interest. Repeat the process for the other video tracks as well to get your desired split screen effect in Final Cut Pro X.
Pros
- Offers quick and easy way to add split screen effect
- Allows practically unlimited number of videos to be used for split screen
Cons
- Doesn’t have any particular preset for split screen effect
You may also like: How to create a PIP video with Final Cut Pro X
Best Free Online Split Screen Video Editors
Apart from the desktop programs discussed above, there are a couple of web tools that can be used as split screen video maker online free. Two of the most used ones are introduced below:
1. Kapwing Collage Maker
Although Kapwing offers several other online tools like video resizer, meme generator, slideshow maker, etc., the solution that can be considered split screen video editor is Kapwing Collage Maker. This web app allows you to select a template to get started, and the rest of the process is simple.
The following steps explain how to create a split screen video with Kapwing:
Step 1: Add Clips to Preset
Go to the https://www.kapwing.com/collage link, click to select your preferred split screen preset, click REPLACE on one of the segments of the split screen on the next page, and select and upload the first video. Next, click REPLACE on the other segment(s), and select and upload the other videos as well.
Step 2: Reposition and Publish
Click and drag each of the added clips to reposition them on the screen, use the other tools to crop and adjust the videos as needed, and click Publish from the top-right corner. Note: Optionally you can click Timeline from the top of the preview window, adjust the timings and other settings as needed on the next page, and click Done. After this, you can go ahead and hit Publish to create the split screen effect out of the uploaded videos.
Pros
- Free to use
- Allows as many as 4 videos to create split screen effect
Cons
- Requires you to register and sign in to remove the watermark from the output file
2. WeVideo
Yet another split screen video maker online free solution, WeVideo offers almost desktop program-like experience while creating split screen effects. Even though all the subscription plans that the vendor offers are chargeable, the Education plan can be tried for 30 days for free, post which the teachers are required to pay to continue using the web tool.
The following steps explain how to get split screen effect with WeVideo:
Step 1: Import Videos
Visit https://www.wevideo.com and on the main window, click Video from under the Create a new section at the top, select a layout on the Let’s get started box, and click START EDITING from the bottom right corner. Next, click ADD in the My media window in the upper-left section, click BROWSE TO SELECT on the Import media box, and add the videos you want to use in the split screen effect.
Step 2: Add Clips to Timeline
As explained earlier, drag the videos from the My media pane and drop them in the Timeline. Make sure to place every video in its separate layer, and that all the layers are on top of each other.
Step 3: Create Split Screen Effect
Select any clip in the Timeline, and click the Open clip editor icon from the upper-left area of the track. On the next page, use the Scale slider to reduce the size of the selected clip, and from the preview window in the right, drag to reposition the video to your preferred location on the screen. Click SAVE CHANGES from the bottom of the left pane to confirm the settings. Repeat the process for the second clip in the Timeline to resize and reposition it on the screen. Click FINISH from the upper-right corner, on the next box, enter a name for the video in the available field, click SET, choose your preferred settings on the next page, and click EXPORT from the bottom-right corner to produce the split screen video.
Pros
- Free to use
- Allows multiple videos to be used for split screen
Cons
- Paid subscription is needed to remove watermark from the outputs
FAQs About Split Screen Video Editors
Why you should use split screen effect in video?
There are a couple of reasons you may want to use split screen effect in your video. Some of the most common uses include:
- Showing multiple actions by the same or different characters at the same time, without changing the screen
- Comparing multiple objects or picture quality. This can be done only when the entities in question are placed side-by-side
- Making your video look more professional
- Showing different effects on the same screen
Can I create a split screen video with Windows Movie Maker or Windows 10 Photos app?
No, you cannot. Although these tools enable you to resize the videos, since they don’t allow multi-tracked Timelines, no video clips can be placed one above the other which is an essential part for any split screen video maker to create the effect. However, as discussed above, there are several post-production tools, offline and online, that allow you to make split screen videos easily and without any cost.
Conclusion
Split screen video editor tools are both paid and free. Regardless of the program you use to create the effect, the output files always look more professional and informative. Furthermore, things become way simpler if the split screen video maker has simple UI, is less resource intensive, and is easy to use as it is the case with Wondershare Filmora.
Ollie Mattison
Ollie Mattison is a writer and a lover of all things video.
Follow @Ollie Mattison
Ollie Mattison
Mar 27, 2024• Proven solutions
The effect that comes up after adding two or more screens in a single frame is called split screen, and the tool that enables the users to do this is a split screen video editor. These split screens have significant importance in post-production tasks. That said, the following sections discuss about the tools that enable you to create split screen videos, and explain the process of doing so.
As mentioned above, the split screen effect lets you add two or more screens in a single frame. When multiple activities occur at the same time but at different locations, they all can be shown on one screen by placing their corresponding footages side-by-side or in any other arrangement that the split screen video maker allows.
Best Split Screen Video Editing Software for Windows and Mac [Free & Paid]
After understanding what split screen is, it becomes both obvious and mandatory to know about some of the most used split screen video editor applications, and how they help you in adding the effect to your movies. Following is a list of a couple of such programs:
1. iMovie
A proprietary of Apple, iMovie is available for both iOS and macOS, and is absolutely free of cost. Even though the tool lacks some advanced options for fine editing, it still offers a good platform to those planning their career in post-production industry. With simple UI, it is easy to learn iMovie.
The step-by-step instructions given below explain how to use iMovie to add split screen effect to your videos:
Step 1: Add Footages to iMovie
After importing the footages to the Media Bin in iMovie, drag the first one to the Timeline, and then drag the second one above the first layer.
Step 2: Select the Split Screen Effect
Select the top video layer in the Timeline, and choose Split Screen from the screen type drop-down list at the top.
Step 3: Select Split Screen Preset
Choose a position for the selected layer from the Position drop-down list at the top, and use the Slide slider to adjust the speed of the appearance of the footage.
Pros
- iMovie is free to download and use
- The program is available for both macOS and iOS
Cons
- Allows only up to two videos to be used in split screen
You can get iMovie from here: https://www.apple.com/in/imovie/
2. Wondershare Filmora Editor
One of the most robust apps that is compared with post-production applications like Adobe Premiere Pro and Final Cut Pro X, Wondershare Filmora is also a video editor that helps split screen easily. The software is available for Windows and Mac computers, and provides prompt technical support to its consumers. Although Filmora that packed with more advanced tools is also available, most of the times Filmora serves the purpose pretty well.
You can learn how to add split screen effect in Wondershare Filmora by following the steps given below:
Step 1: Import Footages to Filmora
Launch Wondershare Filmora, click anywhere inside the Media window in the upper-left section, and import all the videos you want to use to create the split screen effect.
Step 2: Choose a Split Screen Preset
Click Split Screen from the standard toolbar at the top, click and drag your preferred preset to the Timeline, and then extend the duration of the effect in the Timeline by dragging its handle.
Step 3: Add Videos to Split Screen
Click ADVANCED from the bottom-right area of the Media pane, on the Advanced Split Screen Edit box, drag the first video from the left pane, and drop it on your preferred section in the right. Repeat the process to add all the other videos to their corresponding sections. Adjust their time of appearance by dragging their thumbnail in the Timeline of the box, and click OK.
Pros
- Wondershare Filmora is lightweight and is less resource intensive
- Allows as many as 6 videos to be added to create split screen effect
- Has 30+ split screen presets
Cons
- A couple of windows are required to be opened while working with split screen
3 . VSDC
VSDC is a free and efficient split screen video maker. In fact, the program is a full-fledged post-production application that can be used to edit the videos to prepare industry-standard clips for presentations, broadcasting, and commercial and private distribution. The best thing about VSDC is, it is absolutely free of cost, and doesn’t add any watermarks to the output files.
The instructions given below explain how to use the split screen feature in VSDC:
Step 1: Add Video Footages
Click Add object from the standard toolbar at the top, click Video, and select and add the first footage to the preview window. Repeat the process to add more video(s) as needed.
Step 2: Add Split Screen Effect
Grab any of the side handles of the video you added last, and drag it inward to reduce its size proportionally. Repeat the process to reduce the size of the other video(s) that is/are now revealed from beneath the one you just adjusted in order to create the split screen effect.
Pros
- Absolutely free to use
- Allows practically unlimited number of footages to be added to create the split screen videos
Cons
- No presets for automatic video positioning are available for split screen effect
You can get VSDC free video editor from here: http://www.videosoftdev.com/
4. Shotcut
A free and opensource editing tool, Shotcut can also be used as a split screen video maker to produce industry-standard movies and documentaries. Shotcut is available for FreeBSD, Windows, Linux, and macOS, and comes in both x64 and x86 variants. Being a free program, Shotcut doesn’t require any activation or registration.
The procedure that follows explains how to use Shortcut as a free split screen video editor:
Step 1: Add Clips to the Timeline
Import the footages to the Shotcut’s media bin, drag one of the clips from the bin to the Timeline at the bottom, and then press Ctrl + I on your keyboard to add more video tracks. You can press this shortcut key for another couple of times depending on the number films you want to use for the split screen effect. Next, drag each film from the bin to their corresponding tracks. Note: Make sure NOT to place all the clips on the same track, and that each of them is on a different, its own, video layer.
Step 2: Adjust the First Video
Select the last video you added to the Timeline (it should be the topmost track), click Filters from above the Timeline, click the + button from the upper-left corner, click Size and Position from the list that appears next, and select the clip’s position from the Preset drop-down list.
Step 3: Adjust Other Videos
Select the second video in the Timeline and repeat the process to set its position, and do the same for all other footages that you added in order to create the split screen effect.
Pros
- Available for FreeBSD, Windows, Linux, and macOS platforms
- If using presets, as many as 4 videos can be added for split screen effect
Cons
- Working with split screen manually may require practice and some calculations to position the clips on the screen correctly
You can get Shotcut from here: https://shotcut.org/
5. Lightworks
Used by the professionals to edit and prepare movies like Pulp Fiction, The Cure, L.A. Confidential, Bruce Almighty, The Wolf of Wall Street, etc., Lightworks is, in true means, a complete and full-fledged post-production application to create industry-standard outputs. The main reason for the app’s wide userbase is that it is a cross-platform software that is available for Linux, Mac, and Windows computers.
To use Lightworks as split screen video maker, you can follow the instructions given below:
Step 1: Add Tracks in Timeline
After importing the clips to Lightworks, leave them in the Media Bin for now, right-click anywhere in the Timeline at the bottom, go to Tracks, click Add multiple, and from the Number to add drop-down list, choose the number of tracks you want to add to the Timeline. Click Add to confirm the changes.
Step 2: Disable Auto Sync
Right-click anywhere in the Timeline, and click to deselect Auto track sync.
Step 3: Add Clips to Timeline
Drag the clips from the Media Bin to the Timeline. Make sure to place each footage on a different track, and that all the tracks are on top of each other. Optionally, right-click the audio that was added along with the clips, and click Remove from the context menu. Use this method to remove all the audios or leave the one you want to have. Note: Removing the audio tracks ensures that they do not overlap during the playback.
Step 4: Enable Split Screen
Click VFX from above the preview window, click the + (Add new effects) icon from the top of the left pane, select the DVE category from the upper-right corner of the left pane, scroll down the left pane to the Split-screen Presets section, and double-click your preferred split screen preset to add the effect to the participating clips.
Pros
- Even the free variant has split screen feature
- A complete post-production tool that doesn’t require any other program for finalizing the things
Cons
- Not many split screen presets are available
Download Lightworks free version from here: https://www.lwks.com/
6. Adobe Premiere Pro
One of the most appreciated and widely used post-production applications for Windows and Mac computers, Adobe Premiere Pro has been professionals’ first choice when it comes to video editing, irrespective of the fact that it has a steep learning curve, and is also a resource intensive software to work with.
The steps below explain how to use Adobe Premiere Pro as a split screen video maker:
Step 1: Add Videos to Timeline
After importing the clips to the Project window, drag each of them to the Timeline, and place them in their separate tracks one above the other.
Step 2: Position and Crop
Select the topmost video track in the Timeline, go to Effect Controls panel from the top of the upper-left pane, and use the Position slider to position the video to your preferred area of the screen. Repeat this process for all the clips in the Timeline you want to add to split screen.
Step 3: Crop the Clips
Search for the Crop effect in the Effects pane present at the lower-left corner, drag and drop the effect on each of the clips in the timeline, and use the Crop slider in the Effect Controls pane to crop the videos as needed. Optionally use the keyframes to add sliding animations to give more professional look to the split screen effect.
Pros
- Most robust and efficient video editing tool
- Allows practically unlimited number of videos to be used for split screen
Cons
- Requires subscription that needs to be renewed regularly
For more details about making split screen with Pr, check How to create a split screen in Premiere Pro
7. Final Cut Pro X
Available only for Mac computers at the time of this writing, Final Cut Pro X or FCPX gives tough competition to Adobe Premiere Pro. Since Apple devices are famous for their speedy processing, professionals any day prefer FCPX over Adobe Premiere Pro if they own a Mac PC running macOS.
You can use FCPX as split screen video maker by following the steps given below:
Step 1: Place Footages in the Timeline
As mentioned earlier, add the clips on top of each other on separate tracks in the Timeline of FCPX.
Step 2: Position and Crop
Select the first clip in the Timeline, from the Transform section of the Video Inspector pane in the right, use the Position slider to move the clip to your preferred side of the screen, and use the sliders from the Crop section to crop the footage to adjust the portion of interest. Repeat the process for the other video tracks as well to get your desired split screen effect in Final Cut Pro X.
Pros
- Offers quick and easy way to add split screen effect
- Allows practically unlimited number of videos to be used for split screen
Cons
- Doesn’t have any particular preset for split screen effect
You may also like: How to create a PIP video with Final Cut Pro X
Best Free Online Split Screen Video Editors
Apart from the desktop programs discussed above, there are a couple of web tools that can be used as split screen video maker online free. Two of the most used ones are introduced below:
1. Kapwing Collage Maker
Although Kapwing offers several other online tools like video resizer, meme generator, slideshow maker, etc., the solution that can be considered split screen video editor is Kapwing Collage Maker. This web app allows you to select a template to get started, and the rest of the process is simple.
The following steps explain how to create a split screen video with Kapwing:
Step 1: Add Clips to Preset
Go to the https://www.kapwing.com/collage link, click to select your preferred split screen preset, click REPLACE on one of the segments of the split screen on the next page, and select and upload the first video. Next, click REPLACE on the other segment(s), and select and upload the other videos as well.
Step 2: Reposition and Publish
Click and drag each of the added clips to reposition them on the screen, use the other tools to crop and adjust the videos as needed, and click Publish from the top-right corner. Note: Optionally you can click Timeline from the top of the preview window, adjust the timings and other settings as needed on the next page, and click Done. After this, you can go ahead and hit Publish to create the split screen effect out of the uploaded videos.
Pros
- Free to use
- Allows as many as 4 videos to create split screen effect
Cons
- Requires you to register and sign in to remove the watermark from the output file
2. WeVideo
Yet another split screen video maker online free solution, WeVideo offers almost desktop program-like experience while creating split screen effects. Even though all the subscription plans that the vendor offers are chargeable, the Education plan can be tried for 30 days for free, post which the teachers are required to pay to continue using the web tool.
The following steps explain how to get split screen effect with WeVideo:
Step 1: Import Videos
Visit https://www.wevideo.com and on the main window, click Video from under the Create a new section at the top, select a layout on the Let’s get started box, and click START EDITING from the bottom right corner. Next, click ADD in the My media window in the upper-left section, click BROWSE TO SELECT on the Import media box, and add the videos you want to use in the split screen effect.
Step 2: Add Clips to Timeline
As explained earlier, drag the videos from the My media pane and drop them in the Timeline. Make sure to place every video in its separate layer, and that all the layers are on top of each other.
Step 3: Create Split Screen Effect
Select any clip in the Timeline, and click the Open clip editor icon from the upper-left area of the track. On the next page, use the Scale slider to reduce the size of the selected clip, and from the preview window in the right, drag to reposition the video to your preferred location on the screen. Click SAVE CHANGES from the bottom of the left pane to confirm the settings. Repeat the process for the second clip in the Timeline to resize and reposition it on the screen. Click FINISH from the upper-right corner, on the next box, enter a name for the video in the available field, click SET, choose your preferred settings on the next page, and click EXPORT from the bottom-right corner to produce the split screen video.
Pros
- Free to use
- Allows multiple videos to be used for split screen
Cons
- Paid subscription is needed to remove watermark from the outputs
FAQs About Split Screen Video Editors
Why you should use split screen effect in video?
There are a couple of reasons you may want to use split screen effect in your video. Some of the most common uses include:
- Showing multiple actions by the same or different characters at the same time, without changing the screen
- Comparing multiple objects or picture quality. This can be done only when the entities in question are placed side-by-side
- Making your video look more professional
- Showing different effects on the same screen
Can I create a split screen video with Windows Movie Maker or Windows 10 Photos app?
No, you cannot. Although these tools enable you to resize the videos, since they don’t allow multi-tracked Timelines, no video clips can be placed one above the other which is an essential part for any split screen video maker to create the effect. However, as discussed above, there are several post-production tools, offline and online, that allow you to make split screen videos easily and without any cost.
Conclusion
Split screen video editor tools are both paid and free. Regardless of the program you use to create the effect, the output files always look more professional and informative. Furthermore, things become way simpler if the split screen video maker has simple UI, is less resource intensive, and is easy to use as it is the case with Wondershare Filmora.
Ollie Mattison
Ollie Mattison is a writer and a lover of all things video.
Follow @Ollie Mattison
Mac’s Finest: 8 Exceptional Movie Making Tools
Many video editors will agree that Apple’s Mac computers are perfect for video editing and other creative media arts such as animation. Unlike, Chrome OS, Windows, or Linux, macOS comes with much-noted preferences. This operating system emphasizes on creativity and design and gives the best producing results with top movie maker software.
8 Stunning Movie Creator for Mac
Browsing through the internet, you will find a myriad of movie maker video editors. However, not every tool is compatible with Mac. If you are getting started with video editing on your Mac, the first step is to choose movie maker software that gives high-quality results. Below, you will find some of the best video editing tools to put out short films and movies professionally.
1. Wondershare Filmora - Best Overall
Filmora by Wondershare is a popular video movie maker for Mac with a wide array of transition, trimming, and overlay options. Notable benefits of using Filmora are modern and advanced features. Also, developers in Filmora consistently introduce new updates and features. For instance, they recently introduced a motion tracking feature. Motion tracking maps objects in a frame and enables the video editor to create texts and graphics that follow that motion. Filmora has a straightforward interface, which makes this tool suitable for beginners as well as professional video editors.

For Win 7 or later (64-bit)
For macOS 10.12 or later
The tool supports 4K videos and offers a plethora of options to add effects, styles, and enable editors to customize videos. Filmora is an affordable tool with many elements and animations. With this tool, editors can insert text and add audio to their videos. Here are some top features offered by Wondershare Filmora:
- Layer multiple video clips
- Video stabilization
- Audio equalizer
- Advanced text editing
- Speed control
- Mosaic (blurring)
- Noise removal
- Screen recording
2. Adobe Premiere Pro – Best for Professionals
Adobe Premiere is another popular platform suitable for video editing. Like Filmora, Adobe Premiere also offers a convenient and simple interface. With embedded layouts, you can use this movie video maker for different purposes. Furthermore, Adobe Premiere also offers complete customization. You can arrange and remove windows and tabs according to your preference.

With a great number of presets and codecs, you can easily export videos in different formats. While exporting, you can customize the settings according to your needs, although default settings also offer decent quality. Besides coding formats, Adobe Premiere boasts numerous templates, plug-ins, and scripts to simplify the working process and include professional elements to your video. Exciting features of Adobe Premiere includes:
- Motion graphics templates
- Simultaneous projects
- Transitions
- Effects
- VR rotate sphere
- VR audio editing
- VR editing
- Multiple formats support
3. Shotcut – Best Open Source Software
Shotcut is a simple tool with customized filters that enable you to create collage videos. This movie video maker enables you to adjust video and audio quality and change the volume. Furthermore, you can export videos in different folders such as MJpeg, and WebM.

With Shotcut, you can export videos in Lossless mode. This mode keeps the original quality of the videos after the export, which is suitable for professional tasks. This means that you can save time by downloading high-quality videos on default settings. Using this movie creator, you can add filters and effects to enhance the video quality and color grading. Shotcut movie maker offers the following features:
- Multiple audio features
- Video effects
- Hardware support
- Display and monitoring
- Codec independent
- Cross-platform
4. Adobe Premiere Elements – Best for Beginners
Adobe Premiere Elements is a beginners’ version of Premiere Pro. This doesn’t mean that it is less capable, but the tool offers simple features for high-quality tasks. That’s why this video movie makeris highly suitable for beginners. So, if you are just starting with video editing, you should consider trying Premiere elements.

Premiere elements offers a wide array of tools to compile multiple videos, audio, and images into a single video. There are few tools available to scale video quality. This movie video maker is compatible with Mac as well as PC. Premiere Elements also helps you add fun minor effects to maintain flow and spice up the video. The tool uses Sensei AI technology that automatically keeps the important video elements in the frame through re-framing.
If you edit videos for social media platforms, using Adobe Premiere elements would be ideal. It enables you to create a social-friendly square or vertical format of videos. Furthermore, you can include backgrounds, mattes, and motion titles in the videos. Abode Premiere Elements offers the following features:
- Animated overlays
- Auto reframe
- New slideshow styles
- Compress video output
- Shadow and highlight guided edit
- Ample video effects
- Cross-platform support
5. Final Cut Pro – Best Tool for Timeline
Final Cut is a convenient and powerful movie creator tool produced by Apple Company. This platform gives a new approach to video editing and has a flexible Magnetic Timeline. The interface is quite uncommon with fixed windows. You can conveniently add new videos and organize clips with Final Cut Pro, and the video clips you no longer use will easily disappear.

The Clip Connections feature enables you to join basic clips with other elements. The downside of this tool is that you can’t use the keyboard to enter the parameters for color correction. Instead, you have to use a mouse for every modification. This can be overwhelming sometimes, especially for minimum correction. Some features of Final Cut Pro include:
- Supports 360° VR content
- Supports 4K XAVC-S format
- 3D editing
- Motion tracking
- Exports to video ()
6. Blender – Best for 3D
Blender is an open-source and free-to-use movie maker video editor. A notable feature of this tool is 3D rendering. It offers excellent functions to work with movable objects such as animation, opening UV, training, modeling, interface, and shading. The video movie maker offers a highly-technological interface, unlike other similar programs. Blender is perfect for 3D enthusiasts, designers, and artists, as it offers professional 3D quality. Some popular Blender features are:
- Modeling
- Sculpting
- Rendering
- VFX
- Animation and rigging
- Scripting

7. OpenShot – Best for Open-Source
OpenShot is another open-source movie video maker but the interface and features are quite different than Blender. It offers drag-and-drop options and a simple interface. This Mac video editing tool creates a perfect balance with simplicity and advanced features. With this tool, you can include wide-ranging transition effects and elements and create high-quality videos. OpenShot offers:
- Desktop integration
- Keyframe animation
- Trim and slice
- Slow-motion and time effect
- Audio waveform

8. Lightworks – Best Tool for Fast Rendering
You can download Lightworks for free on your Mac and include unlimited videos and audio tracks in them. The post-promotion video processing feature performed in real-time saves a tremendous amount of time. With the auto-save feature, you don’t have to worry about losing your progress. Lightworks also offers screen capture features to create YouTube tutorial videos. Features of Lightworks movie maker tool are:
- Unlimited sources
- Live cut
- Unique sync group feature.
- Sync with edits.
- Sync to time code or lock frame

Closing Word
Hopefully, now you can easily choose the best movie maker from the above list and scale your editing skills. Our top pick, Wondershare Filmora is budget-friendly movie maker software with an easy-to-use interface and creative features. There are wide-ranging transitions and effects such as speed blur, ripple and dissolve, making this software a unique option.
Versatile Video Editor - Wondershare Filmora
An easy yet powerful editor
Numerous effects to choose from
Detailed tutorials provided by the official channel
For macOS 10.12 or later
The tool supports 4K videos and offers a plethora of options to add effects, styles, and enable editors to customize videos. Filmora is an affordable tool with many elements and animations. With this tool, editors can insert text and add audio to their videos. Here are some top features offered by Wondershare Filmora:
- Layer multiple video clips
- Video stabilization
- Audio equalizer
- Advanced text editing
- Speed control
- Mosaic (blurring)
- Noise removal
- Screen recording
2. Adobe Premiere Pro – Best for Professionals
Adobe Premiere is another popular platform suitable for video editing. Like Filmora, Adobe Premiere also offers a convenient and simple interface. With embedded layouts, you can use this movie video maker for different purposes. Furthermore, Adobe Premiere also offers complete customization. You can arrange and remove windows and tabs according to your preference.
With a great number of presets and codecs, you can easily export videos in different formats. While exporting, you can customize the settings according to your needs, although default settings also offer decent quality. Besides coding formats, Adobe Premiere boasts numerous templates, plug-ins, and scripts to simplify the working process and include professional elements to your video. Exciting features of Adobe Premiere includes:
- Motion graphics templates
- Simultaneous projects
- Transitions
- Effects
- VR rotate sphere
- VR audio editing
- VR editing
- Multiple formats support
3. Shotcut – Best Open Source Software
Shotcut is a simple tool with customized filters that enable you to create collage videos. This movie video maker enables you to adjust video and audio quality and change the volume. Furthermore, you can export videos in different folders such as MJpeg, and WebM.
With Shotcut, you can export videos in Lossless mode. This mode keeps the original quality of the videos after the export, which is suitable for professional tasks. This means that you can save time by downloading high-quality videos on default settings. Using this movie creator, you can add filters and effects to enhance the video quality and color grading. Shotcut movie maker offers the following features:
- Multiple audio features
- Video effects
- Hardware support
- Display and monitoring
- Codec independent
- Cross-platform
4. Adobe Premiere Elements – Best for Beginners
Adobe Premiere Elements is a beginners’ version of Premiere Pro. This doesn’t mean that it is less capable, but the tool offers simple features for high-quality tasks. That’s why this video movie makeris highly suitable for beginners. So, if you are just starting with video editing, you should consider trying Premiere elements.
Premiere elements offers a wide array of tools to compile multiple videos, audio, and images into a single video. There are few tools available to scale video quality. This movie video maker is compatible with Mac as well as PC. Premiere Elements also helps you add fun minor effects to maintain flow and spice up the video. The tool uses Sensei AI technology that automatically keeps the important video elements in the frame through re-framing.
If you edit videos for social media platforms, using Adobe Premiere elements would be ideal. It enables you to create a social-friendly square or vertical format of videos. Furthermore, you can include backgrounds, mattes, and motion titles in the videos. Abode Premiere Elements offers the following features:
- Animated overlays
- Auto reframe
- New slideshow styles
- Compress video output
- Shadow and highlight guided edit
- Ample video effects
- Cross-platform support
5. Final Cut Pro – Best Tool for Timeline
Final Cut is a convenient and powerful movie creator tool produced by Apple Company. This platform gives a new approach to video editing and has a flexible Magnetic Timeline. The interface is quite uncommon with fixed windows. You can conveniently add new videos and organize clips with Final Cut Pro, and the video clips you no longer use will easily disappear.
The Clip Connections feature enables you to join basic clips with other elements. The downside of this tool is that you can’t use the keyboard to enter the parameters for color correction. Instead, you have to use a mouse for every modification. This can be overwhelming sometimes, especially for minimum correction. Some features of Final Cut Pro include:
- Supports 360° VR content
- Supports 4K XAVC-S format
- 3D editing
- Motion tracking
- Exports to video ()
6. Blender – Best for 3D
Blender is an open-source and free-to-use movie maker video editor. A notable feature of this tool is 3D rendering. It offers excellent functions to work with movable objects such as animation, opening UV, training, modeling, interface, and shading. The video movie maker offers a highly-technological interface, unlike other similar programs. Blender is perfect for 3D enthusiasts, designers, and artists, as it offers professional 3D quality. Some popular Blender features are:
- Modeling
- Sculpting
- Rendering
- VFX
- Animation and rigging
- Scripting
7. OpenShot – Best for Open-Source
OpenShot is another open-source movie video maker but the interface and features are quite different than Blender. It offers drag-and-drop options and a simple interface. This Mac video editing tool creates a perfect balance with simplicity and advanced features. With this tool, you can include wide-ranging transition effects and elements and create high-quality videos. OpenShot offers:
- Desktop integration
- Keyframe animation
- Trim and slice
- Slow-motion and time effect
- Audio waveform
8. Lightworks – Best Tool for Fast Rendering
You can download Lightworks for free on your Mac and include unlimited videos and audio tracks in them. The post-promotion video processing feature performed in real-time saves a tremendous amount of time. With the auto-save feature, you don’t have to worry about losing your progress. Lightworks also offers screen capture features to create YouTube tutorial videos. Features of Lightworks movie maker tool are:
- Unlimited sources
- Live cut
- Unique sync group feature.
- Sync with edits.
- Sync to time code or lock frame
Closing Word
Hopefully, now you can easily choose the best movie maker from the above list and scale your editing skills. Our top pick, Wondershare Filmora is budget-friendly movie maker software with an easy-to-use interface and creative features. There are wide-ranging transitions and effects such as speed blur, ripple and dissolve, making this software a unique option.
Versatile Video Editor - Wondershare Filmora
An easy yet powerful editor
Numerous effects to choose from
Detailed tutorials provided by the official channel
Combine Videos Effortlessly: Best Easy Video Joiner Alternatives
During video editing, one of the most basic steps that people take is cutting and merging clips together in succession. One should use the best video joiner alternative application for the best results with distinctive functionality for video merging, splitting, and other fundamental features.
Multiple options are available in the market that offer the video joining functionality with additional editing features. Make your decision after careful deliberation, and we will help you with that. Here is a list of the top 12 software to try, including their crucial details.
- MKVToolnix
- MP4Tools
- VidCutter
- Wondershare Filmora
- Freemake Video Converter
- Timbre
- Boilsoft Video Joiner
- Windows Movie Maker
- MediaJoin
- Free Video Dub
- FormatFactory
- HandBrake
Part 1: Top 3 Picks for Video Joiner Alternatives
Three notable apps stand out quite well in terms of the best video joiner alternative apps. For a clearer overview, here are some basic details on each.
1. Wondershare Filmora - Best for All-Around Video Editing Qualities

Filmora is a better choice for editing experts and beginners for a comprehensive video editing tool. Use this software to trim and merge clips and add other high-quality effects.
Download it from Microsoft Store and Mac App Store.
Rating: 4.5 out of 5
Free with upgraded plans starting at USD 19.99.
2. Freemake Video Converter- Best for High-Grade Video Format Support During Editing/Converting

The software is both a converter and editor for different types of formatted videos, making it suitable for operating in multiple device types. Take a few steps to convert and edit the files you add, and easily share across social media platforms.
Download it from the Official Website
Rating: 4.4 out of 5
Available for free.
3. VidCutter- Best for Beginners with Timecode-based Video Trimming/Joining

Need a simple open-source tool for straightforward video editing work? VidCutter allows users to trim their video files into multiple shorter sections and clip them sequentially.
Download it from communities like GitHub .
Rating: 2.7 out of 5
Available for free.
Part 2: Ultimate Overview on 12 Best Alternatives to Video Joiner
Yes, the last three options are the top of the line regarding the video cutter for PC. But other options are also available to try out, with specific uses and functions.
Read ahead to know the basics about each that you should consider selecting the right video cutter software for your needs. For a perusal, here’s a comparative table.
| OS Compatibility | Price | Ease of Use | Overall Ratings | |
|---|---|---|---|---|
| MKVToolnix | Linux, Windows, other Unices | Free | Medium-Hard | 4.7 |
| MP4Tools | Windows, Mac | Free | Medium | 3.3 |
| VidCutter | Windows, OSX | Free | Medium-Hard | 2.7 |
| Wondershare Filmora | Windows, Mac, iPad | Annual-$49.99, Perpetual-$79.99 | Easy | 4.5 |
| Freemake Video Converter | Windows | Free | Easy | 4.4 |
| Timbre | Android | Free with in-app costs starting at USD 0.61 | Easy-Medium | 3.4 |
| Boilsoft Video Joiner | Windows, Mac | USD 29.95 | Easy-Medium | 3.2 |
| Windows MovieMaker | Windows | Free, Pro- USD 15 | Medium-Hard | 4 |
| MediaJoin | Windows | Free | Easy | 3 |
| Free Video Dub | Windows | Free | Easy-Medium | 3.7 |
| FormatFactory | Windows | Free | Medium-Hard | 4.5 |
| HandBrake | Windows, Mac, Linux | Free | Easy-Medium | 4.7 |
Part 3: 12 Best Video Joiner Alternatives
Besides the basic details on the 12 different video joiner tools, there are more points about their performance and usage you must consider. Learn about each other more in-depth here.
1. MKVToolnix
Best for Cutting and Merging MKV Files
MKVToolnix includes a wide range of editing tools suitable for MKV file editing and creation on different OS platforms. With this free utility, you will have the option to study the MKV file thoroughly for performance quality and crop out unnecessary parts. Merge the accepted clips without transition errors.

Cost: Free
How to Download/Get: Official Website
Key Features:
- Multi-OS support.
- Contains a set of editing tools within the platform.
- Analyze the MKV files thoroughly before editing.
- Multiple coded versions for different binaries and operating systems.
Pros
- Possible to append or add files to videos
- GUI-centric batch muxing is possible
- Possible to edit the Matroska files
Cons
- Multiple subtitle formats like SRT file containers are not supported
- It is not possible to split or append FLAC-formatted audio tracks
Ratings: 4.7 out of 5
Summary with User Verdict:
Users find many users of this tool on different operating systems with a GUI focus. The ability to set preferences INI files and job queue factors within environmental variables makes it suitable for use.
2. MP4Tools
Best for Open-Source Video Splitting/Joining
Users opt for this online video joiner, free with open-source benefits. The software includes different tools in itself for specialized video editing functions, like MP4Splitter, to cut the files into different sections without any quality loss or re-encoding necessary. The same is available for merging files, like with the MP4 Joiner tool.

Cost: Free
How to Download/Get: Official Website
Key Features:
- Multiple languages are supported.
- Works on different devices with varying operating systems.
- Avoid reencoding before cutting the MP4 file into multiple clips.
- No loss in video resolution quality.
Pros
- GNU-protected open-source software
- Multiple editing tools are available for quick video cutting and merging work
- No major or secondary package installation is needed
Cons
- Limited advanced functions for editing
- Only allows MP4-based editing work
Ratings: 3.3 out of 5
Summary with User Verdict:
MP4tools contains different tools that make it simple for users to create and alter MP4 videos for different devices. With this, users find it easier to get fast video processing for hardware types.
3. VidCutter
Best for Beginners with Timecode-based Video Trimming/Joining
VidCutter is another top video joiner alternative to try out for standard-level video editing and trimming. Beginners and professional-level editors alike can try out the features of this tool for full-scale video cutting and merging, finally into one cohesive MP4 file.

Cost: Free
How to Download/Get: developer communities like GitHub
Key Features:
- Change the frame shape.
- Combine the cut clips into a full video for output.
- Accessible on any device.
- Easily rotate video from one style to the other without affecting video quality.
Pros
- Supports drag-and-drop functionality for playback setup
- Timecode video playback
- Cut a video into multiple sections easily
Cons
- Advanced OS-compatible native software is unavailable
- Supports videos that are 500 MB in size or lower
Ratings: 2.7 out of 5
Summary with User Verdict:
Reviewers regarding the software mention the fast performance with different video editing work as the best USP of this software. VidCutter is simple to use.
4. Wondershare Filmora
Best for All-Around Video Editing Qualities
The Wondershare Filmora 11 software is a capable video joiner alternative with miscellaneous editing benefits available. You can work with the desktop-based tool to trim sections of the video, crop size, and rearrange the clips as needed for merging. The features are quick to use, and preset templates and effects are available to create seamless transitions.

Cost: Free, Annual- USD 49.99, Perpetual- USD 79.99
How to Download/Get: Official Website , Microsoft Store , Mac App Store
Key Features:
- FX Plugin support for additional effects like NewBlue FX and Boris FX.
- Crop, split, merge, and rotate the video clips.
- Add an audio track or voiceover in the background.
- AI-powered tools for quick edits like the Instant Mode feature.
Pros
- Support drag and drop functionality
- Multiple features that benefit professional editors and new users
- Advanced editing features like TTS/STT support, denoise, equalizer, and more
Cons
- Not possible to move editing files from the Instant Mode section to the editor timeline under the free plan
- Watermarks are available in video for free trial users
Ratings: 4.5 out of 5
Summary with User Verdict:
According to reviews , the simple and user-friendly interface and navigations make Filmora a capable software for video editing. One can use the animation and video templates available and change the background with Chroma key supply, among others.
5. Freemake Video Converter
Best for High-Grade Video Format Support During Editing/Converting
Another top-quality video joiner for PC that you should give a try is the Freemake Video Converter. With this software, you can access media files in multiple formats and even convert them into any format or size for different devices. It supports both common and rare formats, like AVI, MP4, DVD, MP3, 3GP, , MTS, SWF, and more.

Cost: Free
How to Download/Get: Official Website
Key Features:
- Prepare slideshows with different images and cut clips.
- Transfer final videos for different gadget types.
- Acquire and convert videos from other sites like Dailymotion.
- Trim and convert video files into different formats.
Pros
- Upload the final file directly to other sites, like YouTube
- Supports 500+ formats in audio and video files
- Batch processing is allowed
Cons
- Cannot use it offline at all
- Only for Windows users
Ratings: 4.4 out of 5
Summary with User Verdict:
Users with and without much technical knowledge can find it suitable to use this software for video editing purposes, like splitting and merging files. Expert reviewers mention the no ad and pre-set output profile supports as major pros of this software.
6. Timbre
Best for Trimming Video and Audio Files of Different Formats
With the Timbre video editor tool, users can find it simple to cut videos and songs into multiple sections as needed. The software is compatible with different video formats, so it is simple to use this for editing various video file types. Later, merge the clips in the sequence you prefer with seamless transitions. Cut out unnecessary video parts if needed.

Cost: Free, with in-app paid elements that cost USD 0.61- USD 12.22 per item
How to Download/Get: Google Play Store
Key Features:
- Use raw mpeg in-built console to fine-tune your editing clip playback.
- Adjust video and audio speed.
- Edit out specific parts like the audio from videos.
- Split the file into two separate clips.
Pros
- Supports multiple types of audio and video formats for editing
- Compress files with custom bitrate
- Convert video to other formats like GIFs
Cons
- Only for Android users
- Cannot efficiently maintain or optimize the original quality of the file you are editing
Ratings: 3.4 out of 5
Summary with User Verdict:
This app is highly useful for quick and efficient video cutting and merging capabilities for Android users. The speed of processing is reasonable as well.
7. Boilsoft Video Joiner
Best for Cutting and Joining Varying Video Formats with No Reencoding
You use the Boilsoft Video Joiner to cut different video files, even if they have different formats. Then, it is simple to use the Direct Stream Clone Mode to join similar ones without necessary encoding and without affecting the quality. The Encode Mode feature here allows users to join video files without different formats as well.

Cost: USD 29.95
How to Download/Get: Official Website
Key Features:
- Customize video specifications like aspect ratio, bitrate, codec, frame size, etc.
- Cut and combine unlimited video clips with different formats using Encode mode.
- Preview the video after making edits.
- Supports various formats for input and output among audio and video files.
Pros
- Works as a suitable video cutter on different device types
- Users can customize their personal adaptive profile for video encoding
- Drag and drop support
Cons
- No free version
- Only supported on some Windows devices
Ratings: 3.2 out of 5
Summary with User Verdict:
Users find it easy to use this software to drag the files into the editor, cut the fines, and adjust specifications.
8. Windows Movie Maker
Best for Multiple Windows-based Video Editing Functions
If you want to create movie-like projects after trimming and merging different sections cohesively, Windows Movie Maker is a capable software choice. After trimming and merging clips, you can add music to the video file to give a suitable background soundtrack. Not to mention, it supports a wide range of video formats.

Cost: Free, Pro- USD 15
How to Download/Get: Microsoft Store
Key Features:
- Use quick tools for cropping, joining, and splitting video files.
- Use green screen and video overlaying functions.
- Rotate, trim, and merge videos in your project.
- Add a high-quality soundtrack to the video.
Pros
- Adjust the background sound volume
- Advanced editing functions are capable like other video editing software
- Multiple output formats and resolutions are supported
Cons
- 4K support is not available for free users
- You must upgrade the software to a paid plan to improve project management features
Ratings: 4 out of 5
Summary with User Verdict:
As per reviews , Windows Movie Maker has a straightforward UI without any overwhelming features for new users. It is useful for handling various video editing tasks, like animation, music, images, and text addition.
9. MediaJoin
Best for cropping videos and text files
For video cutter free download, MediaJoin is a capable choice for editing experts to try out. One can easily try out the program to cut and combine different audio and video clips into a single project. It supports different formats such as WAV/MP3/MPEG/MPG and even allows users to cut and combine text-based files.

Cost: Free
How to Download/Get: third-party site URL
Key Features:
- Easily combine audio and video clips.
- Supports different video and audio formats like MP4, MP3, WAV, and MPEG.
- Compile text files into one cohesive document.
- Extremely lightweight software.
Pros
- No complex additional downloads are necessary
- Users can use this program without any cost
- Simple usability for beginners
Cons
- Official link with native app unavailable
- Best for older Windows versions only
Ratings: 3 out of 5
Summary with User Verdict:
People who need to handle basic-level video editing work can opt for MediaJoin for quick and simple trimming/joining functions. Beginners find it easier to handle this tool.
10. Free Video Dub
Best for Fine-tuning Videos After Cropping
Free Video Dub is an efficient software that you can use in a portable manner across different devices, especially useful for video editing. Expect a wide range of cutting tools that make it simple to split and shape the clips, rearrange them, add filters, and preview the changes before posting.

Cost: Free
How to Download/Get: third-party site URL
Key Features:
- Use markers to remove video fragments.
- Cut the clips easily and run them on other editing software afterward.
- Supports different video formats, like MOV, DIVX, MPEG-1/2, MPEG-4, FLV, XVID, and M4V.
- Control video playback consistently to see the edited file quality.
Pros
- Easy to proceed frame-by-frame to refine the cropped clips
- No major software download is necessary
- Users can get video files with the preserved format and input quality
Cons
- No native software
- A limited number of modern functions are available
Ratings: 3.7 out of 5
Summary with User Verdict:
Users of Free Video Club enjoy the beginner-friendly functionality of this tool. It is easy to work with to edit and combine video files in different formats, like MKV, MP4, WMV, and AVI.
11. FormatFactory
Best for clipping video/audio and converter different media file formats
FormatFactory, as a video cutter for PC, offers users multiple functions with joining, cutting, clipping, and cropping video and audio files. With this tool, you can also convert the file into other formats after downloading from online video sources or uploading it from the device storage. As for cropping videos specially, you can rip other devices, like DVDs, and crop the sections from that.

Cost: Free
How to Download/Get: Website
Key Features:
- Split, clip, crop, join, and do other such standard edits with HandBrake.
- Supports file formats of multimedia files from other devices, like iPods.
- Easily reduce file size and backup.
- Video format conversion and cutting functions are available.
Pros
- Supports multiple languages, and you can add more to the team
- Allows users to download and upload videos from other websites like YouTube
- It is possible to DVD rip with this software
Cons
- Separate versions to download for 32-bit and 64-bit-supported devices
- Need to rename all file names in English if they contain any special characters
Ratings: 4.5 out of 5
Summary with User Verdict:
According to expert reviews , the file joining and mixing utilities and batching processing functions make Format Factory a suitable choice for many. Plus, one can rip DVDs, CDs, and Blu-rays with this.
12. HandBrake
Best for Encoded Video Editing
Handbrake is one of the most noteworthy and widely likely free video joiner for PC users. The software supports specific video/audio/image codecs, and allows users to cut the file with other specification-based adjustments. Preview the cut part and merge the clips into singular files without quality loss or overwriting.

Cost: Free
How to Download/Get: Website
Key Features:
- Add video filters, like denoise, decomb, grayscale, etc.
- Scale and crop video files with chapter markets.
- Queue the encoding processes, and expect average and constant quality bitrate video-based encoding.
- Supports multiple audio and video encoders.
Pros
- GNU licensed open-source support
- Select the video section range, chapter, and title
- Preview the video file and live static
Cons
- It cannot work with protected video sources
- Limited file containers are supported, like WEBM, MP4, and MKV
Ratings: 4.7 out of 5
Summary with User Verdict:
Per reviewers , the ability to convert files quickly and other editing tools in HandBrake make it a capable software. It supports several codecs and assures zero quality loss after editing.
Part 4: How to Edit a Video with a Video Joiner Alternative
Yes, all of the software options given are suitable in different manners to editing video files with standard cutting and joining functions. However, for an overall high-quality video editing experience, you can expect a better experience with the advanced editing features of Filmora.
How to use Filmora to Edit Videos?
Free Download For Win 7 or later(64-bit)
Free Download For macOS 10.14 or later
Step1 Install the Filmora software on your PC and launch it.
Step2 Press New Project > Click here to import media. Add the video you will edit from your device.
Step3 Drag the imported file to the editor timeline.
Step4 Right-click + Ctrl on the video clip and choose functions like scene detection.

Step5 Choose the clip on the timeline and place the cursor playhead at the exact point where you will split the video.

Step6 Right-click the video clip and choose Split. Alternatively, you can click on the red-colored scissor icon at the playhead to instantly cut the clip.

Step7 Arrange the clips in a specific sequence on the timeline. Press the Export button >Make setting changes like choosing the save location, and press the Export button.
For a better understanding of the process of editing video files, watch this video to get visual learning:
Hot FAQs on Video Joiner Alternatives
1. Does Video Joiner still keep updating?
Yes, the Video Joiner app is updated in terms of its functions, but other options like Filmora ensure more modern features and consistent version upgrades exist.
2. What Features Should I Look for in a Video Joiner Alternative?
To choose the best video joiner alternative, you should check if it can cut files into multiple sections, processing speed, and simplicity in UI. Also, consider if the software allows batch-processing benefits and multi-format support.
Final Words
Indeed, there are multiple different video joiner app alternatives with strong functionality, support for different devices/OS, and smooth UI. On all fronts, Filmora is a capable choice for users who want advanced feature benefits simultaneously with a simpler learning curve. Try this out, as well as the other options, before settling on one.
Free Download For Win 7 or later(64-bit)
Free Download For macOS 10.14 or later
- MKVToolnix
- MP4Tools
- VidCutter
- Wondershare Filmora
- Freemake Video Converter
- Timbre
- Boilsoft Video Joiner
- Windows Movie Maker
- MediaJoin
- Free Video Dub
- FormatFactory
- HandBrake
- How to Edit a Video with a Video Joiner Alternative
Part 1: Top 3 Picks for Video Joiner Alternatives
Three notable apps stand out quite well in terms of the best video joiner alternative apps. For a clearer overview, here are some basic details on each.
1. Wondershare Filmora - Best for All-Around Video Editing Qualities
Filmora is a better choice for editing experts and beginners for a comprehensive video editing tool. Use this software to trim and merge clips and add other high-quality effects.
Download it from Microsoft Store and Mac App Store.
Rating: 4.5 out of 5
Free with upgraded plans starting at USD 19.99.
2. Freemake Video Converter- Best for High-Grade Video Format Support During Editing/Converting
The software is both a converter and editor for different types of formatted videos, making it suitable for operating in multiple device types. Take a few steps to convert and edit the files you add, and easily share across social media platforms.
Download it from the Official Website
Rating: 4.4 out of 5
Available for free.
3. VidCutter- Best for Beginners with Timecode-based Video Trimming/Joining
Need a simple open-source tool for straightforward video editing work? VidCutter allows users to trim their video files into multiple shorter sections and clip them sequentially.
Download it from communities like GitHub .
Rating: 2.7 out of 5
Available for free.
Part 2: Ultimate Overview on 12 Best Alternatives to Video Joiner
Yes, the last three options are the top of the line regarding the video cutter for PC. But other options are also available to try out, with specific uses and functions.
Read ahead to know the basics about each that you should consider selecting the right video cutter software for your needs. For a perusal, here’s a comparative table.
| OS Compatibility | Price | Ease of Use | Overall Ratings | |
|---|---|---|---|---|
| MKVToolnix | Linux, Windows, other Unices | Free | Medium-Hard | 4.7 |
| MP4Tools | Windows, Mac | Free | Medium | 3.3 |
| VidCutter | Windows, OSX | Free | Medium-Hard | 2.7 |
| Wondershare Filmora | Windows, Mac, iPad | Annual-$49.99, Perpetual-$79.99 | Easy | 4.5 |
| Freemake Video Converter | Windows | Free | Easy | 4.4 |
| Timbre | Android | Free with in-app costs starting at USD 0.61 | Easy-Medium | 3.4 |
| Boilsoft Video Joiner | Windows, Mac | USD 29.95 | Easy-Medium | 3.2 |
| Windows MovieMaker | Windows | Free, Pro- USD 15 | Medium-Hard | 4 |
| MediaJoin | Windows | Free | Easy | 3 |
| Free Video Dub | Windows | Free | Easy-Medium | 3.7 |
| FormatFactory | Windows | Free | Medium-Hard | 4.5 |
| HandBrake | Windows, Mac, Linux | Free | Easy-Medium | 4.7 |
Part 3: 12 Best Video Joiner Alternatives
Besides the basic details on the 12 different video joiner tools, there are more points about their performance and usage you must consider. Learn about each other more in-depth here.
1. MKVToolnix
Best for Cutting and Merging MKV Files
MKVToolnix includes a wide range of editing tools suitable for MKV file editing and creation on different OS platforms. With this free utility, you will have the option to study the MKV file thoroughly for performance quality and crop out unnecessary parts. Merge the accepted clips without transition errors.
Cost: Free
How to Download/Get: Official Website
Key Features:
- Multi-OS support.
- Contains a set of editing tools within the platform.
- Analyze the MKV files thoroughly before editing.
- Multiple coded versions for different binaries and operating systems.
Pros
- Possible to append or add files to videos
- GUI-centric batch muxing is possible
- Possible to edit the Matroska files
Cons
- Multiple subtitle formats like SRT file containers are not supported
- It is not possible to split or append FLAC-formatted audio tracks
Ratings: 4.7 out of 5
Summary with User Verdict:
Users find many users of this tool on different operating systems with a GUI focus. The ability to set preferences INI files and job queue factors within environmental variables makes it suitable for use.
2. MP4Tools
Best for Open-Source Video Splitting/Joining
Users opt for this online video joiner, free with open-source benefits. The software includes different tools in itself for specialized video editing functions, like MP4Splitter, to cut the files into different sections without any quality loss or re-encoding necessary. The same is available for merging files, like with the MP4 Joiner tool.
Cost: Free
How to Download/Get: Official Website
Key Features:
- Multiple languages are supported.
- Works on different devices with varying operating systems.
- Avoid reencoding before cutting the MP4 file into multiple clips.
- No loss in video resolution quality.
Pros
- GNU-protected open-source software
- Multiple editing tools are available for quick video cutting and merging work
- No major or secondary package installation is needed
Cons
- Limited advanced functions for editing
- Only allows MP4-based editing work
Ratings: 3.3 out of 5
Summary with User Verdict:
MP4tools contains different tools that make it simple for users to create and alter MP4 videos for different devices. With this, users find it easier to get fast video processing for hardware types.
3. VidCutter
Best for Beginners with Timecode-based Video Trimming/Joining
VidCutter is another top video joiner alternative to try out for standard-level video editing and trimming. Beginners and professional-level editors alike can try out the features of this tool for full-scale video cutting and merging, finally into one cohesive MP4 file.
Cost: Free
How to Download/Get: developer communities like GitHub
Key Features:
- Change the frame shape.
- Combine the cut clips into a full video for output.
- Accessible on any device.
- Easily rotate video from one style to the other without affecting video quality.
Pros
- Supports drag-and-drop functionality for playback setup
- Timecode video playback
- Cut a video into multiple sections easily
Cons
- Advanced OS-compatible native software is unavailable
- Supports videos that are 500 MB in size or lower
Ratings: 2.7 out of 5
Summary with User Verdict:
Reviewers regarding the software mention the fast performance with different video editing work as the best USP of this software. VidCutter is simple to use.
4. Wondershare Filmora
Best for All-Around Video Editing Qualities
The Wondershare Filmora 11 software is a capable video joiner alternative with miscellaneous editing benefits available. You can work with the desktop-based tool to trim sections of the video, crop size, and rearrange the clips as needed for merging. The features are quick to use, and preset templates and effects are available to create seamless transitions.
Cost: Free, Annual- USD 49.99, Perpetual- USD 79.99
How to Download/Get: Official Website , Microsoft Store , Mac App Store
Key Features:
- FX Plugin support for additional effects like NewBlue FX and Boris FX.
- Crop, split, merge, and rotate the video clips.
- Add an audio track or voiceover in the background.
- AI-powered tools for quick edits like the Instant Mode feature.
Pros
- Support drag and drop functionality
- Multiple features that benefit professional editors and new users
- Advanced editing features like TTS/STT support, denoise, equalizer, and more
Cons
- Not possible to move editing files from the Instant Mode section to the editor timeline under the free plan
- Watermarks are available in video for free trial users
Ratings: 4.5 out of 5
Summary with User Verdict:
According to reviews , the simple and user-friendly interface and navigations make Filmora a capable software for video editing. One can use the animation and video templates available and change the background with Chroma key supply, among others.
5. Freemake Video Converter
Best for High-Grade Video Format Support During Editing/Converting
Another top-quality video joiner for PC that you should give a try is the Freemake Video Converter. With this software, you can access media files in multiple formats and even convert them into any format or size for different devices. It supports both common and rare formats, like AVI, MP4, DVD, MP3, 3GP, , MTS, SWF, and more.
Cost: Free
How to Download/Get: Official Website
Key Features:
- Prepare slideshows with different images and cut clips.
- Transfer final videos for different gadget types.
- Acquire and convert videos from other sites like Dailymotion.
- Trim and convert video files into different formats.
Pros
- Upload the final file directly to other sites, like YouTube
- Supports 500+ formats in audio and video files
- Batch processing is allowed
Cons
- Cannot use it offline at all
- Only for Windows users
Ratings: 4.4 out of 5
Summary with User Verdict:
Users with and without much technical knowledge can find it suitable to use this software for video editing purposes, like splitting and merging files. Expert reviewers mention the no ad and pre-set output profile supports as major pros of this software.
6. Timbre
Best for Trimming Video and Audio Files of Different Formats
With the Timbre video editor tool, users can find it simple to cut videos and songs into multiple sections as needed. The software is compatible with different video formats, so it is simple to use this for editing various video file types. Later, merge the clips in the sequence you prefer with seamless transitions. Cut out unnecessary video parts if needed.
Cost: Free, with in-app paid elements that cost USD 0.61- USD 12.22 per item
How to Download/Get: Google Play Store
Key Features:
- Use raw mpeg in-built console to fine-tune your editing clip playback.
- Adjust video and audio speed.
- Edit out specific parts like the audio from videos.
- Split the file into two separate clips.
Pros
- Supports multiple types of audio and video formats for editing
- Compress files with custom bitrate
- Convert video to other formats like GIFs
Cons
- Only for Android users
- Cannot efficiently maintain or optimize the original quality of the file you are editing
Ratings: 3.4 out of 5
Summary with User Verdict:
This app is highly useful for quick and efficient video cutting and merging capabilities for Android users. The speed of processing is reasonable as well.
7. Boilsoft Video Joiner
Best for Cutting and Joining Varying Video Formats with No Reencoding
You use the Boilsoft Video Joiner to cut different video files, even if they have different formats. Then, it is simple to use the Direct Stream Clone Mode to join similar ones without necessary encoding and without affecting the quality. The Encode Mode feature here allows users to join video files without different formats as well.
Cost: USD 29.95
How to Download/Get: Official Website
Key Features:
- Customize video specifications like aspect ratio, bitrate, codec, frame size, etc.
- Cut and combine unlimited video clips with different formats using Encode mode.
- Preview the video after making edits.
- Supports various formats for input and output among audio and video files.
Pros
- Works as a suitable video cutter on different device types
- Users can customize their personal adaptive profile for video encoding
- Drag and drop support
Cons
- No free version
- Only supported on some Windows devices
Ratings: 3.2 out of 5
Summary with User Verdict:
Users find it easy to use this software to drag the files into the editor, cut the fines, and adjust specifications.
8. Windows Movie Maker
Best for Multiple Windows-based Video Editing Functions
If you want to create movie-like projects after trimming and merging different sections cohesively, Windows Movie Maker is a capable software choice. After trimming and merging clips, you can add music to the video file to give a suitable background soundtrack. Not to mention, it supports a wide range of video formats.
Cost: Free, Pro- USD 15
How to Download/Get: Microsoft Store
Key Features:
- Use quick tools for cropping, joining, and splitting video files.
- Use green screen and video overlaying functions.
- Rotate, trim, and merge videos in your project.
- Add a high-quality soundtrack to the video.
Pros
- Adjust the background sound volume
- Advanced editing functions are capable like other video editing software
- Multiple output formats and resolutions are supported
Cons
- 4K support is not available for free users
- You must upgrade the software to a paid plan to improve project management features
Ratings: 4 out of 5
Summary with User Verdict:
As per reviews , Windows Movie Maker has a straightforward UI without any overwhelming features for new users. It is useful for handling various video editing tasks, like animation, music, images, and text addition.
9. MediaJoin
Best for cropping videos and text files
For video cutter free download, MediaJoin is a capable choice for editing experts to try out. One can easily try out the program to cut and combine different audio and video clips into a single project. It supports different formats such as WAV/MP3/MPEG/MPG and even allows users to cut and combine text-based files.
Cost: Free
How to Download/Get: third-party site URL
Key Features:
- Easily combine audio and video clips.
- Supports different video and audio formats like MP4, MP3, WAV, and MPEG.
- Compile text files into one cohesive document.
- Extremely lightweight software.
Pros
- No complex additional downloads are necessary
- Users can use this program without any cost
- Simple usability for beginners
Cons
- Official link with native app unavailable
- Best for older Windows versions only
Ratings: 3 out of 5
Summary with User Verdict:
People who need to handle basic-level video editing work can opt for MediaJoin for quick and simple trimming/joining functions. Beginners find it easier to handle this tool.
10. Free Video Dub
Best for Fine-tuning Videos After Cropping
Free Video Dub is an efficient software that you can use in a portable manner across different devices, especially useful for video editing. Expect a wide range of cutting tools that make it simple to split and shape the clips, rearrange them, add filters, and preview the changes before posting.
Cost: Free
How to Download/Get: third-party site URL
Key Features:
- Use markers to remove video fragments.
- Cut the clips easily and run them on other editing software afterward.
- Supports different video formats, like MOV, DIVX, MPEG-1/2, MPEG-4, FLV, XVID, and M4V.
- Control video playback consistently to see the edited file quality.
Pros
- Easy to proceed frame-by-frame to refine the cropped clips
- No major software download is necessary
- Users can get video files with the preserved format and input quality
Cons
- No native software
- A limited number of modern functions are available
Ratings: 3.7 out of 5
Summary with User Verdict:
Users of Free Video Club enjoy the beginner-friendly functionality of this tool. It is easy to work with to edit and combine video files in different formats, like MKV, MP4, WMV, and AVI.
11. FormatFactory
Best for clipping video/audio and converter different media file formats
FormatFactory, as a video cutter for PC, offers users multiple functions with joining, cutting, clipping, and cropping video and audio files. With this tool, you can also convert the file into other formats after downloading from online video sources or uploading it from the device storage. As for cropping videos specially, you can rip other devices, like DVDs, and crop the sections from that.
Cost: Free
How to Download/Get: Website
Key Features:
- Split, clip, crop, join, and do other such standard edits with HandBrake.
- Supports file formats of multimedia files from other devices, like iPods.
- Easily reduce file size and backup.
- Video format conversion and cutting functions are available.
Pros
- Supports multiple languages, and you can add more to the team
- Allows users to download and upload videos from other websites like YouTube
- It is possible to DVD rip with this software
Cons
- Separate versions to download for 32-bit and 64-bit-supported devices
- Need to rename all file names in English if they contain any special characters
Ratings: 4.5 out of 5
Summary with User Verdict:
According to expert reviews , the file joining and mixing utilities and batching processing functions make Format Factory a suitable choice for many. Plus, one can rip DVDs, CDs, and Blu-rays with this.
12. HandBrake
Best for Encoded Video Editing
Handbrake is one of the most noteworthy and widely likely free video joiner for PC users. The software supports specific video/audio/image codecs, and allows users to cut the file with other specification-based adjustments. Preview the cut part and merge the clips into singular files without quality loss or overwriting.
Cost: Free
How to Download/Get: Website
Key Features:
- Add video filters, like denoise, decomb, grayscale, etc.
- Scale and crop video files with chapter markets.
- Queue the encoding processes, and expect average and constant quality bitrate video-based encoding.
- Supports multiple audio and video encoders.
Pros
- GNU licensed open-source support
- Select the video section range, chapter, and title
- Preview the video file and live static
Cons
- It cannot work with protected video sources
- Limited file containers are supported, like WEBM, MP4, and MKV
Ratings: 4.7 out of 5
Summary with User Verdict:
Per reviewers , the ability to convert files quickly and other editing tools in HandBrake make it a capable software. It supports several codecs and assures zero quality loss after editing.
Part 4: How to Edit a Video with a Video Joiner Alternative
Yes, all of the software options given are suitable in different manners to editing video files with standard cutting and joining functions. However, for an overall high-quality video editing experience, you can expect a better experience with the advanced editing features of Filmora.
How to use Filmora to Edit Videos?
Free Download For Win 7 or later(64-bit)
Free Download For macOS 10.14 or later
Step1 Install the Filmora software on your PC and launch it.
Step2 Press New Project > Click here to import media. Add the video you will edit from your device.
Step3 Drag the imported file to the editor timeline.
Step4 Right-click + Ctrl on the video clip and choose functions like scene detection.
Step5 Choose the clip on the timeline and place the cursor playhead at the exact point where you will split the video.
Step6 Right-click the video clip and choose Split. Alternatively, you can click on the red-colored scissor icon at the playhead to instantly cut the clip.
Step7 Arrange the clips in a specific sequence on the timeline. Press the Export button >Make setting changes like choosing the save location, and press the Export button.
For a better understanding of the process of editing video files, watch this video to get visual learning:
Hot FAQs on Video Joiner Alternatives
1. Does Video Joiner still keep updating?
Yes, the Video Joiner app is updated in terms of its functions, but other options like Filmora ensure more modern features and consistent version upgrades exist.
2. What Features Should I Look for in a Video Joiner Alternative?
To choose the best video joiner alternative, you should check if it can cut files into multiple sections, processing speed, and simplicity in UI. Also, consider if the software allows batch-processing benefits and multi-format support.
Final Words
Indeed, there are multiple different video joiner app alternatives with strong functionality, support for different devices/OS, and smooth UI. On all fronts, Filmora is a capable choice for users who want advanced feature benefits simultaneously with a simpler learning curve. Try this out, as well as the other options, before settling on one.
Free Download For Win 7 or later(64-bit)
Free Download For macOS 10.14 or later
Also read:
- Updated Best Audio Converter Applications that You Should Try Out Today Here Is the List of Multiple Audio Converter Applications, Which You Can Use Online or Download on Your Device for 2024
- Updated 2024 Approved Best Online Video Flippers to Flip Videos Free
- New In 2024, Create a Digital Doppelganger Free Online Generators
- New In 2024, Photo to Cartoon Converter Online
- New 2024 Approved 8 Great Image Ratio Changer Online
- Updated Unlock the Power of Mp3 Conversion on Windows A Must-Read Article for 2024
- 2024 Approved Steady as a Rock Mastering Video Stabilization in AE
- New In 2024, Premiere Pro Transition Essentials Top 10 Plugins You Need
- New Shooting Videos in High Resolutions Can Help You Create Visually Impressive Content Your Followers on Social Media Are Going to Adore. In This Article We Are Going to Take You Through the 10 Best Vid for 2024
- New Dont Get Fooled 5 Key Factors to Evaluate When Selecting a Video to Audio Converter for 2024
- 2024 Approved Twitter Video Size Matters How to Find the Perfect Ratio
- New The Visual Blueprint Understanding Social Media Aspect Ratios for Success
- Updated Top Video Editors for Newbies Free and Paid Options for 2024
- New LumaFusion vs Final Cut Pro X Which Do You Need, In 2024
- New WebM to MP3 Conversion Made Simple Top Tools for 2024
- Updated Uncovered Top Mac Speech-to-Text Apps You Never Knew Existed Free & No Installation
- Updated The Art of Transitions 3 Expert Tips for Final Cut Pro Users
- Updated Video Editing Mastery Top 4K/8K Software for Beginners and Pros for 2024
- New In 2024, Splice Video Editor for Mac Download Now
- New In 2024, The Steadiest of Them All Best Video Stabilizer Apps for iPhone and Android
- Updated In 2024, Video Editing Essentials Import, Edit, and Export in Adobe Premiere 2023
- Updated Premiere Pro 2023 Mastering Video Stabilization for Pro Results for 2024
- In 2024, S Hottest Adobe Premiere Title Templates 20 Free Downloads
- In 2024, MacBook Video Editing Download and Set Up Videoleap in Minutes
- New In 2024, Androids Finest 10 Movie Maker Apps You Need to Try
- Updated 2024 Approved Say Goodbye to iMovie Top Windows Video Editing Software
- New 2024 Approved Reframing Your Content The Impact of Aspect Ratio on Video Style
- New In 2024, Final Cut Pro Tutorial Collection
- Updated 2024 Approved The Ultimate Guide to Creating Viral WhatsApp Status Videos
- New In 2024, HD Video Essentials A Beginners Guide to Pixel Size and Resolution
- New Say Goodbye to Watermarks Top TikTok Removal Tools for 2024
- New 2024 Approved Adobe Premiere Pro Offers Different Paths to Importing and Exporting Videos. Here We Discuss How to Import and Export Media Files Into Adobe Premiere
- New In 2024, Best of the Web Top 10 Gaming Intro Creators
- In 2024, The Most Reliable MP3 Converters for Mac Users
- New Mac Users, Rejoice! Top VSDC Video Editor Alternatives You Need to Know
- 2024 Approved WebM Video Editing on a Budget Top 10 Free Options
- New Hands-On with AVS Video Editor A 2023 Review for 2024
- In 2024, How To Do Itel P55 5G Screen Sharing | Dr.fone
- In 2024, A Step-by-Step Guide on Using ADB and Fastboot to Remove FRP Lock on your ZTE Nubia Z60 Ultra
- The 6 Best SIM Unlock Services That Actually Work On Your Motorola Edge 2023 Device
- In 2024, How to Reset a Xiaomi Redmi Note 12 Pro 4G Phone that is Locked?
- How to Change GPS Location on Realme 12 Pro+ 5G Easily & Safely | Dr.fone
- Three Ways to Sim Unlock Asus ROG Phone 7
- Mastering Lock Screen Settings How to Enable and Disable on Vivo X Flip
- In 2024, How to Cast Oppo A59 5G to Computer for iPhone and Android? | Dr.fone
- In 2024, Top 4 Ways to Trace Vivo Y55s 5G (2023) Location | Dr.fone
- In 2024, Easy Fixes How To Recover Forgotten iCloud Password From your iPhone 7 Plus
- Can Life360 Track You When Your OnePlus Ace 2 is off? | Dr.fone
- 6 Solutions to Fix Error 505 in Google Play Store on Oppo Find X6 | Dr.fone
- 9 Solutions to Fix Oppo Find X7 System Crash Issue | Dr.fone
- New In 2024, S Best Free Video Editing Apps for Those Just Starting Out
- Updated 2024 Approved Best 12 Sports Streaming Sites (Free&Paid)
- In 2024, How To Change Your Apple ID on iPhone 15 With or Without Password
- New In 2024, Whiteboard Animation Services Top 15 Animation Companies to Pick
- New In 2024, Camtasia vs Final Cut Pro
- Catch or Beat Sleeping Snorlax on Pokemon Go For OnePlus 12 | Dr.fone
- 2024 Approved How to Make Memes on iPhone and Android
- In 2024, How to Bypass Google FRP Lock on Samsung Galaxy A05 Devices
- How and Where to Find a Shiny Stone Pokémon For Oppo Reno 9A? | Dr.fone
- What to Do if Google Play Services Keeps Stopping on Honor 90 GT | Dr.fone
- Top IMEI Unlokers for Your Vivo Y100 5G Phone
- In 2024, How To Create an Apple Developer Account From iPhone 12 Pro Max
- 4 Ways to Fix Android Blue Screen of Death On Samsung Galaxy A15 5G | Dr.fone
- MKV to Motorola G24 Power converter - convert MKV for Motorola G24 Power
- New How To Change Font In Premiere Pro
- How to Change Your OnePlus Ace 2 Location on life360 Without Anyone Knowing? | Dr.fone
- Complete Review & Guide to Techeligible FRP Bypass and More For Oppo F23 5G
- Review of LazLive Live Selling Platform With Guide
- Free Video Cutting Without the Catch No Watermarks Guaranteed for 2024
- Unlocking the Power of Smart Lock A Beginners Guide for ZTE Nubia Z60 Ultra Users
- 2024 Approved Blur Videos Online Without Spending a Dime The Ultimate Tutorial
- Title: New 2024 Approved Take Your Videos to the Next Level Top 20 Adobe Premiere Title Templates Free
- Author: MdadeLe
- Created at : 2024-04-28 15:03:57
- Updated at : 2024-04-29 15:03:57
- Link: https://smart-video-editing.techidaily.com/new-2024-approved-take-your-videos-to-the-next-level-top-20-adobe-premiere-title-templates-free/
- License: This work is licensed under CC BY-NC-SA 4.0.
